
After a lengthy break, I return again to the Final Fantasy 5 solo challenges to take up the mantle of the Red Mage. I needed that rest period of close to a year off; the Berserker solo challenge thoroughly exhausted me. I was burned out and needed a chance to do something else and recharge my batteries. But with just a few job classes left to go, I wanted to finish the project that I started years earlier. I'll leave the White Mage report to T-Hawk for now, since that would be another incredibly tedious effort and he's described exactly how it would play out on his website. But I always intended to play the last two jobs in full, the Red Mage and the Mimic, and they should be relatively straightforward to complete. I'll mention right here at the outset that T-Hawk has already played out the Red Mage solo quest, and probably did a more interesting run than I'll manage to pull off. I haven't read that report since it was initially posted, so I'll be going off my own thoughts here. I probably won't write quite as much since the Red Mage's run has already been thoroughly documented. [Note: and then I wrote 10,000 words with 39 accompanying screenshots. I suck at brevity.]
The Red Mage is a class unique to the Final Fantasy world. It's always been kind of interesting to me that the casting job that mixes White and Black magic together is known in this series as the "Red" Mage instead of getting the color gray or something like that. In the untranslated Japanese original version of this game, the Red Mage is indeed called the Red Mage (あかまどうし "Aka Madoushi" is essentially Red Magic Person), but there is no "Red" Magic - it's actually listed as White/Black Magic on the command screen! (Red Magic is しろくろまほう "Shiro Kuro Mahou", literally "White Black Magic"). I've always guessed that the class only got its red moniker due to the spiffy sprite design, with the flashy clothes and the pimp feather hat. As in other Final Fantasy games, the Red Mage is the dabbler in all trades and the master of none, able to use half of the White and Black magic spells, along with all of the non-Knight swords in the game, and some but not all of the game's armor. The Red Mage is pretty awesome in the first world, but falls off significantly as the game progresses. They also are unique in this game for eventually unlocking the X-Magic command, which allows them to cast two spells in a row! This is hugely abusable in non-variant games for all sorts of reasons. The drawback: it costs 999 ability points to unlock. Yikes. Better get started grinding out those AP.
I named my Red Mage after the author of the long-running "Ask Red Mage" column of 8-Bit Theatre fame, Sosa. There aren't many inspirations for Red Mage names out there, and this seemed like as good of a name as any for a master of twinkery. Sadly, the Ask Red Mage columns appear to have been lost into the Internet void over the years, so you'll have to take my word on this if you never saw them. Sosa fought his way through the starting pirate cave and the Wind Shrine, then converted to his permanent job at Level 6 as so many of my other characters have done.

As expected, the Red Mage is average in nearly all of his stats. Strength value of 36 sat almost exactly halfway between the melee classes and the physically frail casting jobs. Magic Power of 33 was the same in the opposite direction; in fact, the Red Mage actually gets an indentical value of 32 in these two stats, which is modified here by the Butz character's innate bonuses to Strength (+4) and Magic Power (+1). The class itself doesn't lean in either direction. Agility of 30 was also very standard in comparion to other jobs. Where the Red Mage suffers is in the Vitality department, with a base value of only 18 brought up to 21 thanks to the +3 bonus from the Butz character. This was a very low number indeed - only the Dancer (14) and the Bard (15) have lower starting Vitality. Even the Black Mage starts at 22 base Vitality! This meant that Sosa was under 100 HP at Level 6, and I knew this would cause problems in the days ahead.
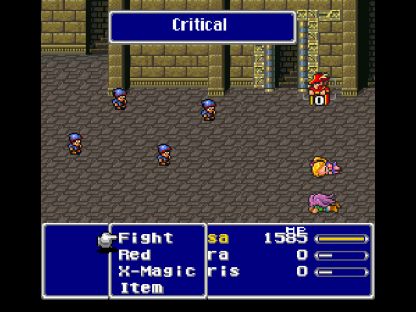
Sosa fought until Level 11 in the Wind Shrine, picking up three Elixirs in the process. He gained an extra attack multiplier at Level 11, although that was somewhat meaningless since I had Sosa go after Karlabos with magical attack anyway. This was the first time since my solo Black Mage that I had access to routine Black magic this early in the game:

Sosa did less damage with each casting of Bolt than Black had, since his Magic Power was lower and he was getting one fewer multiplier to his spell attack. I needed five successful castings to win instead of four. This was still pretty trivial compared to other classes of mine, and I hit on a long lucky streak of non-Tentacle attacks from Karlabos on my first boss attempt. Karlabos used Tentacle on his first attack, then used his normal "Fight" command five times in a row after that. I had to use one Elixir, but ran into no further trouble and won the battle on the first attempt.
Because the Red Mage class can equip both rods and staves in addition to swords (only class in the game that can do this), Sosa found himself swapping from his Broad Sword over to a Flail in the Ship Graveyard. I moved Sosa to the back row and mostly used physical attack, along with Cure for healing or Fire for direct damage as needed. Siren was a matter of healing against the human form and casting Fire against the undead form. Sosa could sit in the back row thanks to his Flail and magical attacks, making this fairly easy.
I bought three important additional spells in Carwen, Mute in the White magic tree, Sleep in the Black magic tree, and the supremely value Armor spell. Sosa would be using this against virtually every boss for the rest of the game, and for very good reason. Cutting the multiplier M in half for all physical attacks held enormous value. I made sure to grab the hidden Ice Rod in the town to power up Sosa's ice magic. In the following dungeon, Sosa used his Mute spell against Magisa:

This didn't block her Aero spell, since Blue magic is bugged in Final Fantasy 5 and goes right through Mute status, but it did block her other attack spells, including her only truly dangerous spell Drain. When Forza showed up, he was immediately put to sleep, lacking that particular status immunity. Sosa killed Magisa, then slowly downed Forza with repeated castings of Ice.
Access to the wind drake meant a visit to Tycoon Castle and the amazing Heal Staff, which would be thoroughly abused in the next few dungeons. Endless free Cure 2s on demand allowed Sosa to grab the Elf Cape in the basement of Worus Castle, as one such example. Just run from the Garkimasras and keep healing yourself whenever you have the chance to take an action. Sosa continued to cast or fight his way up Worus Tower until reaching Galura at the top:

Here was a boss where the combination of Healing Staff and Armor status turned the encounter into a joke. Sosa sat in the back row where all of Galura's physical damage was cut by 75%, casting Ice spells powered by the rod he found in Carwen until the boss died. Those Ice spells were only doing about 100 damage each, but there was no danger whatsoever. I could have won easily with even less offense.
Karnak town and castle offered up even more goodies for the Red Mage class. In addition to a new Mythril Sword, Sosa was able to purchase appropriate rods for fire and lightning element, and most of the third level White and Black spells. Say hello to Fire 2, Ice 2, Bolt 2, Cure 2, and Charm. The effects were immediately obvious in battle:


I couldn't find an easy way to stitch those two images together, so I'll just go ahead and post them both. The Wild Nacks (weak to fire) went down in a single casting. In fact, this was right when Sosa was at the height of his Red Mage powers. He could use all of the same weapons as a Knight, while casting White and Black magic equal to the mages in their respective classes. Of course, the powers of the jack of all trades / master of none would soon begin to wane with time. Sosa would never be able to upgrade his spells again; he had already maxed out on his spellbook here, halfway throughout the first world! Food for thought. But man, it sure was easy for the moment.
Nearly everything in the Steamship is weak to ice element, and Sosa mowed them all down with Ice 2 and an Ice Rod. The few things that didn't die to ice could be handled with physical attack. The biggest danger was running out of magic points, which were highly limited on the Red Mage (due to his lower Magic Power stat compared to other casting classes). I found myself going to the inn and using tents quite a bit. Liquid Flame is a very easy battle for any class with access to ice element, plus Sosa could cast Armor to reduce her physical damage, plus Sosa had infinite free healing with the Heal Staff. Umm, it wasn't much of a fight.
Sosa blasted his way out of the exploding Karnak Castle by casting Fire 2 on everything in sight. I had to drink three Ethers in the process to restore MP, but calculated that it was much better to use them and grab all the Elixirs than run out of time through slower physical attacks. By way of comparison, Ethers cost 1000 gold in this game while Elixirs cost 50,000 gold. Willing to make that trade every time. Sosa grabbed everything important and got out with room to spare. He also reached "Red Level 3" during the castle sequence, and began the long grind towards the 999 ability points needed for X-Magic.

I fought one of those Dragon Chimeras on the way over to the Ancient Library. With Armor status and as much free healing as needed, Sosa was able to sit in the back row and gradually wear down the monster with repeated Fire 2 casts. It was pretty easy to win. Sosa's ability to combine the abilities of so many different classes left him a bit overpowered at this point in the game. Ifrit's damage was nullified with Armor + Heal Staff, then downed with repeated casts of Ice 2. The pattern was exactly the same for Byblos:

They both died on the first attempt with no problems. About the only issue in this area was having to run from all the book monsters in the Ancient Library because Sosa would run out of MP if he sat there casting Fire 2 to kill them all. Sosa was only Level 22 on clearing this area, on the low end for my solo characters.
From there it was on to Jachol and Crescent, where Sosa picked up a few odds and ends that might be useful later. The Mage Masher dagger probably wouldn't be too useful for a character that could simply cast the Mute spell, but hey, you never know. I found in the battles on the ship as Sosa traveled around the world that he was a very sturdy character, able to defeat almost anything with his combination of attack magic along with healing and Armor status. Even the rare battle against a pair of Corvettes could be handled without much trouble:

Back row and Armor cut their physical attacks down to size, although they still did 150 per successful hit. (That would have been a one-hit kill in the front row and no Amor protection.) Like most everything else in the sea, they were weak against repeated castings of Bolt 2. Use the Healing Staff as appopriate, and they'll all die eventually. The tradeoff was a lack of direct killing power; Sosa generally didn't defeat enemies very fast. His raw damage potential was on the low side. Enemies that lacked some kind of elemental weakness took a long time to destroy. I think this gameplay generally reflected the personality of the Red Mage class: no terrible matchups because of the wide range of class abilities, but no crushing damage in any one area either. Average at everything.
The Healing Staff meant that the Sandworm was completely trivial. Keep casting magic from the back row and heal as needed. I used this time to pick up the last two magic spells missing from Sosa's arsenal, the Toad spell located in Istory (hidden in the flowerbed of the town) and the Size spell hidden in the base underneath Crescent Island:

You have to solve a little puzzle to open up these chests; the other two next to it both have Shurikens in them. This is therefore useless for most solo challenges, not so for Sosa. He actually had a lot of status-affecting magic to play around with, something that I would use in the next battle:

The Adamantium Turtle is one of the few bosses vulnerable to poison status, which I had Sosa inflict with Venom. Poison works the same for them as it does for player characters: every tick takes away 1/16 of max health. You can poison enemies with Venom, then put them to Sleep, and simply wait until their life runs out. This is one of the more amusing ways to kill enemies, even though it's not too efficient in most situations. I did this mostly to highlight another spell available to Sosa; it was much easier to win the battle by casting Ice 2 with the Ice Rod equipped, and then healing as needed. Like the other bosses in the first world with an elemental weakness, it was fairly simple to win.
At this point, Sosa was Level 25 and had about 22k gold in his inventory. I knew that I would need a Flame Ring to get through the battles against the Flameguns (well, I could have broken Rods to get past I suppose, but I would want a Flame Ring later anyway), and set about to grind up to the 50k gold mark. Sosa fought against the enemies on Crescent Island, hoping for Doom Axes to drop, which could then be sold for just under 3000 gold apiece. I was reasonably lucky and gained three levels in the process of farming up that gold. Then it was on to the battles against the Rockets and the Flameguns:

The Rocket battles were tons of fun. I equipped Sosa with the Healing Staff, so that when he was confused by their Rocket Punches, he would attack and heal himself rather than killing himself. Of course, there was also the chance that he would cast some other spell while confused; here you see Sosa after he had miniaturized himself with Size. I also had the Flame Ring eqipped, allowing Sosa to heal himself if he self-casted Fire or Fire 2. Of course I still died occasionally, when Sosa used Bolt 2 on himself. Whoops! Any time that he wasn't confused, I would cast Bolt 2 against the Rockets and exploit their weakness to lightning element, without a Thunder Rod equipped due to their charming attacks. These battles were highly entertaining, and not too difficult to get past.
Against the Flameguns, the Flame Ring nullified all damage and Sosa cast Bolt 2. Easy.

Sosa did not have an Angel Ring for the Sol Cannon battle. T-Hawk has already demonstrated that this is not necessary; you only need to dodge those first two rockets from the Launchers, and that can be done by equipping some items with extra Magic Evade. Sosa needed to kill the Launchers in two shots though, to prevent them from getting off more rockets with the ability to put him in Aging/Old status. I went ahead and broke two Thunder Rods here, as Sosa's Bolt 2 spell only did 400 damage to one Launcher or 200 damage when multi-cast. That wasn't enough damage, and he'd have to dodge way too many rocket attacks. I got this to work on about the fourth try at the battle, and it was easy going from there, Healing Staff to remove the damage from Surge Beam and then lots of castings of Bolt 2. The Red Mage was the rare class that had access to both healing and Sol Cannon's elemental weakness.

There were few elemental weaknesses inside the Lonka Ruins, so I had Sosa exploit status ailments instead. The Lonka Knights could be hit by Size, which reduced their attack damage to 0. They were all physical, making them totally useless once polymorphed as seen above. The Ra Mages could be confused, the Whirl Demons could be put to sleep, and so on. This section was a ton of fun, as Sosa made his way through in a completely unorthdox manner. I fought all the battles, and the enemies ran screaming from the sheer twinkery of the Red Mage.
ArchaeoAvis proved to be a bit more difficult than expected. This was a battle where the dual nature of the Red Mage, physical and magical, came into play. ArchaeoAvis has five different forms, which start out very strong against physical attacks / weak against magic and then reverses over time until the last form is almost completely immune to magical damage, but with a weak resistance against melee attacks. The plan for Sosa was to start the battle in the back row, casting Bolt 2 against each form with a Thunder Rod equipped, and then swap at some point into the front row and swap over to the Fight command. When to switch? I figured out that the best time was against the fourth form, as this form was immune to lightning damage and had the first truly dangerous melee attack. (Each form gets a special ability on its physical attack that inflicts a status ailment; in order these are HP Leak, Poison, Blindness, Paralyze, and Charm/Confuse.) That fourth form had a chance to paralyze Sosa on a successful physical attack, making this the correct form to swap over from the Lightning Rod to the Guardian dagger for maximum physical evade. I wanted to dodge those attacks if at all possible:

There's the Elf Cape in action above. The first three forms took four castings of Bolt 2 each, then the fourth form took six hits with the Guardian dagger, and the last form took about eight or nine successful attacks. Sosa had a lot more utility than the average solo character (Healing Staff + Armor status), with the tradeoff of fairly low damage direct damage capability. While I thought this would be fairly simple to pull off, Sosa kept dying against the final form when he would get charmed or entangled. Part of this was simple bad luck, but I realized that it was also partly due to my armor choices. My previous mage characters had all been wearing the "light" armor set, all of which carry significant amounts of Magic Evade. This gave them a better chance to dodge stuff like Maelstrom and Entangle. Since that was the real danger in the battle, it was better to swap Sosa onto these items as well, even if he took slightly more physical damage from attacks. I was also hurt somewhat by Sosa's own Red magic tendencies; most characters will attack themselves when confused and instantly cancel the status. Not Sosa though: half the time he would cast some kind of spell, which would keep him charmed even longer. One time he killed himself with Bolt 2, another time he cast the Armor spell on ArchaeoAvis!  That was all kinds of hilariousness. Eventually I got the job done, on about the tenth try at the battle.
The meteor miniboss trio were all fairly simple for Sosa. I equipped the Flame Ring against the Chimera Brain and successfully cast Venom; the poison did as much damage as Sosa's physical attack over the rest of the battle, as it ticked away at 1/16 of max health (206 damage) every few seconds. Titan's only dangerous move is his Earth Shaker spell, so I had Sosa walk to North Mountain, confuse one of the Gala Cats, get the enemy to cast Float on Sosa, and then fight the battle in a situation where he floated harmlessly above all ground attacks. Naturally this was a page stolen from the solo White Mage playbook, with Sosa having more offensive firepower to fight back. Easy battle. Against the Puroboros, area of effect damage spells always rule the day, which Sosa had by virtue of his Red (Black) magic. Three castings of Fire/Ice/Bolt 2 only did about 700 damage to each of the little grenades, which wasn't quite enough to survive their subsequent Exploder attacks. I went ahead and did two castings instead along with one rod breaking to do 1100 damage to each Puroboros. This allowed Sosa to survive two Exploder castings, and then he simply healed and defended until they all blew themselves up. His low health total and low damage output had been the principle culprits.
Sosa was only Level 30 on entering the second world, one of the lowest of any of my characters. I expected him to have to do some grinding at some point, but it simply hadn't happened yet. I had used him mostly as a pretend Black Mage in the first world due to the strength of his third-level magic spells. I expected that this would be changing, as Sosa's spells wouldn't be getting any stronger but the enemies would. Time to reinvent him as an underpowered fighter with lots of utility spells.

Solo Gaulf got everyone out of Exdeath's Castle blah blah blah. On the Big Bridge, Sosa stepped back into the role of caster once again, sitting in the back row and blasting these mostly water enemies with their weakness to lightning. Although Gilgamesh was immune to all of Sosa's spell-based status ailments, he couldn't stand up to Old/Aging status obtained via the Ancient Sword. This cut his speed enormously in battle. I tried to stop his triple Armor/Shell/haste buffs late in the battle, with Sosa successfully hitting on a Mute spell, only to see those buffs go through anymway. Huh. Guess Sosa didn't have enough speed to attack before the Haste status wore off. Sosa spent a lot of time recovering after that with the Healing Staff, but was never in any real danger. Gilgamesh didn't have the damage to get through his infinite healing.
I had barely enough money to pick up the new equipment on sale in Rugor, and not enough to get more than a handful of Hi Potions there. The most important thing on sale was the Slumber Sword, a stronger direct damage weapon with the chance to put enemies to sleep. Sosa was a low gold character due to his lack of grinding, his need to pick up quite a few rods to store in inventory for breaking purposes later, and his ability to equip two armor sets. For those who don't know, there are three armor sets in this game: heavy (Knights), medium (Monks), and light (mages). Red Mages can equip both the medium and light armor sets. Sosa needed to have copies of both, depending on whether he wanted to emphasize physical defense and boosts to Strength or Magic Evade and boosts to Magic Power. While all of this was useful gear, it left his wallet empty at times. Too much twinkery.
The enemies in the underground cave are all weak to either fire or lightning element; Fire 2 and Bolt 2 had a field day here. The biggest issue was Sosa running out of magic points, which remained low due to his modest Magic Power stat. His spells also hit a lot weaker than a true caster, requiring more than one casting against typical enemies. I could see that Sosa's pretend Black Mage days were nearing their end, but they still worked for the moment. The Tyrannosaur at the end was introduced to a Phoenix Down as usual.

I never show my characters picking up the Dancing Dirk, so here's what that looks like. It's found in the Moogle Village in one of the treasure chests. This was a very useful weapon for Sosa, who could use it from the back row and pick up four useful abilities. Most casting classes can get excellent use out of this unique weapon.

I also never show pictures of the Abductor fight outside Bal Castle, largely because it's such a joke of a battle. For fun, I had Sosa cast Charm over and over against this guy; each time, the Abductor would attack itself and break the confusion, only for Sosa to reapply it again. He killed himself after about ten attacks. Sosa never did a point of direct damage - ha!
Sosa was able to equip the Bone Mail, and I had the further possibility of combining it with the Flame Ring for self-healing via Fire 2. Not all that much healing, mind you, but this still added another possibility to his arsenal. In the Hiryuu Valley, I tried to fight from the safety of the back row, only to find that Sosa was running out of magic points way too fast. It would take four castings of Fire 2 to take down one of the Zombie Dragons, consuming 40 MP, and that simply wasn't practical given that Sosa's max MP was still under 200. I did a lot of fighting in the front row, using the Healing Staff and Armor status for protection. Sosa could use the Epee sword found in Bal Castle to do pretty good damage.

My plan for the Hiryuu Plant was to cast Fire 2 against all of the little Flowers, and wipe them out endlessly while wearing down the boss. Any class with multi-targeted damage can normally do this, like the Monk's ability to Kick all of the Flowers. I found to my surprise that Fire 2 did 0 damage to everything! The magic defense on all of the Flowers is actually very high, enough to nullify Sosa's own spellcasting. I suppose I could have broken rods as a solution to this problem, but that would be a bit of a cheese solution. Instead, I looked in the Algorithms Guide and found that all of the Flowers are susceptible to the Sleep spell. That made this a very easy battle: put each individual Flower to sleep and then attack and kill the Hiryuu Plant. (It will only revive the Flowers as they die, and never directly attacks.) Twinkery to the rescue!
The battle on the ship with Gilgamesh and Enkidou was more difficult than many of the others that Sosa had faced. Neither of these foes had any elemental weakness, and the direct damage output of the Red Mage was quite low all throughout the variant run. Devoid of his usual tricks, Sosa had to fall back on attacking with his Epee sword and hoping for the best. I chose to equip the Bone Mail along with a Flame Ring; this allowed Sosa to heal himself with castings of Fire 2, while also blocking the damage from Enkidou's annoying Vampire spell. (He drains his own life and gives it to you with the Bone Mail equipped!) Aside from that, it was pretty much attack away and pray that Sosa would dodge the Death Claw spell. I had quite a few failures here, and went ahead and broke two rods when both Gilgamesh and Enkidou were on the screen together to speed things up a bit. This seemed to do the trick, reducing the amount of time Sosa had to dodge Death Claws, and eventually he won the battle. It was mostly luck, not any impressive strategy.
Now Sosa had to turn up a Wall Ring in the Barrier Tower, and the darned thing would not drop for him! I fought endless numbers of Wall Knights with nothing dropping afterwards. Sosa picked up many copies of everything else that enemies could drop (Dream Harps, Speed potions, Hi Potions, etc.) without the coveted Wall Ring appearing. By the time that one finally dropped, my Red Mage had gained SEVEN whole levels in the process, going from Level 33 all the way to Level 40. Sheesh! Sosa had been ahead of the leveling curve the whole game, and now he was squarely back to being average for a solo quest.

The Red Mage is one of the few classes with a ready answer to the Atmos battle, as the boss has an infamous vulnerability to the Sleep spell. Sosa successfully hit on his Sleep spell on the first casting, and that was essentially it for the fight. He did still have to truck through Atmos' 20k health, however, which took no less than 38 castings of Fire 2, each one powered by the Fire Rod. Sosa drank all four of his Ethers in stash, and this was only just enough magic points to finish the battle. He would have had to resort to Elixir usage next. Against a boss that couldn't even move or fight back! Heh.
Sosa successfully managed to pick up two Light Staffs (Staves?) in monster drops on his passage through Guido's Cavern. This was outstanding news, reducing the need to grind these items from the Metamorph enemies later. I planned to return after finishing the Forest of Mua to turn up several more.

Mua was fairly easy to complete, even if the town offered little in the way of additional power for Sosa. I did get the Air Lancet dagger and some better magely armor in the item stores, but there would be no Fire/Ice/Bolt 3 spells for my Red Mage. Inside the dungeon, I found myself equipping the Bone Mail + Flame Ring and fighting the enemies from the front row. Sosa would cast Armor at the beginning of every battle, and that along with the Bone Mail made him a pretty hefty melee tank. (Well, ignoring his very low max HP, anyway!) When Sosa's health ran low in a fight, I would have him swap over to a Flame Rod and self-cast Fire 2 for healing, as seen above. This allowed Sosa to obtain all of the defensive benefits of the Bone Mail while still having access to self-healing. Quite frankly, this was exceeding my expectation for this particular job class. I have to admit, I didn't think the Red Mage would be that interesting to play out, mostly rehashing the playstyle of other classes. But I was finding to my surprise that the Red Mage truly did have a unique set of gameplay all his own, able to swap on the fly from a casting charcter over to a melee bruiser and back again. Combined with all of Sosa's status effect abilities, the Red Mage was carving out its own role before my eyes. No other job class was quite like this.
The Crystals/Seal Guardians were pretty routine. Sosa stuck with the Bone Mail + Flame Ring combination and used the free healing from the Fire Crystal as so many other characters had done. I did have to use some self-healing towards the end of the battle, since the Wind Crystal acts so much faster than the Fire Crystal (speed 55 vs speed 40). If I did nothing, two Aero 3s would hit Sosa before a healing Fire 3 arrived, and that would mean the death of him. A couple of correctly-timed self-cast Fire 2s solved this problem and made short work of the battle.

Now it was back to Guido's Cave to farm more Light Staffs from the Metamorph enemies inside. These foes were very easy to defeat, as they possessed a weakness to Air element and Sosa could now use the Air Lancet dagger to dish out double damage as seen above. I wanted to fight until Sosa had four Light Staffs, and he picked up another drop in the first couple of battles that I fought, to go along with the two Sosa already had in stash. "Great," I think, "this won't take long at all." Then Sosa racked up 350 ability points in random encounters before the final Light Staff dropped. I don't know the exact number of Metamorphs he killed, but it to be over 70 based on the number of ability points gained. The odds of getting a drop in each battle are 1 in 16, so this was phenomenally unlucky. I guess that balanced out the extremely fast drops from earlier, but still... sheesh.
The monsters in Exdeath's Castle were fairly challenging for Sosa. There were only a couple of opportunities to use his status-affecting twinkery, and enemies like the Yellow Dragons had no easy solutions. I ran from more battles than usual. Sosa was using the Bone Mail + Flame Ring combination again, although unfortunately many of the monsters were beginning to out-damage that particular solution. He needed to get into the third world and get an offensive upgrade.

The final Gilgamesh battle was a lot of fun, even if it was also on the challenging side. This was another battle where none of Sosa's tricks had any special effect; if anything, the shoe was on the other foot, with Gilgamesh having all kinds of status attacks. Here was the relevant code from the Algorithms Guide:
{Sonic Wave,Fight,TinySong}
{Strange Dance,Fight,Specialty}
{Flash,Fight,Specialty}
{Hurricane,Fight,FrogSong}
{Time Slip,Fight,Specialty}
{Rocket Punch,Fight,FrogSong}
As always, Gilgamesh would pick one command out of each group of three and move on to the next row, then keep repeating these six groups endlessly. He had two really dangerous moves in this arsenal, Sonic Wave to cut Sosa's level in half in the first group and Hurricane to drop Sosa's health down to nil in the fourth group. There were also a whole bunch of status attacks, turning Sosa into a frog or a midget or putting him to sleep. With some practice at the battle, I could keep Sosa alive indefinitely - at least until Sonic Wave would inevitably appear and start cutting into his level, dropping damage drastically. I needed to win the fight quickly, and so that meant using the Dancing Dirk and hoping for Sword Dances. Sosa needed about three of them to hit, and eventually that took place after a long run of engagements featuring Tempting Tangoes and Mystery Waltzes. Nevertheless, the battles were always entertaining to play out, even when I was losing them. I had to time my moves properly and keep healing various status conditions, which kept me as a player on my toes.

When it came to the Exdeath battle, Sosa's only chance was to break his accumulated Light Staffs for Holy element damage. I was under no illusion that Sosa had any chance to do this battle with his paltry basic attacks. I went into the fight with a Wall Ring equipped to reflect back Exdeath's magic attacks, and magely armor to increase Sosa's Magic Power stat for maximum damage when breaking those staves. Much as I would have liked to use the Bone Mail here, that make it very difficult to heal, and I knew Sosa would need to burn through some of his Elixirs before this brawl was done.
In practice, the Light Staffs produced about 5000 damage each when broken, which was better than I had been expecting. I had been worried about the low Magic Power stat on the Red Mage compared to other casting classes. This meant that I only needed three of the four accumulated Light Staffs to get past the first half of the battle. Easy victory, right? Heh, not so much. The second half of the battle proved to be very difficult indeed. Sosa's extremely light armor and very low Vitality stat meant that he was taking a brutal pounding despite the safety of the back row. Basic attacks from Exdeath did about 400 damage, while Vaccuum Waves would do slightly over 700 damage. Exdeath would act twice on each move, and Exdeath could potentially fire off two Vaccuum Waves to do nearly 1500 damage in one go. Sosa only had 1900 HP at max, and Exdeath's high speed had him moving faster than Sosa. Uh oh. Thank goodness for the Wall Ring, which turned about half of Exdeath's actions (all of his spells) into harmless moves which would reflect back and damage the boss. I found myself burning through Elixirs at an alarming rate, having to use one any time that Exdeath could potentially kill Sosa... which was often. There was no opportunity to go on the attack, only use Hi Potions (if the damage was minimal) or Elixirs. This was a tense and brutal encounter, but Exdeath's health was dropping very slowly from those bounced Fire/Ice/Bolt 3s that he kept casting. Finally, Exdeath was down to his last 5000 health, and then I could break out the heavy artillery:

The final Light Staff was broken and that cinched the victory. Sosa ended up using almost a dozen Elixirs, as I grew more and more risk-averse as the battle progressed. I did not want to go back and have to do the whole thing all over again. I actually did win this fight on the very first try, since the initial Condemn missed and Exdeath never got a chance to fire off another one. As rough as it had been, I was happy to take it. The Exdeath battle is rarely an easy one.
Sosa had acquired a Power Staff from another monster drop in Exdeath's Castle, and I used this to Berserk the Antlion, removing any chance of Sonic Wave appearing. The ability points from the victory unlocked his final job skill:

X-Magic, or Doublecast in the GBA translation, requires an ungodly 999 AP to become available. It's one of the most abusable abilities in the game, allowing the caster to use two spells in succession. When combined with other jobs like the Time Mage or Summoner, it can get pretty ridiculous. For a pure Red Mage, X-Magic is somewhat less useful, but it did open up some new opportunities. Sosa found that he could get good damage out of Fire/Ice/Bolt 2 if they were doublecast against an opponent with an elemental weakness. Each spell would do about 1500 damage, and the combination for 3k damage was enough to still be practical in the third world. Foes that lacked an elemental weakness were generally too strong for this to be effective; casting Fire 2 six times in a row to kill one enemy was a bit silly.
There were still opportunities for more Red Mage twinkery in the Pyramid:
Groups of four Cursed Ones are extremely common in the Pyramid, and guard most of the treasure chests in there. They hit very hard, and their AI routine is pure melee-only. As it turns out, however, they lack an immunity to the Size spell, and that nullifies their damage completely. Sosa was able to doublecast Size to hit two of them at once, and knock out all the enemies in two rounds of combat. At that point, he could then carve them up at his leisure with the Epee sword. Naturally I did have the Chicken Knife, but I wanted to avoid the Flee effect in these battles (which would exit them and then Sosa would have to fight all four enemies again to obtain whatever was in the chest). X-Magic was also useful against anything with an elemental weakness, like the Machine Head robots. Six Bolt 2 castings across three uses of X-Magic would finish them off. Sosa had to use a lot of Cabins to restore magic points, but he worked his way through the dungeon with fairly minimal fuss. Anything that wasn't weak to one of his spells would fall to the power of the Chicken Knife.

Merugene can be put to Sleep immediately. Sosa followed by casting a metric ton of Fire 2s via X-Magic until she croaked. One of the most boring and safest battles I've ever fought.
Sosa looted the three Legendary weapons from Kuzar Castle that he could actually use: the Assassin Dagger, the Wizard Rod, and the Sage Staff. The latter two were only of minimal use; the Wizard Rod at least allowed Sosa to power up all of his elemental spells at once when equipped, while the Sage Staff was almost pointless since Sosa could not cast the Holy spell. (When used as an item, the Safe Staff casts the Life spell - not terribly useful for a solo challenge!) The Assassin Dagger was pretty helpful, giving Sosa his first access to an instant-death ability, and as an alternative to the Chicken Knife. I picked up the rest of the usual gear at Mirage Village: Running Shoes, Thief Knife, improved medium/light armor, and so on.
The Solitary Island Temple was uneventful. Sosa fought enemies with a combination of Assassin Dagger, Chicken Knife, and doublecasted Red Magic spells. I ran from the Tote Avis enemies and killed everything else. Stalker was easily handled with the Chicken Knife, Running Shoes, and a couple of Elixirs. This was actually a mistake, as Stalker also lacks an immunity to Sleep and could have received the Merugene treatment in identical fashion. Not enough twinkery here.

The main treasure in Fork Tower was the marvellous Wonder Rod, granting access to every White and Black magic spell for Sosa, most notably a one-time use of Shell status for difficult bosses. The duo at the top were fairly simple to complete, with the Minotaur going down to standard attacks with the Chicken Knife. Against Omniscient, I had Sosa reflect Old/Aging status off of his Wall Ring (via the Ancient Sword) onto the boss, which slowly cut his Regen status from 175 health per tick down into single digits. This allowed Sosa to down the boss with a metric ton of doublecasted Fire 2 spells off of his own Wall Ring. I made sure to have the Goldpin helmet equipped to reduce MP cost, and Sosa still had to drink a number of ethers. Without the application of Aging status, I'm not sure Sosa could have out-damaged the regen rate of Omniscient.

The dangerous Unknown enemies in the Great Trench were largely handled by the same combination, moving Sosa to the back row and spamming massive amounts of doublecasted Black magic. This made sense because all of the battles in this area have lots of monsters show up, usually 3-4 per battle, and most of the Unknown opponents have some kind of counterattack tied to use of the Fight command (Possess, Condemn, etc.) Typically it would take four or five uses of X-Magic (or eight to ten total castings of Fire/Ice/Bolt 2) in order to clear out the monsters. Sosa once again had to use the Goldpin helmet to conserve MP, and I still was limping from one save point to the next, using Cabins all the while. Against the skeleton Unknowns pictured above, Sosa did his best to put them to sleep before they could use their Condemn move. When all else failed, I could break out the Magic Lamp and use summon spells to wave clear these monsters in rapid fashion (you can recharge the Magic Lamp halfway through this dungeon). The danger level was actually fairly low, and Sosa made it through here without too much trouble. The boss trio at the end were insta-wiped with an Odin summons from the Magic Lamp. The Red Mage job practically demanded this easy solution.

Istory was essentially the same as the Great Trench, only here most of the enemies had a lightning weakness to exploit. That meant half as many uses of X-Magic, and much faster progress through the dungeon. Enemies weak to lightning took about 800-850 damage per cast, or 1700 damage per use of X-Magic. With the addition of the Running Speed for Haste status, this allowed Sosa's very old magic spells to still remain competitive here towards the end of the third world. I'll admit that I was surprised by this. Sosa was able to make use of Armor status and the Coral Ring against Leviathan, and I found that I could avoid using Elixirs by doublecasting Cure 2 when Sosa fell low on health. I had to use some ethers to restore MPs, but Sosa did this with no trouble.

I did not see any point in clearing out the other side quests in the third world, so on to the Cleft of Dimension it was. I continued to find that many of Sosa's spells were useful against the random enemies here in the first desert section. These Ammonas had no magic evade and could easily be turned into toads, where their purely physical damage was cut to zero. The Anku Hegus were vulnerable to ice element, and two uses of doublecasted Ice 2 would drop them as a group. Even the dreaded Land Crawls could be hit with the Charm spell, where they would usually kill themselves with self-inflicted damage. In the Lonka Ruins section, the Bone Mail protected Sosa against the Roulette spell, and nearly everything else dangerous could be put to Sleep if necessary. Same story in the forest area, where Sosa killed the Moss Funguses (weak against fire) and ran away from the rest. He could even take out the nasty Achelones and Great Dragons in the cave section through a simple combo: Sleep + Venom. Once they were asleep and poisoned, their life would tick away in 1/16 increments until they were dead. All Sosa had to do was wait.
I have nothing much to say about Wood Sprite or Apanda. The first one is a joke to any class that can wear the Bone Mail, and Apanda has the well known weakness to fire element. Apocalypse was a bit of a different story:

There were a number of dangerous moves here, such as Roulette, Condemn, Deathclaw, ????, and the various Level spells. Any time that Sosa was hit with Condemn, I would use the Wonder Rod to cast Reset and start the fight over again, as pictured above. This certainly was a lot easier than walking all the way back from the previous save point (as mentioned many times before, I don't cheat using save states when playing these challenges). Apocalypse will never attack physically, only cast spells, making this an easy battle to use the Chicken Knife with full damage from the front row. However, Sosa did still have to work through the 27k health of the boss without getting wiped out by something nasty. To protect against this, I made use of Shell status from the Wonder Rod at the start of each fight, and this did make a real difference. Shell cuts in half the chance for any spell to hit the target, at least for any spell that doesn't auto hit like Fire or Bolt. I found that the biggest problem in this battle was the various Level spells; Sosa was Level 54 at the time, and kept getting pegged by Level 2 Old, which would drop his damage to nothing after a few seconds. I went ahead and took Sosa to Level 57 to render all of the various spells based on character level out of the picture, and the battle was fairly easy after that point. Wiped out a couple of times by ???? but otherwise routine.
In order to do the Catastrophe battle, I had Sosa cycle all the way through the Wonder Rod's spell arsenal and back to Shell again. This reduced the damage from his Earth Shakers to a manageable level, and also greatly reduced the odds of petrification from the boss' Demon Eye spell. With Armor + Shell, doublecasted Cure 2s were enough to sustain Sosa during the fight until his Chicken Knife could win out. Halicarnassus reflected herself to death with her own Holy spells as usual. And Twin Tania was downed in twinkerrific fashion:

Break spell out of the Wonder Rod to take advantage of his weakness to petrification in the "charging up for Giga Flare!" phase of the fight. There are a lot of different ways to exploit that particular form; it's weak to virtually everything you can imagine.
Now it was on to Necrophobia, where Sosa had more tools available than most other solo characters. I once again used the Wonder Rod for Shell status at the start of the battle, and this gave Sosa enough protection to survive the magic damage from the four Barriers. I actually found that I could doublecast Cure 2s and avoid having to use Elixirs in this first part of the fight. The Barriers quickly ran themselves out of magic points, allowing Sosa to down them in completely safety. With one Barrier to go, move to the back row, cast Armor status, and get ready for the second half of the fight. Necrophobia has very high physical defense but is weak to all eight of the game's elements, making this a good situation to put on the Black Mage hat and become a pretend caster. Sosa could even use the Magic Lamp for extra damage here:

Bahamut gave decent damage while Leviathan did even more (Necro being weak to water element). At that point I shifted over to breaking rods; Sosa certainly could have doublecasted Fire/Ice/Bolt 2 here, but that would make the battle longer and stretch out the danger zone of being killed by Necrophobia's Hurricane/Attack combo. Because every failure meant another walk back from the Dimensional Castle's save point and another lengthy fight against the Barriers, I went with the safer option. Each broken rod did about 4000 damage, and Sosa was very well protected against physical damage due to his back row + Armor situation. I rarely had to waste a round healing. The first attempt at this battle saw Sosa die to a Hurricane move, the second attempt at the battle was successful. Necro tried Hurricane on the second battle as well, only to have it blocked by Shell status. Ha!
Sosa was still Level 57 at this point, and I wanted to give him two more levels up to 59, where he would pick up another attack multiplier. Even more important was getting extra health, as the very low Vitality of the Red Mage class made Sosa a highly fragile character. His ability to use Armor and Shell (the latter once per battle) allowed him to hang in many of these fights, but he still barely crested 3000 max HP. That didn't leave a lot of margin for error. With two more levels in hand, I got started on the last boss.

The one and only thing I remember from when T-Hawk played this variant was his use of the Bone Mail against Neo Exdeath combined with self-healing through broken Venom Rods. I had no intention of doing anything that complicated and intended to fight the last battles in standard fashion. That meant using the Chicken Knife from the front row (!) Fortunately this wasn't as dangerous as it might sound, thanks to the use of Armor and Shell spells, the lifesaving combo. Sosa started every battle by using the Wonder Rod first for Shell status, then casting Armor on the second turn. Shell gave extremely good protection against the dreaded White Holl insta-petrification move; the numbers suggested that it should have been hitting about 40% of the time (compared to 80-90% without Shell), but in practice it was much lower than that, more like 20% by my best estimate. Sosa's armor must have been giving him some extra magic evade that I hadn't considered. Anyway, White Hole was almost a complete non-issue in this battle. It almost never killed Sosa in my actual playthrough.
The real danger for Sosa came in the form of two other attacks: Condemn and Meteo. There is a chance for the Exdeath Tree form to cast Condemn in the second of its three AI routines, and Condemn is unfortunately an auto-hit spell that cannot be dodged or avoided. Once the ticking death clock started, the game was over. There is no way to remove Condemn status once it's activated, not even with Heal or Dispel (both of which Sosa could access via the Wonder Rod). This put a stop to quite a few of my boss attempts. The other danger was the Meteo spell, which the Exdeath Tree will cast when it gets under 10k health remaining. Sosa had a slight chance to survive a casting of Meteo thanks to his Shell status, but only if he was full health, and the boss only has 1/3 odds to cast Meteo anyway. Since Sosa would always have to survive at least one action of Exdeath to get through that sub 10k health zone, I would usually cross my fingers and rely on Meteo not appearing, continuing to attack to power through to the next half of the battle faster. After all, why bother pausing to heal to full health if Meteo would likely kill Sosa anyway?
I played this battle very well, but I could not get the luck factors to line up properly for a while. Sosa died with the Exdeath Tree down to a single hit left a good five or six times, often in some of the dumbest ways imaginable. Meteo appeared at the worst moments, Sosa got FOUR STRAIGHT "Can't Run!" messages from the Chicken Knife when he was about to kill the boss, and so on. Just one of those streaks where things would not line up correctly. After two dozen failed attempts, I said screw it, went back and added three more levels up to 62. This granted one more attack multiplier, and let me buy additional Elixirs back in Mirage Village, now up to 31 total in inventory. As soon as I went back, Sosa made it to the Neo Exdeath half of the fight on like the third try. It figured.

Sosa wanted to stay in the front row for the Neo Exdeath battle as well, in order to kill the Grand Crossing Part #1 as quickly as possible. At roughly 3600 damage per swing, it would take 15-16 attacks to wipe out the one dangerous part of the fight. During this ordeal, Part #2 would be casting Almagest while Part #3 kept attacking physically. The other great danger in this fight was the frequent use of Dispel magic from Neo Exdeath, which permanently removed Shell status (Almagest damage immediately going from 800 up to 1600) and forced Sosa to recast Armor frequently. So long as Sosa had Armor up and running, the boss could never kill him with normal damage, since even a combination of Almagest and Vaccuum Wave would not wipe him out from full health (1600 + 1100 = 2700 damage). On the other hand, without Armor in place, Sosa would take 2200 damage from Vaccuum Wave, and he could indeed be one-shotted by a boss combo. I kept a cool head and ensured that the protection remained up at all times.
This meant that the only danger came from Grand Cross and its 18 status ailments, as usual. The first time Sosa fought Neo Exdeath, he was hit with Condemn on the very first Grand Gross. Oh great, thanks. So much for that attempt. On the second try, Sosa would not freaking hit the darn boss with his Chicken Knife. I swear he missed 7 of the first 10 swings due to that "Can't Run!" effect. Argh. But Neo Exdeath was missing on his own Grand Crosses as well, as they kept inflicting pointless statuses or doing nothing. Sosa made it through four different Grand Crosses and finally dropped the one truly scary part of the boss.
Now I could move Sosa into the back row and down the final two parts at my leisure. (Part #4 was eliminated at the very beginning of the battle via an Odin summon from the Magic Lamp, as usual.) With Armor in place, the physical attacks from Part #3 were now doing only 300 or 500 damage, easily enough for Sosa to remove with doublecasted Cure 2s. Two castings restored 1000-1100 health as seen above, still formidable even at this final moment in the game. The occasional 1600 damage Almagest did nothing to change the basic math of this fight: Sosa was out-sustaining their damage. They couldn't do anything to him. So what if he was only dishing out 1700 damage per attack with the Chicken Knife from the back row? They could never kill him, making it impossible for me to lose the battle. It took about 60 attacks to wade through the remaining 105,000 health on the boss, not counting misses from the Chicken Knife, then finish things off with a Syldra summons from the Magic Lamp, with a Wizard Rod equipped to boost the Air element damage:

I'd argue that this was a lot simpler than fooling with the Bone Mail, and Sosa didn't have to break any rods or use save states in this fight to win. So there.  Most of my defeats were due to getting bad luck at the wrong moment; a little more love from the dice rolls and this could have been an extremely simple final boss run. Sosa killed Neo Exdeath the second time that he reached that phase, paired with roughly 30 tries at the Tree form. Condemn and Meteo caused nearly all of those deaths; I think Sosa only died to White Hole four times. It wasn't much of a factor.

That wraps up the journey of the Red Mage, a class that I hadn't been planning on playing through but was glad that I did. The gameplay for Sosa was geninely different from that of any other solo character. He was the only one who could reconfigure himself completely from physical attacker to magely caster through a shuffling of gear, and I found myself using both roles a lot throughout the quest, including swapping roles within the final battles themselves against Necrophobia and Exdeath. The gameplay of the Red Mage matched the job's reputation perfectly: the acolyte of all professions and master of none who used constant twinkery to bypass the game's dangers. Sosa's direct damage output was never very high, but my goodness was he ever a versatile character. This was a very deserving and fun variant run.
I didn't read T-Hawk's report until after I was done playing to approach everything fresh without copying ideas. Looking at it now, we generally used most of the same tactics, with a few variations here and there. One thing I'll mention is that Old/Aging status is bugged in the SNES version; enemies hit by Aging status are supposed to have their Strength and Agility drained away over time, just like it happens to the player's characters. Instead, Aging status only affects their Agility, not their Strength; their damage will not drop to 0 over time. This made one or two situations like the Gilgamesh ship battle a bit tougher. Generally speaking though, our characters played very similar games up until the final battle. I think it's pretty neat how the Red Mage can defeat the last boss in two completely different styles altogether. It speaks again to just how malleable the class can be. The ultimate example of the stat twinker indeed.


