Realms Beyond PBEM7: The Opening Salvo

All of the players in the PBEM7 game were nervously anticipating the arrival of Turn 146 when the Declaration of Friendship ran out between Rome/China and Nubia/England. We were still using the same turn order from the beginning of the game, which started with the deceased Kongo and then proceeded through Russia, Rome, Nubia, England, and then China. Thus by pure dumb luck Rome had the first-mover advantage in this conflict and that was a very large advantage indeed. The reporting for this war was excellent and I'm largely going to reproduce the forum posts as written by the participants in the conflict. First up to act was my own Rome:


Sullla:
The turn begins and I'm confronted by the same situation that Singaboy had on his turn. The Declaration of Friendship with Chevalier has ended and war can now be declared by either side.


Before moving any of my units, I needed to get more information about what Chevalier had out in the water, and I needed to do that before declaring war so that my units could still pass through his with no zone of control rules. I moved my scout one tile east, saw a frigate on the pearls resource, and kept moving east to discover these units. Looks like this is where the units hanging out around Nan Madol ended up, along with the Great Admiral. Well, if that's all that Chevalier had on the eastern ocean then this would be a picnic, but I was pretty sure he had some more units hanging around somewhere.


I moved my northernmost frigate a tile to the west and spotted this: two frigates and a caravel. Mousing over them also revealed that there were more units behind them, just great. How many? At least two or three more units in the fog. Note as well the suspicious tile outlined with a hexagon, which had to be the location of a Sea Dog, and since we knew that there were two of them, the other one almost certainly was nearby too. Those Sea Dogs were the most important units to kill on the ocean, with their potential to capture my own ships. No matter what I did this turn, those units had to die.

What to do with my ships? Ultimately Chevalier's move didn't leave me with much choice. He was clearly heading towards my canal city at Genova and there's no way that I could allow that city to be captured or razed. I had no choice but to move to engage and fight him on this turn. If I were to pull back and try to wait for battleships, he would just use his superior range (7 move frigates) to hit me from distance with a devastating first strike and cripple me before the war began. I'm still annoyed that TheArchduke managed to snipe Darwin away from us, as the extra beakers he would have given us would have allowed me to reach Steel tech 5 turns sooner and have battleships here for this fight. Instead I have to try and do it with frigates against frigates, and that's a tough situation when fighting an English civ with mucho Great Admirals and the Venetian Arsenal and Great Lighthouse. Could get ugly but I had no choice.


First things first though: Nan Madol. It was time to capture this city state once and for all. I moved my knight up to the top of that hill northeast of the city to make room for the field cannons, rotating them to the east to pull the fourth one into the battle. They shot at the city center tile to do the damage pictured above. Even with the city state weakened to half health, these field cannon shots didn't do very much damage. That one dice roll in particular where I did 16 damage was just pathetic, pretty much the minimum damage possible at that strength differential. Annoying, although not likely to make a difference. So I lined up the musket to take the city with this attack. It was nice to finally have this location under my control, and...


What the!?! Oh you stupid game! Come on, 3 HP left? You've got to be kidding me. Well, fortunately that knight was in position to attack from the hill tile, who I'd put there "just in case" without ever expecting I'd need to use him. I was planning on moving back to the tile east of the tobacco resource to provide a little more cover for the field guns but I guess not. Die you stupid city state:


That's better. Nan Madol comes as a pretty solid city in its own right, with the notable features being a Harbor district (another trade route yay!), a repairable monument and granary, and a stone resouce that can be harvested. I'll likely turn that into a privateer with the expectation of upgrading it into a submarine later. I'd prefer to get another frigate but there isn't time to harvest the resource before discovering Steel tech, and I'm certainly not delaying that one. City was renamed to Bologna so that we never have to talk about Nan Madol again.

Oh, and Chevalier's culture dropped from 128/turn to 59/turn, heh. Woden only makes 64 culture/turn so they are essentially finished as far as civics research goes. Nan Madol was their whole cultural strategy and Chevalier was getting SEVENTY culture/turn from it. Sheesh. Again, he was incredibly lucky to have that city state located in that particular spot, one of the best possible city states for his civ. This whole game would have played out differently if that had been a random Industrial city state or something.

Removing Nan Madol from the playing field was an important first step in seizing control of the region. Now Rome would have another base in the center of the disputed zone where land units could be stationed and injured units could retreat to heal. For the moment, our respective armies were deadlocked in the central part of the southern continent with neither team able to advance through the heavily jungled terrain. If there was going to be a breakthrough on either side, it would have to come in the wide open spaces of the northern ocean. The remainder of my turn was devoted to landing the most powerful first strike possible.


Sullla:
*Deep breath* OK, let's do this.


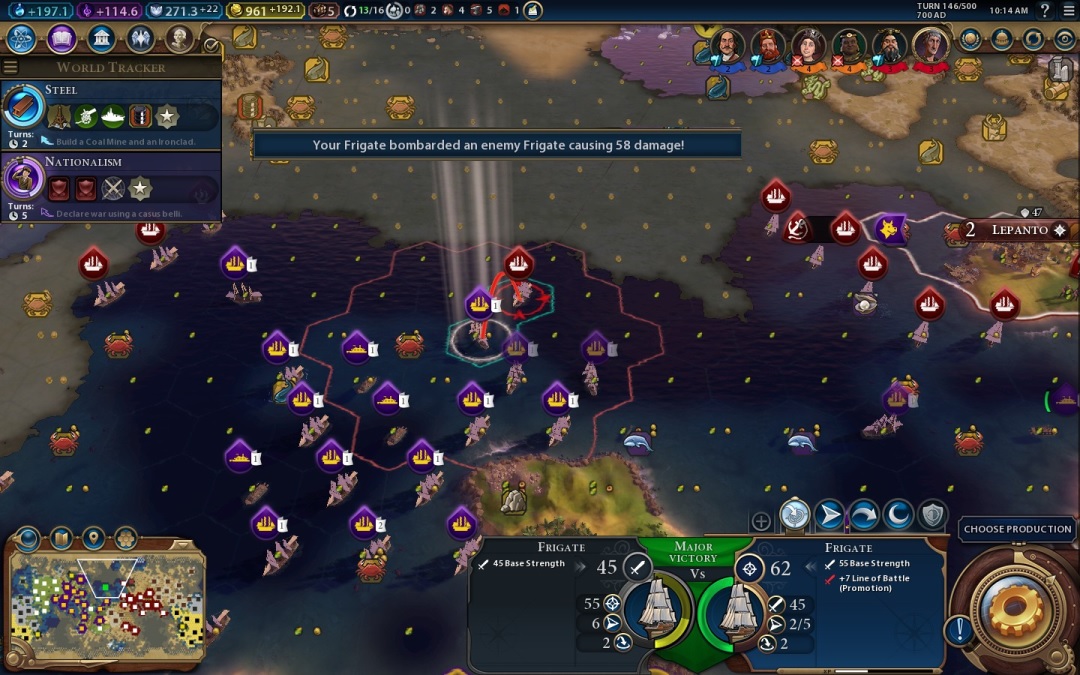
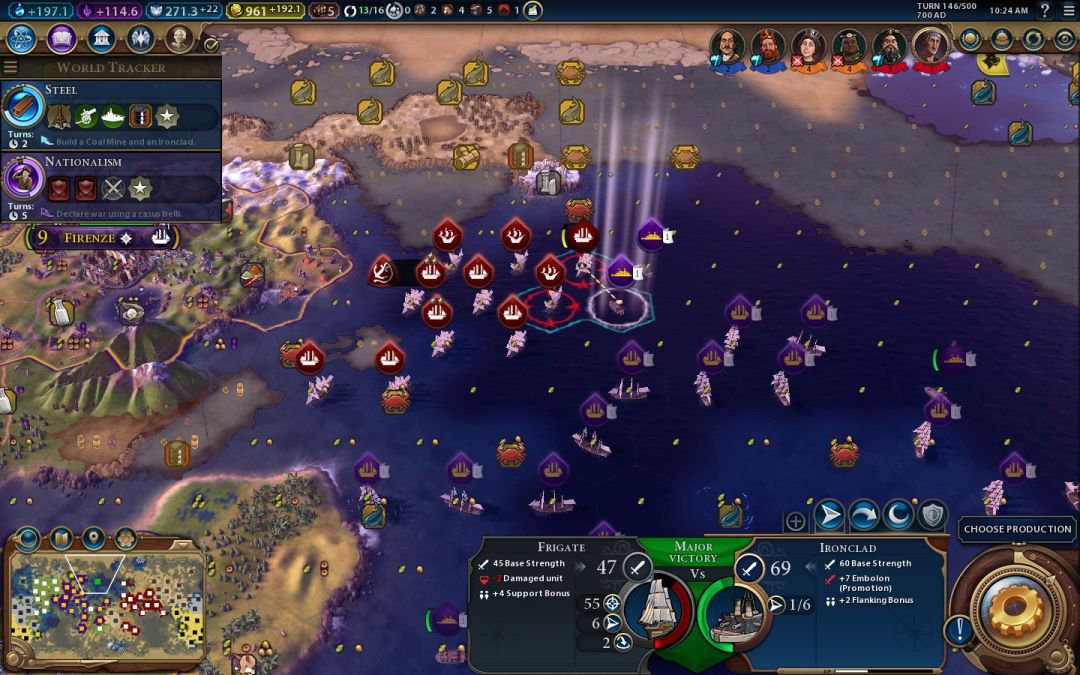
All of my tactical movements at sea this turn were based on getting every ship into the battle. There was only one ship out of range to attack any of Chevalier's ships, the injured frigate next to Nan Madol, and even that unit could attack the embarked English musket next to it. Every other unit was focused on killing the maximum possible number of English ships before they had a chance to attack me. For example, this frigate could only reach two ships: the English frigate next to the pearls (which is the one that I was originally planning on targeting) or this other frigate that was revealed in the fog when I moved forward. Now, should I have sat back and tried to defend with my ship while waiting for battleships? Unfortunately that wasn't an option. Chevalier's ships all move faster than mine and frigates are much better on the attack than on the defense. If I pulled back to Nan Madol and waited, he would just get the first strike instead of me. I really did have no choice but to attack and inflict maximum damage. I went for the southern frigate next to Midway because it didn't get any bonus from the nearby Great Admiral.


Then this ironclad finished it off. My frigate that attacked over is surely dead, but Chevalier will need to use two of his own attacks to sink it. The ironclad is probably OK: this guy is the only one of my ironclads with double promotions, enough to get the generic +7 strength (Embolon) that all my ironclads have plus the anti-ranged promotion (Reinforced Hull) for +10 strength against ranged attacks. In other words, this ironclad defends at 77 strength against those frigates, who will be attacking at 60 strength with the Great Admiral (average damage around 15 per shot). I think this unit will probably not be targeted, although if Woden wants to use five attacks to sink it I'm fine with that. (Woden will be playing the next few turns for Chevalier, for the curious.)


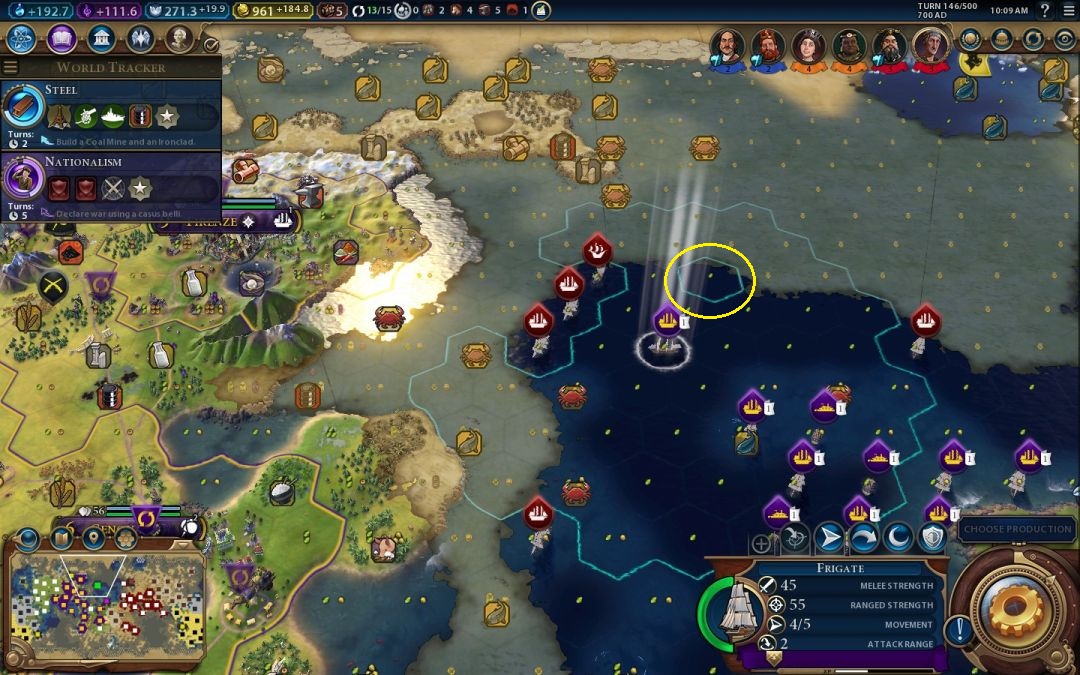
I chose not to go after the Great Admiral in the east. While I could have sunk the frigate that it was protecting, that would only teleport it over to Lepanto and it would be right back into the action again. My larger strategic goal was to pull the fighting over to the western side of the ocean, both to help protect my cities and to draw the English units further away from their own cities. That way if I do kill a Great Admiral, it will take much longer to return back to combat. Anyway, I had range enough to reach this frigate sitting off by itself and shoot for 52 damage.


Then finish it off with this frigate. Again, notice how I'm pulling these units over to the west as much as possible. The one frigate off in the east is completely doomed, but I was trying to create a formation with everything else.


Another frigate, another shot for 50+ damage. This is the power of the Terracotta Army in action: line of battle on every single frigate meant 62 strength attacks instead of 55 strength attacks. That pulled the damage range per shot up noticeably, from 36-54 damage (average 45) at +10 strength up to 47-71 damage (average 59) here at +17 strength. I could confidently assume that two attacks would kill every defending frigate. Without the extra damage from the promotion, I would not have been able to two-shot these units and the combat would have been much more difficult.


I finished off this frigate with an ironclad, taking 9 damage in the process. These units here would end up becoming the eastern end of my naval formation by the time this combat was over.


Next I wanted to go after the Sea Dogs, but what's this? They disappeared! Apparently they really do become invisible when you're at war; even mousing over their tiles doesn't show them on the screen. Scary stuff, good thing that I already found the location of this pair. I moved up another frigate, and there they were:


Both of them, just as expected. Sea Dogs are more frail than frigates and rely on stealth for safety. This one practically melted when a frigate engaged it, although unfortunately I didn't have quite enough damage to get into the one-hit kill area. The two frigates highlighted here combined to take down the eastern of the two Sea Dogs.


Now I shifted focus over to the western half of the ocean. I had just barely enough range to get this enemy ship into firing distance to make this attack. This was one of the two frigates chopped out of Parma, and the lack of a promotion was instantly notable in terms of the damage dealt. Only 47 damage here and that roll was slightly above average (45 damage). Fortunately it was still enough to ensure a two-hit kill:


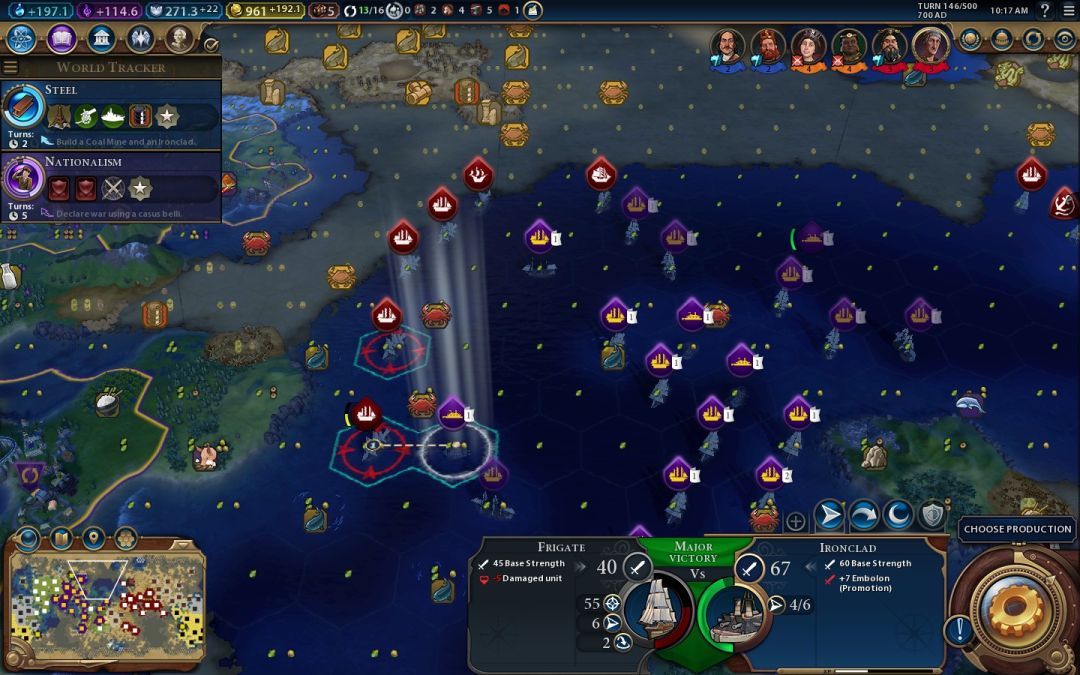
I used an ironclad here for the finishing blow. Now why an ironclad you might ask? The simple answer is that I'm looking ahead to the next round of combat and trying to minimize damage taken on my ironclad. Unlike the ranged frigates, my ironclad takes damage every time that it attacks and therefore I had an incentive to use ironclads to finish off crippled attackers. This is backwards from what you might think, where the melee unit would go after the strongest attacker, but actually not so much here. Both the ironclads and the frigates shared the same 62 strength on their attacks so I basically "babied" the ironclads to keep their health as high as possible for the next round of fighting. Keep in mind too that melee units have to deal with defending support bonuses while ranged units get to ignore them. I didn't want to attack into the teeth of that formation up there to the northwest where the defending unit would get +6 or +8 strength. My frigates could attack the same unit without any strength bonus for the defender.


This worked out so well that I repeated the process again. First the non-promoted frigate...


Then I was going to use an ironclad, only to realize that this double promoted frigate couldn't attack any other targets. It was this enemy ship or nothing. Don't worry about me "wasting" the double promotion frigate, the second promotion just provides a combat bonus against land units. Irrelevant in this context.


Have you noticed that more ships kept appearing as I sank more and more English units? This was concerning but no choice now other than to soldier on. This frigate pictured could only reach the Sea Dog and crippled it with a shot.


Followed by this frigate hitting an English ship with a Great Admiral bonus. Hmmm, must be still more units in the fog to the west back there. It looked like I still had enough attacks to kill this unit, the Sea Dog, and then maybe one or two more units with my ironclads, although I wasn't eager to attack with the melee units into the middle of that English formation.


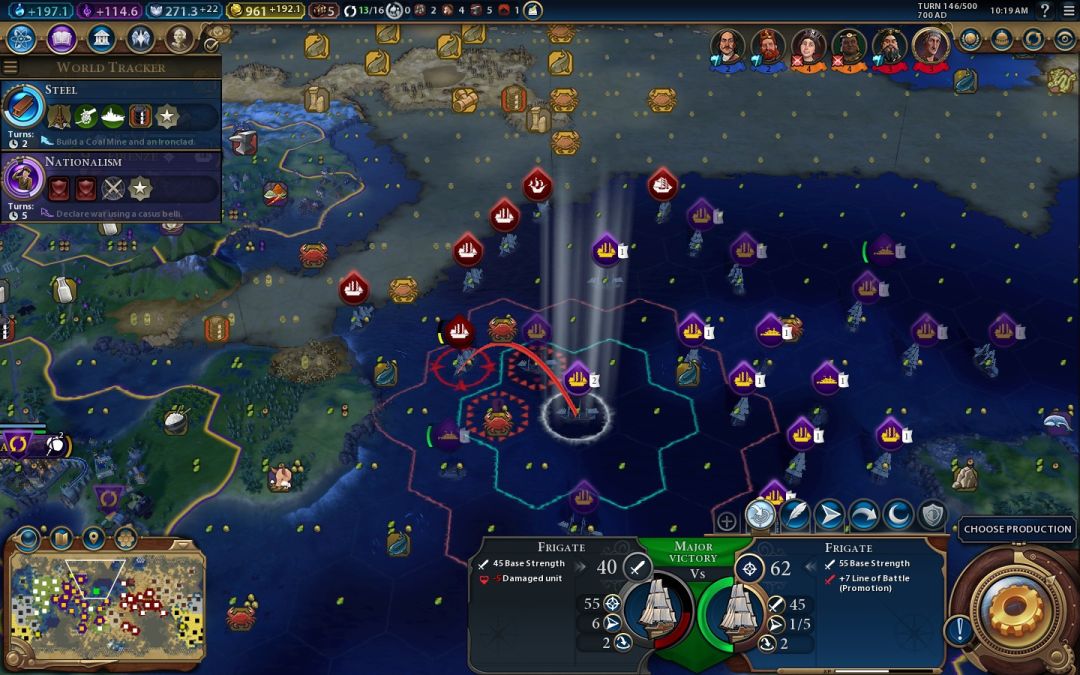
The last attack revealed this ship, which I saw did *NOT* get the Great Admiral bonus. I pounced on that chance, first with this frigate...


And then sunk with a second frigate. Note that I wasn't leaving any of these units alive but in critical condition. You want to finish kills in Civ6 if at all possible. Do not leave units alive but redlined. In Civ4, a redlined unit is nearly worthless in combat, attacking at a fraction of its strength when full health. In Civ6, a near-dead unit just has a -9 strength penalty, that's all. If Woden reduces one of my frigates to 1 HP, it will still attack at 53 strength and that's pretty darn good! I was making sure to get complete kills on each and every enemy unit. My promotions gave me just enough damage to two-shot everything.


Next I moved my ironclad forward, and oh my god, are you kidding me?! How many ships did Chevalier build on this ocean?! Stupid Venetian Arsenal, sigh. Well, I still had room for some more kills on my turn. This frigate, the one that had moved a tile west at the very beginning of the turn to spot the English ships, slid over to the east and finished off the Sea Dog.


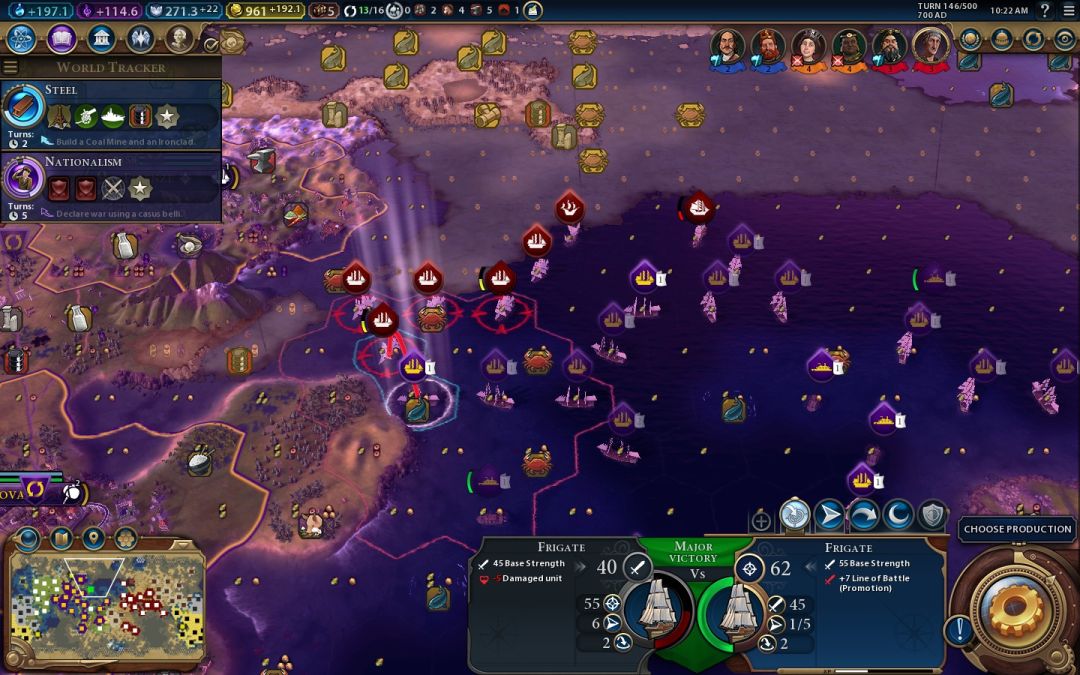
That opened up space in my naval formation for this frigate to move up and finish off the injured frigate from before. And there was one injured enemy frigate up there in the north, presumably from barbarian activity by that camp. (Thanks barbarians!) That was the last target for this turn, using my ironclads to hit another ship out of Great Admiral range.


Note the +4 support bonus. This is why I tried to have my ironclads pick off exposed enemy ships to avoid the defender's strength bonus. Oh, and there's the Great Admiral behind a frigate ARMADA, jeez. That was Chevalier using one of his Great Admirals for their sacrificial bonus, only he gets to use it twice because he built the Mausoleum way back in the day. Man oh man, it is not going to be fun dealing with that unit and its 77 ranged strength. I just pray that it will roll low and not one-shot a frigate on its turn.


Anyway, the other ironclad finished off the damaged English frigate and that brought the naval portion of my turn to a close.


All told, I sank 8 frigates and 2 Sea Dogs this turn. The first mover advantage in combat is huge and I did my best to make the most of it. The real MVP here was the Terracotta Army; without the extra promotions, this would not have been possible. Building that wonder may have just saved my entire game. And yet, despite killing 550 points of naval power rating in a single turn, England still has 5 frigates in the east, 6 frigates in the west, and 3 additional caravels. I also spotted builders at Lepanto and Midway preparing to chop/harvest out additional ships, although fortunately England is down to "only" 3 forests and 1 stone remaining over there. That would normally convert into 1 frigate per stone and 0.75 frigates per forest, or about 3 ships, but of course with Venetian Arsenal that will become 6-7 more frigates. That wonder is really, really dumb. In retrospect it should have been banned for this map. Settling two junk cities and harvesting/chopping should not produce close to 15 modern ships for one player.

This upcoming turn is going to be brutal for me. I expect to lose about 6 frigates, and anything less than that would be a very pleasant surprise. I do have 4 frigates completing between turns and a pair of caravels racing up from the southern ocean that can upgrade into ironclads along the way and help out. With some battleship upgrades, I think that I'll eventually prevail in this battle, but it's going to be a bloody mess. I think that I played this turn just about perfectly and it's still going to be nasty. Crossing fingers for Woden to make some tactical errors somwhere at sea on his turn...

One last note: these turns are starting to eat up too much time. I spent most of my day playing this turn, and while they won't all be this bad, the game is simply taking too long. I'm wearing out on this game and its daily grind. I really hope that we're getting close to the end; it's been over six months now, and whatever anyone believes, I wasn't looking to take on this commitment when I filled in for BrickAstley. Hopefully we can smash the rest of the English navy and maybe that will be enough for the other players to call it quits.

This is one of the most complex turns that I can remember playing in a Civilization game and I think that it was optimized about as much as possible. I spent more than two hours slowly plotting out the movement of each unit one at a time so that every ship could get into the fighting and sink as many English vessels as possible. The Venetian Arsenal's extra promotions were absolutely vital to this effort, shifting the math so that the English ships could be defeated in two attacks rathe than three attacks. I never imagined that I'd be able to sink this many ships on the first turn of the war... but I also never imagined that England had quite this many ships in the water to contend with! The immense time commitment required to play (and report on) these turns was grinding me down and wearing me out. There was simply no way that I could pour this much time and energy into every turn of the war and I fervently hoped that the wider game wouldn't last too much longer.

With Chevalier temporarily on vacation, it was Woden who led the English counterattack:

Woden:
Start the turn off with a bunch of notifications and also got a notification that 10 units were killed...Ouch! Took a screenshot but it didn't take. For my return fire, let's start in the east by England's coast, where a Roman frigate and ironclad are sitting...


I hit the frigate once with an English frigate and then a seadog with 62% change of capture. I do end up getting a redlined frigate. It takes everything else over here to take out the ironclad...


Only 25% chance of capture, which didn't happen. I chop out a pair of frigates at Jutland, so I will have 8 frigates and 2 seadogs to sail towards Rome's fleet next turn. I do need to kill the scout by Lepanto but needed everything this turn to kill the ironclad. Over west, CMF suffered major losses. This is where I had to think about what to do. The plan was to go and raze Genova but do I want to get trapped in the bay and have Sullla pick off England's ships or do I want to go for a war of attrition and try to take out as much as I can? Well...


I do decide to stick with the plan for a few reasons: Rome has to be close to Steel and Urban Defenses. I just hope he doesn't complete it next turn and the city magically gets 200HP walls after I removed them this turn. And second, I need to limit the number of ships he can bring to this northern sea if I want a chance to beat him. England took a major blow this turn but if I can get more built or captured, I might have a chance. So, next I pillage his harbor at Firenze. It may only take a few turns to repair but it will delay any ships in production right now. I then start on a couple of frigates and take them out...


I was only able to respond by killing 3 frigates and an ironclad but I did capture 1 frigate and Genova will fall next turn. I don't think there is much Sullla can do to prevent it. He probably will be able to get another settler out fairly soon to replace the city but it might be enough time to get more boats out and get the advantage in the northern sea. Finally, I do kill a Chinese knight in the southern tundra with the frigates and seadogs. Let's hope the next turn doesn't hurt so much. I am expecting to have lost the western fleet with the exception of the units by Genova but I should be able to chop a few more boats out too.

Woden was able to eliminate the two Roman ships off in the east but it tied up a good bit of the English navy to sink the pair of them. He used a Sea Dog to capture one of the Roman frigates without having the same luck with the ironclad; we discovered over the course of this game that the percentage chance to capture was based on the combat strength of the unit being attacked. Frigates had pretty good odds to be taken over, ironclads and more advanced naval units not so much. With the rest of his ships in the west, Woden decided to push for Genova to deny Rome a canal city. Although he was able to destroy several of the Roman frigates and severely damage the city of Genova, this had to be viewed as a tactical advantage for the Roman side. The English fleet had largely been split in two while the Roman fleet was able to remain concentrated. My reaction at the time was highly pleased:


Sullla:
Wow, that went *MUCH* better than I thought. 
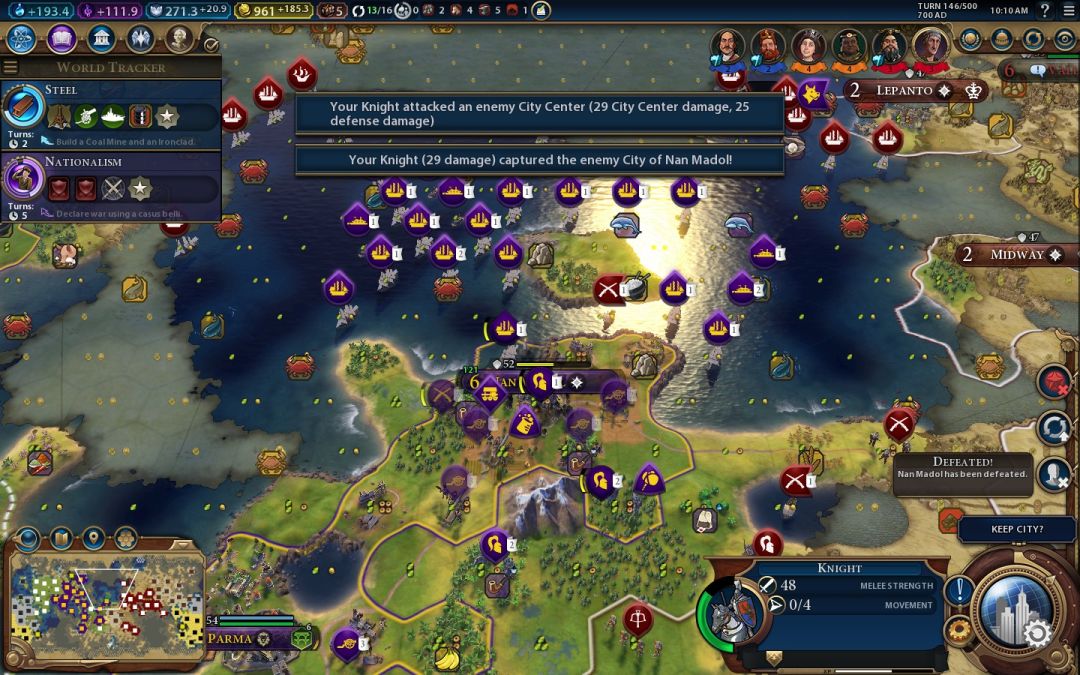
Now it might seem weird to be posting that at a time when one of my cities looks like it's going to fall, but I mean it. This was a fantastic turn for our team, between the 10 English ships sunk and the strange response by Woden on his half of the turn. Here's a quick tally of what I lost:

* Double promoted ironclad in the east
* Helpless isolated frigate in the east
* Two frigates in the west

And that's it! I only lost four total ships, and that's shocking given the amount of firepower that Woden had available. I was expecting much worse. My fleet is almost entirely intact. What's more, nearly all of these ships can reach the remaining English fleet in the west. I should be able to sink everything over there except for the frigate and caravel fleets sieging up Genova. These actions just don't make sense to me. Why did Woden waste a caravel attack on pillaging the Harbor at Firenze rather than using another attack? I can easily repair that district in a turn or two. It's annoying because there was a frigate 1 turn from completion that now won't complete until after it gets autoupgraded to a battleship in queue, but that's pretty minor overall. Similarly, by directing so many attacks against the ironclad + frigate pair off in the east, Woden has done the one thing that he needed to avoid: splitting up his fleet. The ships in the east are completely separated from the ships in the west. I'm going to crush the western fleet and then turn and destroy the eastern ones after upgrading to battleships, and then all of Chevalier's cities on this ocean are ours for the taking.

As far as Genova goes, losing it will be annoying but not fatally so. I can swap the capital over to a settler and pop out another city for this spot in 9 turns, less than that if I can get a forest chop into it. (There's a forest tile in the third ring that may be worth purchasing to speed along a settler build. Maybe.) Genova has a Campus and Commercial district, worth roughly 10 beakers and 4 culture and 25 gold/turn (with the trade route). Losing the city will suck. But it's replaceable, and if losing the city lets me destroy the English navy, I'm happy to make that trade. I don't even need a canal city immediately because most of my fleet will be needed in the eastern ocean for the time being. I just need to be able to get them back in time to face TheArchduke by Turn 161, and there's plenty of time for that.

This decision to sell out in the hopes of taking Genova makes no sense to me. What is the thinking behind this decision? If Woden razes the city then he's trapped up against the coast with nowhere to retreat and all of those ships die. If he captures the city, he can move through it and keep going, but what then? He's not going to capture Siena on the other side, which will be getting 200 HP walls on Turn 148. Woden would need to spend Turn 147 finishing up with the conquest of Genova, and then the extra strength walls are there at the start of Turn 148. Furthermore, I have two caravels and a frigate over near Venezia, and they can reach Siena by Turn 148, while upgrading into ironclads / battleship along the way. Siena is never falling, not to this force. I just don't get it. Woden could never possibly take and hold Genova, and if he burns it down, he traps his whole western navy for destruction. One city (and not one of my better cities honestly) is not worth sacrificing most of the English fleet.

I'm reminded of something that oledavy wrote in the closing stages of the PBEM2 game. He said something to the effect that his cities didn't matter anymore; the Japanese empire essentially was equivalent to the Japanese fleet. We're in extreme lategame here just as oledavy was in that game, and I think the same lesson applies. The goal right now in the eastern ocean is not to capture territory, it's to destroy the enemy fleet. Once the fleet is gone, every city on the water is helpless and can be taken at leisure. Woden should have been trying to sink my ships over any other possible goal. I won the first turn 10-4 in ships killed, and since combat is a snowball game, I'm set to win the second round even more decisively. I started the turn with 19 ships on the eastern ocean, and by my count England started with 25. England has double Great Admirals, two fleets, and an armada. I should not be winning these trades - with better tactics, I think England could have wiped the floor with me. So yes, this qualifies as a very, very good turn for our team regardless of what happens at Genova.

My one concern is holding onto Nan Madol from the English frigates in the eastern fog; I might try to plug that one-tile gap south of the island with an ironclad to stall for time. Battleships are online in just two more turns though, and then it's really time to kick some ass.

There certainly had been no shortage of action here as the great fleet battle commenced. I've filled up almost 5000 words just on this page of the report largely by archiving the forum posts that the participants were writing at the time. It also bears mentioning again: this entire page has been solely about the first turn of the war! This was only the beginning and the war would increasingly drag on the combatants over the course of the following days. There would be no easy victory for either side in this conflict.