
 |
Part Six: The Gang's All Here |
|
At the end of the previous section of Spyderman's journey, he had finally managed to track down two pieces of the Arachyr's set (in the correct inventory slots) and unlock his Spider Queen. This was the fitting conclusion to Spyderman's trip through Torment VII difficulty, and I was about to take another step upwards into the realm of Torment VIII. This would mean the standard increase of another 120% monster health and an additional 40% monster damage as compared to where Spyderman had been previously. If you're curious about how much further Spyderman could potentially keep increasing the difficulty, there were sixteen total Torment difficulties at the time of writing, and opponents on Torment XVI would have about 300 times more health than Torment VIII. That's not 300 percent more health, that's 300 times more health (30,000 percent more). So yeah, Spyderman still wasn't anywhere close to the maximum difficulty level yet and he still had room for significantly more growth.

I'll start by covering a new item find that Spyderman picked up after completing a Greater Nephalem Rift at a difficulty level of 32. Spyderman had been accumulating pieces of the Helltooth set throughout his character progression, without making any attempt to do so, and he wound up discovering the set item in the gloves slot, the Helltooth Gauntlet. This gave him four total items in the set when combined with the Helltooth helmet, pants, and boots. (Spyderman had previously been getting the four item set bonus via the Ring of Royal Grandeur's unique property while wearing only three items. This gave him the actual fourth item in the set.) Even better, this particular Helltooth Gauntlet had rolled as an Ancient item and also managed to land perfect stats in two key categories: 10% additional crit chance and 6% additional attack speed. Even with a slightly subpar roll on the Vitality, this was an exceptionally good item and increased all of Spyderman's core stats. While it was a shame to lose out on the 20% additional fire damage by giving up Magefist's unique property, switching over to the new gauntlets was a no-brainer.

There was another bit of critical itemization that I need to mention here. Following another run through a Greater Nephalem Rift at Rift Difficulty 33, Spyderman managed to turn up the Sacred Harvester legendary ceremonial knife. This was a non-Ancient item and therefore inferior as a weapon to his current Sky Splitter, however it had an exceptionally useful unique property attached to it: Soul Harvest now stacks up to 10 times. Recall that Soul Harvest as a skill adds 3% to the Witch Doctor's Intelligence stat for each stack, and doubling the stacking limit from five to ten would mean that the bonus from Soul Harvest would scale up from 15% to a new maximum of 30% more Intelligence. Since this is the primary stat of the Witch Doctor, adding those additional Soul Harvest stacks would increase the damage from all of Spyderman's various abilities as well as provide more resistances via the secondary passive function of the Intelligence stat. This was significantly better than the fireballs tossed out by the Fire Brand unique property that he had been equipping via Kanai's Cube, and Spyderman quickly extracted the Sacred Harvester into the cube and equipped its ability. Now I had to be more careful than ever about maintaining all ten stacks of Soul Harvest.
The purpose for doing these Nephalem Rift runs is also apparent from that screenshot above. I had been working to get the Gogok of Swiftness up to Rank 25 to unlock its secondary property, gaining 1% cooldown reduction for each stack of Swiftness, which meant a maximum of 15% cooldown reduction at 15 stacks. This was not the best ability for Spyderman since he wasn't terribly cooldown-dependent in his character build, and it also bears mentioning that the cooldown reduction only applied when the Swiftness stacks were in place. Using a skill at the start of the battle before the Gogok had been stacked up to full would not get the cooldown reduction. However, it was still a lot better than not having that secondary property enabled, and the additional ranks were also increasing the dodge chance provided by the legendary gem. Spyderman was up to 11.25% dodge chance at max Swiftness stacks now and that was a real improvement over the base 7.5% at Rank 0.

With the new Helltooth Gauntlets and the additional Sacred Harvester unique property in place, I was able to snap this screenshot of Spyderman's stats at the max 15 Gogok stacks and 10 Soul Harvest stacks. His Intelligence was displaying the full 30% bonus and had ballooned to more than 12k points, while the in-combat Damage rating was up by almost 50%. Toughness and Recovery had also scaled up enormously thanks to picking up the additional stats from Soul Harvest and Gogok chance to dodge. This random boss never knew what hit him.

A few more itemization notes have to follow here, as changes to Spyderman's gear were coming fast and furious at the moment. First I need to discuss a new Ancient legendary ring that had appeared in the form of Pandemonium Loop. The stats were naturally better here as compared to the prior non-Ancient legendary ring that Spyderman had been wearing, especially after I rerolled its initial 5% resource cost reduction into the far superior 5.5% crit chance affix. This ring also had a geuninely useful unique property, however: enemies slain while Feared die in a bloody explosion for 800% weapon damage and cause other nearby enemies to flee in fear. There was a natural synergy here with the Horrify skill that Spyderman had as part of his skill set, and it was easy to see how a well-timed Fear from that skill could set off a chain reaction of one explosion after another rippling through a crowd of monsters. This would prove to be particularly useful against swarms of low-health opponents, and it became a key part of Spyderman's battle tactics. Horrify had often been an overlooked skill in Spyderman's build and it was nice to see it gain this powerful new function.
More importantly though, Spyderman also found a third item in the Arachyr set in the form of that same Arachyr's Visage from earlier. The stats were noticeably worse on this item than on the Ancient version of the Helltooth Mask that Spyderman was already wearing, but the benefits of unlocking the four item set bonus were too powerful to pass up. By equipping the Ring of Royal Grandeur's unique property via Kanai's Cube, Spyderman could actually get the four item set bonus for both the Arachyr set and the Helltooth set at the same time! He would wear the Arachyr gear in the helmet, shoulder, and chest slots and the Helltooth gear in the feet, legs, and hands slot. This allowed Spyderman to keep the Necrosis 3000% weapon damage and incoming 60% damage reduction from the Helltooth set, both of which were extremely helpful. As far as what he would pick up from the Arachyr's set bonus, it was time to introduce another new animal companion:

The Arachyr four item set bonus added the "Toad of Hugeness" rune to the Hex skill that Spyderman spammed all the time. This rune summoned a giant toad that swallowed enemies and then spit them back out for 750% weapon damage, while also slowing them and increasing their damage taken by 15%. That was in addition to the 15% damage bonus that Hexed enemies took from the Jinx rune that Spyderman was actually running for the skill, and it was always obvious when an opponent was hit with these double damage buffs at the same time because their healthbars quickly melted away. The Toad of Hugeness was quite good at killing bosses for this reason. But wait, that was only half of the four item set bonus! In addition to gaining the Toad of Hugeness rune, the Hex skill also unlocked a new healing property: Spyderman gained 50% damage reduction and healed for 10% of his maximum life each second (!) over the next 15 seconds. Again that wasn't healing for 10% of max life over 15 seconds, it was healing for 10% of max life EACH second for the next 15 seconds. And since the Hex skill has a 15 second cooldown, this was a healing property that could have 100% uptime even with no cooldown reduction at all. Pretty sweet deal. 
The net result was that Spyderman was now effectively unkillable as long as I didn't play like a total idiot. He had 60% damage reduction from the Helltooth Necrosis ability, plus another 50% damage reduction from the new Toad of Hugeness rune on the Hex skill, plus using Hex also healed him for 10% of his maximum health every second basically forever. Even with the difficulty going up to Torment VIII, I would have to screw things up pretty royally to find a way to get him killed through all of that. My focus going forward needed to be increasing his damage to keep up with the greater monster health on the higher difficulties, not on finding extra survivability. He had that pretty well covered for the moment.

Spyderman needed to return to collecting bounties for a while at the outset of his Torment VIII journey. He had gone through a series of Nephalem Rifts to get the Gogok of Swiftness up to Rank 25, and the number of legendary items in his stash awaiting extraction into Kanai's Cube was beginning to pile up. I started out in Act One with a plan to go through all five acts in turn, and actually found a couple of bounties that I hadn't seen before. One of them named "The Cursed Cellar" ended with Spyderman killing a Farnham zombie, which was a bit of a sad callback to the original Diablo. (Did the designers have to kill off or retcon every single character from the first game?) Eventually this led Spyderman to the Royal Crypts in pursuit of Leoric once again, only this time he found a Rainbow Goblin just outside the boss chamber. Rainbow Goblins are the rarest of the treasure goblin types and open a portal to Whimsydale when defeated. What's Whimsydale you might ask?

It's basically the special bonus area of Diablo 3, this game's version of the secret cow level. (Although there's actually the "Not The Cow Level" secret area as well, added after release for D3's third anniversary, which Liz and I encountered once with our non-variant characters via another treasure goblin portal.) Whimsydale is also not be to confused with Whimsyshire, which is essentially the same place but accessed via a very difficult to obtain crafting recipe instead of through a treasure goblin portal. In any case, Whimsydale is a cartoonish area full of brilliant colors and cuddly animals. The enemies here are various forms of unicorns and teddy bears and flowers. There are smiling clouds with happy rainbows and little gifts wrapped up with bows and pots of gold scattered across the landscape. Whimsydale was a joke area created by the game's developers in response to pre-release complaints that Diablo 3 was "too colorful", turning everything up to eleven with this saccharine fantasy land that looks like a Lisa Frank artbook on steroids. I love the artwork in Diablo 3 and I'm glad that the developers didn't make the game endless shades of brown and gray (the visual look of the game has never been one of my complaints). The fact that they thumbed their noses at their critics with this secret area was a masterful form of trolling.
As a secret area, Whimsydale offers up an absurd amount of loot rewards:

These were the yields from two sets of gift wrapped presents, and there were dozens of them scattered across Whimsydale. The prizes came in a couple different forms: standard item drops with large numbers of high quality gear, massive piles of gold, enormous numbers of Imperial gems, and big stacks of rare crafting materials. The most valuable items for Spyderman were probably the crafting materials - just look at the five Forgotten Souls sitting on the ground over there. He picked up about 30 Forgotten Souls in total in the process of clearing out this region. As for everything else:

I stitched together this overview map of Whimsydale together with a screenshot of Spyderman's inventory. He accumulated about 30 million gold in this area, enough that I would never have to worry about money ever again. This was far more gold than needed to cube however many Flawless Royal gems I might want, plus have gold left over for empowering Greater Nephalem Rifts. I also stacked together all of the gems that Spyderman found in Whimsydale: 39 Marquise and 152 Imperial gems in total! It was enough Imperial gems to get a Flawless Royal of all five types since they combine at a 27:1 ratio. This was honestly more gems than Spyderman really needed. Finally there were the legendary items: I found eight new legendary items that Spyderman hadn't turned up before, and another half dozen legendary items that he had already extracted into Kanai's Cube. Now there was more need than ever to complete bounties for Horadric Cache crafting items to extract all of those new properties into the cube. Overall then, it was a disgustingly good haul even if none of the items proved to be better than Spyderman's current gear. I was spoiled by the bounty provided by Whimsydale, and the "normal" game felt a bit bland by comparison afterwards.

The biggest change to Spyderman's combat setup had been the addition of the Pandemonium Loop ring which caused Feared enemies to explode in a bloody froth. This new unique property brought Horrify back into more regular use, and the screenshot above captures it being used at an ideal moment. (This may also be the best image yet demonstrating what the graphical effect of Horrify looks like when used.) In this particular situation Spyderman was confronting a mob of relatively weak skeleton opponents, and he had held off on using Horrify until the monsters in the front rank were about to die. Then he triggered Horrify to induce Fear in those skeletons, exploding them and triggering further terror in their surrounding companions, thus setting off a chain reaction of explosions that swept through the ranks of the enemies. The very first explosion in the chain is just detonating and about to spread to the rest of the group. This was a great tactic for quickly clearing through large mobs of weak opponents, and it helped to speed through these bounties at a faster pace. Thus far Spyderman wasn't having any problems with Torment VIII difficulty.
While chasing after these bounties, Spyderman picked up another new legendary ring named the Convention of Elements. This increased damage from a single element by 160% and cycled through the four elements available to the Witch Doctor: physical, poison, fire, and cold. Every four seconds it changed to a different element, and there was a little counter on the interface indicating which one was in current use. Spyderman's damage was mostly fire in nature from the Blazing Spiders rune on his Corpse Spiders skill, and I figured even having that in play only 25% of the time would be a nice little boost. He also found a fourth item in the Arachyr's set in the form of the pants slot (Arachyr's Legs). This allowed me to wear the new pants and go back to the superior Ancient version of the Helltooth Mask in the helmet slot, continuing to wear three items each of the Arachyr and Helltooth sets while maintaining the four item set bonuses via the Ring of Royal Grandeur. It also meant that with four total Arachyr items on hand now, Spyderman was only one item short of getting the full six item set bonus through that same Ring of Royal Grandeur. Quite a handy ring!

I wasn't scared in the least by the major act end bosses at Spyderman's current strength level, and he happily took on all comers here on Torment VIII difficulty. This allowed me to revisit some of the bosses that I hadn't seen in a while, such as Ghom here in Act Three. Ghom moves very slowly and largely attacks by spitting out blobs of yellow goo at the player, but his gimmick is that he slowly fills up the room with poison until it's impossible to escape. Those are the pale circles surrounding Ghom in the image above, places where his poison breath has been overlaid on the terrain. Eventually there will be enough stacking poison throughout the room that the player is guaranteed to lose, this being the form of Ghom's slow-building Enrage timer. (There's an amulet that makes the wearer immune to poison that completely shuts down Ghom but Spyderman hadn't tracked it down yet.) Fortunately Spyderman's damage was more than sufficient to overcome this current challenge, and it only took him about a minute to chew through Ghom's 14 billion HP lifebar. He had enough damage reduction and outright healing from his Hex skill that he wasn't in any danger.
I was content to have Spyderman stay at Torment VIII difficulty for the moment even though he wasn't facing that much of a challenge. While he could probably increase the difficulty to Torment IX, this would greatly slow his clear pace and wouldn't result in any additional crafting materials from each Horadric Cache. The rewards are 6 materials from Torment I to Torment VI difficulties, then 8 materials from Torment VII to Torment IX difficulties, and then increasing to 10 materials at Torment X. There didn't seem to be a compelling reason to switch difficulties at the moment. During this bounty hunting process, Spyderman was able to upgrade his legendary Witching Hour belt to... an Ancient version of the same Witching Hour belt. Heh. Better stats were better stats and made this an obvious switch. Spyderman was running on cruise control right now.
And then everything changed in an instant:

A long series of gambles on boots turned up the Arachyr's Stride item once again, giving me five total items in the set. Along with the Ring of Royal Grandeur equipped via Kanai's Cube, this would be enough to unlock the six item bonus for the Arachyr set: 9000% increased damage for the Corpse Spiders skill. I imagine that most Witch Doctors use this set to boost the power of their Locust Swarm or their Piranhas, but this massive set bonus was still amazing for the humble Corpse Spiders, and exactly what Spyderman had been working towards ever since he reached Torment I difficulty. Unfortunately there was one tradeoff that he had to make here: giving up both of the set bonuses from the Helltooth items. Since the Arachyr and Helltooth sets use exactly the same item slots, it was not possible to retain even the two item set bonus from the Helltooth set while also gaining the full six item bonus from the Arachyr set. This meant that Spyderman would lose the Necrosis effect from the Helltooth set, and while the newly empowered Corpse Spiders would easily output way more damage, Spyderman would no longer have the 60% damage reduction working in his favor. I would have to rely on the Hex skill's own 50% damage reduction and significant healing properties to keep Spyderman safe.
So now it was time to take the full Arachyr set out for a test drive, and what better opponent to use for that purpose than Malthael:

Malthael has no Enrage timer in Diablo 3, instead bringing heavy damage and an extremely large lifebar to this boss encounter. He showed up with 37 billion HP and that was more than anything else that Spyderman had seen thus far. And yet this battle very quickly turned into a total farce that was nothing like my tense duels from earlier difficulties. Remember how the Corpse Spiders had previously done damage in the thousands? Now their damage was printing out in the MILLIONS instead, especially once Soul Harvest and the Gogok of Switfness were fully stacked plus the Toad of Hugeness had managed to apply its own damage buff. Malthael's lifebar simply disintegrated over the course of roughly 20 seconds of real world time. He couldn't even get done with his villain monologuing before the whole thing was finished. I wish that I'd recorded a video of this because it had to be seen in action to be believed. Spyderman's completion of the Arachyr set made him a virtual god in terms of Torment VIII difficulty. I couldn't even get close enough to normal enemies to pick up Soul Harvest stacks before they were torn apart by the Corpse Spiders.

This provided an ideal moment to create a new Hellfire Amulet for Spyderman. I'd been thinking of trying to roll something better than his original crafting attempt, and with the new souped up Corpse Spiders in hand, Spyderman was easily able to defeat the double bosses that guard the "organs" needed to craft the Hellfire gear. Pictured was one of those double boss fights, against the reskinned versions of Ghom and Rakanoth. They had less health combined than Malthael had by himself, and I had just witnessed firsthand how the fallen angel had been unable to survive for more than a few seconds. With critical hits now dealing damage in the hundreds of millions, both of them wilted almost immediately. They simply didn't survive long enough to pose any kind of a threat. Diablo was the only one who gave Spyderman a challenge, and that was due to the fact that I was slow to cast his Hex skill for its damage reduction and healing properties. Once I realized that I'd failed to get off that skill, Diablo quickly collapsed alongside his brethren.
The subsequent Hellfire Amulet that Spyderman crafted ended up with much better base stats than his first Hellfire Amulet, starting out with both Intelligence and Vitality present as opposed to the old amulet that only had Intelligence. For the third primary affix I tested out a bunch of different options before finding that critical strike damage was the best option. Even a max roll in extra crit chance (10%) or attack speed (7%) didn't end up providing as much damage output as getting a big bonus to crit damage. The amulet slot is a bit unique in this regard because the crit damage bonus is so large, as much as 100% extra damage. I ended up rerolling this amulet's affixes about 50 different times over the course of later hours (each time spending a Forgotten Soul) and couldn't seem to get the crit damage percentage anywhere near the max. The range is 51-100% and I had amazingly hit the +100% exactly with my old Hellfire Amulet. On this one, Spyderman couldn't seem to get much better than this starting 71%; eventually I got the thing up to 78% after spending dozens of Forgotten Souls. At least the passive skill was genuinely useful here, with Zombie Handler adding 20% to max health and allowing me to use Spyderman's actual passive slots on another skill. This was better than the old amulet but still not a true longterm keeper, since I'd want an Ancient item eventually.
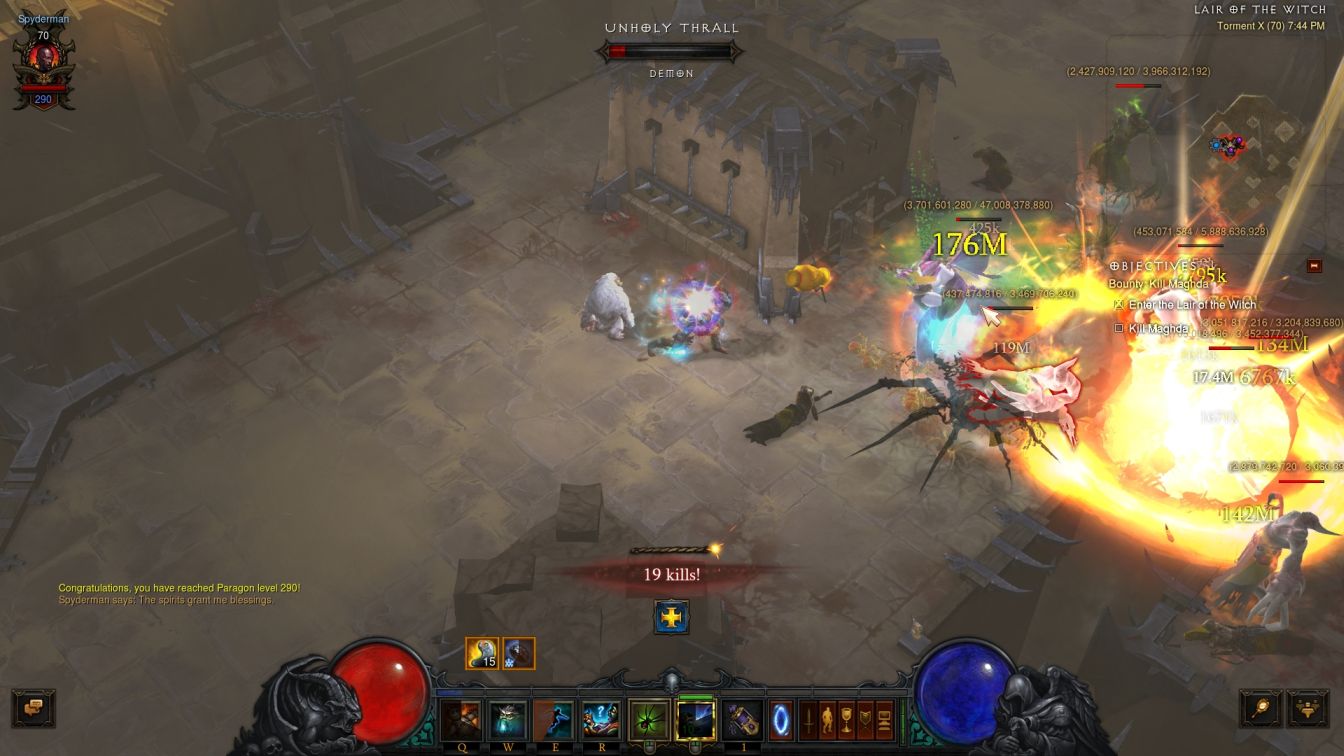
I had Spyderman test out a single set of bounties by going through Act One in Torment IX difficulty. This didn't prove to be much more challenging, and since I wanted to be in Torment X difficulty anyway to collect the increased haul of 10 Horadric Cache crafting materials, I skipped right ahead to the next level. This was a very big jump indeed, with monsters on Torment X difficulty having almost exactly five times the health of their Torment VIII predecessors along with double the damage output. Typical run of the mill critters now showed up with somewhere between 1 billion and 2 billion HP, with major bosses having dozens of billions of health points. And yet, even as intimidating as that math might sound, Spyderman still wasn't overly concerned by the challenges that he was facing, at least not from a damage output. His Corpse Spiders were just so much stronger than they had been previously that he could leap up two whole difficulty levels and still be in good shape overall. In the picture above, Maghda and her 47 billion HP had nearly been devoured by the biting pincers of Spyderman's minions. She could not summon additional cultist followers fast enough to protect her from destruction. Completing the Arachyr set made all the difference in the world.
Spyderman's biggest issue had flipped at this point in time. Before he had been essentially impervious to damage while needing to boost his damage output. Now the situation was reversed: the Corpse Spiders were extremely strong at dishing out punishment but Spyderman himself couldn't take too much of it:

Check out the icon on the interface above indicating that the Spirit Vessel passive had recently triggered. This was one of the Witch Doctor passive skills that I always kept active in one of Spyderman's four passive skill slots, which causes your character to enter the spirit realm and heal for 50% of maximum health whenever fatal damage is triggered. It can only apply once every 60 seconds, thus the cooldown. This was the aftermath of a fight against an elite mob encountered along with a treasure goblin (the Gilded Baron mentioned in the corner of the screen), and I'd been a little too aggressive in chasing after the goblin. I was too slow in keeping Spyderman's Hex skill up at all times, and when it dropped for a few seconds, he was "killed" almost instantly. Spirit Vessel triggered and I ran Spyderman the heck out of there! I had to be careful to remember that the damage output of the monsters on Torment X was significantly higher than what I was accustomed to seeing. Spyderman could often feel deceptively tanky, able to walk into the middle of enemy hordes with impunity when he had the damage reduction and massive healing from the Hex skill in play, and when he was using Horrify or Mass Confusion to crowd control the monsters. Strip away his defensive protections and his various forms of crowd control though and he was basically a sitting duck. This was turning into somewhat of a glass cannon situation and that looked like it would be fun to play.
With renewed caution in mind, Spyderman was able to clear out the remaining bounties in Act Two. It was a real pleasure to open the resulting Horadric Cache and have 10 Caledeum Nightshades pop out of it, plus a double legendary item drop - nice! One legendary item was guaranteed in each cache of items but the second one only had 50% odds to appear. There were definitely more legendary items dropping now as a result of normal gameplay, which was to be expected since the legendary drop rate was double what it had been back in Torment VII difficulty. On one of these bounty hunting trips, Spyderman was lucky enough to find an Ancient version of his same helmet:

It had spawned with resistance to all elements and I was able to replace that with 6% additional crit chance, very nice. The result was an item that was better in every way as compared to the non-Ancient version of the Arachyr's Visage helmet, and this was a true keeper item. Outside of getting a Primal Ancient version of the same thing, Spyderman was effectively finished with this item slot. This was particularly good fortune because the helmet and the gloves slots are the best places to get Ancient items. Not all equipment slots are created equal, and helmets/gloves can get 850-1000 stat points when they roll as Ancient as opposed to other slots like boots and pants that can only get 500-600 of the same stat points. Since Ancient items roll with 1/3 higher stats, the relative effect of having an Ancient item in the helmet or gloves slot is simply better.

With more crafting materials appearing from each Horadric Cache, Spyderman was able to spend less time hunting bounties and more time in the Nephalem Rifts. The basic pattern between these two systems is that the bounties are necessary to access various crafting materials for Kanai's Cube, but the Nephalem Rifts are better for turning up Death's Breaths and Forgotten Souls, as well as providing a place to upgrade legendary gems. This picture was taken from the tail end of a Greater Nephalem Rift on difficulty level 45, equivalent to the same Torment X difficulty where Spyderman had been hunting bounties. He finished with 6:37 remaining and clearly could have completed a tougher rift difficulty if required. That really wasn't needed as yet though because Spyderman's legendary gems were still pretty underleveled at the moment, with him able to complete fairly easy rifts and still upgrade his gems. I was still searching for the legendary gem that I really wanted, Simplicity's Strength, and planned to do as many dedicated rift runs as needed until that showed up. I did get a kick out of the Rift Guardian named Ember, who was a fire-tossing mage of some kind. Please let this be a reference to Sirian's famous Firebolt sorceress and not a random generic fire-related name!

Legendary items drop at a noticeably higher rate in the Nephalem Rifts, with the Diablo 3 difficulties page suggesting that the drop rate is roughly 50% higher. For example, the earlier Rift Difficulty 45 run that defeated the Ember boss resulted in four different legendary items dropping, although I have to caution that that was a bit better than normal. An obvious gear upgrade came in the form of these Ancient Arachyr's Mantle shoulders, the same item as before but with the Ancient bonuses applied. This was another item that was effectively as good as Spyderman could get and didn't require any more hunting around for additional gear. More interesting was Lakumba's Ornament, which did not roll as Ancient but which did have an absurdly useful unique property: reduces all damage taken by 6% per stack of Soul Harvest. With the Sacred Harvester unique property increasing the maximum Soul Harvest stacks up to 10, that meant a full 60% damage reduction at max stacks.  It was like getting the Necrosis ability from the Helltooth set back again! Even with the stat penalty associated with this non-Ancient item, I had to make the switch for that new unique property. Now keeping up Spyderman's Soul Harvest stacks was more critical than ever before, not only in terms of higher damage but also for his own survivability. He was significantly weaker when entering an area for the first time with no Soul Harvest or Gogok of Swiftness stacks in place.

More Nephalem Rifts followed in both the normal and Greater varieties. I was helped out here by the fact that a normal Rift Guardian was almost certain to drop two Greater Rift keys on Torment X difficulty, with the first key guaranteed and the second one having 90% odds to appear. This made it easier to accumulate additional legendary gems as I kept hunting for the one that I wanted. There are only 21 of them in total (plus a secret one that spawns in the Anniversary Dungeon) and Spyderman already had 17 of them without getting Simplicity's Strength as yet. The picture above was noteworthy for having both a Speed Pylon and a Conduit Pylon in action at the same time. Although those dual effects didn't last long, that was small consolation for the poor monsters on the receiving end.
Finally Spyderman found the legendary gem that he was looking for:

Simplicity's Strength increased the damage from primary skills by 25% and that could be boosted further with more ranks in the gem. It would get a damage bonus of 0.5% with each addition rank, slowly increasing the damage dished out by Spyderman's Corpse Spiders. The secondary property would be highly useful as well once it was unlocked at Rank 25, adding another source of significant healing to Spyderman's setup. This is why life per second regen doesn't end up being very important in terms of high end character builds, as many of the best items naturally include huge sources of health regen anyway. Any natural sources of life regeneration would be overwhelmed by the healing provided by Spyderman's Hex skill and the upgraded Simplicity's Strength. I intended to spend some more time in the Nephalem Rifts to get this gem upgraded quickly.
With the discover of Simplicity's Strength, I felt that Spyderman was ready to move upwards in difficulty yet again. He hadn't spent too much time on any of the difficulty levels from Torment VIII to Torment X, and that was largely a reflection of the immense power associated with completing the Arachyr set. It had been enough to go up two difficulties all on its own. Continuing to improve on Spyderman's build was starting to be genuinely challenging as he filled out not just legendary but Ancient legendary items in most of his item slots. How much longer could he keep this going, and what was the ultimate Torment difficulty that he'd be able to reach? I didn't know the answers to those questions myself at this point as I continued to explore deeper into the endgame.


