For my second foray into a solo class in Dragon Quest 3, and the first time trying this without using the overpowered Hero, I decided that I would explore the Monster Wrangler. This is the newest class in DQ3 as it was added specifically for the HD-2D remake, and the general consensus is that this class has the most overpowered abilities in the game. While the Hero unquestionably has the best stats, the Monster Wrangler's Wild Side and Monster Pile-On abilities are considered to be staples of the postgame content that every character needs to master. I thought that this would be the perfect opportunity to test another solo character on the easy side of the difficulty spectrum while I was still figuring out what to do; how would the Monster Wrangler stack up relative to the Hero class?
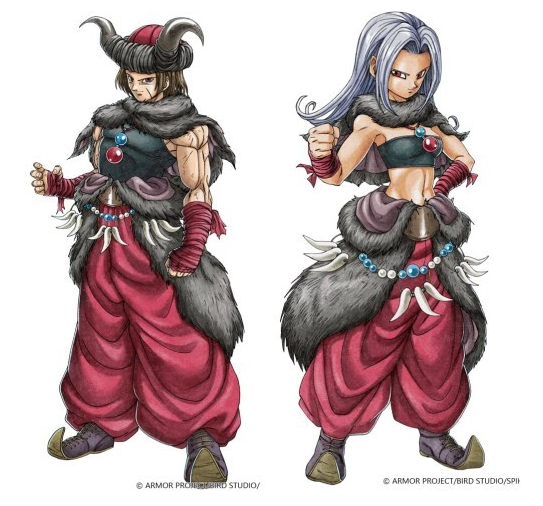
Since the Monster Wrangler is not the prophecied Hero of legend, the starting sequence for this class looks a bit different. While there's still the introductory series of questions to determine the Hero's personality, followed by the opening cut scene where the Hero visits the King of Aliahan, none of that factors into a solo playthrough for a different class. All of the other classes have to be recruited at Patty's Party Planning Place where new characters are effectively created out of thin air. The HD-2D remake offers a surprising amount of customization in terms of what these characters look like, with each class having four different male appearances and four different female appearances for eight total. Then there's further customization in terms of their hair color and their voices:
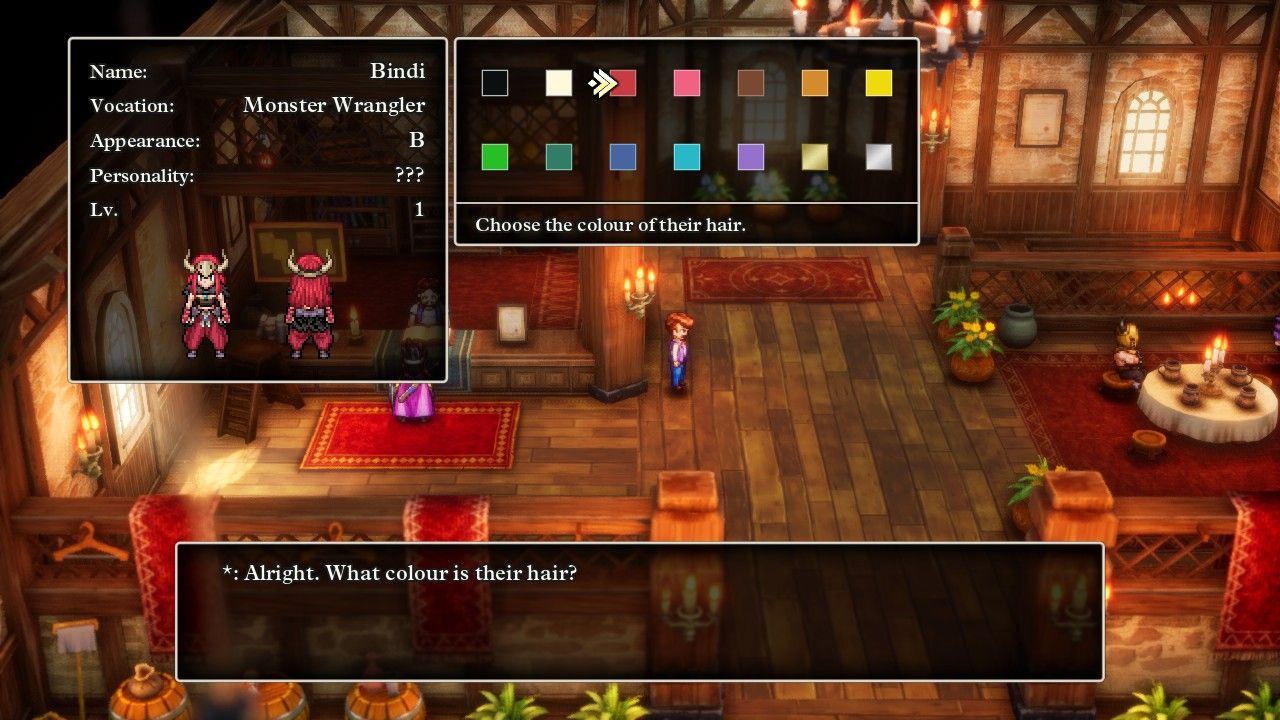
Female characters get significantly better equipment options than male characters so I opted for a woman Monster Wrangler. Out of the four different options, I chose the fourth appearance due to its silly demon horn headdress, then picked some flaming red hair as it matched the coloring of the baggy duds that this class seems to wear. For a naming choice, I thought about what would constitute a "Monster Wrangler" in real life and came up with Steve Irwin, the beloved Crocodile Hunter from Australia. That name wouldn't work for a female character, but Steve Irwin had two children before his untimely death and naming this character after Bindi Irwin seemed like a good choice. The orphaned daughter of a heroic figure looking to follow in their dad's monster wrangling footsteps? That was a perfect fit for the real life Bindi Irwin, who's been a highly successful conservationist and media personality in her own right, even winning one of the seasons of the American reality TV show "Dancing With The Stars". It also helped that "Bindi" is a unique name to help make this character stand out a bit more.
When creating a new character at Patty's Party Planning Place, the player gets the chance to assign them any five of the stat-boosting seeds desired. (You can also have the AI automatically assign five seeds at random but of course I wouldn't be taking that option.) Which seeds the player chooses will determine the personality of the new character, such as picking Seeds of Wisdom leading to a Genius personality, though no personality is ever completely guaranteed to appear. This is where a huge amount of RNG luck comes into play: the personality gained via assigning seeds picks randomly between several choices *AND* the seeds themselves can each roll a value of 1-3 when used! There's also no chance to hold onto the seeds and use them later, they must be consumed immediately. This prompts a lot of rerolls when creating a new character for a solo game, as you're trying to reroll for the desired personality while also rerolling for good seed results at the same time. Furthermore, there's ANOTHER random factor here as well because each new character will receive anywhere from 2-10 additional bonus stats to their base numbers. Most new characters will get 4-7 bonus stats but it is possible to get as many as 9 or 10, plus those bonus stats could appear in useful categories or in mostly useless ones. If you want a really strong starting character, you have to keep rerolling a *LOT* to get everything to line up properly!

I rerolled Bindi's numbers roughly 25-30 times before winding up with this very, very nice result. For sake of reference, the Monster Wrangler's default starting stats for female characters are 7 / 10 / 10 / 10 / 7 / 6 which meant that Bindi scored bonus points in Strength, Resilience, and Luck - all places where I really wanted extra stats. You can probably tell that I had assigned her five consective Seeds of Defense to boost her Resilience score, the stat that affects physical defense in DQ3 and I've found to be extremely important thus far. Since this character creation process involved using five seeds that each granted 1-3 stat points, an average character would gain about 10 points of Resilience. I believe that I landed 14 out of the possible 15 Resilience points from this dice roll, while also getting the Ironclad personality that I wanted. Earlier I had been forced to scrap half a dozen other promising characters because they didn't roll Ironclad and kept getting the far inferior Plugger and Gourmand personalities, ugh. Here's what the stats looked like for the Monster Wranger class and the Ironclad personality:


It's easier to show where everyone's stats end up at Level 99 since all of the classes look similar when starting out. The Monster Wrangler has middling stats on the whole, with average Strength, Resilience, and Stamina to go along with poor Agility, Wisdom, and Luck. Fortunately this isn't as bad as it seems since Agility and Wisdom are probably the two least-important stats for a solo character and Bindi wouldn't even have any spells that scaled off the Wisdom stat. Subpar Luck was a real weakness though since the Luck stat affects damage from physical auto attacks, critical strike chance, and resistance to / inflicting status ailments. I have to point out again here how stupidly strong the Hero class gets to be relative to everyone else. My solo Hero Erdrick was able to benefit from literally hundreds of extra points in every stat compared to Bindi which should make for some interesting comparisons over time.
Then I had picked the Ironcad personality for Bindi which has the third-highest total boost to overall stats behind Vamp and Lucky Devil. This was a personality that leaned heavily into the Resilience and Stamina stats, with the 40% bonus to Resilience being the highest boost to this stat among all the personality choices. I wanted these defensive stat bonuses because the Monster Wrangler class has an ability that deals damage independent of Strength and Wisdom scores, meaning that I could try to build Bindi as a pure tank and she would still deal outstanding damage. I wanted her to have lots of health and lots of physical protection which this personality seemed to have in spades. In situations where Bindi did need to attack, well, 10% additional Strength growth wasn't bad at all. The tradeoff was having a 20% penalty to Luck growth in a stat that's already a weakness for the Monster Wrangler class. I intended to remedy this with a bunch of Seeds of Luck and later the Elevating Shoes, which hopefully would supply enough Luck not to suffer undue penalties from status ailments.
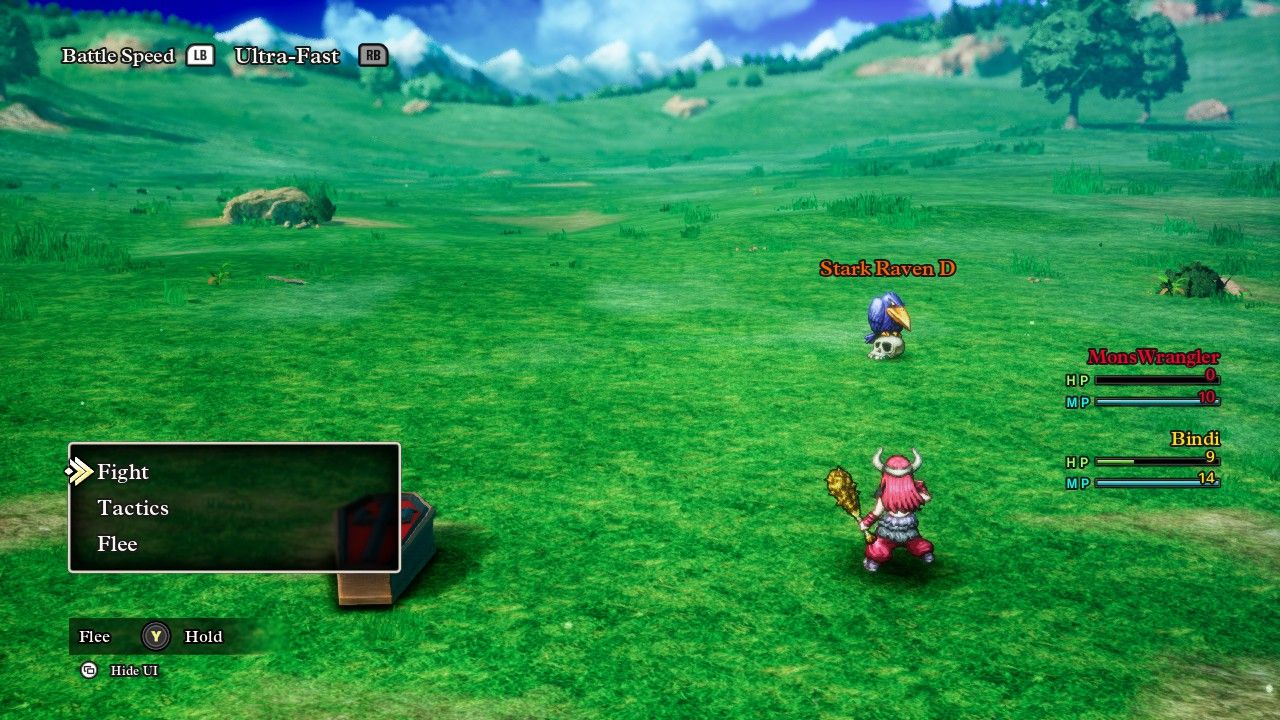
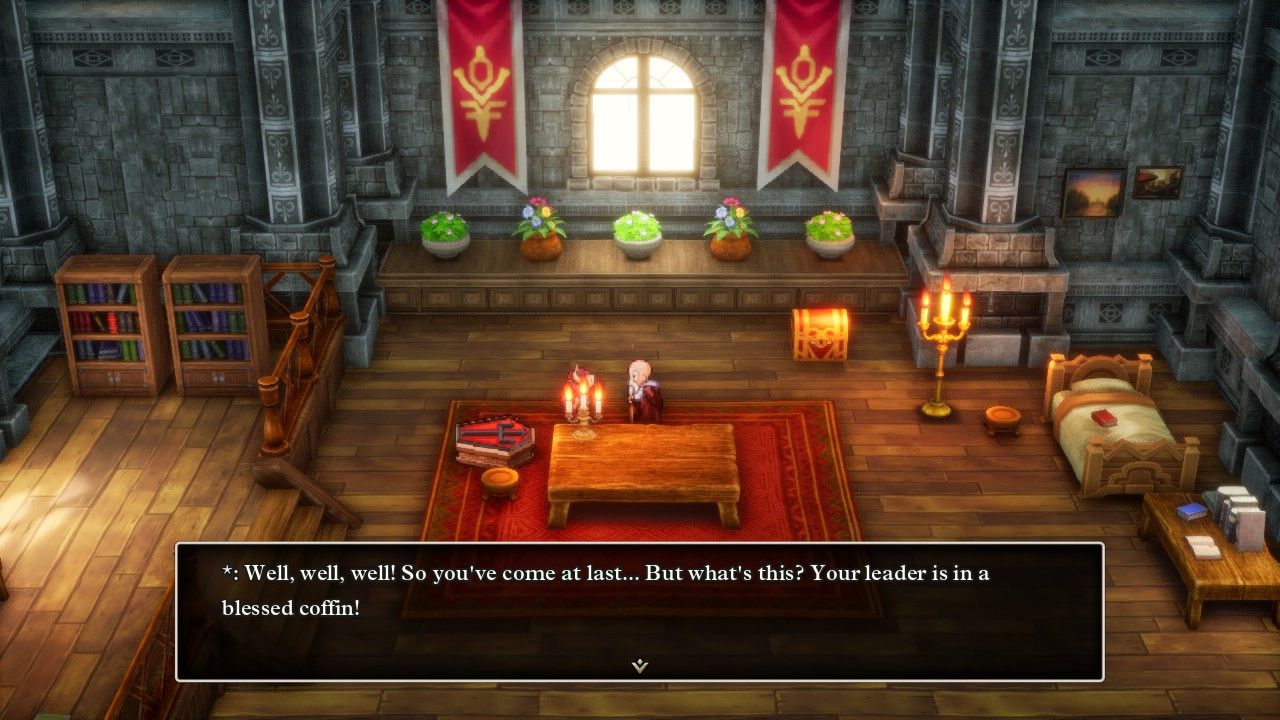
All told, Bindi was able to start the game with 45 points of Defense which was an utterly ridiculous amount. That was well above the 31 Defense with which my solo Hero had started the game and it ensured that Bindi couldn't take more than 1 point of damage from each monster attack. I began by killing off the unfortunate Hero of this world and, since it's not possible to remove the Hero from the party, this meant that Bindi would spend the whole game dragging around a coffin with her. RIP poor guy! Amusingly this meant that the Hero's mother would not provide the free inn service that she usually grants, not unless I revived the Hero which was never going to happen. Well then, Bindi could use the local inn at the princely sum of 2 gold, heh. She took quite a bit of damage from the initial monster encounter of four Stark Ravens, then leveled back to full HP and never struggled again on the starting island. I turned in the first two mini medals for a Thorn Whip to have some group damage, plus gain another 11 points of Attack to increase damage by about 50%, and Bindi was off and rolling.
Not much of interest happened during these early portions of the gameplay, with Bindi following the normal patterns here on the tutorial starting island. She explored the wilderness to pick up the first few sparkly and secret spots, bought a Tortoise Shell and Turban in Reeve for some additional defense, and so on. Individual monsters died in a single auto attack, with large groups surviving to a second round due to the property of all whips and boomerangs dealing 20% less damage for each target hit. When Bindi reached Level 6, she gained her first new Monster Wrangler ability:
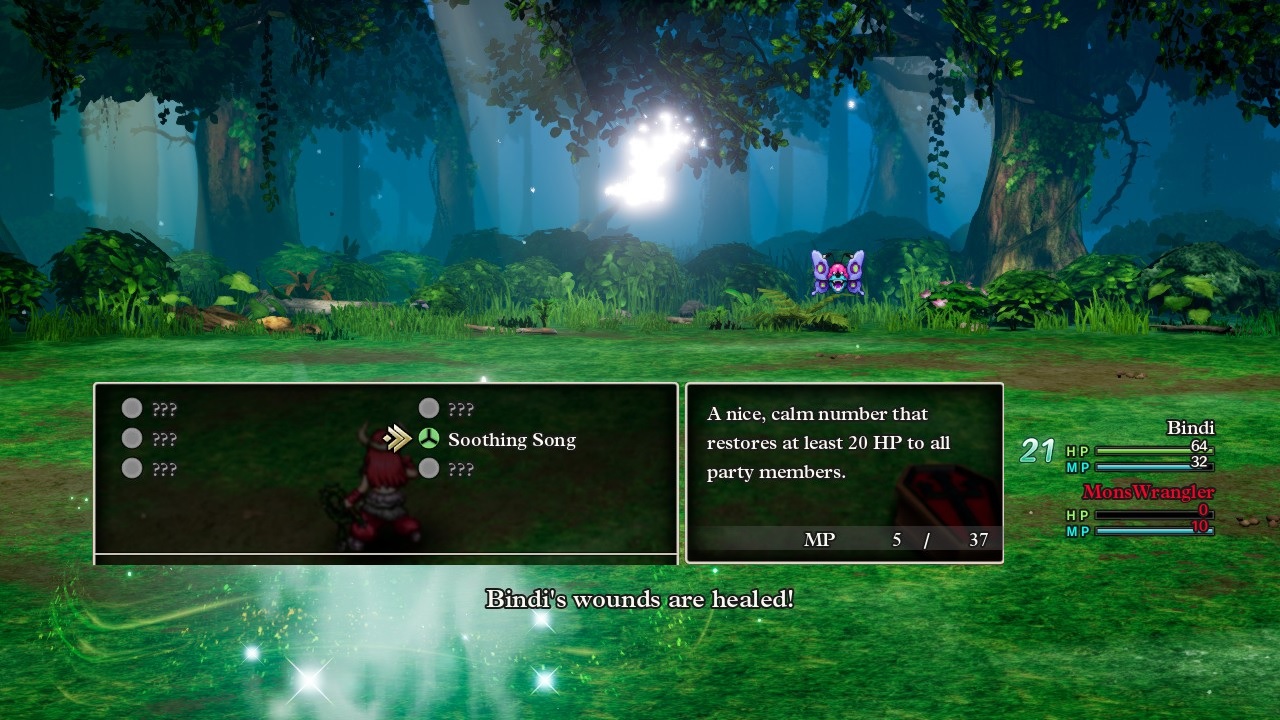
This was Soothing Song, a basic healing ability. It could only be used within combat where it granted 20-30 HP restored to the whole party, a rather nice ability for the early portions of the gameplay where there's no comparable spell that refreshes the whole group. Soothing Song wasn't quite as useful for Bindi since she was traveling the world by herself, however she could still use it to heal up from chip damage suffered over time rather than having to consume Medical Herbs. I could break this out whenever there was a single surviving monster and that along with frequent leveling from gaining experience at 4x the normal rate kept Bindi feeling nice and comfortable. She climbed up Dreamer's Tower and claimed the Thief's Key (prompting this hilarious message from the old man at the top) along with the Boomerang, with the Monster Wrangler being one of six different classes that can equip the item. Notably the Warrior and the Martial Artist both can't equip boomerangs which is going to be a real pain if I play those classes. For Bindi though, her gameplay looked like a carbon copy of my earlier solo Hero as she boomeranged everything to death in one or two tosses per random encounter.
Bindi opened up the previously locked doors with her new key, claimed the Wreckling Ball, and proceeded through the Path of Promise dungeon. She leveled to 11 during the underground area where she learned two more ability at the same time, apparently having failed her "chance to learn" roll on the first ability at Level 10. The more useful of the two abilities was Emergency Groom, this one being a single target healing ability that restored 50-60 HP at a time. While this ability also could only be used during combat and wouldn't scale very well into the later portions of the gameplay, it was still quite nice to keep Bindi's health in the green area for the moment. The other ability was a bit more esoteric:
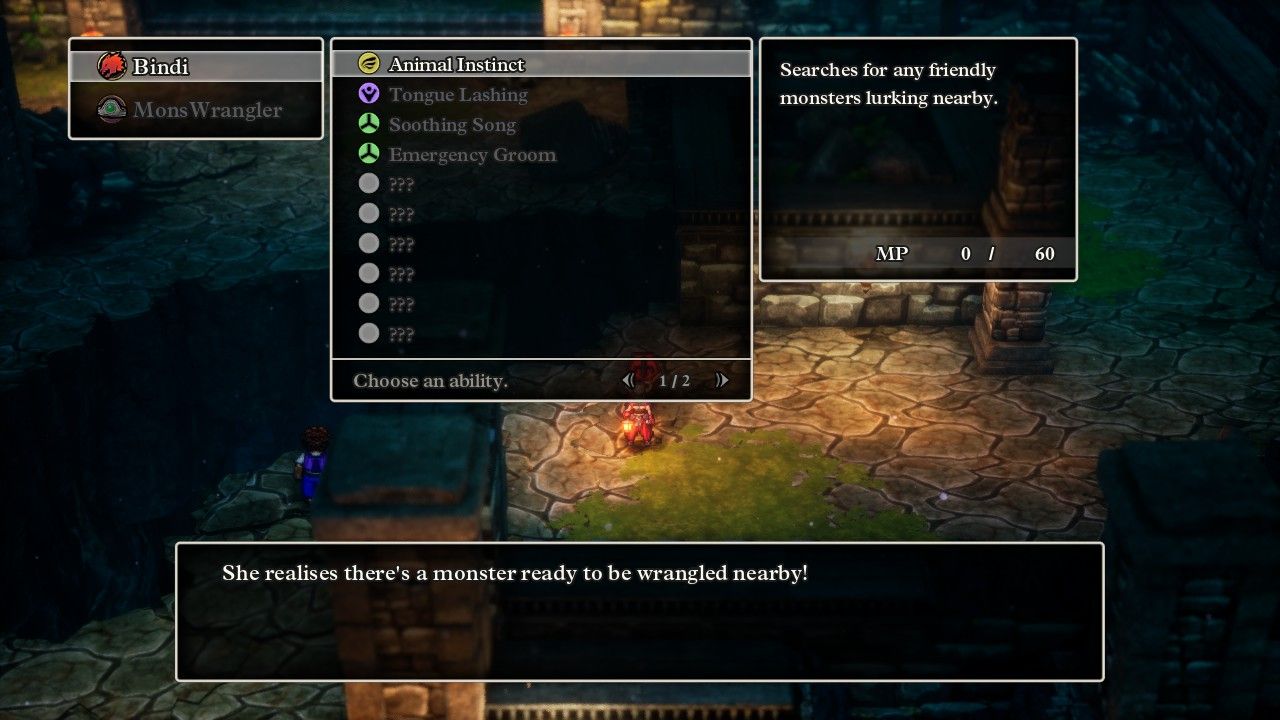
Animal Instinct can only be used outside of battle and informs the player if there's a recruitable monster nearby. This still isn't terribly helpful as it doesn't inform the player where they might be or what needs to be done to successfully recruit the friendly monster. In this example above, the man off to the west was actually a hidden monster that needed to be brought on board using the Mirror of Ra much later in the game - good luck figuring that out! The Monster Wrangler class needs to find as many of the friendly monsters as possible since recruiting them onto the arena team will unlock additional Monster Wrangler abilities and power up some of the existing ones. This portion of the gameplay began upon reaching the end of the Path of Promise where Monty and his friendly Slime introduced the mechanic for the first time. Fortunately I had a list of where every such monster was hiding on my reference spreadsheet, and I planned to navigate Bindi's course through the world map by unlocking these monsters as quickly as possible. Usually I chased after the sparkle locations and their seeds with first priority but not so much for this character.
Bindi grabbed the Spiked Hare at the fountain in Romaria, with this monster normally being a pain in the butt to recruit since there's no item to mask the sound of the party's footsteps. Bindi never had to worry about that, however, since the Monster Wrangler can always recruit all friendly monsters without having to worry about sound or sight or smell. Then I used a Chimaera Wing to teleport back to the Mini Medal Mansion and claim the Edged Boomerang reward for another 13 points of Attack over the default boomerang. Bindi would never have access to the Zoom spell but at least Chimaera Wings are dirt cheap to purchase at only 25 gold cost. Then it was off into the wilds of the north to start finding more friendly monsters (along with medals / sparkles / secret spots) which soon resulted in this message:
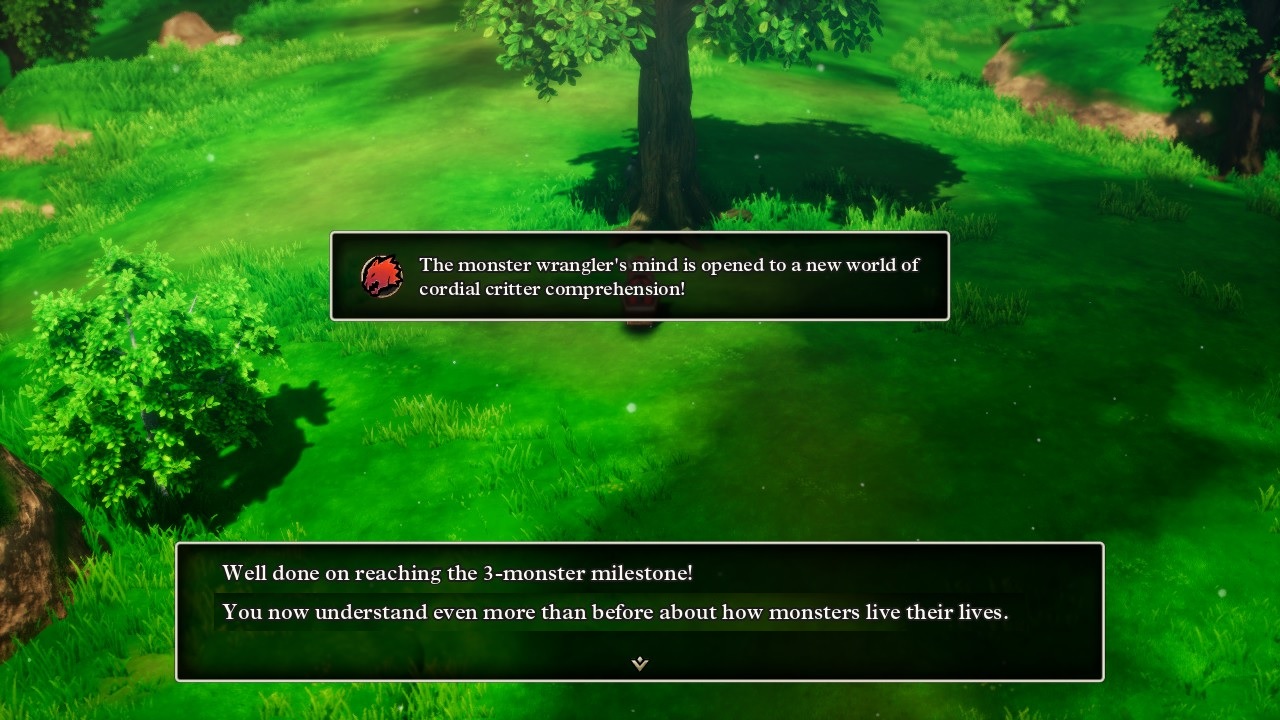
The third monster to jump on board was Gobblebert the Ant Gobbler which prompted this message. The Monster Wrangler class is unique in DQ3 for learning some abilities based on the character's level, and then additional abilities based on the number of recruited friendly monsters. Bindi would gain new abilities when reaching 3 monsters, 10 monsters, 30 monsters, 50 monsters, 80 monsters, and 100 monsters; for reference, there are 121 friendly monsters in total, with 112 available before hitting the postgame content. The three monster ability that she had just unlocked was named Call of the Wild:
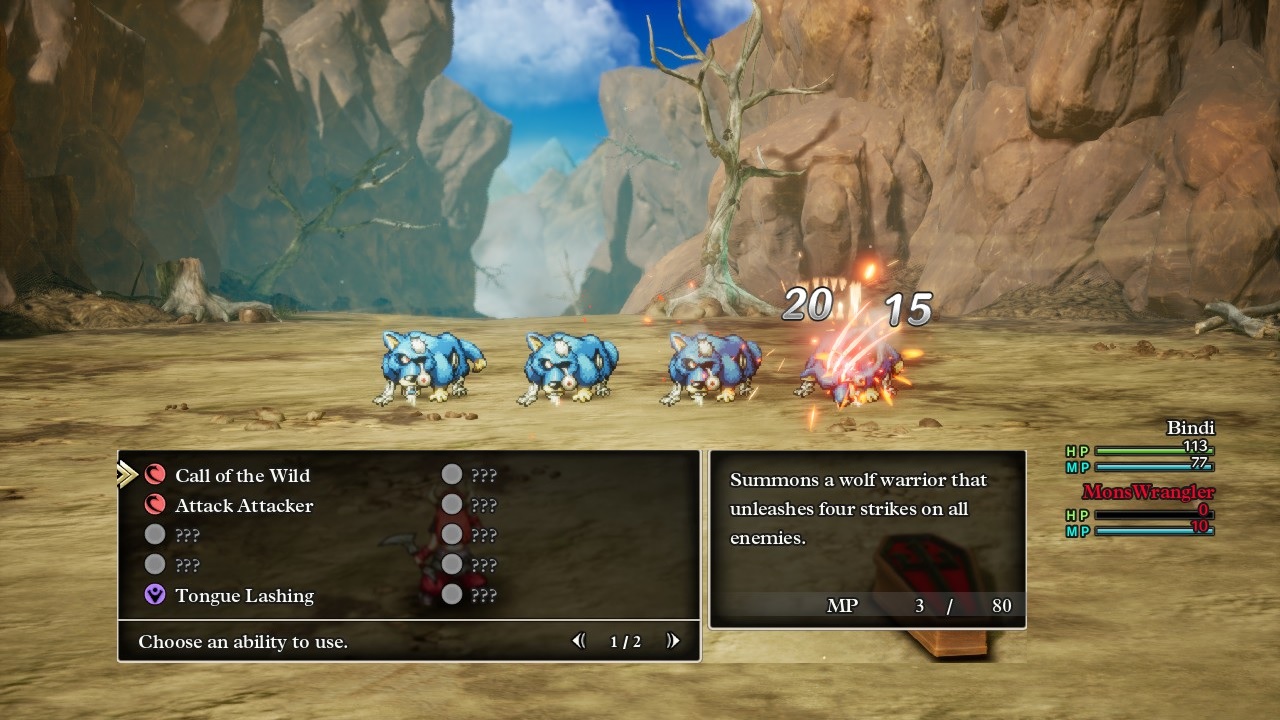
As far as abilities go, this one wasn't so great. Call of the Wild summoned wolves to make four attacks at random, each of the four attacks dealing, uh, 10-20 damage. I guess that could theoretically be decent against a single opponent but it was downright terrible in the typical random encounter against four or five monsters. Bindi was already boomeranging targets for 60 damage at a time (followed by less damage for each additional monster hit) which meant that Call of the Wild was already outdated before it even appeared. I believe that this ability does ignore the enemy's defensive rating so perhaps it would be useful against Metal Slimes later on. Sharp eyes might also notice the Tongue Lashing ability in that screenshot above; that was an innate Monster Wrangler ability which Bindi had possessed since Level 1. It deals no damage and has 60% odds to stun a single target for a turn, something which I'd never been able to find a use for. While this might be decent somewhere in a normal party setting, it was basically useless for a solo game where Bindi would simply waste the turn that she gained from stunning the enemy.
Using her chart of recruitable monsters, Bindi ranged north to Khoryv and then Norvik and the Faerie Village, picking up several more friendly monsters along the way. She was also gaining a bunch of seeds as she traveled through various hidden spots though I held off using them for the moment until I could do a big seed-rolling session all at once. The growing monster team allowed Bindi to teleport back to Romaria and dominate the initial two arena tiers, with her team of a Spiked Hare, Cumulus cloud, and Healslime absolutely steamrolling the competition. The prize was another three Seeds of Strength and three Seeds of Stamina, two of the most useful stats to boost. Bindi had eight monsters in her collection at this point, prompting a trip southeast to Asham where she was able to recruit two more friends and reach the round number of ten. This was a big deal as it unlocked the most infamous Monster Wrangler ability:
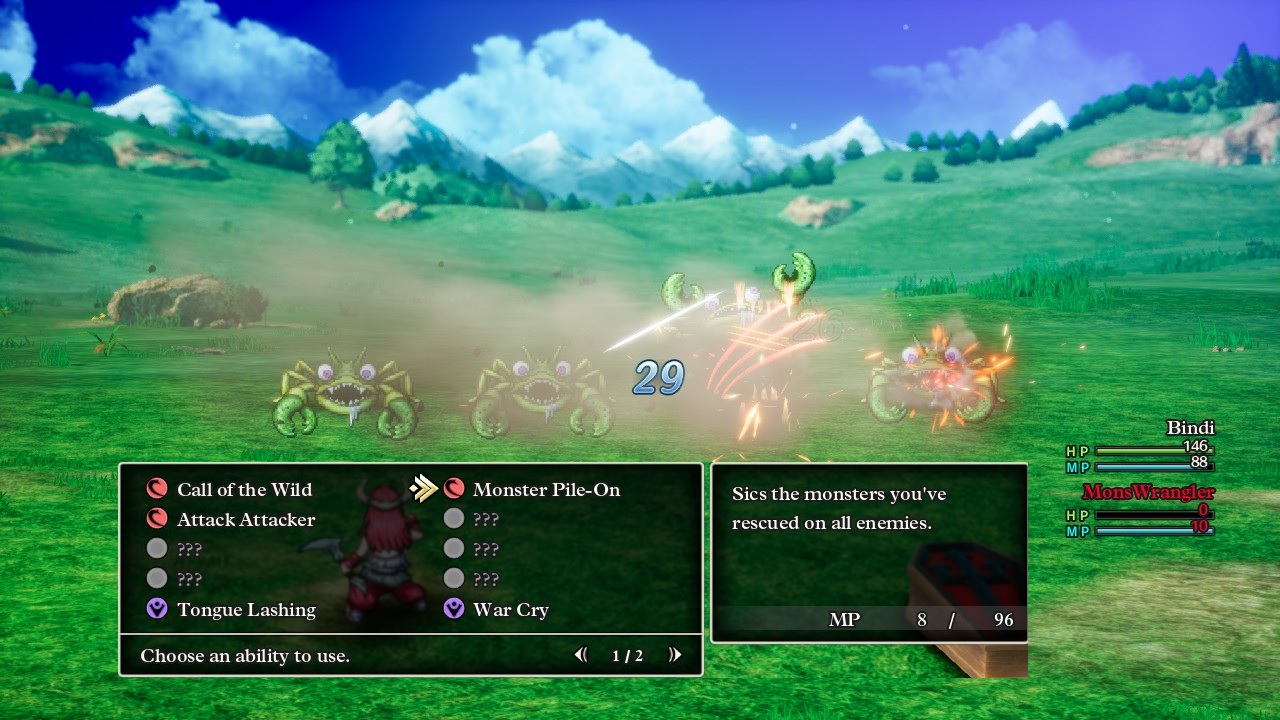
Whenever I came across information about the Monster Wrangler class online, everyone said that this ability, Monster Pile-On, was completely broken and trivialized the gameplay. And yet despite all the discussion of this skill, I couldn't find any information about how it actually worked aside from repeated mentions that its damage scaled with the number of monsters recruited. Alright then, I decided that I would conduct an in-depth test to determine the mechanics of the Monster Pile-On skill. I started by testing the ability against a series of different monsters with different Defense stats, beginning with the Slimes back at Aliahan (Defense 5) all the way up to the pictured Crabber Dabber Doos which had the highest Defense of anything thus far at 146. The results were clear: Monster Pile-On must ignore the Defense stat completely since it was dealing the same damage against everything, always falling within the 24-36 damage range. I was thrown off for a little bit because the skill seemed to deal less damage against the Crabber Dabber Doos, which at first I thought was because they cast the Kabuff spell to increase their Defense score. But then I saw the same result against some Cumaulus clouds and a lightbulb went off in my head: both of these monsters have physical damage resistance! That solved the mystery.
Therefore I had the first piece of the puzzle: Monster Pile-On launches 3-5 attacks when used against a random target. The damage is completely unaffected by the Monster Wrangler's Strength stat or any weapon that they might be holding; this also means that Oomph Powder does not boost the damage from the ability, FYI. The damage type is classified as Strike (i.e. as physical) which means that it can be resisted by the handful of monsters that have Strike resistance, and the damage was cut in half if a monster happened to be using its turn on the "Defend" command. However, actual Defense rating seems to be irrelevant and does not reduce the damage from Monster Pile-On at all, which makes it a fantastic boss killer. It should also theoretically be great against Metal Slimes though I still had to test that out with Bindi.
Now for the scaling part of the damage. This skill supposedly increases its damage as more friendly monsters are recruited, so I expected that the damage would go up when Bindi went from 10 monsters to 11 monsters and then slowly increase over time in linear fashion. However, this did not happen! I couldn't detect any change whatsoever in the ability when Bindi added another monster, then it remained the same at 12 monsters, and again at 13 monsters. How in the world does the scaling for this ability work?! I theorized that there must be some kind of breakpoints which cause the damage to increase all at once, and I resolved that I would keep checking every time that Bindi added another friendly monster in the interests of cracking the formula. For the moment, dealing roughly 30 damage per tick of Monster Pile-On (therefore about 90-150 damage depending on how the skill rolled) was clearly inferior to attacking normally with the boomerang, not least since I couldn't control what was going to get hit by Monster Pile-On's damage. I needed to keep testing this skill further.
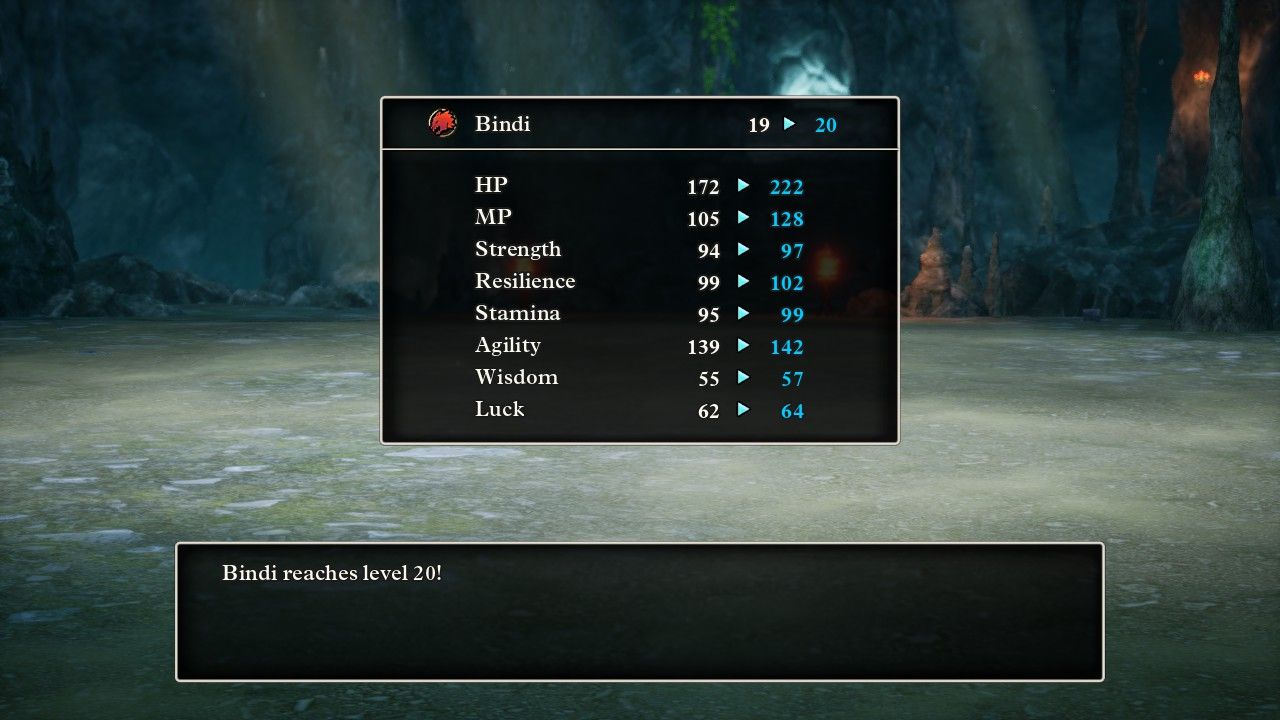
The need for more friendly monsters to keep testing Monster Pile-On had led Bindi all the way to the desert kingdom of Ibis. I took this time to update her equipment setup a bit, paying the extra cost at the special shop in Asham for the Magical Skirt which had a higher Defense score and would reduce damage from incoming spells by 25%. I also finally sat down and spent half an hour save-scumming all of the seeds that Bindi had collected, which was more than two dozen of them in total. They made a huge difference in her stats after cashing them all in for the maximum value, as she turned seven Stamina Seeds into 21 additional points of Stamina = 42 additional health. Since this pictured level up also granted her four more points of natural Stamina, that explained the massive 50 HP gain. Then on top of that, she also rolled three Seeds of Life into another 15 max HP for a total gain of 65 HP above where she had been previously - that was a total increase of roughly 30% more life! Tracking down all those seeds can be tedious at times, and then doubly so for rerolling all of them for the best value, but it certainly did pay off in terms of making Bindi stronger.
I had also noticed that Bindi was gaining about three Strength and three Resilience with each new level. Those were solid gains, however they paled in comparison to what the solo Hero had been gaining during my previous playthrough. She had averaged more like 4-5 Strength per level and that actually accelerated in the lategame where the Hero was often getting 6-7 Strength for each new level. The Hero is just an absolute monster from a stats perspective and it was sobering to watch a more normal character like Bindi by way of comparison. She was still quite effective but I could already see that her boomerang attacks, which relied on the Strength stat for damage, were not going to scale nearly as well as they had for the solo Hero.
Bindi made her way through the Underground Lake dungeon without issue, using her Emergency Groom ability as much as possible to keep her health up at the tail end of fights. The next dungeon in line was Skyfell Tower, which is technically supposed to come before the Underground Lake but which I tend to delay since it contains the first boss fight. Robbin Ood and his henchmen were waiting up at the top, and this is a boss fight that has to be taken seriously because Robbin Ood can break out his Brutal Strike which is the monster version of a critical hit and completely ignores the party's defense. I had learned from my previous solo Hero playthrough and knew to focus the boss himself while ignoring the minions. Bindi's Defense was high enough that they were hitting for only 1 damage per attack, and even Robbin Ood's default melee blows were barely scratching Bindi for 4 damage. That Brutal Strike possibility was the only danger in this fight.
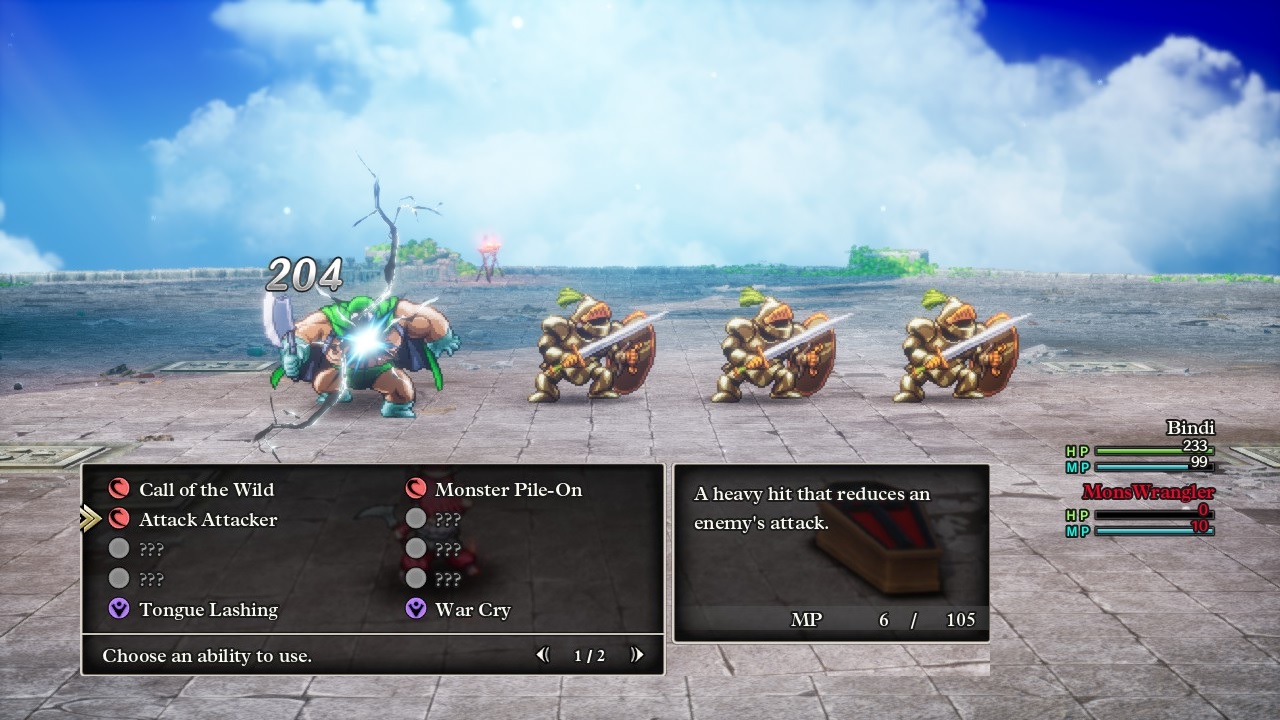
To counter it, Bindi made use of the Attack Attacker ability for the first time. This launches a normal attack with 2/3rds odds to reduce the target's attack by 25%. Since Bindi wasn't relying on Monster Pile-On here, I made sure to bring some Oomph Powder and use it on the first turn of combat, followed by smacking Robbin Ood in the face with this ability for 200ish damage. It successfully applied the debuff which would in fact reduce any damage taken from his Brutal Strikes; stacking your own defense doesn't do anything against that monster ability, but debuffing the attack on the boss would indeed be effective. I was also trying to determine if the 25% reduction from Attack Attacker could stack over time, and it appeared that yes, it would stack since two applications of this skill knocked Robbin Ood's basic attack from 4 damage down to 2 damage. Bindi hit him three times in a row and slew the boss without him ever using his Desperate Strike, then a final Oomph-boosted boomerang wiped out the minions in a single attack. This was a perfectly managed battle with virtually no damage taken and I felt as though I had significantly improved in my tactics since coming through here for the first time with a solo character.
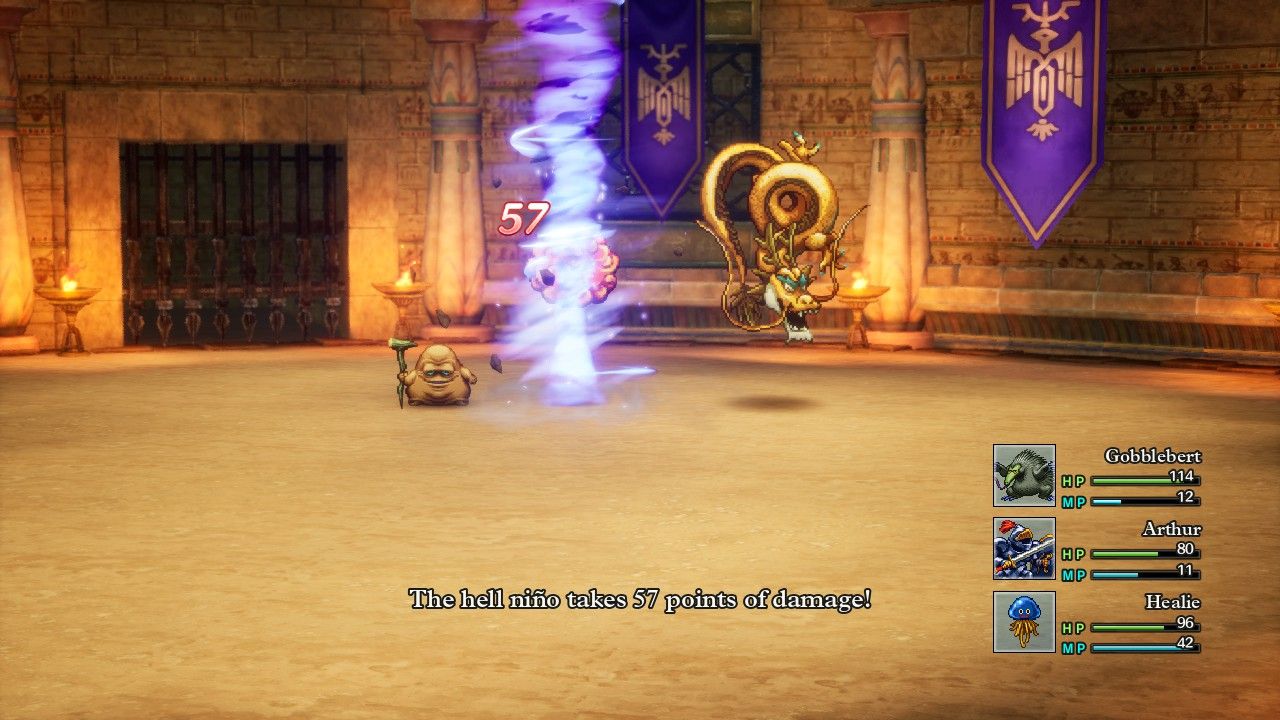
Bindi returned the stolen crown back to Romaria, where amusingly I discovered that the crown can't be given back to the king unless the Hero is alive. This is so that the Hero can then take over as the temporary monarch - with no thanks to Bindi who had actually done everything! After that was over, it was back to the southern deserts once again in search of the Magic Key. Bindi cleared out all of the various hidden treasures within Ibis, then tackled the rank 3 and rank 4 monster arena battles. It was nice to see the recruited monsters in action for a change, with this team of Gobblebert and Arthur and Healie defeating the next two arena ranks without encountering serious difficulty. I recall having some trouble with the tier 4 arena during my earlier playthroughs of this game but by this point I had a better feel for how these monster fights work mechanically. It's a really good idea to assign the monsters the "Don't Use MP" command whenever they have things under control, since even the "Fight Wisely" instruction causes them to waste their magic points like crazy.
Then Bindi headed into the Pyramid where she actually experienced fewer issues than my solo Hero, entirely due to better understanding of the place on my part. The basement floors of the Pyramid don't allow the party to cast any spells... which was irrelevant for Bindi since she didn't have any magic. Abilities are not classified as spells in the HD-2D remake of DQ3 which basically makes them superior in every way since they can't be blocked by Fizzle or reflected by the Bounce spell. I did take the time to trigger the Golden Claw trap even though it was again meaningless for this character, with Bindi fighting her way out and using healing items when she needed HP recovery. The only dangerous enemy in the Pyramid was the Mummies since they could use the monster version of a critical hit, instantly rendering Bindi's strong physical defenses worthless. I tried to focus them if possible though Bindi's boomerang was still hitting everything on screen most of the time.

The Pyramid also held the next major boss fight of the game against the Ripper of the Rift and its two Kylla minions. This had been a disastrous opponent for my initial non-variant party, where I expericed my first complete party wipe, however I had learned a lot about the DQ3 gameplay since then and went into this boss fight with a clear plan. The most important preparation for Bindi was equipping the Magic Skirt and double Aerofoil Earring accessories, which cut damage from wind element abilities by 50% and from wind element spells by 75%. The Ripper of the Rift heavily focuses on wind element attacks between Woosh, Swoosh, and Wind Sickles which were essentially neutralized by this gear setup. Woosh went from 8-21 damage down to 2-5 damage, Swoosh went from 26-46 damage down to 6-12 damage, etc. Wind Sickles still packed a modest punch by virtue of being an ability, and yet it too only dealt 20-30 damage which wasn't too bad. Most importantly, equipping these anti-wind element items dropped the damage output from the boss low enough that Bindi could have out-healed it using Special Medicine items. Those restore 80-90 HP and although Bindi would have been limited by her personal item bag to about a dozen of them in combat, she could have turtled up and healed back to full a couple of times. That didn't prove to be necessary but it was a potential option.
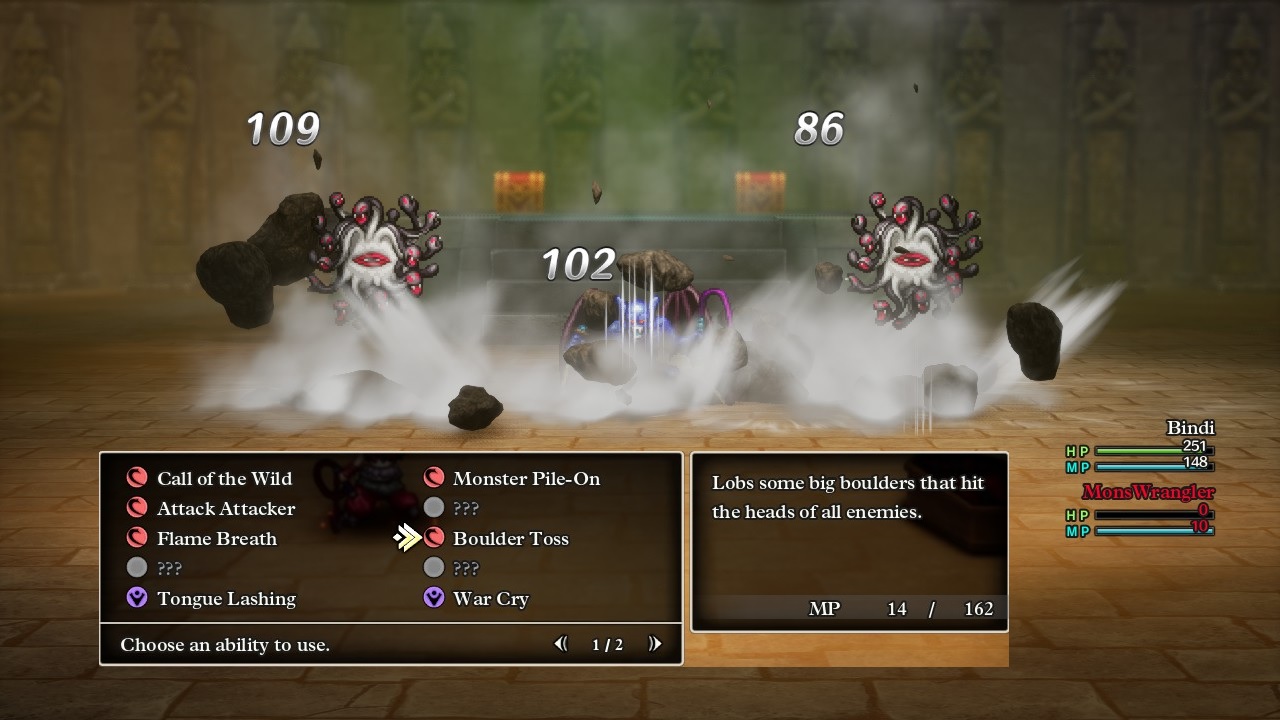
Instead, the plan was to cut through the health of these bosses before any healing proved necessary. I intended to use Bindi's normal attack for this and, after swapping over to the Beastly Bullwhip with a higher Attack value than the normal Edged Boomerang, used Oomph Powder on the first turn of combat. However, the Ripper of the Rift put Bindi into Dazzle status and therefore I swapped over to this new Monster Wrangler ability instead. Boulder Toss dealt 80-120 physical damage to all opponents on screen which made it much better than the boomerang against large groups of opponents. However, the damage from Boulder Toss was independent of Bindi's Attack stat which meant that she gained no benefit from her Oomph Powder when using this ability. Furthermore, Boulder Toss was not guaranteed to hit and still needed to make a successful attack which meant that the Dazzle debuff was still affecting Bindi when using this ability. In retrospect, she would have been better off just attacking normally to benefit from the Oomph Powder, heh.
Unlike the Robbin Ood boss fights where the minions could be ignored, Bindi wanted to focus and defeat the two Kyllas as quickly as possible here. They had an ability called Lullab-Eye which inflicted a guaranteed successful Sleep status that Bindi couldn't avoid in any way, then they also liked to spam the Crack ice spell which was doing more damage than Woosh/Swoosh due to Bindi's wind element protection. Her Magical Skirt did cut the damage from Crack by 25% but that still left it at 16-24 damage which was enough to be noticeable. In any case, Bindi was able to defeat the two Kyllas relatively quickly with several Boulder Tosses, then went back to Oomph Powder plus Attack Attacker for the Ripper himself. The boss managed to accumulate enough damage to get Bindi down to 85 HP remaining, however I knew that Bindi was about to finish him off and successfully completed the battle with a final Monster Pile-On ability. This was a reasonably comfortable fight though I think my tactics still could have been a bit better.
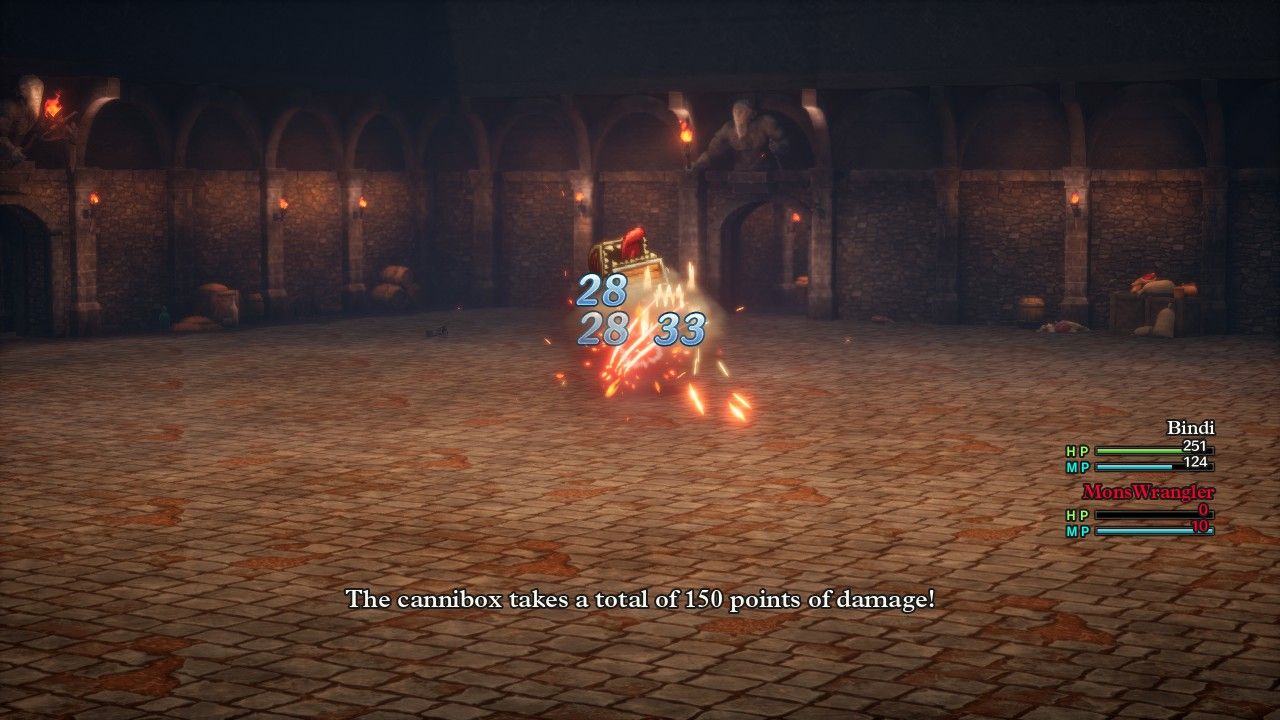
The Magic Key opened a path west to Portoga, then indirectly to the east after showing the King of Portoga's letter to Nordy the Dwarf. The following portion of the gameplay was a bit more open-ended, with a large wilderness portion of the map to explore corresponding to central and south Asia in the real world. Bindi followed her usual pattern of tracking down all of the sparkling and secret spots, picking up more seeds and mini medals and recruitable monsters along the way. On that note, I was still tracking the damage from Monster Pile-On every time that Bindi added another creature to her arena team. She had gained the ability after recruiting 10 monsters and I hadn't seen any noticeable changes in damage for a little while after that. However, by this point she was up to 20 friendly monsters and the damage did seem to be increasing, slowly but steadily. Initially Monster Pile-On had mostly been hitting for about 28 damage per tick, though this was hard to track since it could go as low as 24 damage or rarely as high as 35 damage. By this point though, Bindi was mostly seeing numbers in the 30s and rarely a number as high as 42 for the damage printout. It looked as though the average per-tick damage was somewhere around 33 or 34 damage even though this was hard to measure. (Remember, Monster Pile-On hits 3-5 times per use of the ability and also strikes completely randomly against enemies on screen which introduces a lot of randomness to this ability.)
The damage from Monster Pile-On might not look too impressive against the Cannibox mimic pictured above. That's deceptive though: the Cannibox had 25% physical (Strike) resistance which meant that this was actually a good damage roll from Monster Pile-On and the per-tick damage would have been hovering close to 40 against a normal target. Monster Pile-On was clearly dealing superior damage to Bindi's normal attack against these mimic chests and I continued to suspect that the ability would be more of a single target boss-killer than something used in random encounters. The screenshot was taken inside the Kidnapper's Cave where Bindi cleared out everything of interest but did *NOT* do the Robbin Ood boss refight, not yet at least. He might be intended as a joke boss but for a solo character that battle can be deadly serious. There were more areas for Bindi to explore and more treasures to claim along the way so I was content to delay for a little while longer.
Oh, and a Catula inside the Kidnapper's Cave dropped a Cat Suit at 1 in 256 odds leading to this:
Bindi now became a gigantic walking cat, heh.  In all honesty, I'm not certain if she was better off wearing this thing despite its rarity over the plain old Magical Skirt. While the Cat Suit had nearly 30 more points of defensive rating, the Magical Skirt reduced all spell damage by 25% and that was a pretty big deal. I valued these two equipment items about equally and decided to wear the Cat Suit because it was simply more fun to watch. Bindi was exploring the Tower of Transcendence at the time of this screenshot after having already claimed the various seeds and other goodies in Alltrades Abbey. I'm starting to get a better feel for the confusing layout of the tower now that I've been through it a few times, with Bindi picking up a few more levels for her troubles along the way. There were Metal Slimes here and unfortunately Monster Pile-On did not prove to be the slayer of slimes that I had been hoping. While Monster Pile-On clearly did ignore enemy Defense rating (I kept periodically verifying this by using Monster Pile-On against basic Slimes outside Aliahan and it always remained true), unfortunately Metal Slimes have 100% Strike resistance which is why hitting them always seems to deal 1 damage. Only critical hits can burst through that protection and Bindi's poor Luck stat meant that she was quite bad when it came to the crit department.
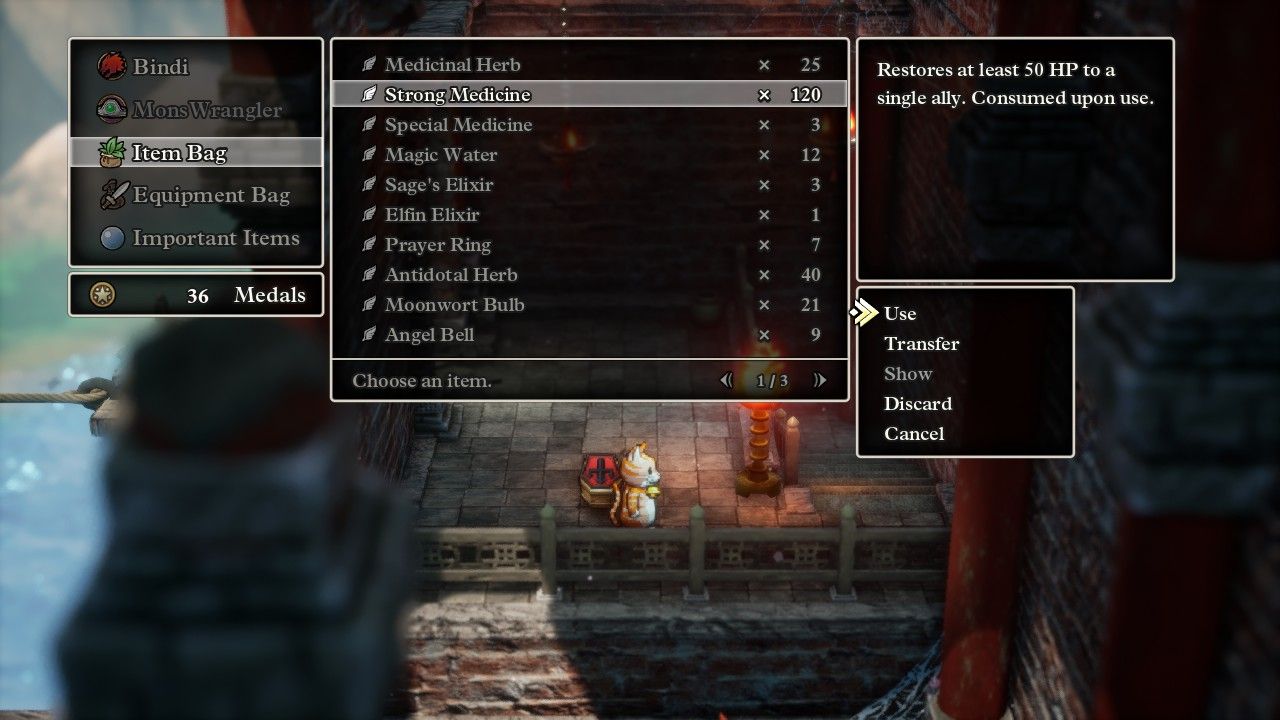
I also wanted to highlight how Bindi was maintaining her health while passing through various dungeons. She lacked the healing spells of my solo Hero and therefore relied on items instead, specifically the Strong Medicine that restored 50-60 HP at a time. These things were thankfully dirt cheap to purchase at 48 gold apiece and I was beginning to stock up on them whenever Bindi returned to town. The HD-2D remake inferface even helpfully allows up to 999 of them to stack at a time in the item bag, a true godsend as a limit of 99 of these items would almost certainly be insufficient by the end of the game. This is one place where the DQ3 remake helps make life possible for solo characters that can't heal themselves normally.
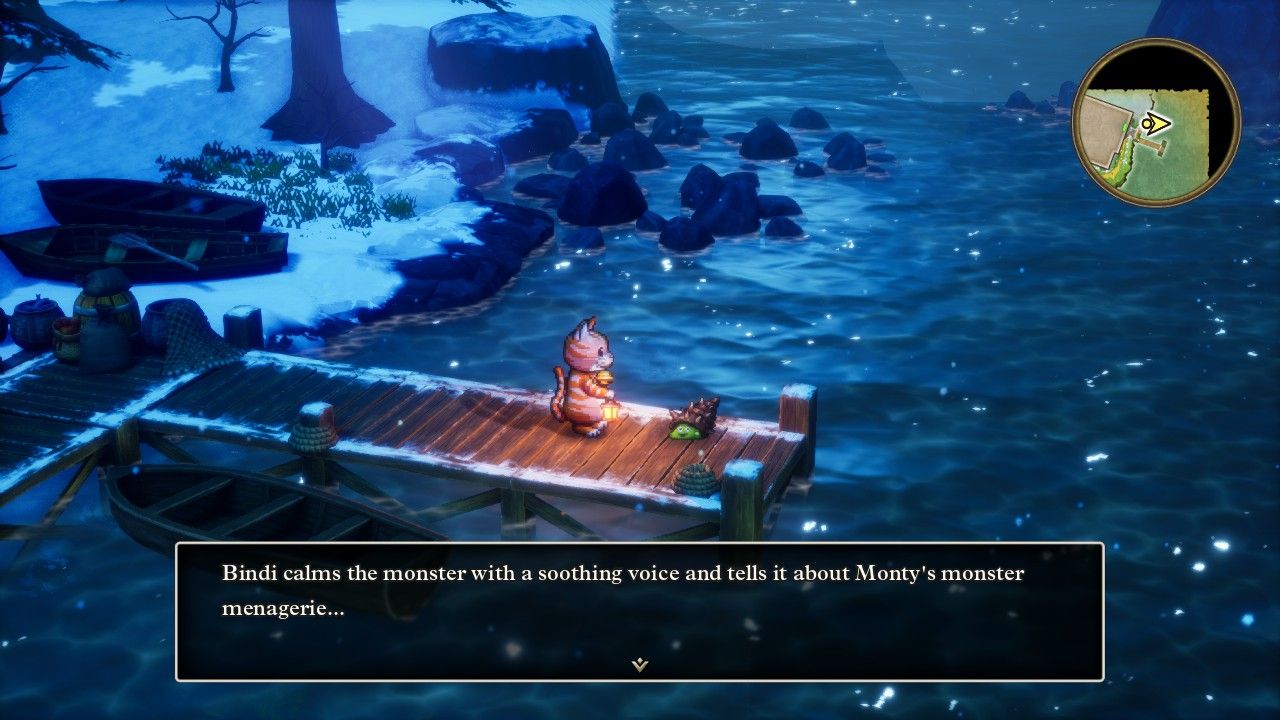
After clearing the whole Tower of Transcendence and claiming the Sage's book that Bindi would never use, she pushed further east all the way to Mur. This is as far as the party can go without obtaining the ship as Mur sits at the far eastern edge of the main continent; I had to save this screenshot as Cat Suit Bindi recruited a Shell Slime friendly monster on a dock, in the dead of night, as snow fell in the background. Notably all of the various stuff involving Ortega does not take place in Mur if the Hero happens to be dead. No one talked about how the Hero resembled Ortega, there were no cut scenes showing how Ortega protected the town, and the shopkeeper maintaining Ortega's helmet refused to hand it over. It was a completely different experience for Bindi as she visited the town with her ever-present coffin toting along behind her, another one of those places where the developers simply assumed that the Hero would be present at all times. I mean, who would play the whole game without the Hero being alive - that would be crazy!
That Shell Slime was the 27th friendly monster to join Bindi's crew and by this point the increased damage from Monster Pile-On had become impossible to ignore. I had hit on a better method for tracking its damage: wait until there was one enemy remaining, then use Monster Pile-On and record the total damage output printed at the bottom of the screen, dividing by the number of ticks to get the per-tick damage output. The animation for this ability was very fast even at the default speed and relying on the gameplay to summarize the damage worked better than me trying to do it myself. From what I could see, the average per-tick damage of Monster Pile-On had been going up by about 1 point for each new monster added, though that was only a rough estimate and I had no idea if the trend would continue. Over the past few new recruited monsters, the damage had increased from about 37 per tick, then to 38, then 39, and now a little over 40 damage. That still wasn't good enough to outperform Bindi's normal boomerang attacks, not least due to the random number of ticks from Monster Pile-On and its inability to target where the damage went, however it was starting to become a closer comparison as more friendly monsters joined the team.
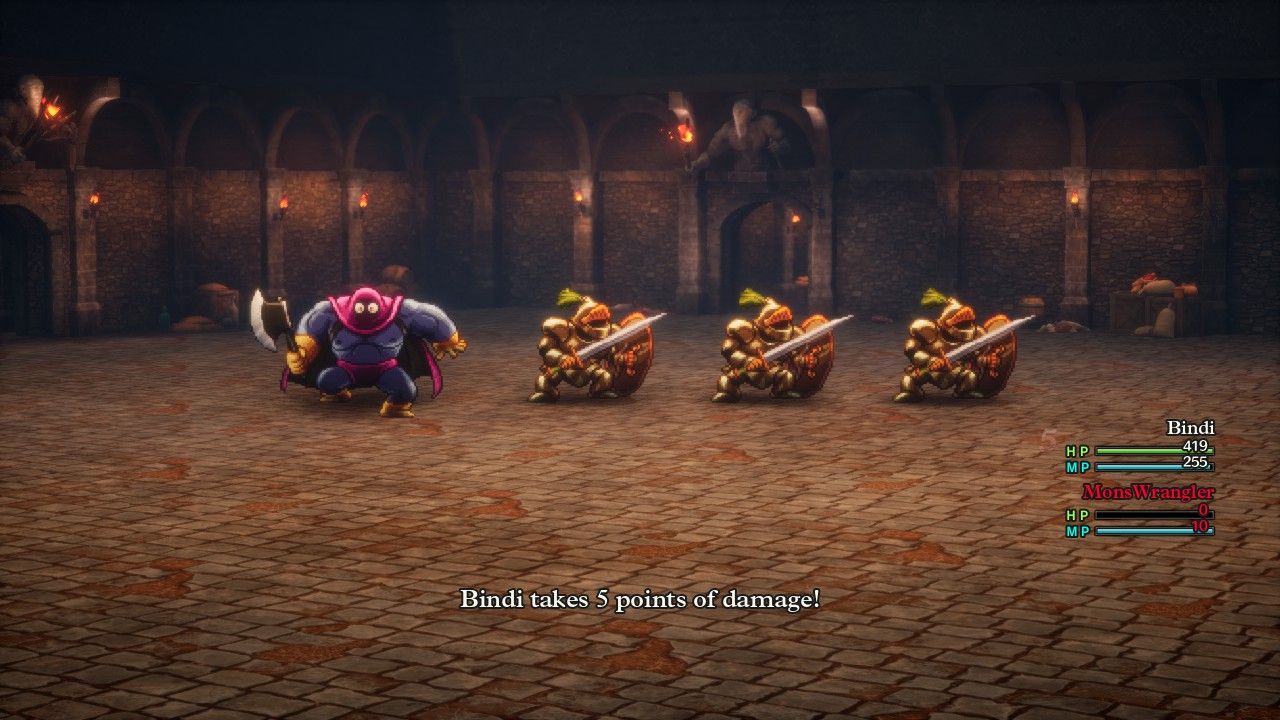
With nowhere else left to go, Bindi now returned to the Kidnapper's Cave for the Robbin Ood refight. Let me restate again that the three minions were utterly useless and could be ignored, mostly attacking Bindi for 1 damage and occasionally casting the Kasap spell to lower her physical defense. Annoying as that was, they weren't a threat and Bindi could focus on Robbin Ood himself. This was an all-physical opponent so Bindi didn't need anything with additional elemental resistance and brought all of her strongest Defense gear instead; that Cat Suit was legitimately the correct decision here. Robbin Ood's normal attacks were similarly irrelevant for Bindi, as I took the above screenshot of him hitting for 5 damage at a time. The one and only threat was his Brutal Strikes (i.e. monster critical hits) which would ignore Bindi's defense and could hit for as much as 100 damage at a time. If those started showing up, Bindi could die very quickly even though every other aspect of this boss fight was a joke.
Monster Pile-On was no good here since there was no way to get it to focus on Robbin Ood himself. Instead, Bindi used Oomph Powder on the first turn of the fight and then started whacking the boss with Attack Attacker again, the same strategy from the first version of this opponent. Attack Attacker landed for just barely over 300 damage against Robbin Ood which was what I had been aiming for. The boss has 1120 HP which allowed Bindi to follow this sequence: Oomph Powder, Attack, Attack, Attack, Attack, with Robbin Ood dying to the fourth use of Attack Attacker on the final turn before the Oomph buff wore off. If she had possessed a slightly lower Attack (or if I hadn't found the Battle Fork with 32 more points of Attack in the Tower of Transcendence), then Bindi would have needed another round of attacking to land the kill, plus another round of re-buffing herself with a second Oomph Powder. As it turned out, Robbin Ood never used Brutal Strike even one time but he absolutely could have done so and this fight could have been diverted into dangerous territory in a real hurry. The fact that it all went so smoothly was a sign that I had done a good job of preparing Bindi ahead of time.

Bindi remained a cat in the cut scene following the defeat of Robbin Ood which led to this screenshot. Watching him beg mercy of a giant cat was one of those things that made this whole variant worthwhile.  In any case, Bindi now had her Black Pepper and teleported back to Portoga to claim her ship. Her journey would continue on the next page as the quest for the six orbs was underway.


