Bindi continued her quest in Portoga where she finally obtained the deed to a ship. Or rather the Hero did, as the plot forced a revival of the titular main character so that this cut scene could take place. Bindi was relegated to the background where she was still hanging out in her Cat Suit, quietly resuming control of the journey once the Level 1 Hero exited town and was instantly plastered by the first hostile monster they encountered. Access to the sea opened up the huge overworld map in DQ3, as it was now possible to visit something like 90% of the available locations across the world. I decided that I would chart Bindi's course across the globe by using my out-of-game reference list of the various recruitable friendly monsters. She would collect as many of them as possible while picking up the sparkle and secret locations along the way, prioritizing the recruitment of more critters over collecting mini medals and stat-boosting seeds. (Though of course I would get everything eventually!)
The first task was a quick trip over the Internation Date Line to Persistence where Bindi purchased the Swallowtail boomerang. This weapon was simply better in every way as compared with the old Edged Boomerang, still hitting every opponent on screen but doing so with an additional 28 points of Attack. Then Bindi was free to head pretty much anywhere that she wanted, as I broke out the list of friendly monsters and started checking them off one by one. The first two were pretty straightforward, in a secret spot next to Portoga and located at the eastern end of this world's Mediterranean in another secret spot near Asham. After that, the list started making considerably less sense as it directed Bindi to an isolated secret spot in the Arctic:
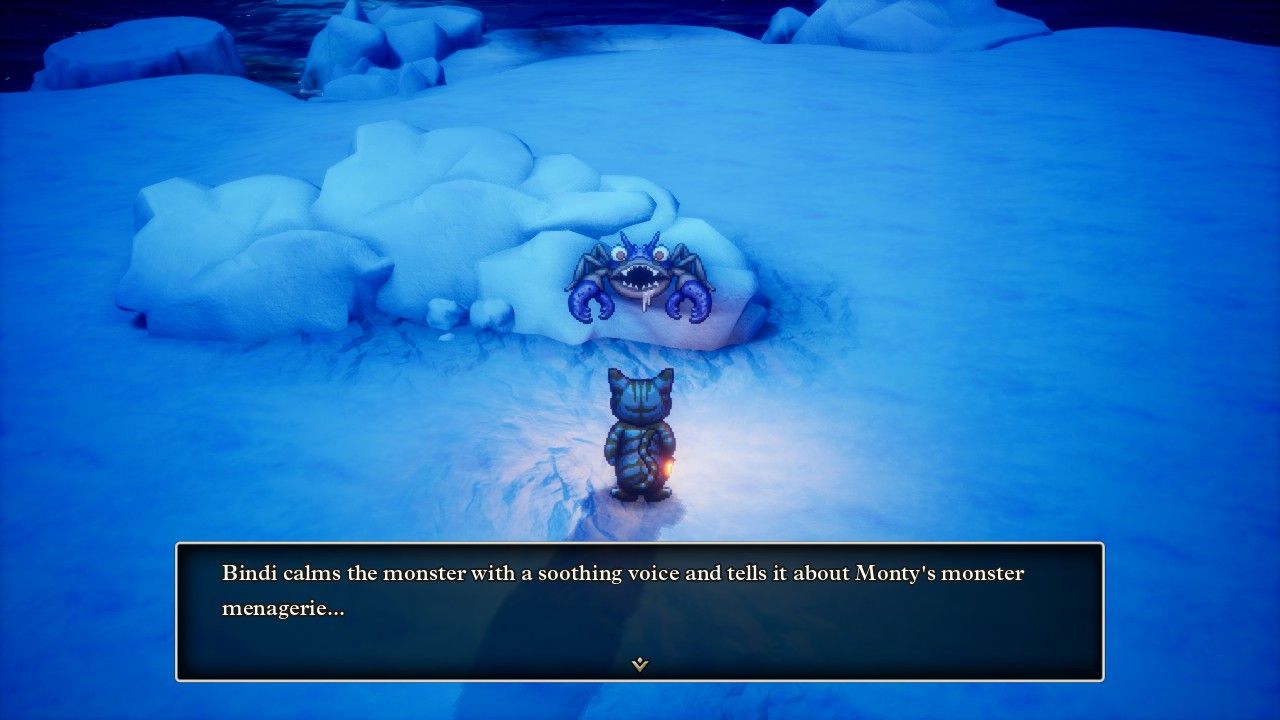
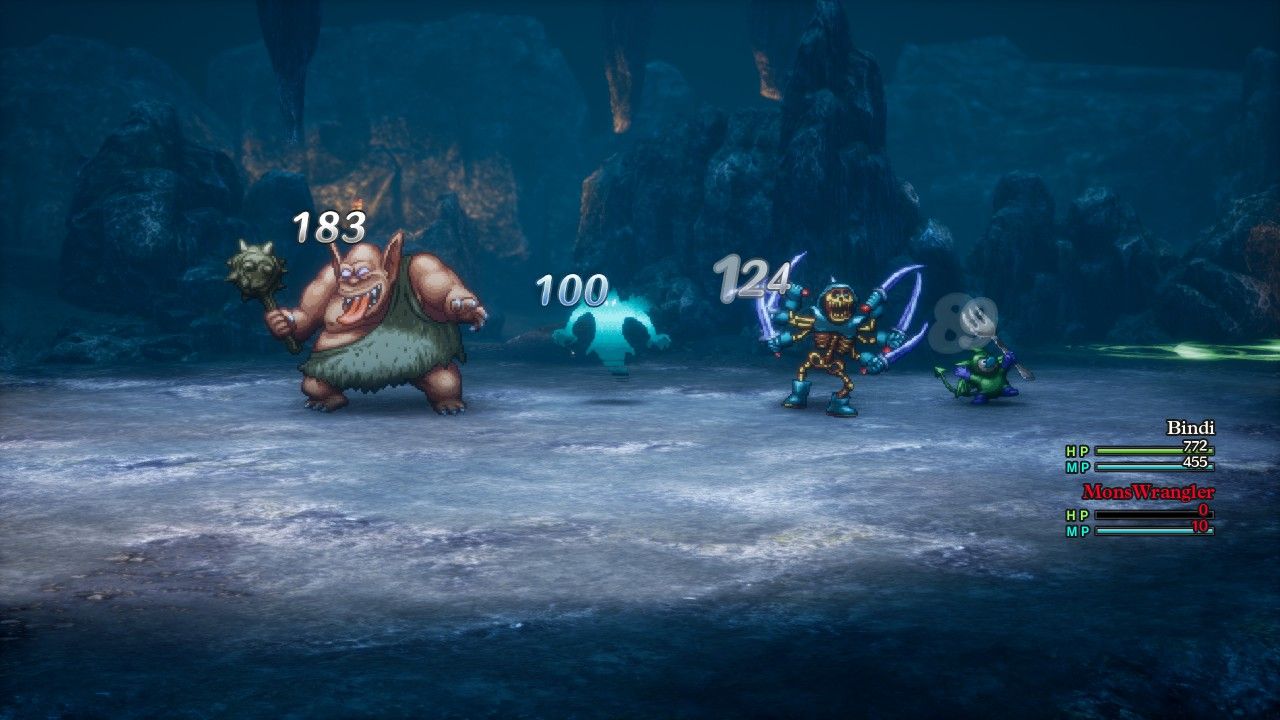
This Handsome Crab was the 30th friendly monster to join the team and therefore unlocked a new ability for Bindi; more on this in a minute. I was also tracking the damage from Monster Pile-On as Bindi brought these new monsters on board, and it was undeniable that the skill's damage output was slowly climbing over time. From an initial 26-27 damage per tick of the ability, Monster Pile-On had grown to right around 40 damage per tick now that Bindi had 30 monsters recruited. The per-tick damage was quite variable as it could drop as low as 35 damage or range as high as 45 damage, and of course the ability would also hit either 3, 4, or 5 times when used for a wide range of possible outcomes. It was still going up though and I was excited to see where the numbers would end up as Bindi voyaged her way across the world.
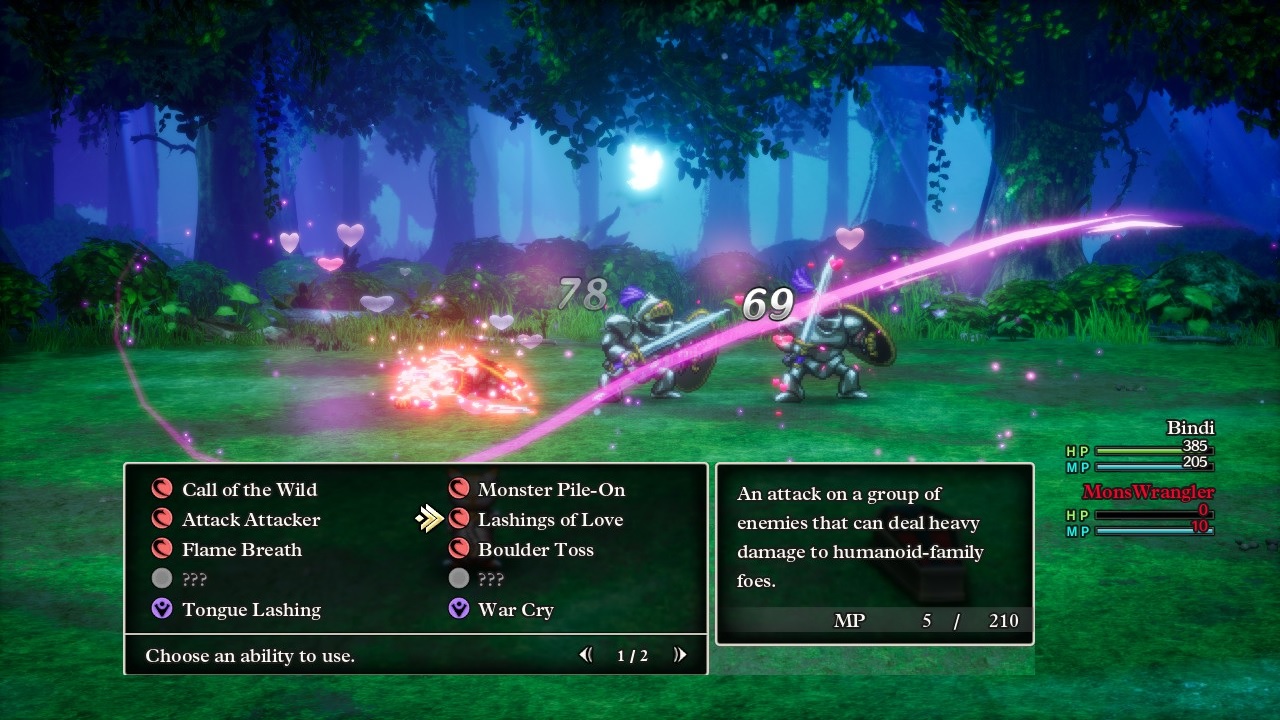
As far as the new ability was concerned, this was named Lashings of Love and had the property of hitting a single group of enemies, basically functioning the same way as a whip attack (not a boomerang). Lashings of Love supposedly hit this single group for physical (Strike) damage, boosted to 130% if the targets happened to be humanoid in nature. Unfortunately the monster reference list that I was working from indicated that very few enemies are classified as "humanoids" in DQ3, with the little Lump Mages and the Robbin Ood reskins apparently being the only such creatures to be found anywhere. These pictured armored knights? Not humanoids according to the game's coding. There are exactly six normal enemies (out of 125 total) that are classified as humanoids which makes this ability pretty sad. The only boss in the whole game to have this enemy type is Robbin Ood and it would have been useful against him... except of course that Bindi had already defeated that boss twice and would never see him again, heh. Lashings of Love also retained the same whip property of decreasing the damage dealt by about 20% for each additional target hit; all told, this meant that the skill wasn't very useful on the whole and Bindi did better simply using her boomerang. The one niche use for Lashings of Love would be hitting a group of monsters while equipping a single target weapon like a sword or axe, and I hadn't come across any such situations like that to date.
Once Bindi had this ability unlocked, she continued onwards down the western cost of this game's African continent. There were several friendly monsters to grab in the Theddon area, then her list directed her to Jipang next, then all the way up to Grimland, then down the eastern seaboard of the Americas to the Pirates' Den. There was a very useful bit of equipment to be found there:

This was the Phantom Mask helmet hanging out in a chest next to the Red Orb which remains completely unguarded here in the HD-2D remake. Leaving aside the first of the six orbs needed for plot purposes, the Phantom Mask was an item with solid defensive value that also had the property of granting 12.5% physical evasion. This is the only helmet in the whole game with evasion on it and the Hero can't equip the item at all, which is why I never made use of it in my previous solo game. Evasion on items is very, very rare in this game since there are no shields that grant this property and exactly two armor items that have it. The game would benefit greatly if there were an accessory that granted the same 12.5% evasion since then characters could stack two of them for some decent dodge chance against physical damage bosses; as it is, it feels weird that there are Asbestos / Antifreeze / Aerofoil Earring accessors that completely shut down the various elemental damage types while nothing whatsoever exists to avoid physical damage. You can stack Defense items and that works against most opponents... but fails completely against enemies that can critically strike like the Boss Troll. I think the gameplay balance could be a bit finer tuned in this particular area.
Afterwards Bindi continued onwards with her lazily-paced journey, traveling here and there to find more friendly monsters. The list that I had sent her to the tiny island of Lozamii, then to ocean-based secret spots near Lanson and Reeve, then back to the Pirates' Den, then north to Fifer's Spire, then back to Lanson a second time before venturing to Edina. This was a completely scattershot list with no consistency whatsoever and I suspect the person who compiled it initially was simply writing these monsters down in the order they happened to find them. I'm definitely not following this particular order ever again since my head was spinning at all of the traveling in circles, heh. At least I had something to do while passing the time: more testing of the Monster Pile-On skill:
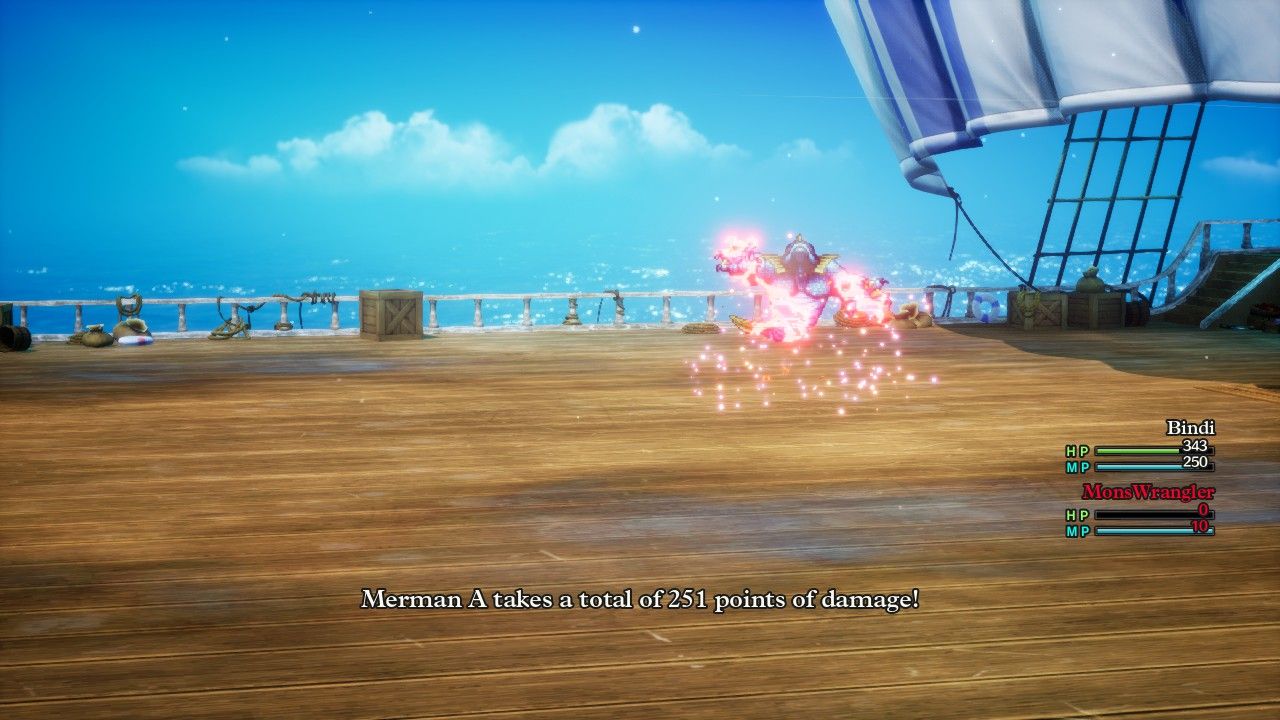
I mentioned on the previous page that the best way to test Monster Pile-On's damage was to isolate a single enemy, then note down the "total damage" printout as pictured above. The animation for this skill was quite fast and it was too hard to jot down the per-tick damages when they flashed across the screen three or four or five at a time. I was also testing this ability dozens and dozens of times so I didn't want to slow down the gameplay speed and drag things out even further. Initially I was testing the damage after every new monster recruited, though the pace of increase was too slow for this to be particularly noticeable and the whole process was just taking too much time to be worthwhile. Instead I swapped over to experimenting with Monster Pile-On after every five new monsters came aboard, and this seemed to work better in terms of getting less noisy data. The screenshot above was taken when Bindi had 45 monsters recruited for her team, and after taking a dozen different readings, the skill came out at about 48 average damage per tick. That was getting to be pretty impressive stuff, especially when Monster Pile-On rolled the full five hits and banged out something like the 251 damage captured above. How high would this go by the end of the game? If Monster Pile-On could get up to 100 average damage per tick, that would definitely be enough for endgame viability.
Mostly though, Bindi spent something like half a dozen hours just sailing around the mostly empty waters of the globe. There were lots of sparkly and secret locations to visit, with enough of the stat-boosting seeds available to make this process more than worthwhile as an undertaking. Remember, there are almost 250 sparkle locations alone in the overworld and it takes many, many hours to find them all even when working off a complete list. I personally found this process to be pretty relaxing, a nice chill way to unwind in the evenings after a busy day of work and taking care of our kids. There's something about having a huge checklist of medals and seeds and whatnot, which leads to a feeling of deep satisfaction as they get checked off one by one. So I didn't particularly mind this slow portion of DQ3's gameplay, however writing it up into a report and making it sound interesting, well, that was definitely harder to do. Hopefully I'm not boring the readers too much as this portion of the gameplay didn't have all that much of interest taking place.

Eventually the list that Bindi was following took her to Edina castle where she solved the rock-pushing puzzle in the basement to claim the Vase of Drought (or whatever it is in this translation), followed by using it to obtain the Ultimate Key. This unlocked a number of additional doors (literally), the most interesting of which was Gaia's Navel dungeon outside of Lanson. This is the game's only intended solo dungeon since only a single character can enter at a time, making it a challenging place for a normal playthrough and a cakewalk for this variant. It was the sole place where Bindi didn't have a coffin following her around everywhere and I included this screenshot from the third-person perspective for that very reason. Also note that the Monster Wrangler class is always left-handed, apparently, with Bindi equipping some snazzy Fire Claws instead of her usual boomerang for this screenshot.
The monsters inside Gaia's Navel were a complete joke, of course, weaker than the random encounters that Bindi had already been facing by herself out in the wilderness. The HD-2D remake added a boss fight at the end of this dungeon, against the green-robed Chiromancer and its Madvlad minion. The main danger in the boss fight comes from the Swoosh spell used by the Chiromancer; Bindi brought the same 75% elemental defense setup that she had used back in the Pyramid and knocked its wind element damage down to the 6-12 range where it was utterly irrelevant. The Chiromancer also has a Muster Strength ability that doubles the damage from its next attack... only to see that fizzle as well since the boss was only doing a single point of damage with its normal attack, heh. I tried using Lashings of Love here, only to be disappointed since neither of these enemies were classified as "humanoids" despite their seemingly human appearance. The whole thing would have been over immediately except that a Dazzle spell from the Chiromancer successfully landed and then caused Bindi to miss her next three Oomph Powder-boosted attack, argh! She still took barely 100 damage in defeating the pair in what proved to be a very easy encounter.
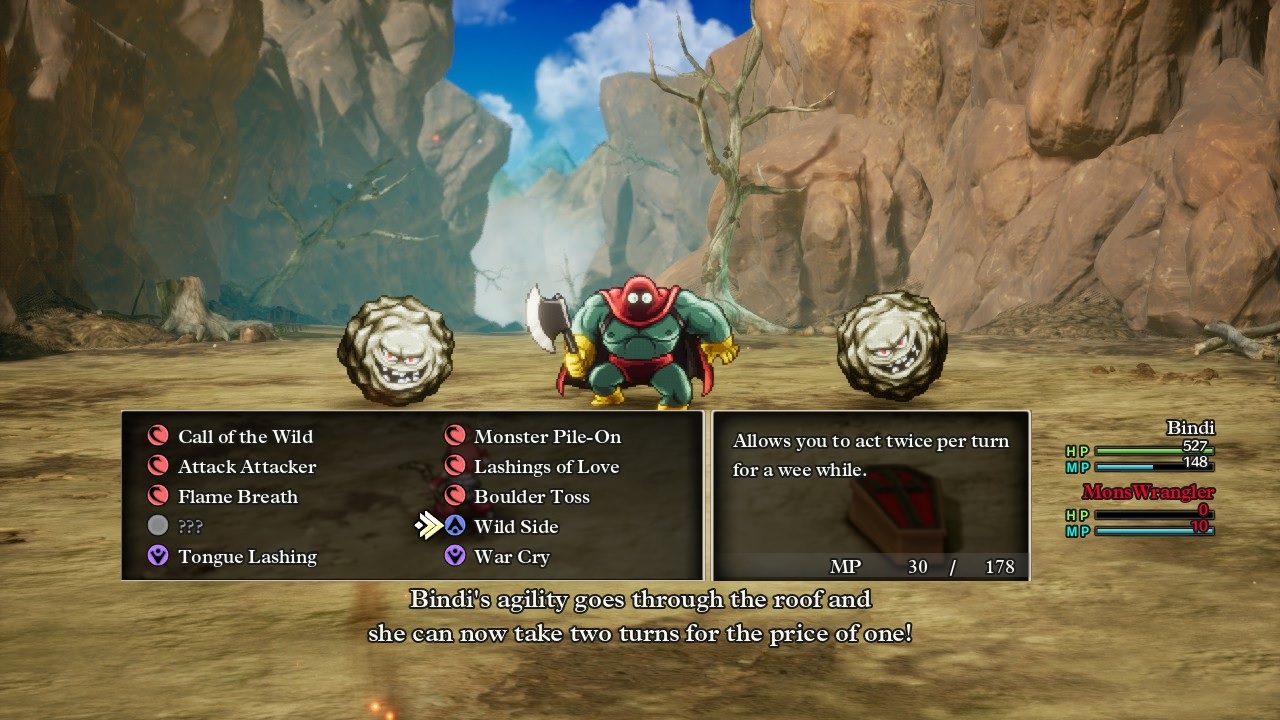
Bindi had 48 monsters in her collection when she completed Gaia's Navel and obtained the Blue Orb, therefore passing the big 50 threshold shortly thereafter. This was a nice milestone as Monty the monster collector handed over 10 seeds as a reward, two copies apiece of five different seeds. That would be great for any solo character, however Bindi gained the much more significant reward of unlocking the Wild Side ability. Forget about all the press given to Monster Pile-On, this is the best Monster Wrangler ability and possibly the single best ability in the whole game. Although Wild Side is an expensive ability at 30 MP cost, it grants just about the best buff possible: it DOUBLES the actions of the character in question for the next few turns!  This is absolutely as great as it sounds by letting the Monster Wrangler act twice in succession, plus it even stacks with other buffs such as Oomph. You could theoretically have the Hero learn this ability in the post game and then combine Falcon Slash with the Falcon Blade along with the Oomph and Egg On buffs to attack 8 times at 400% damage dealt in a single round of combat (!!!) Even with this variant limited to the Monster Wrangler alone, there was serious game-breaking potential here through abuse of Wild Side.
Unfortunately there were a few downsides to this otherwise amazing ability. I had been hoping that Wild Side would let Bindi take two turns in a row, maybe doing stuff like using Oomph Powder on the first half of the turn and then using an attack ability on the second half. That turns out not to be possible: Wild Side simply doubles whatever action the Monster Wrangler takes whenever it's in effect, never allowing the chance to do two different things in succession. This makes combining it with Oomph Powder much more awkward since it takes one turn to put Oomph in play and then another separate turn to use Wild Side. Abilities double cast with Wild Side will also eat up magic points for both uses, and similarly using items will consume two of them from the personal inventory if used back-to-back with Wild Side. Furthermore, Wild Side seemed to have a shorter duration than the normal 3-5 turns of most buffs, often only last two additional turns after going into effect. If Bindi were hit by some kind of debuff or crowd control, it was easy for the doubled period of action to get wasted. Nevertheless, this was a super powerful ability that I would be using constantly in future boss fights.
I continued exploring the map with Bindi until she had essentially everything possible claimed in the Old World. This included some time spent trekking around in the vast expanse of the Great Forest where real world Siberia is located; there were a whole bunch of seeds in that area along with a significant armor upgrade in the form of something called the Epic Apron that had the same 25% reduced damage from spells property of the Magic Skirt along with nearly 50 additional points of Defense rating. With that task completed, Bindi teleported back to Theddon and initiated the boss fight associated with the Green Orb. This is another boss clash added by the HD-2D remake which takes place against a series of Dying Fire and Phantasm undead opponents. They like to summon more monsters as the battle continues and area-of-effect damage tends to be the order of the day since there are six enemies to contend with.
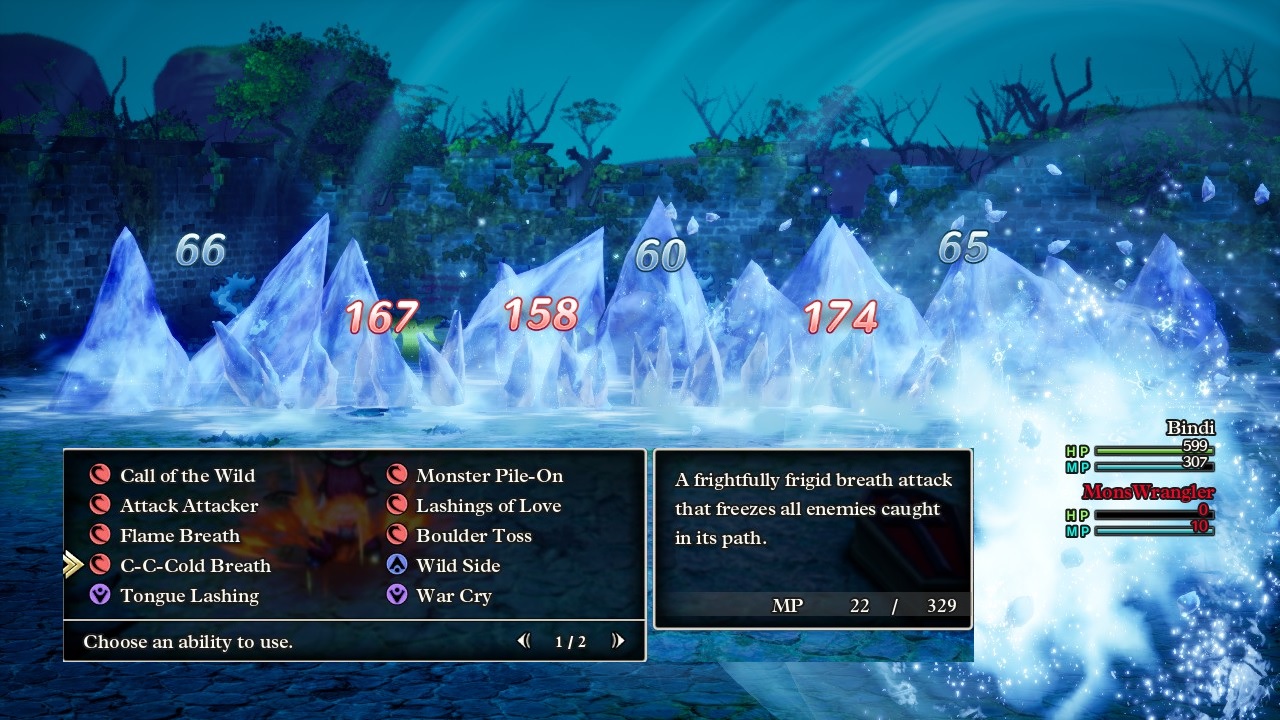
Bindi brought her anti-wind element gear setup yet again due to the Swoosh and Wind Sickles attacks on the Dying Fires; you would think that they would use fire element but nope, it was wind element yet again. The Phantasms like to cast the explosion spell Bang, however I knew they wouldn't be sticking around for long. The Phantasms were weak to ice element and Bindi was able to use Wild Side into a double casting of C-C-Cold Breath (yes that's the actual name) which hit everything on screen for 120-140 (x2) ice damage. This was fantastic against the 340 HP on the Phantasms and quickly wiped the board of them; it was considerably less useful against the Dying Fires who resisted ice element and only took modest damage. Therefore Bindi swapped over to physical attacking with her Swallowtail boomerang after the Phantasms were gone, where she could hit about 225 damage against the first Dying Fire with the Oomph buff in play. The Dying Fires had very little success at cutting through Bindi's healthbar, with their elemental damage blocked and their physical attacks too low to register. However, they spammed the instant death attack Whack and that actually killed Bindi two times in succession despite her having a pair of Diamend items in her inventory. Those things will shatter to prevent an instant death spell from succeeding, so Bindi shoved five more of them into her personal inventory and won immediately thereafter - though three Diamends broke in the process and would have otherwise killed her three times over! Yikes, the perils of having a low Luck stat and all that jazz.

By this point, Bindi had nearly finished claiming all of the various treasures scattered around the overworld map. She spent some more time thoroughly exploring the mostly-deserted continent of South America and then wrapped up with the sparkle locations found along the southern coast of the main continent, which oddly were listed last in numerical order in my reference spreadsheet. Then Bindi continued onwards with the game's main plotline by venturing into the Orochi's Lair dungeon where the enemies were predictably fire-based. Some of the random encounters here contained Metal Slimes and Bindi had one fight where she managed to kill four of them for a big 16,500 XP payout. I didn't care that much about experience gain since Bindi was already leveling very quickly as a solo character, it certainly didn't hurt though. She equipped all of her various fire protection gear and prepared for the two Orochi boss fights at the end of the cave.
While the Orochi looks pretty cool with its five heads, this is not a difficult opponent for a solo character who has the proper equipment. The Ice Shield and two Asbestos Earrings cut the damage from the monster's fire-based breath attacks by 75% and that reduced even the mighty Inferno down to 20-25 damage per appearance. Not a threat. Since victory in this boss fight wasn't in doubt, I used the combat to do some mechanics testing with the Attack Attacker ability. I had Bindi use Wild Side and then start hitting the Orochi with doubled Attack Attackers to see how far she could reduce the attack power on the boss. It turned out that there was a limit to how much Bindi could debuff her opponent's attack, as pictured above, which seemed to take place after stacking Attack Attacker four different times. Sadly this did not reduce the Orochi's attack power to zero, though it did seem to cut it by about 67%. Otherwise, Bindi used some Oomph Powder to speed things along and did some additional testing with Monster Pile-On, with the latter ability dealing as much as 300 damage on a good roll. The Orochi managed to deal all of 100 damage before being defeated, taking Bindi to 560/660 HP, in a sign of how easy this boss fight had been.
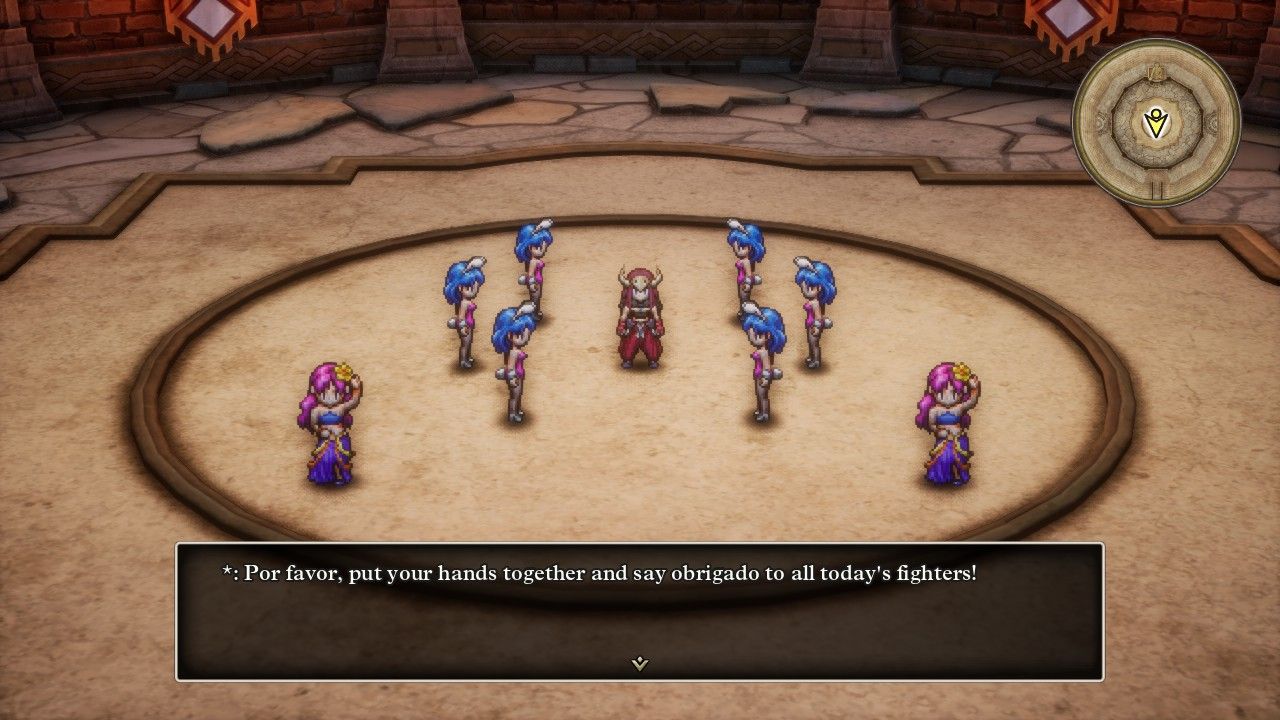
This brought Bindi to the long fetch quest sequence leading to the Silver Orb, beginning in the isolated kingdom of Manoza. This castle town can only be reached via teleportal and it contains the final monster arena of the main world, with three additional monster sequences to battle through. Bindi had been studiously collecting every recruitable ally for her Monster Pile-On ability and therefore cleared the tier 5, 6, and 7 arena challenges without breaking a sweat. (It would have been really easy to re-use the same arena graphics from earlier but nope, the HD-2D remake has unique visuals and victory celebrations in each of the four arenas located in Romaria, Ibis, Manoza, and Cantlin.) I searched through the rest of the town and actually managed to find a Seed of Agility that wasn't previously listed in my reference materials, nice! I added it to the list as I continued to update my spreadsheets for future use, which are also shared on the main DQ3 page of the website for anyone interested.
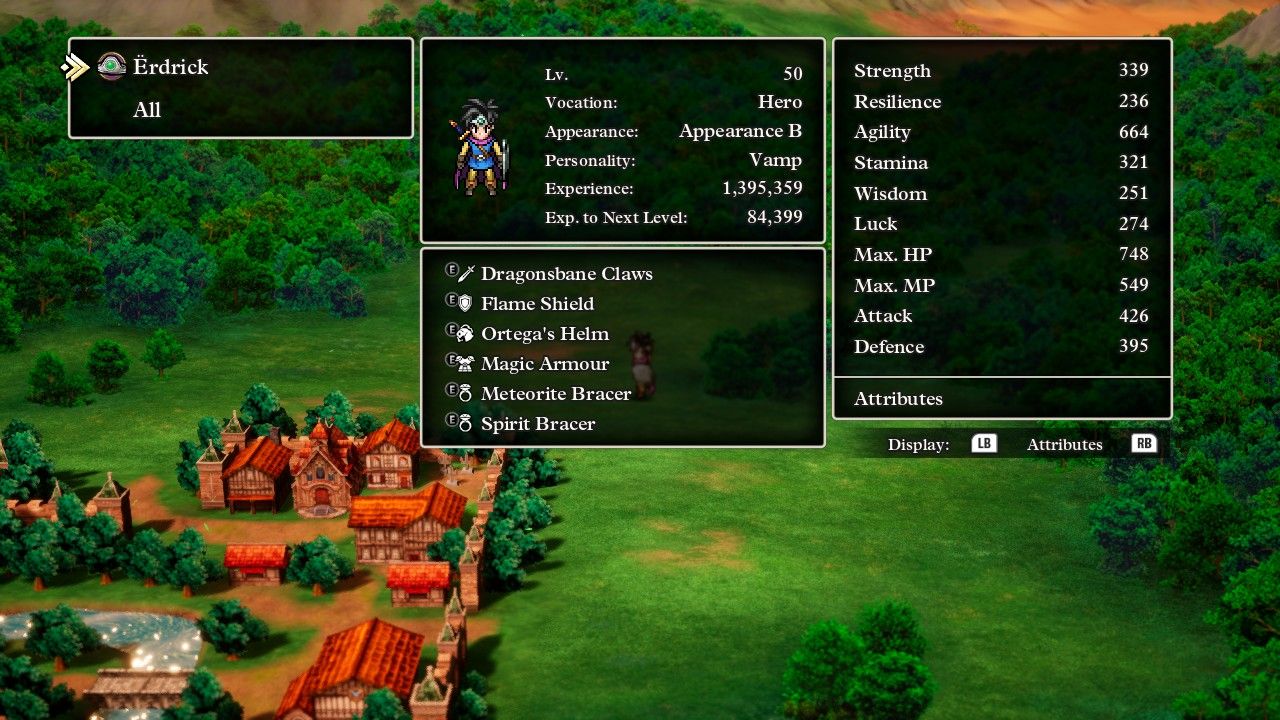
Bindi reached the milestone Level 50 at this point, here were her stats at the time:
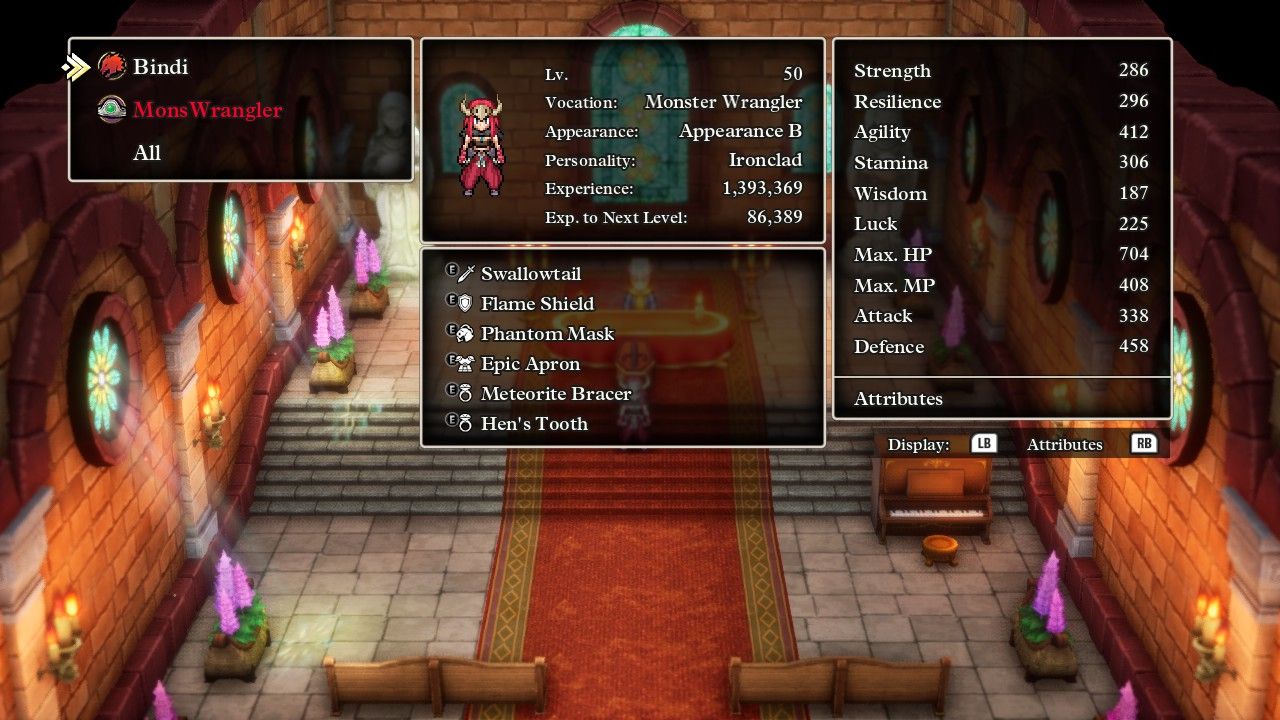
Feel free to compare to the similar Level 50 stats of my solo Hero if anyone's curious. Bindi's Monster Wrangler class couldn't compare directly to the stats of the overpowered Hero class, though notably she did have a higher Resilience score thanks to having taken the Ironclad personality. Bindi had much, much lower Strength, Agility, Wisdom, and Luck which was to be expected when playing the other classes. You can kind of pick out one stat to emphasize but otherwise no one will compare to the Hero's base numbers. Keep in mind that Bindi was wearing the Meteorite Bracer to double her Agility along with the Hen's Tooth accessory for +20 Luck, with her natural score only being 205 in that category. She was sitting right on the "expected value" for Luck for a Level 50 character, which is 204, and that was a very good sign. The gameplay actually stacks the deck heavily against the player by having the expected Luck stat go up very quickly at lower levels, then increase at a much slower pace closer to the level cap. For example, expected Luck goes up 99 points from Level 30 to Level 50... and then only goes up 124 points from Level 50 to Level 99! This essentially means that if you're hitting the Luck target at Level 50, you should easily be able to exceed it later on near the level cap. That was great news due to the way that Luck factors into physical damage, crit chance, and the success/failure of status ailments.
One last detail here: I took this screenshot in the Manoza chapel and in fact Bindi had spent a lot of time in the game's various churches while rerolling seeds for maximum stats. Loading and reloading the same environments over and over again causes you to notice small details that would otherwise get missed: did you know that every one of the game's many chapels has its own unique details? This one in Manoza had purple flowerbeds along the walls and then a flower motif for its stained glass windows. This was not a repeated stock building graphic, each church in each town had its own unique features not present elsewhere. Seriously, the developers did not have to go this hard on the HD-2D remake!
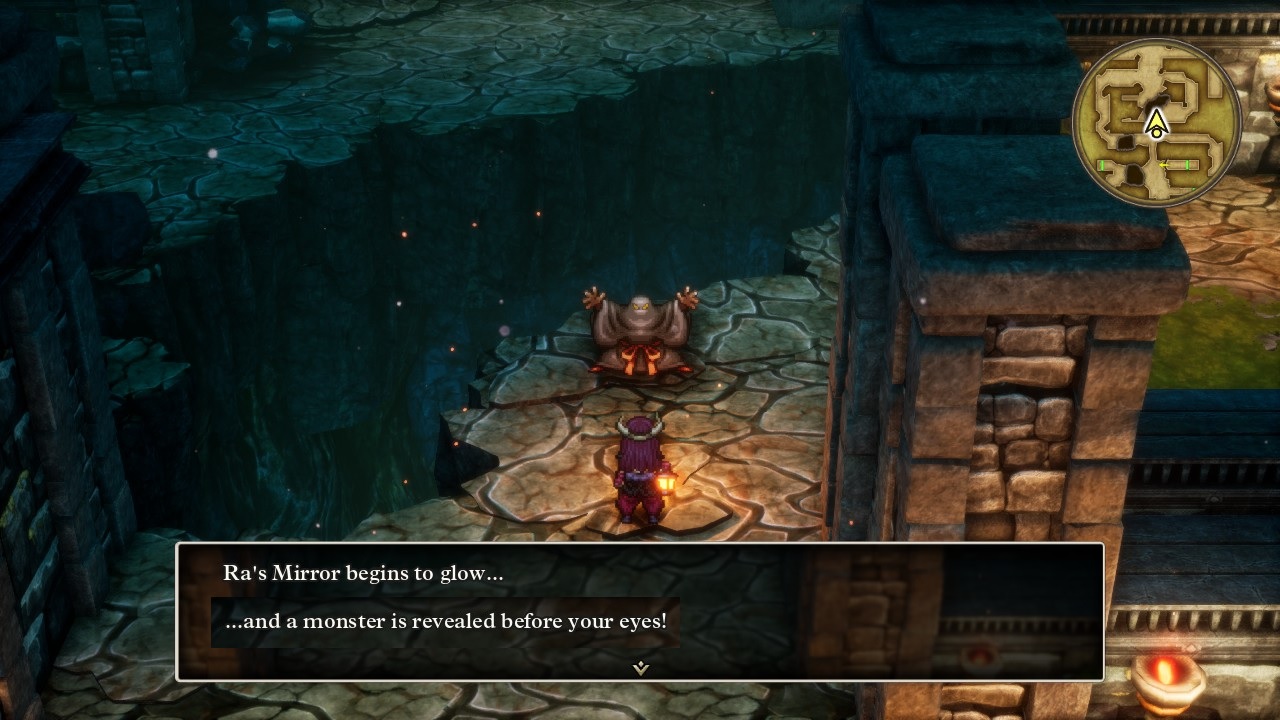
The plot token item in this portion of the gameplay was the Mirror of Ra, which was found at the bottom of the nearby Cave of Manoza. This item is used to demask the monster pretending to be the king of Manoza, however it also can be used to reveal the hidden identity of a whole bunch of friendly monsters scattered around the globe. There were a full dozen of them that Bindi could reach at the moment and she needed all of them to join her monster team immediately for use in the upcoming boss showdown. I spent half an hour tracking them down and captured this screenshot demonstrating what that looked like. Remember this random person in the Path of Promise where Bindi had used her Animal Instinct ability on the first page of the report? That guy was in truth a Prestidigitator and became monster #67 in the collection. Bindi was able to reach 74 monsters in total before reaching the end of the line for the moment; after that, she would need to complete more of the game's plot before further recruiting was possible.
I tested out the increasing damage from Monster Pile-On once all that recruiting with the Mirror of Ra was complete. The ability had been dealing about 52 damage per tick back when Bindi had 50 monsters collected; this increased to about 59 damage at 60 monsters and then right around 70 damage per tick with at the current limit of 74 monsters. Those were only averages though and the ability could deal anywhere from 65 damage per tick to 75 damage when used. Keep in mind as well that Monster Pile-On will hit either three, four, or five times when used for a wide range of potential damage outcomes, anywhere from about 185 damage at the low end to 375 damage at the upper extreme if the skill hit five times and rolled high on damage each time. This was very solid damage though I did continue to wish that somehow it could be boosted by Oomph Powder like many of the game's other best abilities. Bindi could use Wild Side for double Monster Pile-On attacks though and that was effectively the same thing.
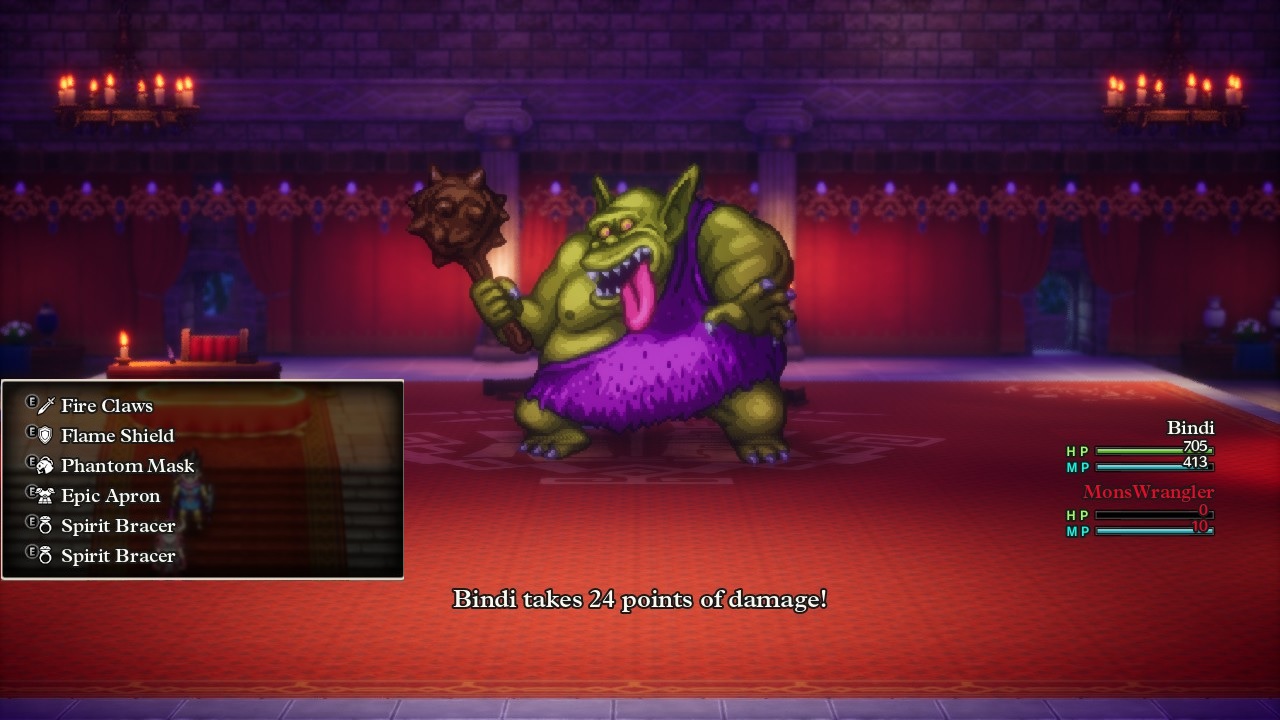
OK, enough stalling, time to take on the Boss Troll. Bizarrely, this is the hardest boss in the whole game and I had been spending the whole game trying to strategize how Bindi would overcome it. The Boss Troll is an all-physical opponent which means that there's no way to mitigate his damage through elemental resistance gear. Bindi equipped the Phantom Mask helmet for 12.5% dodge chance and then added double Spirit Bracer accessories which each added 17 points of Defense rating. That was the best that she could do and it would only help so much. The huge problem here is that the Boss Troll gets two attacks each round and can use them on "desperation strikes", the monster version of a critical hit. Those crits ignore the Defense stat completely when they occur and can hit for as much as 200 damage - which is a huge problem when there's no item in DQ3 that can heal for more than 80-90 HP at a time. The Boss Troll can also do some annoying stuff like cut the party's defense with the Kasap debuff and inflict confusion status with Fuddle. But it's those crits that cause all the problems and without them this would be an easy fight to complete.
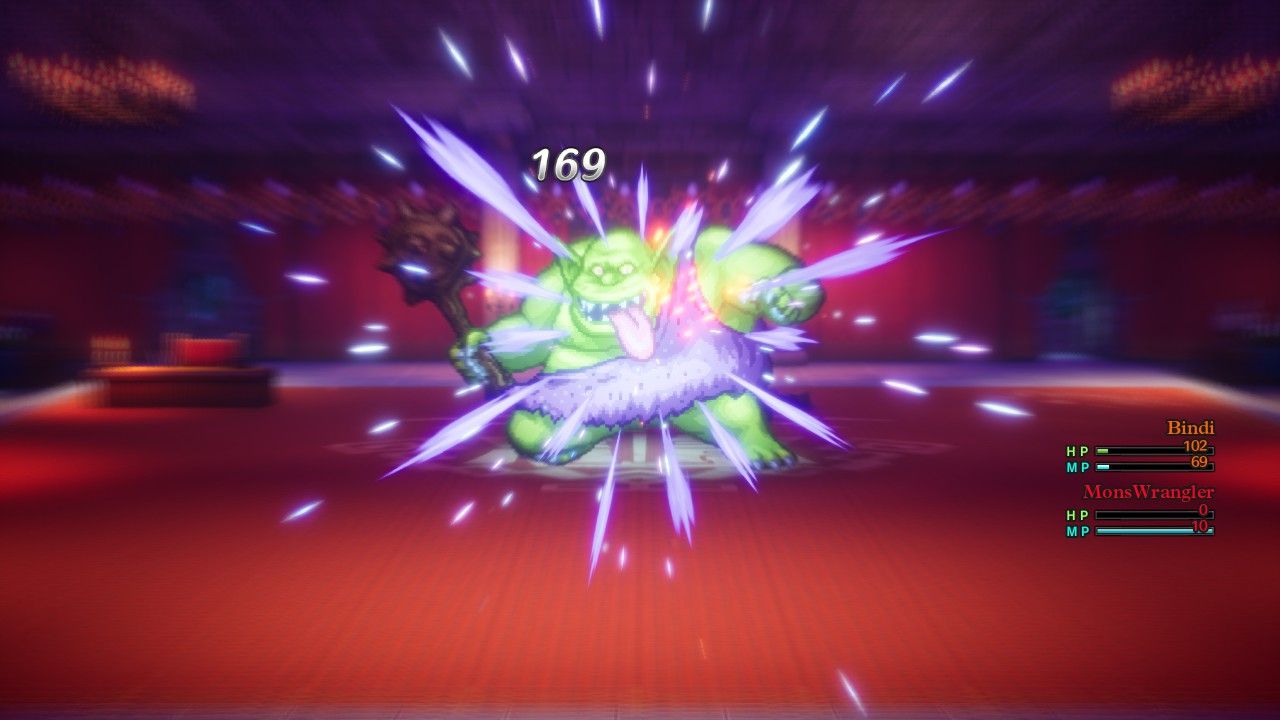
Thus all my planning was focused on minimizing the Boss Troll's chances to critically strike. My testing with previous characters suggested that the Boss Troll wouldn't start using its desperation attacks until after it fell below half health, into the "yellow" graphic on the screen. Unfortunately the stupid thing has 5500 HP in total, more than Baramos (!) for no clear reason whatsoever. My plan was to knock the boss down to just above half health, using Special Medicine for healing along the way, then try to burst through the remaining 2750 HP before the Boss Troll could crit Bindi to death. When combat got underway, it was clear that the Boss Troll wasn't really that dangerous outside of its crit potential. Its base attack was hitting for around 30-35 damage and Bindi could reduce this further via the Attack Attacker ability. Bindi had Wild Sided up and was hitting the troll with double Attack Attacker strikes, dealing 170 * 2 = 340 damage at a time and cutting the Boss Troll's own attacks. At maximum debuff, this reduced the Boss Troll to 10 damage per hit which was almost kind of sad. Wild Side into double Attack Attackers, then pause to heal for a round or two when Wild Side ran out, rinse and repeat. The first half of the boss fight was going as well as I could have imagined.
Then this happened:
Aaaaaahhhhh!  Stupid freaking monster crits! It seemed beyond unfair that the Boss Troll could simply ignore Bindi's 500 Defense rating and smash her for 200 damage whenever he felt like it. Anyway, apparently I was wrong about one crucial detail: the Boss Troll *DID* start using Desperation Strike before hitting the halfway health threshold. I don't know exactly what triggered it but I think it was dropping the boss below 3000 HP, not 2750 HP as I had earlier thought. I'll need to test this further to figure it out, the Boss Troll definitely had not been using its crits at the start of the fight. In any case, Bindi was now in a damage race to kill the Boss Troll before her own health ran out, as I could not out-heal the damage from those enemy crits with Special Medicines. I had been halfway through the setup for the second half of the fight when the boss hit Bindi with its first crit, and now the full plan was revealed: Oomph Powder into Wild Side, followed by double Attack Attacker blows. This required more setup and was vulnerable to either Oomph or Wild Side running out early (each once can last anywhere from 3-5 turns), but when everything was in place Bindi could hit for 170 * 2 * 2 = 680-700 damage per round, while also simultaneously debuffing the attack of the Boss Troll. Could Bindi's remaining health hold out long enough to win?
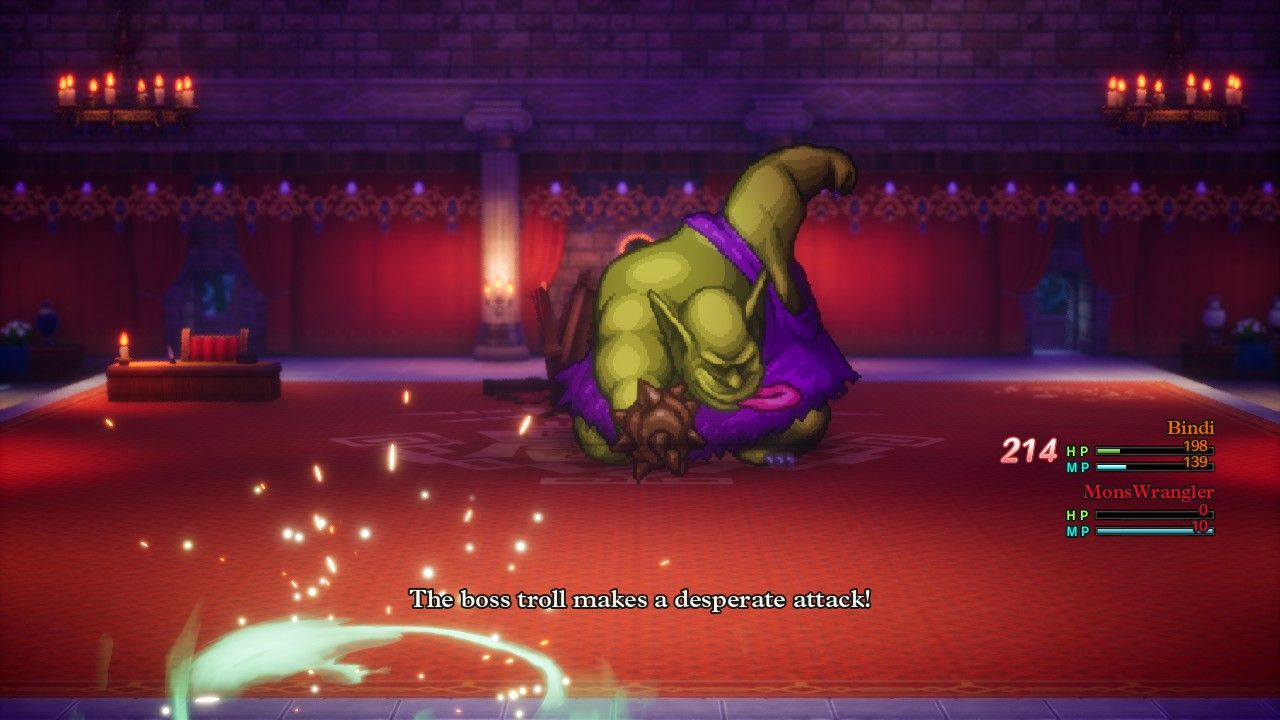
It was clear that this was going to be a tight race. Bindi was able to get off three straight rounds of Oomph-boosted double Attack Attacker blows, including one of which went critical for her. The total damage from those hits was about 2100 and I could see that the finish line was in sight. That's when the Boss Troll hit Bindi with the Deperate Blow pictured above, meaning that she would almost certainly die from the next monster crit. I started to line up another Oomph/Wild Side combo, only to have the Boss Troll use its final ability: Ripple of Disruption, which cancels all buffs on the party. The Oomph buff vanished in an instant and I didn't dare waste more rounds trying to reapply it. Without Oomph in place to double her attack, Bindi now fell back on Monster Pile-On since it did more damage than an unbuffed Attack Attacker. She rolled three straight rounds of the three-tick Monster Pile-On that each did about 190 damage; I was tracking the Boss Troll's health and my math said that the big green thing had 11 HP remaining after that last ability. Come on! Then with that paltry damage amount remaining for victory, the Boss Troll successfully inflicted Fuddle for confusion status after missing every previous attempt throughout the fight. Seriously, what the heck?!? Bindi had no choice but to attack and hope that she didn't fail the confusion dice roll for the round, and...
Success!!! Bindi fought her way through the mental haze to land the final killing blow on the Boss Troll with barely over 100 health remaining. She made it through the last four rounds without seeing another Desperation Strike and nearly ran out of MP as well from spamming her abilities. This was my first attempt at the battle and it did result in success, ending up as one of the closest victories I can remember in a turn-based RPG. What an incredible relief it was to have that smirking green jerk out of the way! I learned a good bit more about how this boss works and I think I have a solid plan to get most of the various classes past here in a solo game. Don't ask me why the developers made this boss so much harder than everything else, I doubt they were even aware of what they were doing when they set things up.

The remainder of the first world was all downhill from this point. I actually rushed over to the chapel as fast as possible after defeating the Boss Troll, locking in the victory by saving the game, just in case some kind of random crash would cause Bindi to lose her progress and force me to fight that jerk all over again. Bindi was now the proud owner of the Mod Rod which had exactly one legitimate use: allowing her to travel to the store in the Faerie Village and purchase items while disguised in non-human form. The elf behind the counter was still willing to sell items to Bindi when she was disguised as a Slime, heh - she must really hate humans. This was the place to load up on Special Medicine, the best healing item in the game and normally not available in stores. They cost a paltry 70 gold apiece so Bindi loaded up on 500 of them, with the game's interface only allowing 99 to be purchased at a time. I really should have bought even more of them since money wasn't an issue and Bindi was about to lose access to the Mod Rod immediately afterwards.
She was forced to trade it to the old man in Grimland for the Boatman's Bone, causing the Ghost Ship to spawn in the Mediterranean out of nothingness. The Ghost Ship is a very short dungeon and had little to offer beyond the next plot token item, the Lover's Locket that allowed passage through Olivia's Promontory to the Shrine of Shackles. That shrine is maybe the most depressing place in the whole game, a tiny island jail where a bunch of corpses are rotting away inside, forgotten to the rest of the world. One of them belonged to Simao, a former companion of Ortega who completely and utterly failed in his quest. Simao was unable to protect his kingdom, unable to protect his family, and died a horrible death in this prison locked away from everyone he knew and loved. Don't be fooled by the silly-looking Toriyama monster designs, this game gets rather dark at times. Simao's spirit handed over his Mountaincleaver weapon, which Bindi then tossed into the volcano of the Necrogond to trigger the next boss fight:

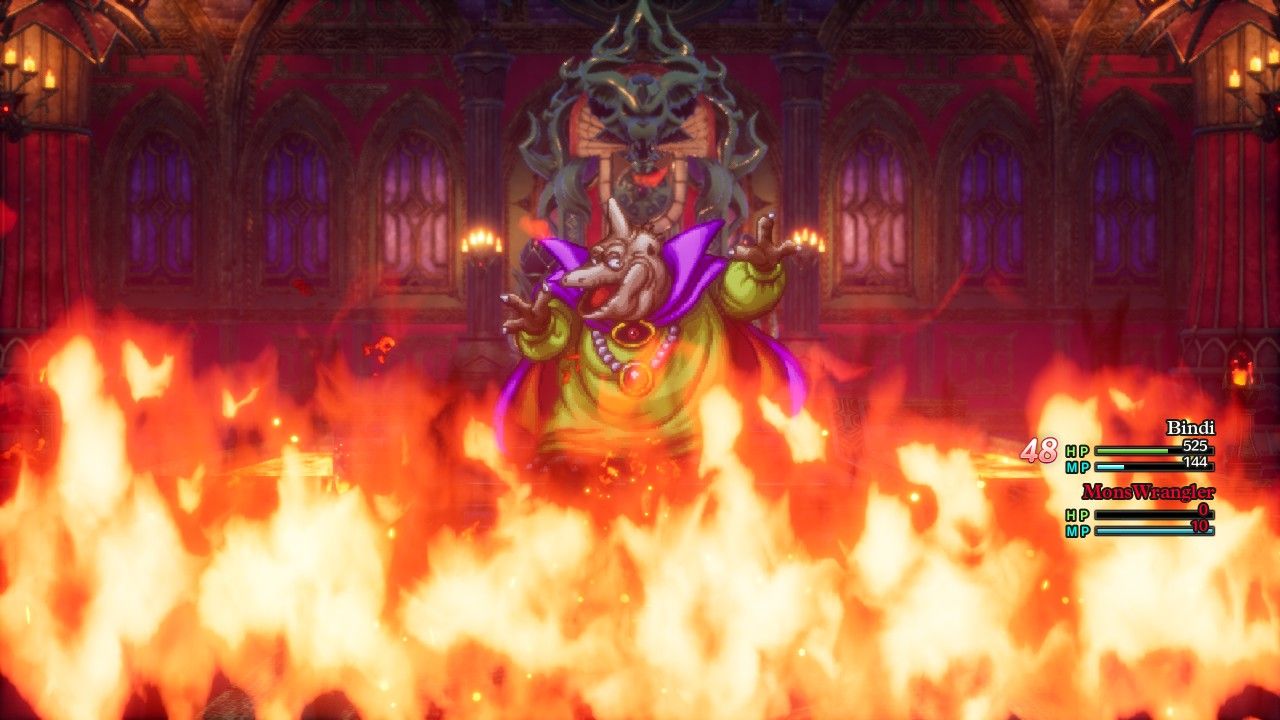
The Garboyle did not exist in the original version of DQ3 and has since been added for the HD-2D remake. This creature lives in the volcano and loves itself some fire element damage, alternating between fire spells like Frizzle and Kasizz which are paired together with fire breath attacks like Wildfire and Inferno. I made sure to bring the standard anti-fire equipment setup for Bindi, completing negating damage from fire spells and reducing damage by 75% from fire breath attacks. There was a new tactic that I wanted to experiment with here, namely using the Staff of Strife to cast the Bounce spell in combat. Bounce is a defensive buff that lasts for the usual 3-5 turns, reflecting back any spells (not breath attacks) at the caster. I didn't do any experimenting with this item while playing my solo Hero character, partly because she didn't need its help, and partly because I wanted more practice in seeing how each boss acted under normal conditions. Bounce is less useful for spellcasting characters because it will reflect back their own spells as well, with the Hero being unable to heal herself with Fullheal under its effects. But for someone like Bindi, who didn't have any magical abilities, it seemed like it would be highly useful for some of these enemies.
To my surprise, Bounce worked better than I had ever imagined against the Garboyle. The creature rarely attacked and didn't deal much damage when it did, limiting itself to 20-30 damage when it used its melee blows. Instead, the Garboyle absolutely spammed the living daylights out of Frizzle, Kasizz, and Boom since it acted two and even three times per round of combat. Frizzle and Kasizz would have had their damage negated by Bindi's defensive equipment, however this was even better since the damage was instead sent back at the Garboyle. The Boom spell deals explosive damage and Bindi only had 25% damage reduction on that element from her Epic Apron, which would have dealt 28-45 damage at a time if it had hit her. Instead that too was reflected back at the demon as pictured above, hah! Only its breath attacks managed to get through the Bounce barrier and those were modest enough that Bindi wasn't too concerned. She used Wild Side into double Monster Pile-Ons to deal damage and consumed double Special Medicines one time during the fight to restore 180 HP. The Garboyle was basically helpless; even though it managed to paralyze Bindi twice with its Burning Breath, it still failed to accomplishing anything as Bindi's paralyzed self was still bouncing back its spells. At the tail end of the battle, the Garboyle used its Channel Anger ability to double its spell damage... which then caused the creature to damage itself even further with reflected spells, heh. I'm willing to say that this is effectively a "solved" boss battle and I don't anticipate much trouble dealing with this guy in the future.
The long trek through the Maw of the Necrogond dungeon was next for Bindi. This is the longest dungeon in the game and it took quite a while to make it through the whole thing, fighting monsters all the way. Interestingly, the hardest opponents were the orange Trolls pictured above since they also had the Desperation Strike ability and could crit Bidi for 150 damage at a time. The Trolls only appear on the first two floors of the dungeon and then drop out of the monster mix later on, ironically making the place easier to complete for Bindi the deeper she descended. There were also Liquid Metal Slimes to be found on one of the floors, though Bindi had no way to kill them outside of landing a lucky crit at 2% odds (which did not take place). My dream of getting another Elevating Shoes drops at 1 in 64 odds from an already super rare monster did not repeat for this character.
The Maw of the Necrogond had lots of useful new equipment for my solo Hero. The solo Monster Wrangler though? Not so much. There was the Thunderbolt Blade which Bindi wasn't able to equip, then a monster dropped a Blizzard Blade which she, uh, also couldn't equip either. But don't forget about the Spiked Armor, which she couldn't use, or the Thinking Cap which... yeah, you get the idea. Bindi dutifully opened all of the treasure chests and made sure to recruit the two friendly monsters inside the dungeon, though the vast expanses of this underground area proved to be pretty underwhelming for her. At least, right up until she was walking out of the final passageway and the literal last random encounter of the dungeon dropped this:
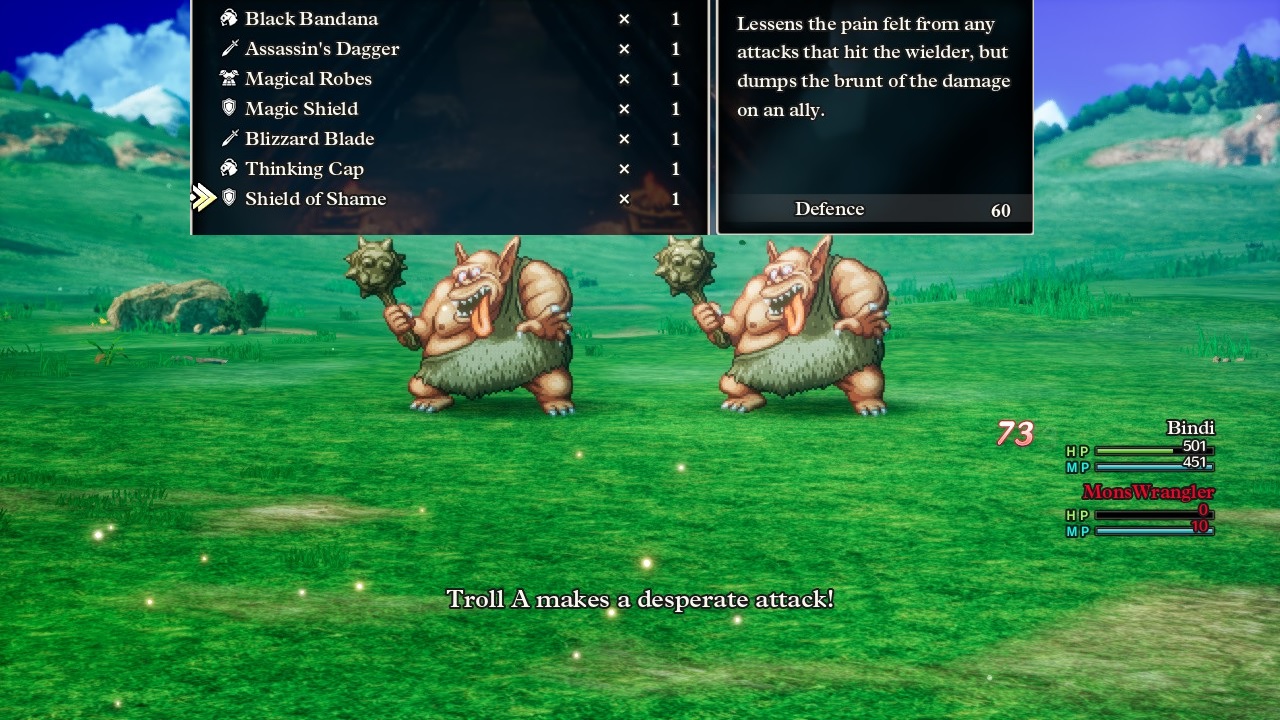
The Infanticore monsters have 1 in 64 odds to drop a rare item named the Shield of Shame. This item can only be obtained via a monster drop from these guys or their related Franticore brethren, as it can't be found in any treasure chests or sparkle/secret locations. I never found this item with my solo Hero and I had been hoping it would drop since I wanted to test out its unique properties. The Shield of Shame is a cursed item and it's pretty terrible in a normal playthrough: half of all physical damage taken gets shunted off onto an ally. So while that's not ideal during a normal game where your tank character wearing this will just send damage over to a flimsy spellcaster, I had to wonder - would it continue to work for a solo game? Would the item even function at all if Bindi was the only living character in the party? I had to test this out and triggered a random encounter outside the Necrogond dungeon where more of those same Trolls appeared. I stood around letting them hit Bindi and waiting for their monster critical hit. Soon enough one of the trolls launched a desperation attack that dealt - 73 damage! That was half of what the same monsters had been dealing back in the cave. The item worked!!!
This was a real revelation for playing out solo characters; there's literally an item that can cut all physical damage in half! Absolutely insane value for a solo character and it's a real shame that this item cannot be obtained until AFTER fighting the stupid Boss Troll. Five of the game's ten classes can equip this item which does mean that some of the weaker classes will have to make due without the help of this thing. The Shield of Shame also does not carry any elemental defense against spells or breath weapons, which could be a problem against some bosses, and obtaining this thing in the first place at very low drop odds won't be fun if I feel the need to farm one down the road. Thus this thing didn't make Bindi invincible by any means but it was still an amazing addition to her gear setup.
Oh, and as a cursed item, Bindi also could not remove the Shield of Shame.  She would have to go to the church and pay one of the clerics to decurse her, which would unfortunately destroy the item in the process. I definitely didn't want that so I guess that shield was remaining right where it was for the moment.

The lengthy push through the Maw of the Necrogond delivered one shiny Silver Orb into Bindi's possession. I belatedly realized that I hadn't been visiting the Immigrant Town and needed to travel back and forth several times to trigger the cut scene that results in the final Yellow Orb. This is pretty hilarious to watch as your character teleports to the town to see it as a tiny hamlet, then teleports away and back again to see new buildings rising up out of nowhere after mere seconds of time passing. I had given the Merchant character the name Ham so that the new town would be christened "Hamburg"; hopefully I can keep coming up with equally silly names for future playthroughs. It took Bindi four or five trips to Hamburg to work through the predetermined course of events: the Merchant always becomes drunk with power and turns into a tyrant, which causes him to be thrown into the very jail that he built earlier. And that was the end of this little story in the original NES version of the game, with your Merchant character having learned a harsh lesson. The HD-2D remake adds one more iteration to the town afterwards, however, in which the townspeople let the Merchant out of jail and they return back to Patty's Party Planning Place. In other words, you can actually get the Merchant back again as a playable character, something that was not possible originally. This is much more of a happy ending to the Immigrant Town's story which was honestly pretty cynical in the NES game.
The Yellow Orb was the last remaining piece needed to unlock air travel on Ramia. The magical flying bird allowed Bindi to visit all of those high elevation spots that had previously been out of reach and I spent the next hour thoroughly looting them for their treasures. These included the Elevated Shoes in a secret spot west of Aliahan, another one of the best accessories in the game with its massive boost of 50 Luck along with additional XP gain for each step walked. Bindi would equip the Meteorite Bracer and Elevating Shoes combo for essentially all non-boss situations for the remainder of the game. There were about two dozen more sparkles to claim which resulted in fully 28 more seeds to boost Bindi's stats. I also rounded up the last remaining friendly monsters in the overworld which brought Bindi up to 85 of them in total. There was one more monster to recruit in Baramos' Lair and that would be it before Bindi had to face the big boss himself.
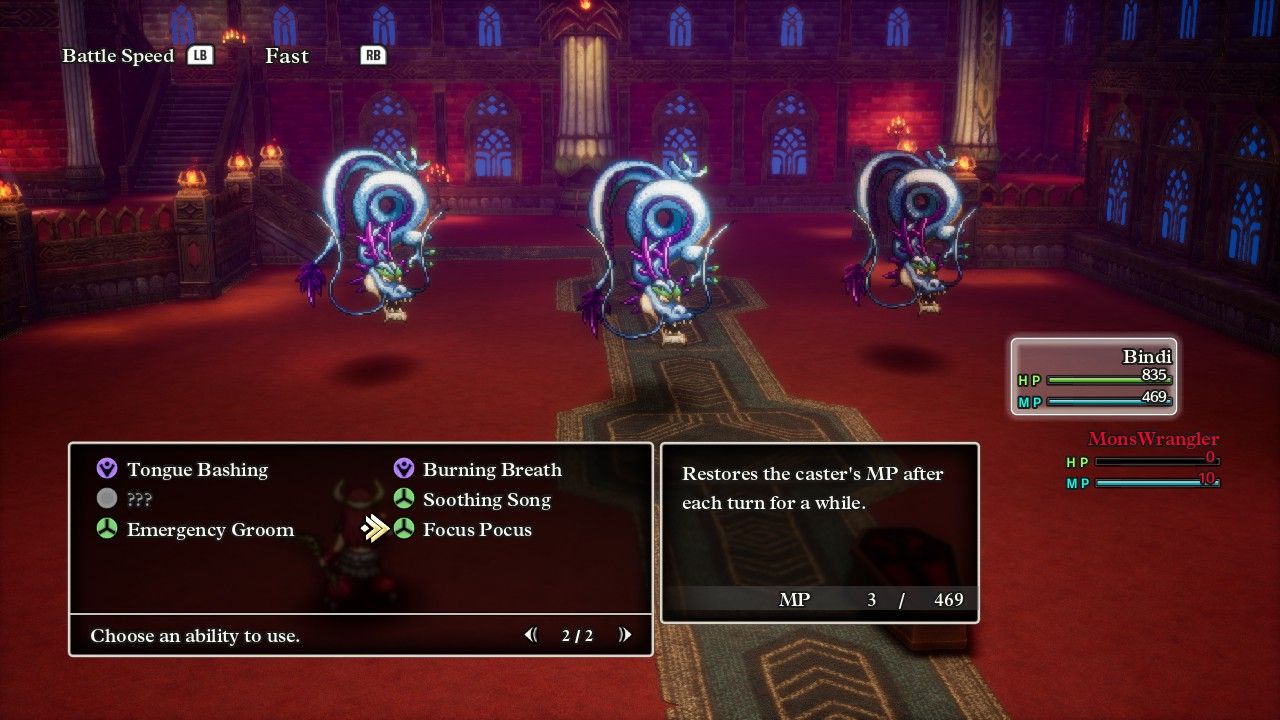
The Monster Wrangler class gains an additional ability upon reaching the 80 friendly monster mark. This was the pictured Focus Pocus which can only be used in combat and gradually restores MP over the next few turns. The exact formula is never displayed in-game but proves to be Level x 0.2 MP per turn for the next 3-5 turns. Bindi was roughly Level 60 at this point which worked out to 12 MP restored per turn upon use. Now the developers apparently thought that this was an outstanding ability given that it unlocks so late in the game and requires so much effort. However, Focus Pocus was basically useless in practice as Bindi had nearly 500 MP and never came close to running out. Even if she did, the HD-2D remake of this game has plenty of items that restore magic points. If Bindi ever found herself in an extended boss fight and ran herself out of MP, she would have used an Elfin Elixir instead of slowly regenerating 40-60 MP over the next few turns.
Baramos' Lair was a decent sized dungeon, albeit much smaller than the prior Maw of the Necrogond. As Bindi fought her way through the monsters inside, the biggest thing that I noticed was the impact of that Shield of Shame. A number of the same monsters were repeated here from the previous dungeon and she was clearly taking half physical damage from all of their attacks. Among the new faces, the Living Statues were clearly the most dangerous opponents since they had that same monster critical hit ability. Bindi didn't have as much Strength as my prior solo Hero so it took her longer to boomerang them to death, more like three or four rounds as opposed to the Hero flattening them in two rounds. This opened her up to more monster crits and it was a really good thing that they were landing for 75 damage at a time instead of the 150 damage that would have been the case without that cursed shield. Speaking of which, an encounter with some more Infanticore monsters dropped a *SECOND* Shield of Shame at the same 1 in 64 odds, sheesh! Bindi didn't really need a second one, though now she could take off the current shield and then re-equip the alternate version later if desired.

Baramos is the big baddie at the end of the first world, an opponent who can easily be reached for repeat boss attempts if needed thanks to the HD-2D remake putting a teleportal right next to his throne room. My plan for Baramos was to load up on the same anti-fire element equipment to defend against his Inferno breath attacks and then rely on Bounce cast out of the Staff of Strife to deflect his spells. I made an equipment error here, using the Epic Apron with its spell defense instead of the Dragon Mail with its 33% reduction of all fire element damage; the Epic Apron didn't actually do anything because Bounce stopped Baramos' spells while Inferno was classified as an ability and was therefore unaffected. Whoops! I was pleased to see that Baramos' physical attacks were pretty weak overall, hitting for roughly 15 damage at a time thanks to the Shield of Shame's physical defense properties. This should be an easy battle, right?
Well, this boss fight was nowhere near as difficult as the Boss Troll, however it wasn't a complete cakewalk either. Unfortunately Baramos was simply a lot smarter than the Garboyle had been. While the Garboyle stupidly spent the whole battle casting spells into Bindi's Bounce protection and therefore killing itself with reflected damage, Baramos refused to cast spells as soon as Bounce had been established. This must have been programmed into his AI routine because my solo Hero was hit with non-stop Kaboom and Kafrizz spells while Bindi didn't see any of them. The only spell that Baramos tried to use was Dazzle, and while this amusingly did reflect back at him and put him into blinded status a few times, for the most part Baramos just didn't cast offensive spells. He mostly attacked physically and used Inferno:
The fire-based breath attack had a base damage of 80-100, which was reduced to 40-50 damage at a time from Bindi's double Asbestos Earring accessories. She really would have benefited here from having that Dragon Mail equipped which would have cut the damage down to 12-18 at a time, argh! My offensive strategy was based around using Wild Side into double Monster Pile-On abilities, as Attack Attacker wasn't viable without having the Oomph buff in place and there wasn't enough time to have that active as well. Since buffs only last for 3-5 turns in this game, a solo character can't realistically run more than two of them at a time, with Bindi already having to juggle Bounce and Wild Side together. Monster Pile-On was averaging right around 80 damage per tick at this point for an expected value of 80 x 4 x 2 = 640 damage each round, though this could vary widely as Monster Pile-On might hit with as few as six ticks or as many as ten ticks on each round. The damage output was certainly good enough to make solid progress against Baramos even if it fell short of what the solo Hero had been able to output.
Bindi and Baramos fell into a rhythm as this proved to be an extended boss fight. Bindi would put up her Bounce shield, followed by Wild Side, then hit with Monster Pile-On for a few turns, followed by using double Special Medicine for about 170 HP restored on the final turn that Wild Side was about to run out. Rise and repeat the process over again afterwards with Baramos' own damage slightly exceeding the healing capacity that Bindi was getting from items. This fight would have been over pretty quickly except for the fact that Baramos regenerates 64-84 HP each round of combat, something that definitely added up over time and extended the enemy's total health by quite a bit. The boss battle dragged out long enough that Bindi was starting to run low on MP and I wish that I'd been wise enough to put an Elfin Elixir into her personal item bag. The end result was never really in doubt though and Bindi emerged victorious with plenty of health to spare:
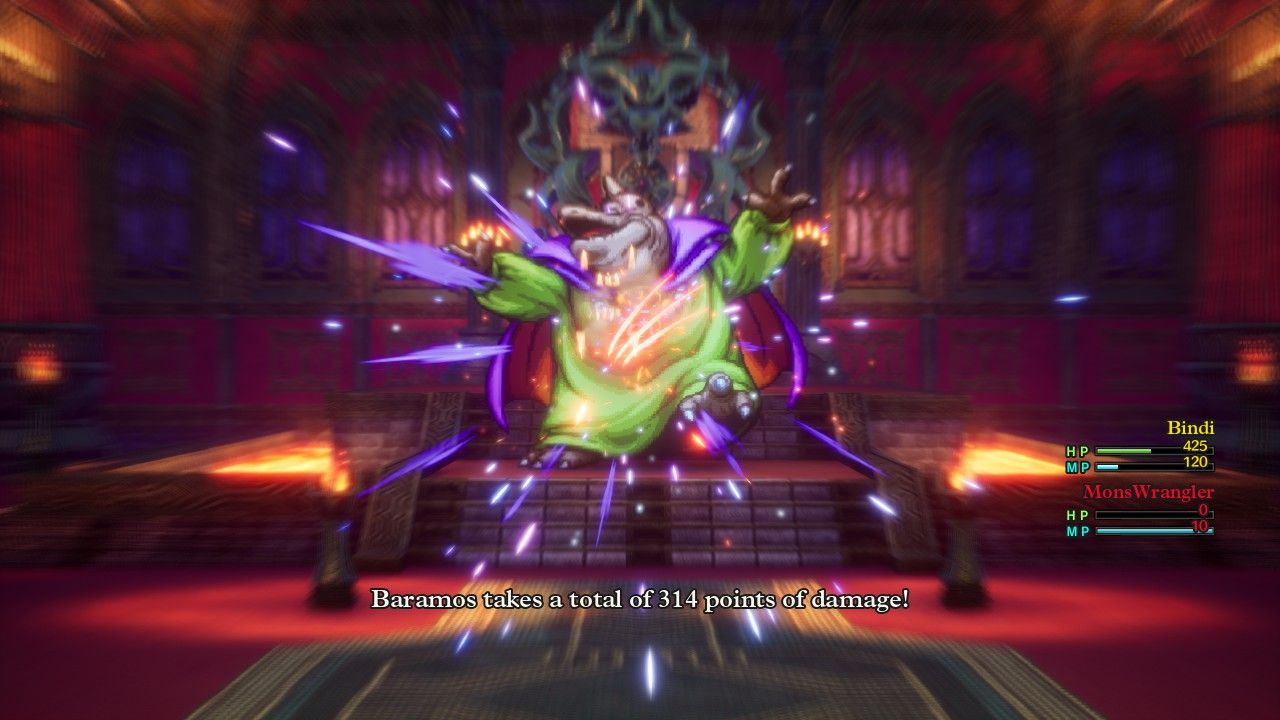
She could have healed again but I opted to push on with more damage since I could see that Baramos was on death's door and wanted to finish the fight. All in all, this culminating boss encounter went mostly as planned and would have been much easier with the correct Dragon Mail equipment since most of the damage that Bindi took came from Inferno. Next up would be a trip into the underworld of Alefgard, with several hours of laid back treasure hunting to start followed by the big boss rush at the end. Bindi would look to complete her journey on the following page.


