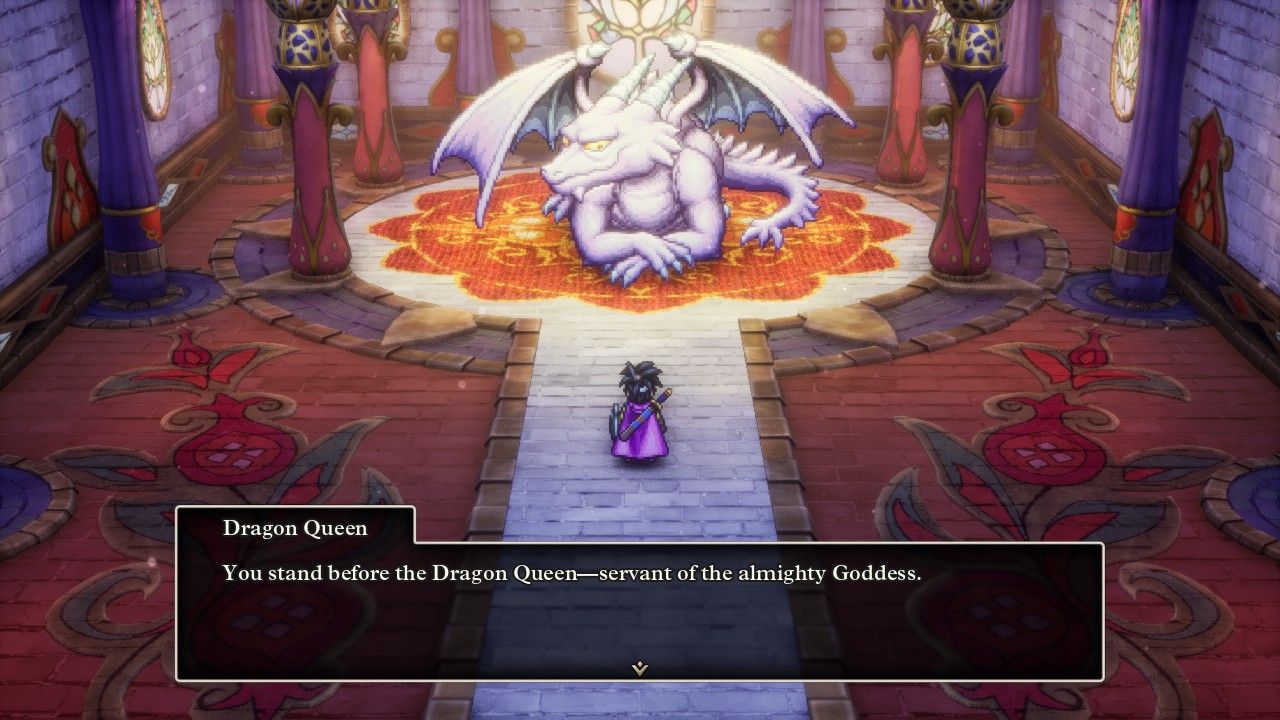
At the end of the last part, Erdrick discovered that there was another even bigger baddie to defeat named Zoma and their her quest wasn't finished yet. The king of Aliahan reacts to this news by demonstrating that he's a true politician, insisting that all knowledge of Zoma must be kept secret to keep the townspeople from panicking - what a stellar example of leadership. Erdrick had a better plan and set out for the secluded Castle of the Dragon Queen, previously blocked off from access by a range of mountains and a shroud of cloud cover. (This is a change from the NES version, where it was possible to visit this castle before defeating Baramos but the doors to go inside were locked.) The name of this place turns out to be accurate as it does contain a Dragon Queen, who happens to be dying and bequeaths an item known as the Sphere of Light to Erdrick before passing away. I mostly wanted to include this screenshot because the Castle of the Dragon Queen is another gorgeous location in the HD-2D remake; just look at the intricate floral detailing on the walls and the floor in this room. The developers did not have to go this hard with the visual details but I'm glad that they did.
The Sphere of Light clears out an evil mist that veils the Pit of Giaga, a giant hole in the earth located next to Baramos' Lair. The Dragon Queen informs Erdrick that this is the entrance to the underworld where Zoma can be found, and Erdrick dutifully yolos herself down into the pit where she emerges into an entirely new realm. This is the world of Alefgard, a place covered in eternal darkness (i.e. always night within the game's day/night engine) with a completely new world map to discover. This was another innovation made by DQ3 when it released in 1990, having not one but two world maps to explore, though Alefgard is significantly smaller than the original overworld. It looks like this:
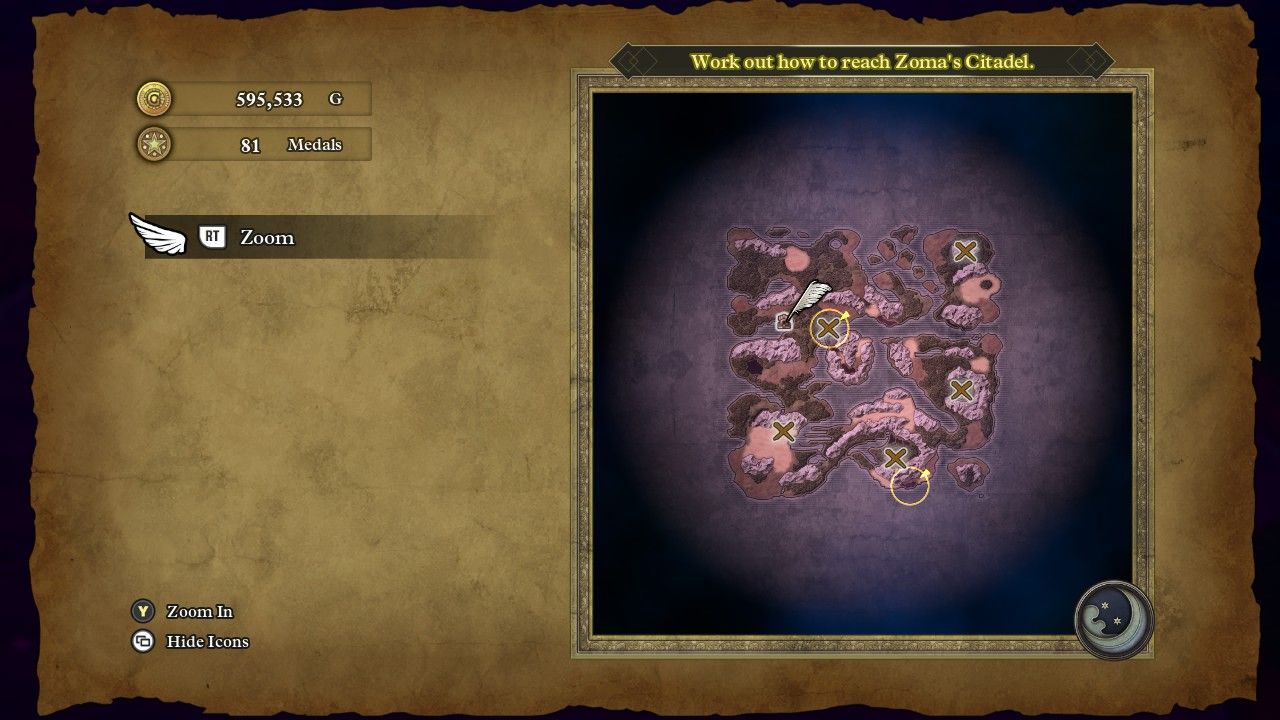
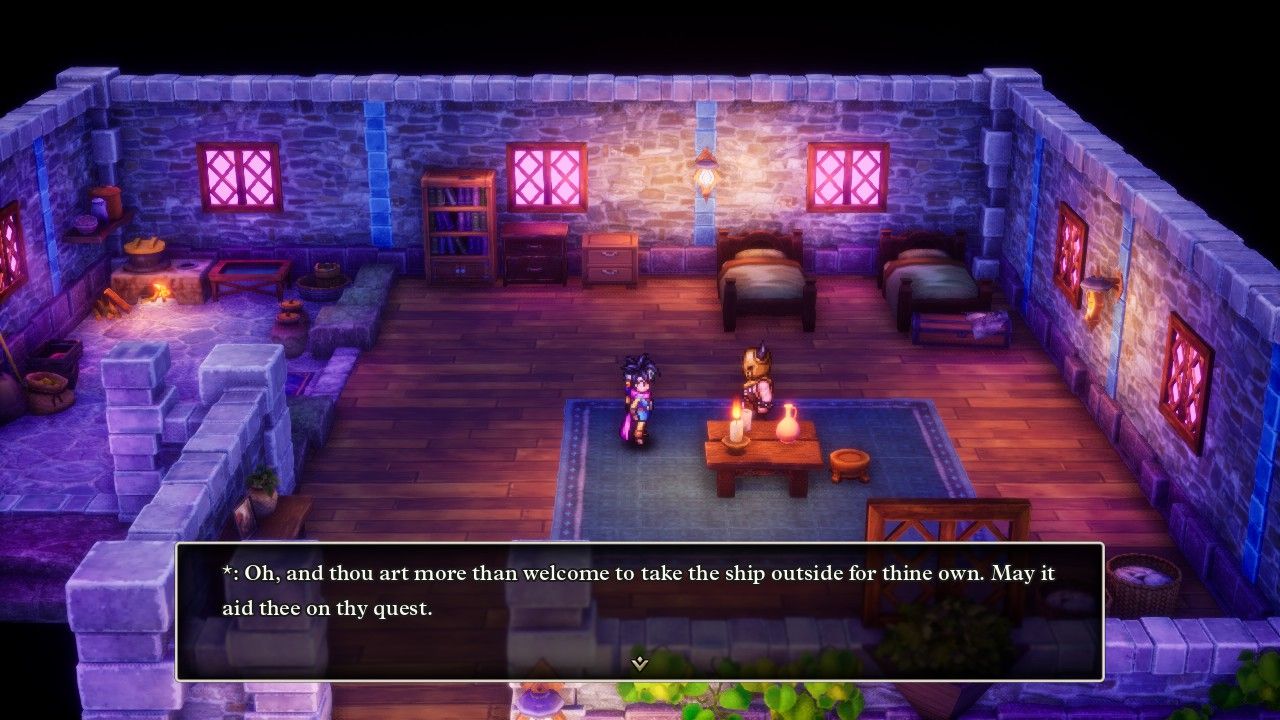
Longtime fans of the Dragon Quest series would have recognized this world immediately though I'll avoid spoiling the surprise for the moment. Erdrick fell out of the sky onto a small island where the person living nearby inexplicably tells her that she can have his ship - what?! This has never made any sense from a logical perspective and it continues to amuse me how the gameplay simply hands the party a ship upon entering this new world. There's no Ramia in the underworld though so no flying, unfortunately. The nearby castle town of Tantegel updates the plot for this portion of the game: Erdrick had to find some way to reach Zoma's Citadel on the small central island, a quest that involves finding three artifacts to create a magical rainbow bridge over the water. It's a bit bizarre how the ending sequence in the overworld had a tightly scripted fetch quest sequence leading up to the confrontation with Baramos, then the party enters Alefgard and the gameplay reverts back to a completely open world setup again, able to visit the remaining towns and clear the remaining dungeons in any order. I don't really mind that but it's a very different feeling from earlier.
There are four other towns located around the corners of Alefgard: Kol, Damdara, Cantlin, and Rimuldar. As mentioned before, these can be visited in any order though Cantlin and Rimuldar are the furthest away from the starting area at Tantegel. I decided to do a bit of a sequence break here with Erdrick, recruiting a handful of key friendly monsters to level up her arena team, then making her way to Cantlin where the final monster arena was located. Cantlin was the southeastern "X" on that map above and Erdrick could sail most of the way there on her new ship while fighting off the much more dangerous sea creatures inhabiting this world. Once she reached Cantlin, it was up to the monster squad to take care of business:
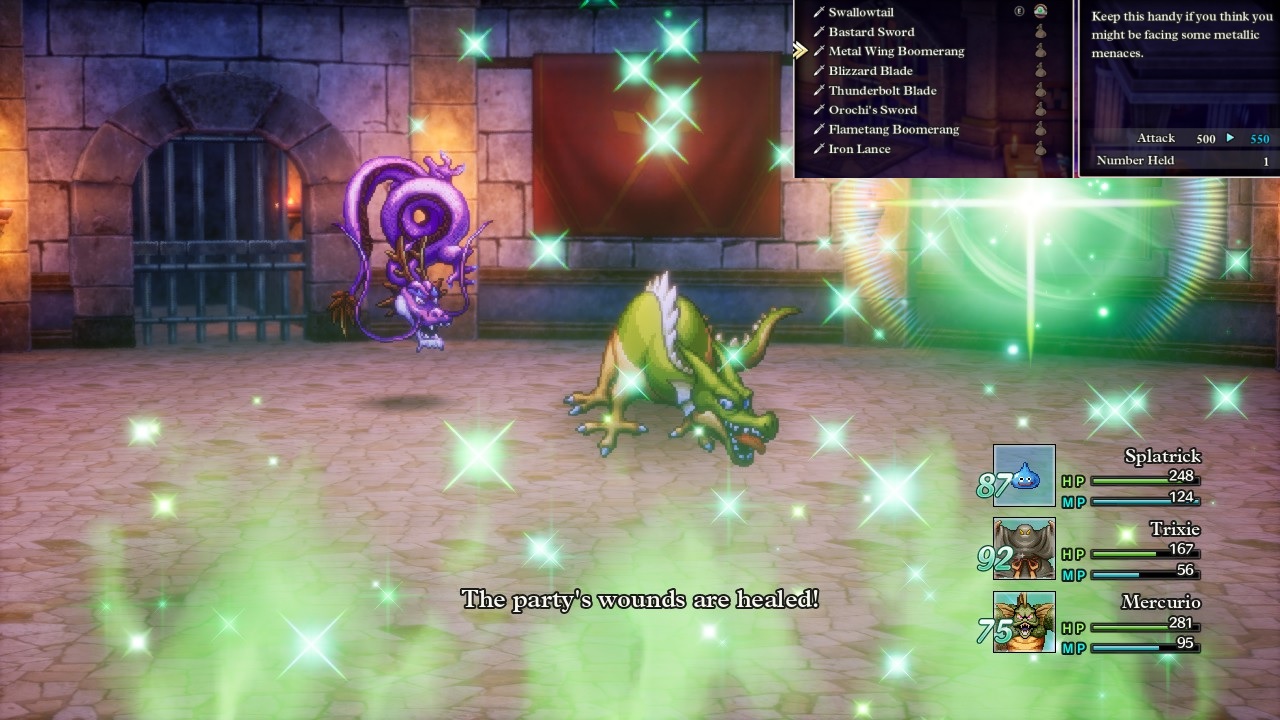
The monster team that Erdrick put together consisted of Splatrick the Slime, Trixie the Prestidigitator, and Mercurio the Mermaniac. All of these monsters were rated around Level 50 and it wasn't really possible to get any friendly monsters with higher stats until venturing inside Zoma's Citadel. Splatrick was essentially a melee fighter with good all around stats, Trixie was an offensive spellcaster, and Mercurio was the designated healer. I discovered through trial and error that it's absolutely mandatory to bring a healer into the more difficult monster arena battles, since the team has to win four fights in succession and the enemy monsters start doing way too much damage to tank through each fight. Mercurio had the Multiheal spell which was absolutely indispensible given how many area-of-effect abilities the enemy monsters were using by this point. This team cleared the tier 8 arena without too much trouble, only to struggle against the tier 9 arena which is the toughest one before accessing postgame content. There's a lot of randomness in these monster battles since the player can't directly control their actions, only give general instructions from the sidelines. I failed four times in a row at the tier 9 arena before finally getting lucky on the fifth try; Trixie died in the third fight but Splatrick and Mercurio were able to carry onwards, concluding when Mercurio won a dramatic 1 vs 1 duel against the final monster in the fourth fight. Success!
The tier 8 arena rewards included three more Seeds of Strength and Seeds of Defense plus a new version of the Mod Rod if I wanted to goof around. I was more interested in the tier 9 arena goodies though, as they included the best boomerang in the game, the Metal Wing Boomerang. This had an additional 50 points of Attack over the Swallowtail that Erdrick had still been using for every random encounter. She would continue wielding this boomerange for every random encounter for the remainder of the game, swapping weapons only for boss fights. There was also another arena reward here, a piece of armor named the Magic Bikini. This armor is only equippable by female characters and it changes their appearance like so:
Erdrick's usual tunic and cape were replaced by this two piece outfit that essentially had her fighting in her underwear. What's really annoying was the fact that this was statistically the best armor option for Erdrick to wear at the moment, with the same property of reducing spell damage by 33% held by the Magic Armor that Erdrick had previously been wearing, plus another 29 additional points of Defense rating. This is also a major reason why it's better to run the solo characters as women instead of men, this item along with an even better female-only type of equipment in the final dungeon. And while I get that this is supposed to be a fun Easter Egg, with the bikini outfit being pretty tasteful in its design, it's really not OK that the female characters get singled out for this kind of treatment. If the designers wanted to have alternate outfits where all the characters are in beach wear, that sounds cool, no big deal. But when it's *ONLY* the women who are being put into revealing outfits? That starts moving into a much uglier place where it's clear that they're being treated as fan service and not as characters in their own right.
Dragon Quest 3: great game, not great on gender issues! 
Anyway, at this point I settled into the long process of exploring the underworld map, finding and looting the many treasures to be found across Alefgard. There were about 85 new sparkle locations to discover and another two dozen secret spots, many of them containing more of the stat-boosting seeds. I started by having Erdrick clear out the land to the north and east of Tantegel, fighting monsters all the way which continued to boost her level further. After she cleared out everything to the north, including plundering the island chain that ran between Tantegel and Kol, Erdrick swung over to the west and began working her way south towards the deserts of Damdara. (That town had a FAR cooler name in the NES Dragon Warrior 3 translation: Hauksness, like a hawk's nest.) There were two optional dungeons in this area, the Talontear Tunnel and the Craggy Cave, both of them completely optional to explore. I tackled the Craggy Cave first which ended up not having much of interest inside. There were a handful of cursed items inside the treasure chests and a couple more friendly monsters to recruit, otherwise this area wasn't that interesting.
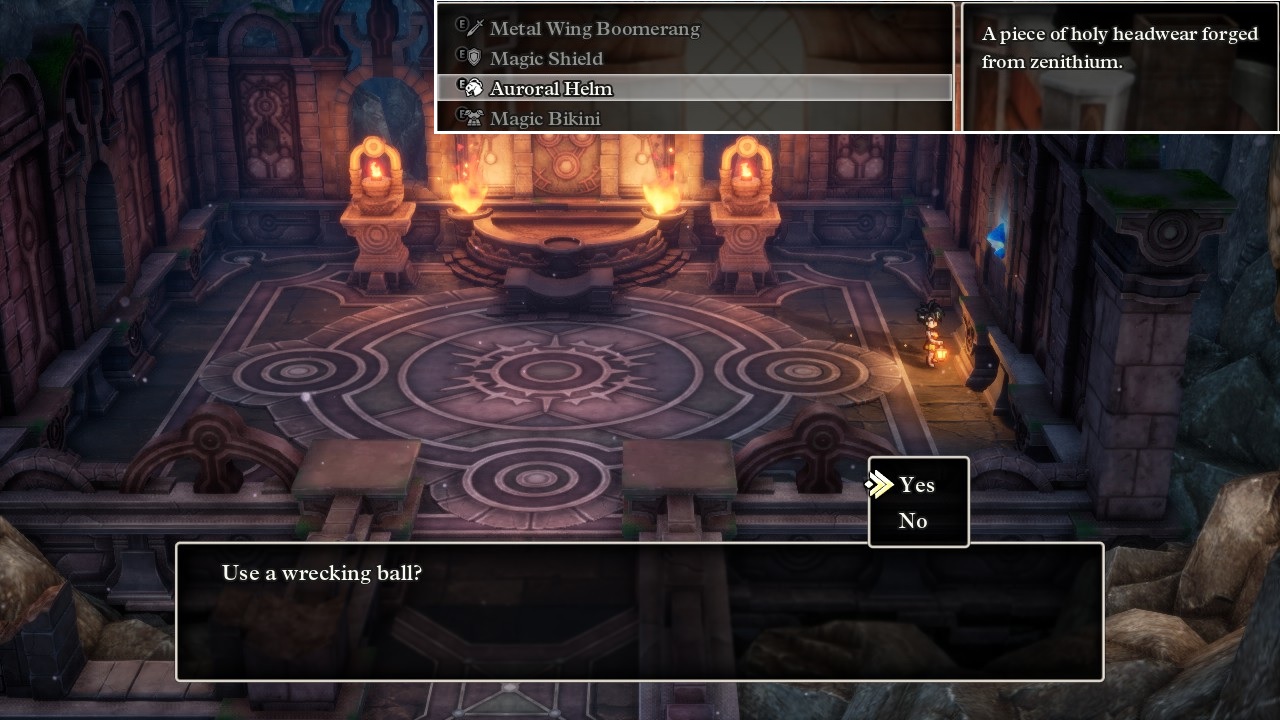
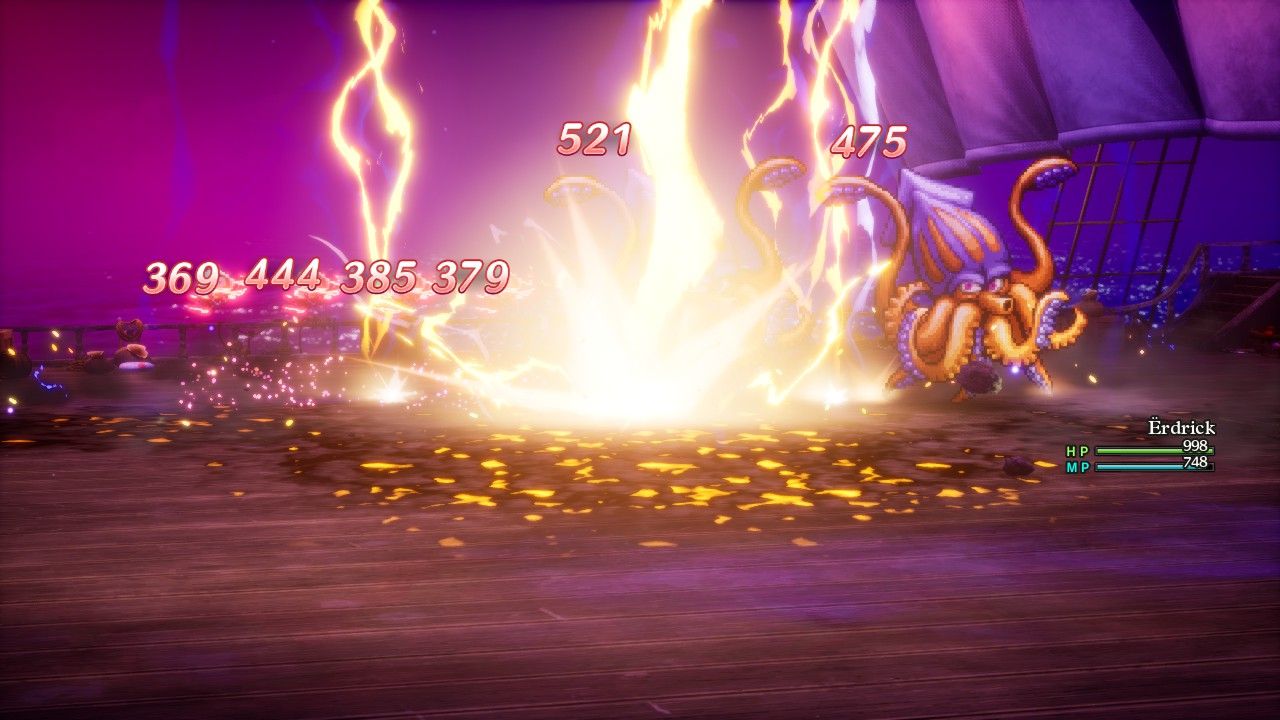
After making her way down to Damdara, I had Erdrick swing around and thoroughly explore the island where Kol was located. There's a cave to the south that does not contain a dungeon, however it does set in motion a sequence that unlocks one of the best helmets in the game. Talking to the NPCs inside the Quagmire Cave allowed Erdrick to return to Reeve, the second village of the game back near Aliahan, where she picked up another Wreckling Ball bomb. Then she used that thing in Gaia's Naval (the solo dungeon near Lanson) to blast free a shard of zenithium, which was then forged by a dwarf together with Ortega's old helmet into the Auroral Helm. This is a Hero-only piece of gear that has the unique property of boosting lightning-based damage by 20%. Since the Hero is the only class in the game with access to lightning element, this helmet effectively boosted the damage of the Kazap spell by 20%. While I typically had Erdrick use physical damage because it was so effective, when she combined together this helmet with her high Wisdom score and turned Kazap against sea monsters who were weak to lightning damage, the results were downright spectacular.

There was another Hero-only equipment item available via fetch quest sequence. This process began in the town of Kol, which contained a family of refugees from Jipang that made their way here to escape the Orochi. Erdrick went and fetched the smith's set of tools from back in Jipang using the magic of the Zoom spell, then dug up some Orichalcum from a horse pasture in Damdara and fetched the Broken Blade from a scholar in Cantlin. Bringing all this stuff to the smith in Kol allowed him to reforge the broken weapon into the Sword of Kings, the weapon with the highest Attack value before reaching the postgame content. The Hero is the only class that can use this sword and it also casts the Kaswoosh spell when used in battle which was occasionally useful against big mobs of opponents with wind element weaknesses. I was also amused to note that the cut scene that played when forging the Sword of Kings transformed Erdrick back into her normal attire; I guess the developers didn't think about someone wearing the Magic Bikini while finishing this quest sequence. Note that the Sword of Kings was present in the original NES version of DQ3 and required the same quest sequence, though the Auroral Helm was a later addition created for the remakes and none of that stuff with the wrecking ball existed originally.
Interestingly, the Sword of Kings was *NOT* the best weapon for Erdrick to use against bosses even though it had the highest Attack value. She actually did better using another new weapon from the same smith in Kol named the Falcon Blade. Though it had nearly 100 points fewer of Attack value, the Falcon Blade had the property of striking twice in combat, and that did apply to most of Erdrick's abilities like her Falcon Slash and the elemental strikes. With Erdrick having more than 500 points of Strength by now, it was better to hit twice at 580 Attack than hit once at 675 Attack. I'm kind of amused that the legendary Sword of Kings was outdone by a routine over-the-counter weapon but that's how the game's combat engine worked in practice.
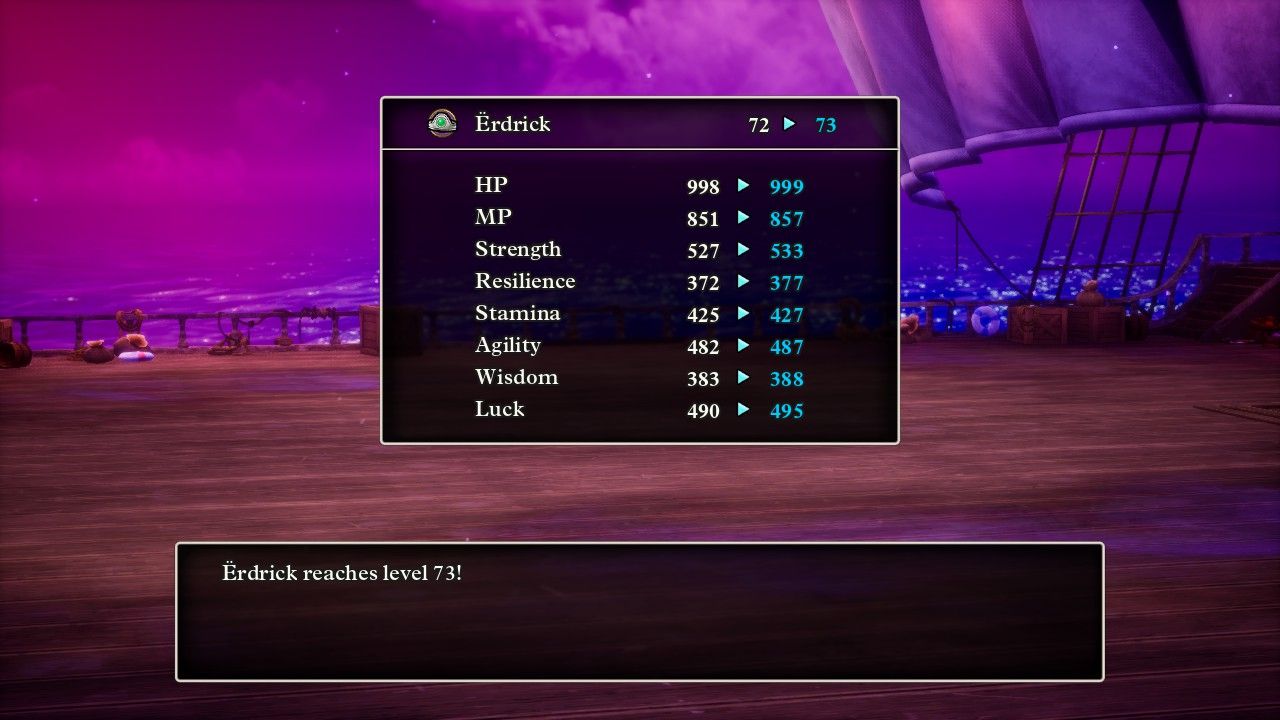
Speaking of stats, one of the big questions that I had going into this solo playthrough was whether max health was capped at 999 or if the value could continue onwards to four digits. I was able to increase Erdrick's health to 998 HP using some Seeds of Life, and then Erdrick failed to gain any health upon hitting Level 71 and Level 72. This meant that she was due for a big increase to her health total at Level 73, with an expected increase to about 1020 HP... only to find that, sadly, her health value was indeed capped at 999. This was profoundly disappointing even though I wasn't really surprised since this game was made by the same team as Octopath Traveler which similarly capped all the stats at 999. It doesn't make much sense: if you design the gameplay such that characters can go well above the 1000 mark, why not program in an extra digit for exactly this reason? That can't be difficult to implement. I estimated that Erdrick could have reached about 1300 HP by the end of the game if she wasn't being artificially limited in this fashion.
Obviously this was a bad sign for future solo variants, as my life would have been much easier if I could take these characters beyond the 999 HP hard cap. However, now that I had this knowledge in my back pocket, it would allow me to adjust the personalities that I picked accordingly. I had previously thought that Stamina was a really important stat for solo characters, since it leads directly to HP growth and that matters a lot when there's only one character. I've since adjusted my thinking though: it looks like everyone should be able to hit the 999 HP cap without too much trouble, therefore devaluing Stamina as a stat. Instead, it seems as though Resilience is much more important for improving defensive survivability; I discovered over time that having a Defense value roughly double the Attack value of the enemy would neutralize the damage that they could do. I will probably focus on Strength, Resilience, and Luck as the key stats going forward, with Erdrick serving as an outstanding guinea pig on this initial playthrough.

As Erdrick continued claiming more sparkle and secret spots across the map, she was also picking up more recruitable monsters as well. She eventually collected 100 of the 121 possible friendly monsters (there are 112 of them available before hitting the postgame content) and returned back to Monty to claim her reward. While the reward for recruiting 50 monsters had been excellent, back when Monty handed over ten different seeds, the 100 monster reward was thoroughly underwhelming: the Empress' Whip and the Glombolero. The whip was not impressive by this stage of the game, with a lower Attack value than the Metal Wing Boomerang and not even close to the Sword of Kings. It was supposed to deal additional damage to humanoid enemies and I'll have to experiment with that at some point; perhaps another class with a more limited weapon selection would want this whip but certainly not the Hero. The Glombolero was even worse, an armor with a low Defense score for this stage of the gameplay that had the property of reducing MP cost in half. That is simply not a valuable property in DQ3, as even my non-variant party that lacked a billion seeds never seemed to run out of MP. It was even worse for a solo game where Erdrick was approaching the max 999 MP cap and needed her armor to have resistances against spells and breath weapons. I found that simply having a high Defense rating wasn't sufficient for armor and shields, they really needed some kind of elemental or spell or breath weapon defenses, and the Glombolero didn't even have a high Defense score. This thing is basically trash and it might mean that some of the monster collecting is skippable for future characters (since the next reward is for collecting all 121 monsters which requires clearing the whole postgame stuff - not going to happen).
Once the entire surface of the underworld had been scraped clean of its sparkly and secret spots, Erdrick ventured inside the other optional dungeon. This was the Talontear Tunnel which has the gimmick of blocking all spells from being cast inside, both in-battle as depicted above as wel as outside of combat. This was a serious problem when I took my initial non-variant party through this dungeon since the group was heavy on spellcasters who became functionally useless within the tunnels. Erdrick didn't particularly care though, as she could boomerang things to death just as easily with or without her magic operating normally. Note that abilities still work in the Talontear Tunnels, as do monster breath attacks, as none of them are considered spells. Erdrick had to use the occasional Special Medicine for healing and that was about it. She was still defeating every random encounter in one or two rounds, very frequently defeating the left-most enemies with the initial boomerang toss and then polishing off the right-most enemies on the second round of combat. This pattern hadn't really changed since she obtained the initial boomerang all the way back on the starting island.
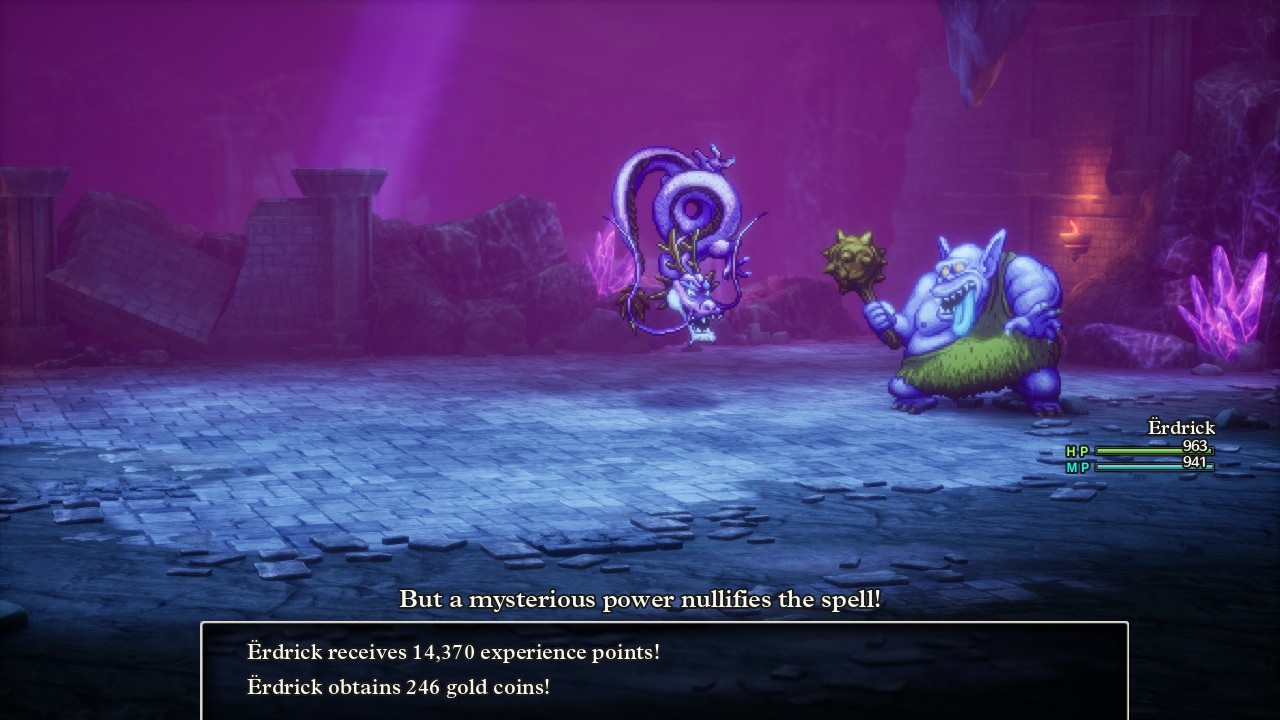
The Talontear Tunnel was also noteworthy for having some huge experience payouts, with Erdrick routinely getting 10,000 XP or more for each victory. These battles weren't harder to win and didn't take longer to play out which means that this dungeon looked to be a great place for power-leveling should it ever be neccessary. On that note, Erdrick was continuing to gain levels at a rapid pace because, for some reason, the XP requirements had stopped going up ever since she hit roughly Level 50. Somewhere around that point Erdrick needed about 85,000 XP for each new level and that's where the threshhold remained ever afterwards. Needless to say, when Erdrick was getting as many as 14,000 experience from a single battle it didn't take very long for her to reach the next level. This was a massive contrast to games like Octopath Traveler and Diablo, where the experience requirements in the lategame very quickly balloon to impossible heights. It looks like it will be fairly easy for any solo character to reach the max level of 99 in this game.

There was one treasure of note in the Talontear Tunnel: the Hero's Shield down on the bottom floor. This is one of the best shields in the game: it has the highest Defense rating of any shield (aside from one item in the postgame content) and it reduces damage from fire and ice breath attacks (not spells) by 33%. As the name suggests, the Hero is the only class that can equip this shield and therefore Erdrick would wear it for the rest of the game outside of specific itemization for boss fights. Then Erdrick picked up another Hero-only item in the mandatory story dungeon the Tower of Rubiss, that being the pictured Auroral Armor. This is an even better item with its own very high Defense score, 33% reduction in damage from both spells and breath attacks, plus the unusual property of restoring 1 HP per step taken. Erdrick wasn't exactly lacking for healing power but it was still nice to see her health slowly tick back up on its own between random encounters. Perhaps best of all, Erdrick was finally able to ditch the ridiculous swimsuit that she had been wearing and go back to her normal appearance. She would never take off the Auroral Armor as it simply outclassed every other armor option.
The Tower of Rubiss itself was a rather lengthy dungeon that involved climbing up the front of a big tower, then falling off the top and climbing up the back end of the same structure. It was a largely empty dungeon with only a handful of treasure chests inside given its wide spaces, with some fairly difficult monsters that liked to spam spells like Kafrizz and Kacrackle whenever they had the chance to act. Erdrick's metal boomerang worked just as well here as it did everywhere else though and she continued to clear most random encounters in two tosses. Up on the top floor, Erdrick faced the first boss of the underworld:
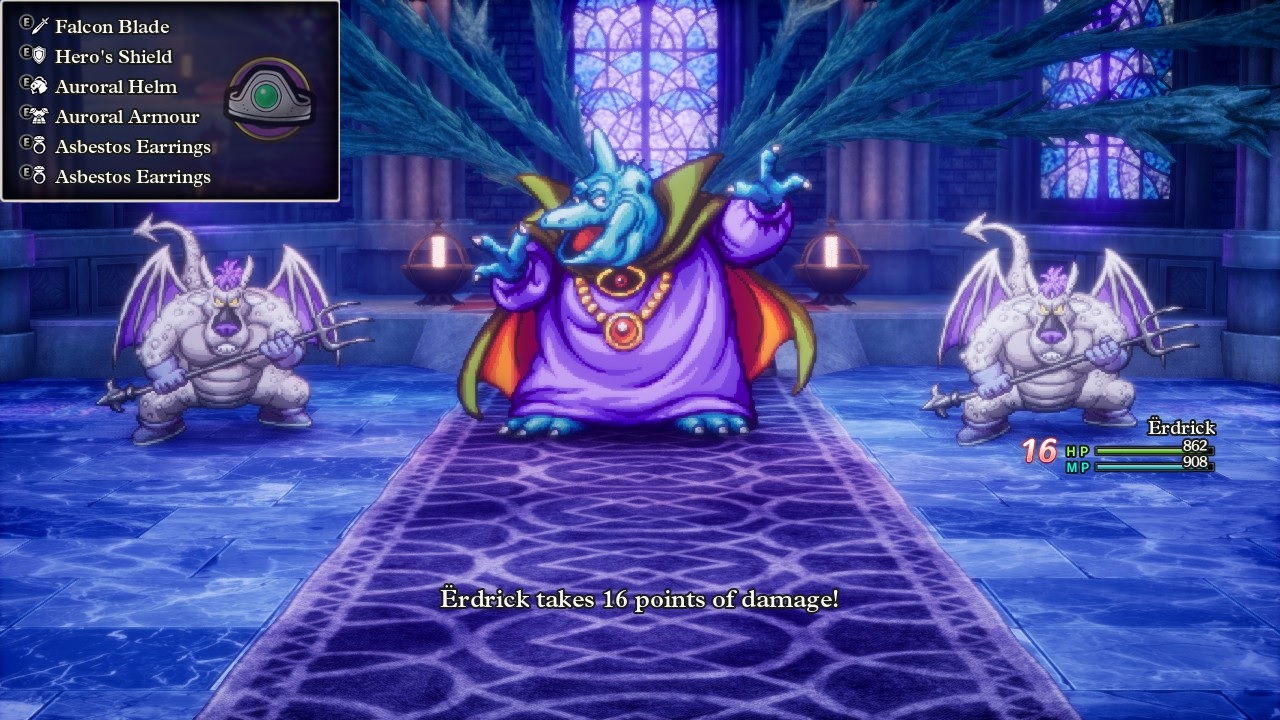
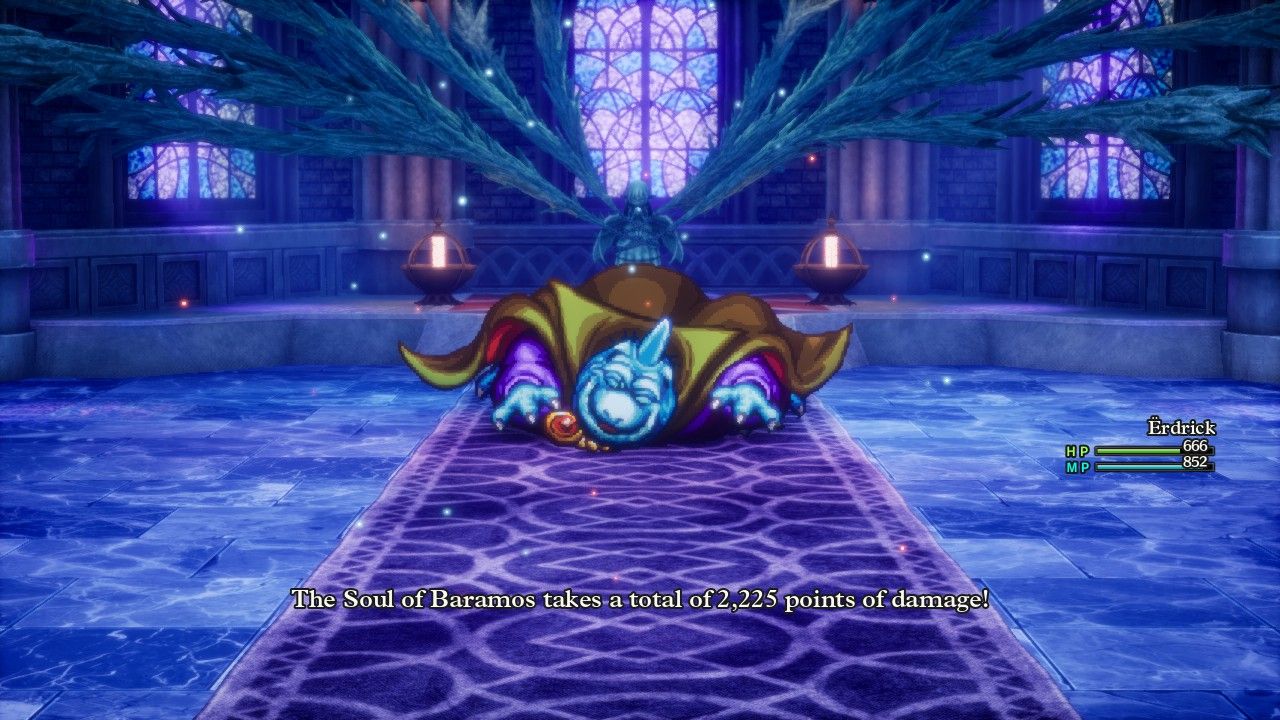
This was the Soul of Baramos, a palette-swapped version of the same Baramos from earlier. This time the blue dinosaur appeared with a pair of Ashdemon minions who liked to buff the Attack and Defense ratings of Baramos as well as cast some weak healing spells on their master. The Soul of Baramos remains a spellcaster for the most part, mixing in some physical attacks that did very little (16 damage? come on) along with repeated casts of the Kaboom spell and the Inferno breath weapon. Erdrick equipped a pair of dual Asbestos Earrings yet again which was sufficient to completely neutralize the damage from Inferno along with the Hero's Shield and Auroral Armor. Given how much the Soul of Baramos spammed the Kaboom spell though, I probably should have brought the Tempest Shield instead, which would have allowed Inferno to deal modest damage but cut the damage from Kaboom by another 33%.
Offensively, Erdrick had brought the Auroral Helm both for its excellent Defense rating as well as the 20% more damage on lightning element spells. This caused Kazap to deal about 450 damage to all targets when Erdrick broke out the spell; she cast it twice to redline both Ashdemons, then finished them off with a Gigaslash ability since the Soul of Baramos had blocked her spellcasting temporarily with a Fizzle spell. Once the main boss was the only one remaining, Erdrick used her Oomph Power to double her Attack and started hacking away with her Falcon Blade. This caused the Falcon Slash ability to hit four times at 400ish damage per strike, very nice. Then I experimented with Erdrick's Lightning Slash ability which hit twice at 1100 damage apiece for a total of 2225 damage and one very dead Soul of Baramos. The boss only had 4300 health so Erdrick had done half of that in a single hit, yikes! And wait, I just realized that the Auroral Helm was probably boosting the damage on that Lightning Slash ability as well. I didn't even think of that until writing this report, heh. Erdrick had been unlucky enough to get paralyzed for several rounds and still managed to win this battle with 666 HP remaining after not healing at all. That was... surprisingly easy?

Afterwards, Erdrick freed the goddess Rubiss from her prison and received the Sacred Amulet in return. This allowed Erdrick to teleport to the island Sanctum in the southeast corner of Alefgard where she combined it together with the Sunstone and the Staff of Rain to create the Rainbow Drop and open up a path to Zoma's Citadel. Before heading there, however, I Zoomed Erdrick back to the Mini Medal King since she had reached the exact total of 100 medals. This would allow her to claim the final available prizes since the 105 and 110 medal rewards can't be accessed until the postgame content. Unfortunately the list of mini medal prizes was pretty underwhelming as far as Erdrick was concerned. She had made good use of the initial items and then hit a big dry spell in the middle of the game as stuff like the Weightlifter's Belt and Dragontail Whip and Mercury's Bandana simply were not useful. The Hero class couldn't even equip the Agility Gilet or Stealth Suit which made them pointless. That was similarly true for the stuff at the end of the list: the Abacus was a Merchant-only piece of gear, the Dragon Robe was intended for spellcasters and can't be used by the Hero, the Blessed Bikini had high Defense but no protection against spells/breath attacks, and the Goddess Shield was an awesome shield that nearly everyone can use... but not the Hero class. I suspect this is because the Hero already gets all sorts of exclusive stuff that no other class can use, and to be fair other classes will definitely want some of these mini medal rewards. For this particular character, I was a little disappointed at how useless the medal collecting had been.
There was only one remaining destination for Erdrick: Zoma's Citadel, the final dungeon in the game. The Rainbow Drop provided a very colorful bridge over to the central island where there was a final secret spot with a few last seeds, then it was time to enter the castle and work down to the bottom basement floor. The initial entry portion of Zoma's Citadel was a giant deadend that led nowhere, with the actual staircase to proceed forward hidden behind the empty throne. The rest of the dungeon was linear in nature, if large, with a bunch of dangerous monsters to contend with. My initial non-variant group experienced some difficult combat here though Erdrick continued plowing through everything with her boomerang throws. The XP gains were even larger in here, averaging 12k experience or more, and Erdrick even managed to kill a pair of Liquid Metal Slimes for a payout of 104,000 XP at one point. She was still leveling at a frantic pace and approaching the level cap of 99 even though I was making no particular effort at grinding.
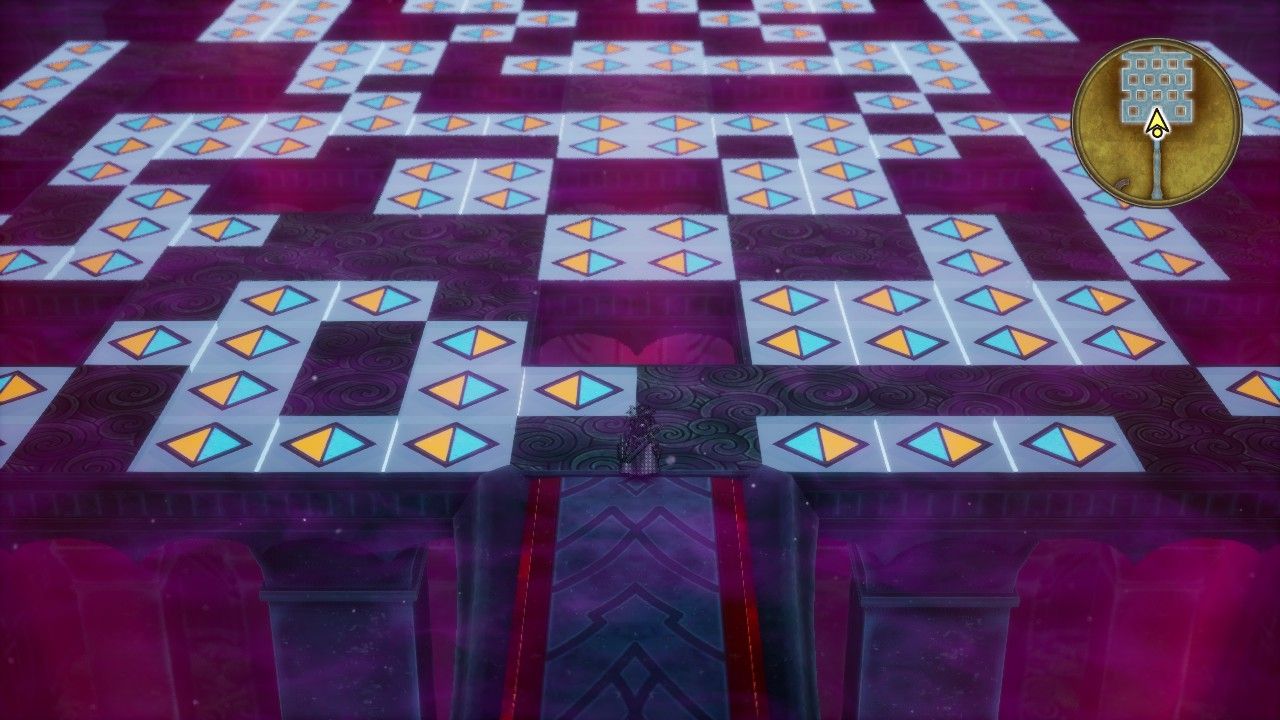
The bottom floors of Zoma's Citadel contain these arrow tiles designed to throw off the player. These things were present in the NES game as well and they change the directional inputs from the controller. The trick is that the blue arrow always points in the new direction of "up" while the orange arrow points to the new "down", with the other directions rotated accordingly. This can be wildly disorienting at first but ends up being fairly easy to navigate with a little practice. Erdrick navigated through this floor without falling into any of the pits by accident, claiming the few treasures to be found in this dungeon along the way. The best of these is the Shimmering Dress which every class can equip so long as the character is female. I would normally wear that for all of the endgame boss fights, except that Erdrick's Hero class had access to the slightly superior Auroral Armor instead. It's another reason why all of these solo characters have to be women since they have much better equipment options in the lategame.
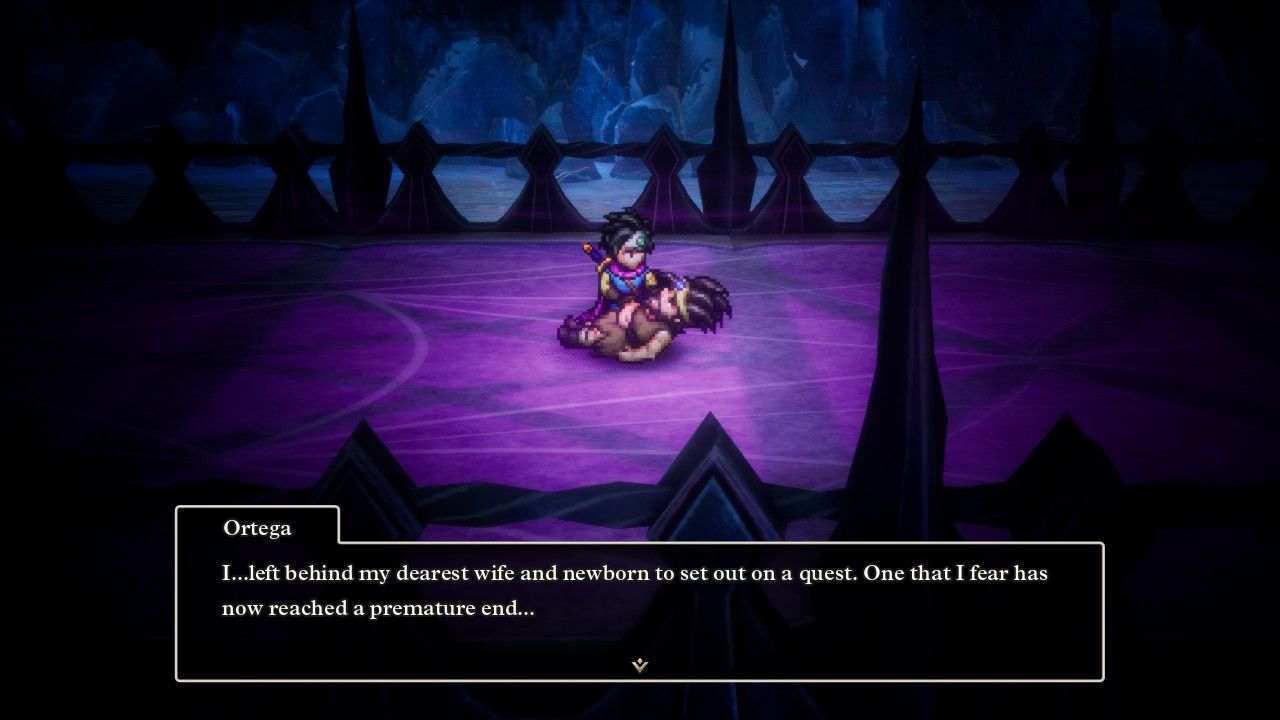
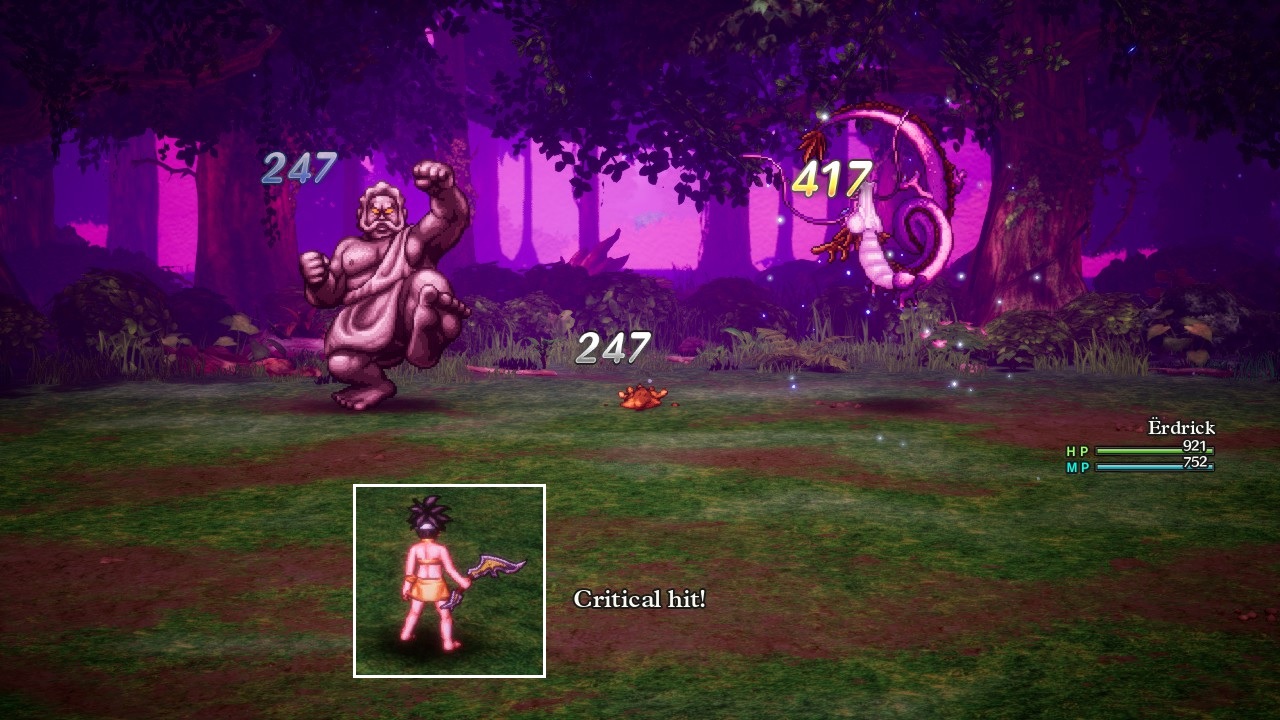
There's a surprise on the penultimate floor of the citadel: off in the distance, the player can see Ortega engaged in combat with a gigantic hydra monster! Unfortunately Ortega winds up losing this contest and gets struck down just as the party arrives on the scene. That prompts the saddest cut scene in the game, as the dying Ortega gasps out his regrets at leaving behind a wife and child that he hasn't seen in more than a decade. To twist the heartstrings further, Ortega has been wounded badly enough that he can no longer see the face of the person holding him, such that he doesn't even recognize that it's his own child cradling him. Or at least that's the standard version of the scene; if the player has repaired Ortega's helmet into the Auroral Helm, then he's able to identify that this is indeed his own offspring from touching the helmet that they wear. It's a genuinely tragic scene as the player spends the entire game chasing after Ortega, only to find him at the very end of his journey and without being able to do anything to save him.  This same event did take place in the NES game as well, though there wasn't any dialogue back then as Ortega simply loses a combat against the hydra and then disappears. The HD-2D remake really leans into the sad story of Ortega and executes it quite well as far as I'm concerned.
Reaching the final floor of the dungeon opens up a teleportal back to the entrance, a real godsend since it allows the players to heal up and save the game before the ending boss gauntlet. DQ3 has weird pacing in this regard, as there's only a single boss fight in the entirety of the underworld before reaching the bottom level of Zoma's Citadel, then FOUR consecutive bosses to close out the game. The first of these offered a chance to get some revenge for Ortega:
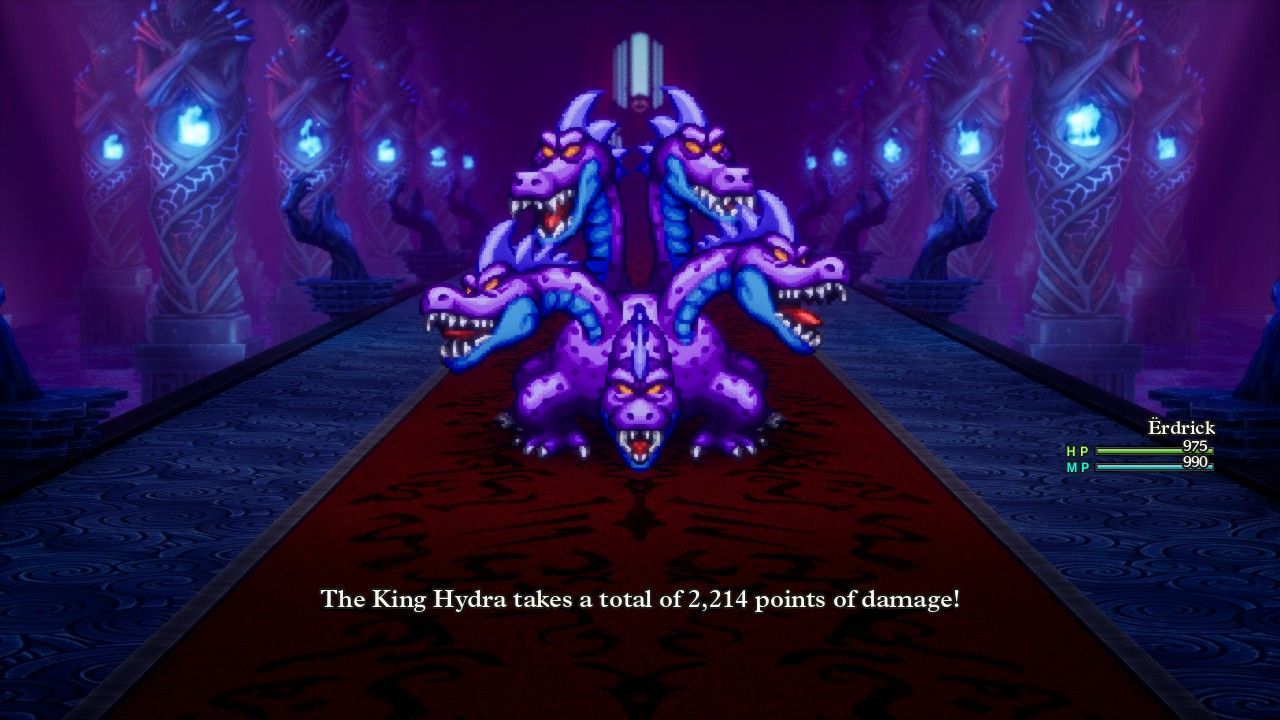
This palette-swapped version of the Orochi is named the King Hydra; this is a place where the NES origins of DQ3 are particularly obvious given all of the reused monster designs. The King Hydra casts no spells and instead uses the Inferno breath attack as its primary weapon, which Erdrick was able to counter completely using the same anti-fire setup employed in some of her earlier boss fights. Oddly, the King Hydra spends a lot of time trying to inflict various different status ailments, using War Cry in an attempt to stun characters, Fog of War to block spellcasting for the next three turns, and Sweet Breath to put the party to sleep. And while that stuff was certainly annoying when it landed, the King Hydra couldn't really deal any damage once the fire elemental properties of Inferno were completely blocked. The big snake could use its physical attack for about 25 damage and, uh, that was it. This was basically a joke boss fight as Erdrick used some Oomph Powder and then Falcon Slashed for 2200 damage at a time. King Hydra does regenerate about 100 HP per round but that was nowhere near sufficient and the thing quickly expired. Maybe Ortega wasn't such a great warrior after all if he couldn't overcome this threat.
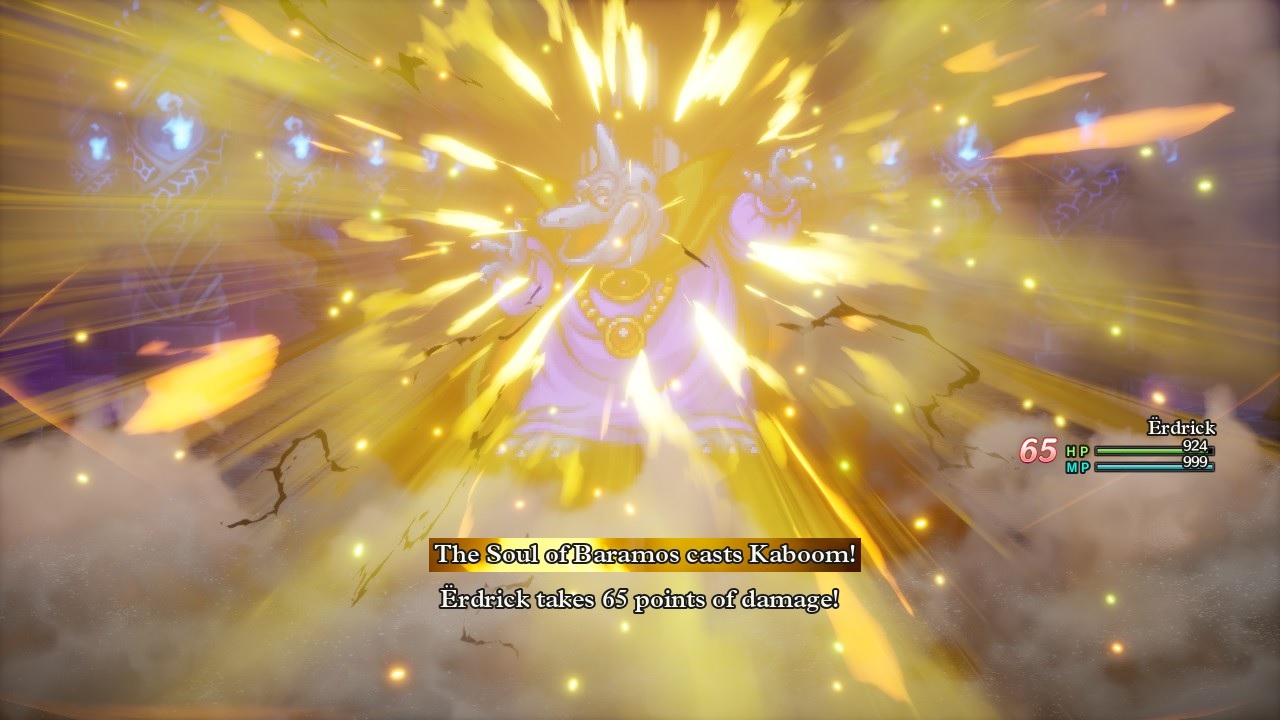
For the second boss, Erdrick had to face Baramos yet again in his Soul of Baramos form. I think the original developers were really proud of this sprite design, either that or they were running out of time and had to ship the game ASAP by reusing the same assets over and over. Anyway, this second Soul of Baramos battle looked very similar to the previous one, with the boss using the same Inferno breath attack along with the Kaboom spell and some instant death stuff that would never land against Erdrick. I switched Erdrick equipment around slightly by equipping the Tempest Shield over the Hero's Shield, as it would reduce damage from explosion element by 33%. This was absolutely the right call since the Soul of Baramos spammed the living daylights out of the Kaboom spell, something that normally deals 96-140 damage when cast by monsters but which was reduced to about 60 damage from Erdrick's defensive itemization. The fighting looked very similar to King Hydra, with Erdrick using more Oomph Power into Falcon Slash and Lightning Slash strikes that hit for 2000+ damage. The Soul of Baramos only had 6100 HP so this fight didn't last long either.
Noticing a trend here about overall boss health? None of these opponents had that much in the way of health, which is why the 5500 HP on the Boss Troll at a MUCH earlier point in the gameplay felt so oppressive. Most of the classes in DQ3 don't have any way to heal themselves aside from the Special Medicine herb at 80-90 HP, however the bosses themselves don't have that much health either. I suspect a lot of classes will need to go all-offense and burst down their enemies before they run out of their own life totals - should be fun to try!
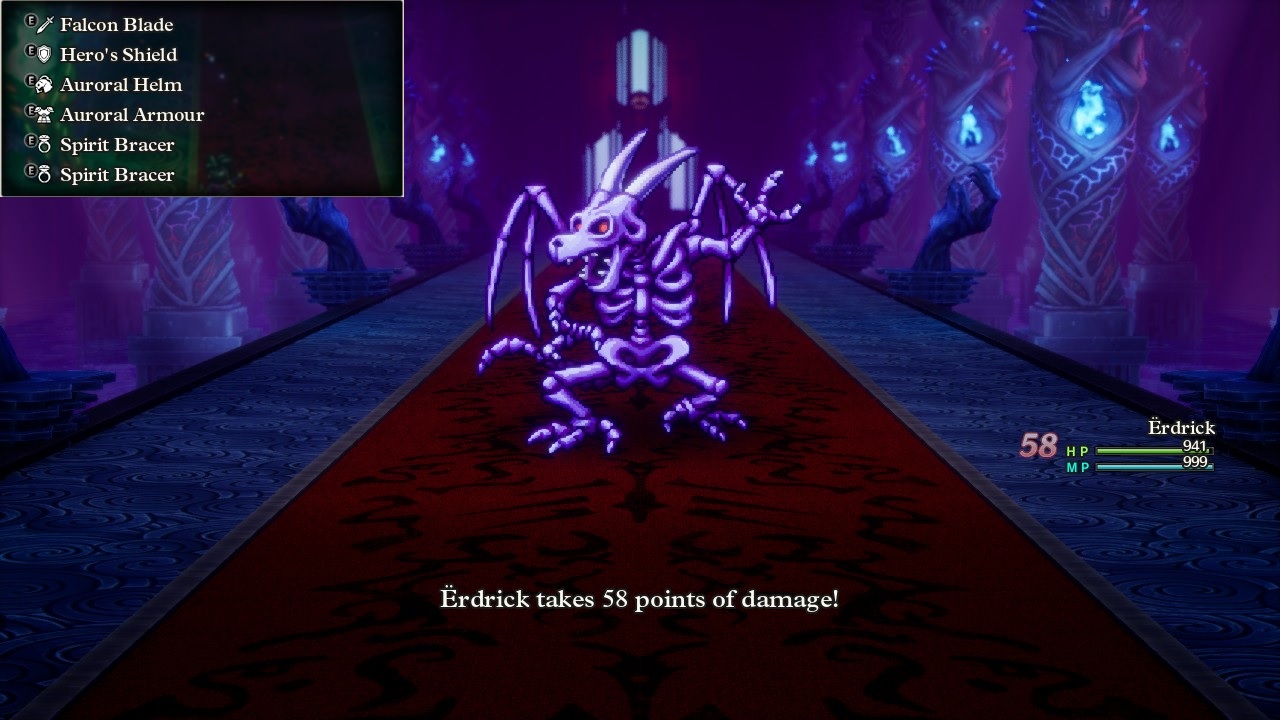
The third of these bosses presented a completely different challenge from the first two. This was the "Bones of Baramos" boss (enough with Baramos already!) who does not cast spells and does not use any breath attacks. Instead, this is an all-physical boss who will attack 2-3 times per turn and try to wear down the player with accumulated physical damage that can't be resisted. It can even use the Double Up ability which doubles its physical Attack at the cost of taking doube damage as well for the rest of the turn. As such, Erdrick equipped all of her gear with the highest Defense rating along with a pair of Spirit Bracer accessories that each contained another 17 points of Defense. This raised her total Defense up to 849 points which lessened the damage from the Bones of Baramos while not stopping it completely. The skeleton could still hit for 50-60 damage at a time which would accumulate quickly given its multiple attacks per round; this boss has by far the highest Attack rating in the whole game, 545 compared to 310 for the Soul of Baramos and only 390 on Zoma himself. The Bones of Baramos also heals for 290-400 HP every single round which looks like it could be a huge problem for a low-offense character setup. The player absolutely must kill the Bones of Baramos quickly due to its constant regeneration and unending melee blows.
There is, however, one massive weakness for this boss:
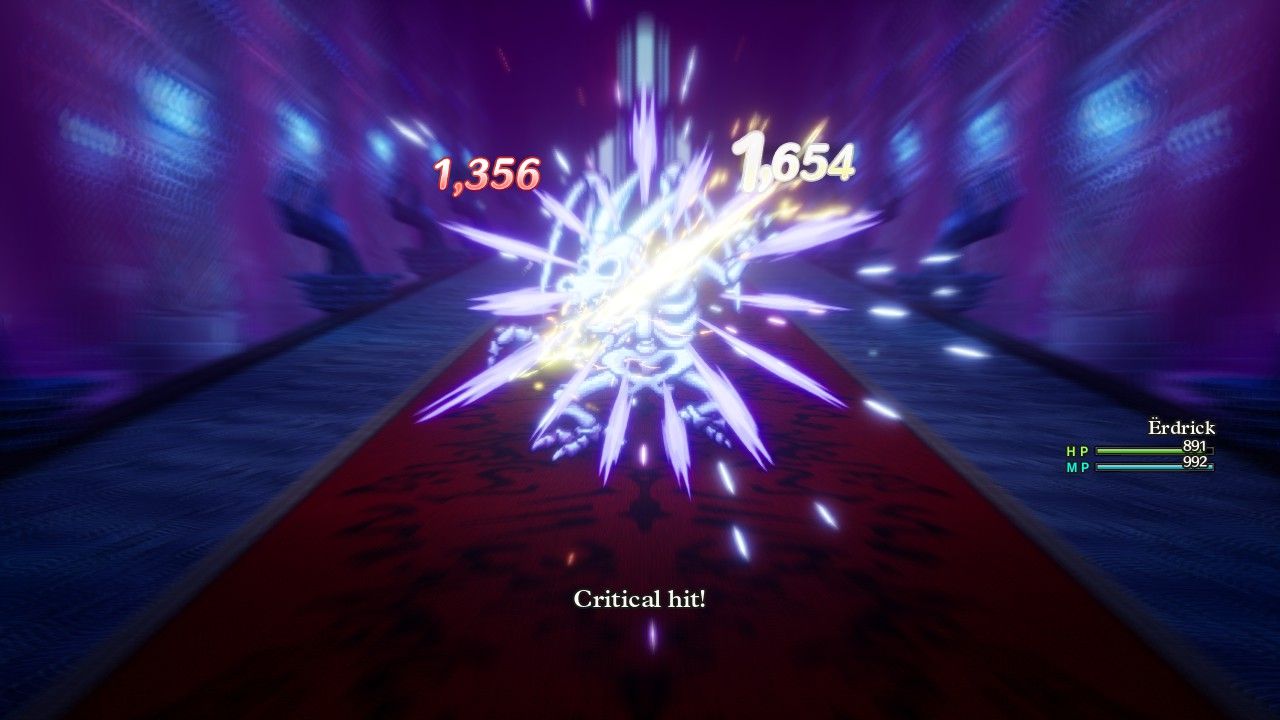
The Bones of Baramos only has 2960 total health: fewer than any of the other endgame bosses, fewer than the Boss Troll, fewer than the Garboyle, even fewer than the Orochi. That leaves it extremely susceptible to getting bursted down before any of that regeneration can kick in. Erdrick used Oomph Powder on the first turn of the battle, then attacked with her Lightning Slash on the second turn. It struck twice due to the Falcon Blade, with the second half of that attack going critical for 3010 total damage and a one-shot kill (!!!) Holy cow Erdrick, I was not expecting that!  She absolutely dumpstered this boss before it even got to do anything, from full health to dead in a single instant. It helped here that the Hero class maxes out at 10% base crit chance, and Erdrick's Luck was high enough that this was boosted to somewhere around 16-17% in practice. She was landing critical strikes an awful lot of the time as it propelled her damage output to greater heights. I couldn't have scripted something this awesome if I tried, heh.
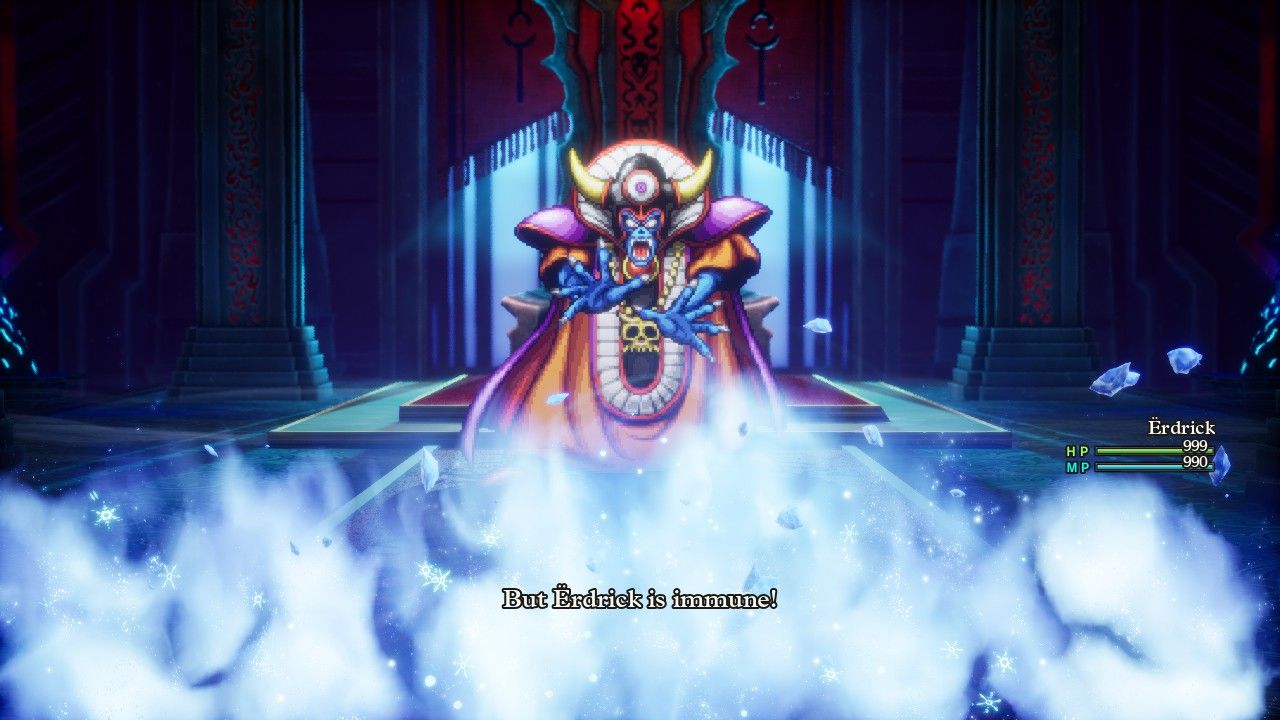
With his minions all dispatched, Zoma was now forced to face off against the Hero of legend. There are actually two different versions of Zoma, the initial "blue" form who deals extra damage and has a strong regenerative component, and then the "orange" version that the player is supposed to fight by using the Sphere of Light against the boss. I followed the intended story route with Erdrick, though it is possible to avoid using the Sphere of Light at all and still defeat the harder version of Zoma. I think that Erdrick could have managed it without too much trouble given that she had the Fullheal spell to fall back on whenever she found herself in trouble.
In any case, I wanted to do the boss fight the standard way since Erdrick was still scouting the path for other potential variant characters. She had equipped a bunch of gear that protected against ice element, with double Antifreeze Earrings in the accessory slots, since Zoma uses a lot of ice stuff in the same way that the original Baramos spammed fire element attacks. In retrospect, I probably should have brought the Fire Shield over the Hero's Shield since the latter only defended against ice breath attacks and not the spellcasted versions. All of these items meant that Zoma's C-c-cold Breath attack (yes that's the actual name) had no effect instead of inflicting the intended 120-140 damage, while Kacrackle's intended 88-116 damage was cut by 75% down to 20-30 damage. Zoma really liked to spam those two abilities, including one turn where he cast Kacrackle three times in a row. But with his breath attack doing nothing, his physical attack hitting for 25 damage at a time, and Kacrackle doing barely more damage, Zoma wasn't exactly burning through Erdrick's lifebar of 999 HP. She actually could have taken rounds doing nothing but using Special Medicine items and still come out ahead on healing most of the time.
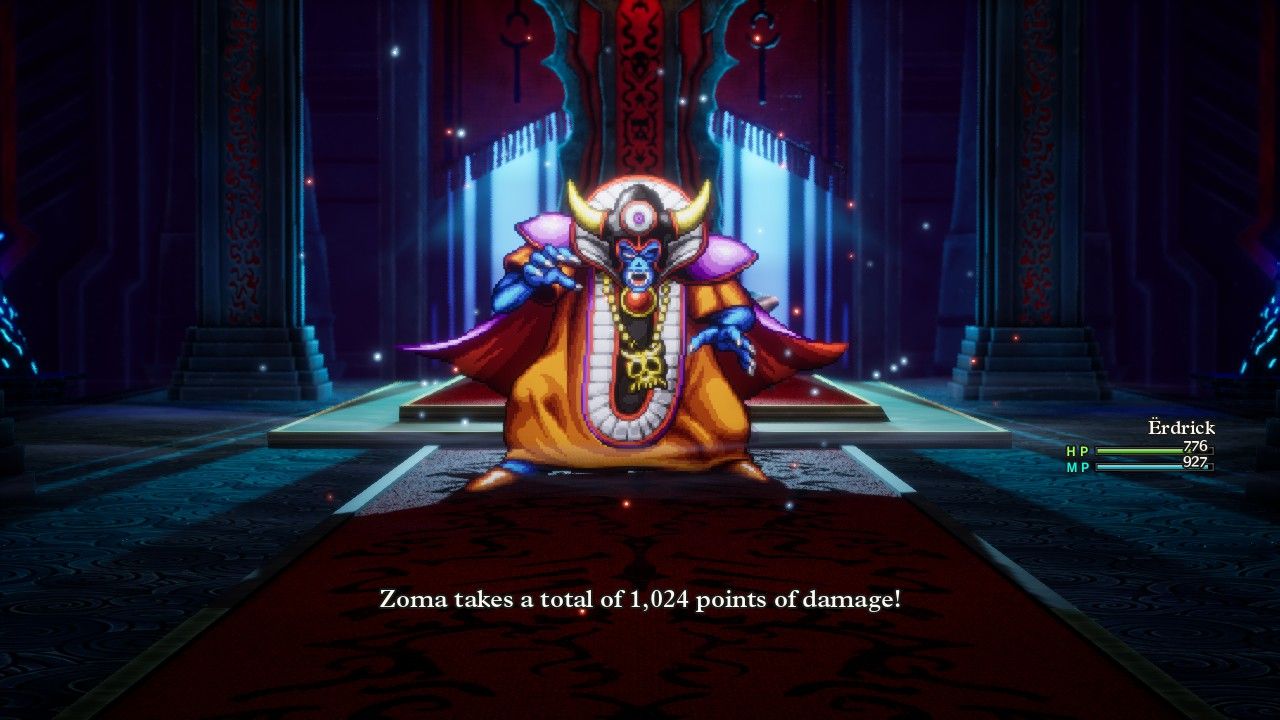
Meanwhile, Erdrick was hacking away at the boss using a mixture of Falcon Slash and Lightning Slash since they seemed to deal about the same amount of damage. I did not have her use Oomph Powder for this battle since Zoma likes to spam his Disruptive Wave ability that nullifies all party buffs as well as any debuffs placed on him. Since Zoma used that ability every few turns, it made more sense to attack without trying to buff Erdrick's attack value ahead of time. This meant that she was hitting for a little over 1000 damage per round, more like 1200 damage if any of the attacks went critical, which steadily wore away at Zoma's invisible lifebar. He has 8300 HP in total which meant that these repeated attacks didn't take low to drop his health into the yellow, then into the red category. I was continuing to marvel that Zoma simply... wasn't dealing damage to Erdrick, struggling to inflict more than 20-25 damage per round even as she cut huge chunks out of his flesh. The whole boss fight took all of seven or eight rounds to complete and Erdrick was still sitting on 776 health remaining when it finished. No healing required, Zoma not even managing to deal a quarter of her health in damage. What just happened there?!
This prompted an escape sequence from the citadel, which immediately began collapsing in classic "defeated villain" fashion. Erdrick found herself in the Talontear Tunnel again, for some unexplained reason, where she made her way to the surface and found the supernatural darkness dissipating from the world. Unfortunately, the defeat of Zoma also apparently snapped his connection back to the overworld, as it was no longer possible to teleport back to Aliahan or any location outside of Alefgard. Erdrick made her way back to Tantegel where the king does have an extra line of dialogue for the specific case of a solo Hero completing the game without any companions. Then he announced a special title for our heroine:

She received the title of "Erdrick" which is again the canonical name of the Hero in Dragon Quest 3. This was the big reveal back when the game originally came out: DQ3 is the prequel to the original Dragon Quest, which takes place in the same land of Alefgard centuries later. When playing Dragon Quest, you constantly hear about this earlier legendary figure named Erdrick, who turns out to have been... you, in Dragon Quest 3. It's a really fun twist ending for fans of the series and there are a bunch of references to later events for those who have been paying attention, like the scholar in the process of building the Golem in Cantlin who will later guard the city and a man in Rimuldar who asks to study your Ultimate Key and would later sell keys in the first Dragon Quest game. I always thought that this was a clever way to tie the games together back at a time when we didn't have movies and TV shows that were all part of the Marvel Cinematic Universe or whatever.
Overall though, the ending to DQ3 is a melancholy one for our Hero. Erdrick saved the world but she didn't arrive in time to save Ortega, and even in victory she was never able to return back home again, stuck in Alefgard for the remainder of her life. When the credits are rolling for this HD-2D remake, there are a bunch of still images from various parts of the world, and one of them drives in the dagger by showing the Hero's mother sitting alone at their house in Aliahan, looking sad with her eyes closed because Erdrick never returned home. That's a low blow game, don't do that to me! The postgame content does offer a happy ending for obsessive players, as defeating the superboss Xenlon offers up the choice of several different wishes, one of which revives Ortega and allows for a family homecoming. That feels a little too saccharine for me though and I kind of prefer the original ending where the Hero had to sacrifice so much in order to achieve victory.
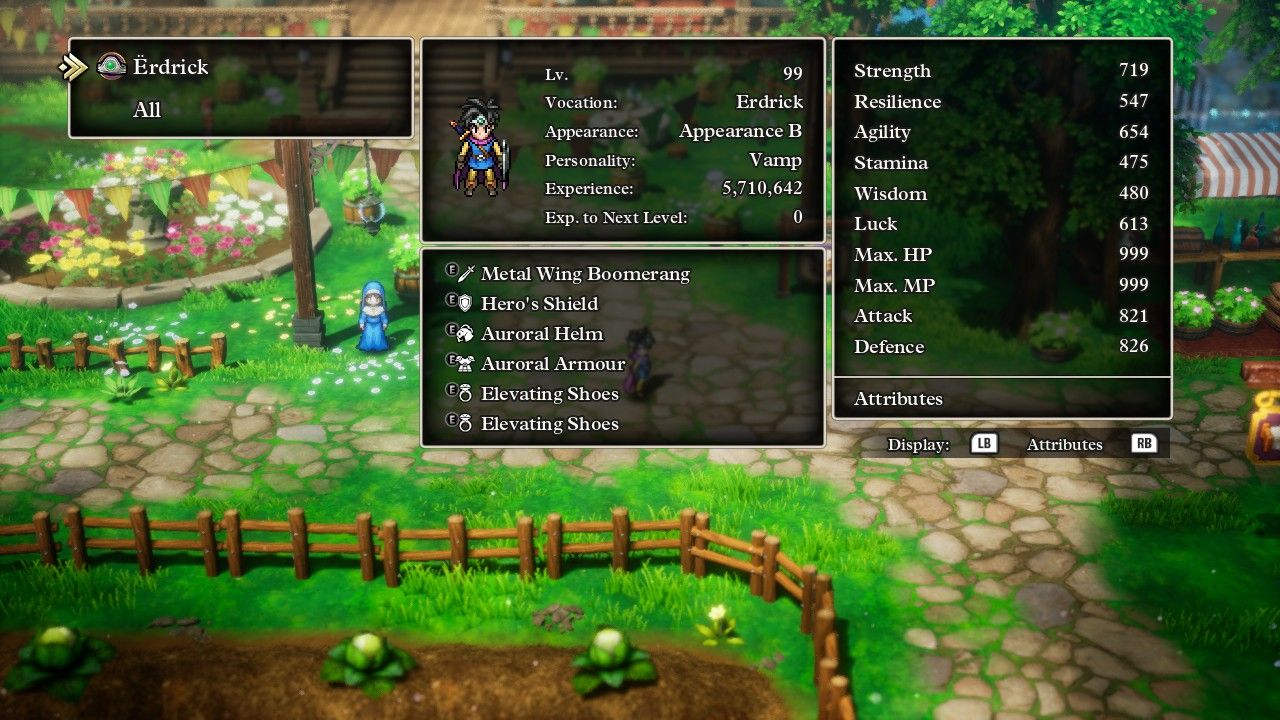
Erdrick finished the game at Level 98, only about 25k experience off of Level 99, so I fought a few final battles and then took this screenshot of her finishing stats with her most common endgame equipment setup. She was an absolute tank who could barely be damage by anything other than bosses while also clearing every random encounter in 1-2 rounds without breaking a sweat. The Hero class proved to be exactly as overpowered as I expected and there were no difficult fights at any time along the way, with the Boss Troll being the only opponent who forced uses of the Fullheal spell. Amusingly enough, the solo Hero had a much easier path than my non-variant group that proceeded through the game first, though they weren't optimizing equipment or hunting down every sparkle / secret spot / mini medal along the way. The ending bosses were really, really easy for Erdrick which I'd like to think was the payoff for her spending so much time exploring the whole world map. It's like how I can sometimes answer difficult questions about physician payment at my job in a handful of minutes - but only because I've spent the previous decade mastering everything about the work. There was a reason why Erdrick spent so much time exploring the world map(s) and save-scumming her seed rolls, with the payoff being worth the effort.
Now the real challenge could start to begin. The solo Hero can trivialize the entire game, how many other classes can manage to make it across the finish line on their own? Based on Erdrick's experience, I think that most of them can make it, though it will be much, much harder for many of them. I will essentially be stripping more and more resources away from myself by playing weaker and weaker classes over time. Strong classes like the Monster Wrangler and the Sage can clearly complete the game, but what about the Merchant or the Mage? The Goof-Off?! It should be fun to experiment and see! Thanks for tuning in as always. 


