
Completing the King's Maze dungeon meant an end to Act Two and the beginning of the FTK endgame sequence in Act Three. Once again, I had ended a playing session after completing the last section of the game and forgot to take screenshots at the beginning of the next session. As a result, I ended up cycling through quite a few turns before remembering to start documenting the party's travels again, although not quite as badly as what had taken place at the beginning of Act Two. The initial quest objective in Act Three is to visit the town of Hasta in the Parched Waste region. This desert area always appears on the other side of the ocean and must be reached using the boat. In this game, it was located to the south beyond the Rogue Isles. I stopped in Hasta briefly to get my next quest objectives, clearing out two caves in the fiery nearby region known as the Dropstone Badlands, then headed back onto the boat to do some more exploring. I started out by returning to the islands in order to clear out the remaining Sea Caves:

There were a bunch of them to the east and southeast of Devil's Wharf, which I happily fought my way through for more gold and experience. This took the party up to a collective Level 8, and Bowstring had found an improved weapon somewhere along the way that allowed her to match Smoky's damage output. Spelunking through the caves had taken long enough for the next scourge to activate, with the little icon for The Hangman appearing in the corner of the screen. This guy causes your party to be haunted by spirits, with a chance for them to attempt to flee from combat on their own accord. I already knew where the scourge's den was located, in the Parched Wastes not far from the town of Hasta. I had skipped it initially because the Hangman's camp was listed as being Level 8 as well, and I was still a bit leery of facing the scourges too soon given what had happened against Deimos earlier. Now that the rest of the Sea Caves were cleared out and my party had become stronger, it seemed like a good time to revisit the scourge.

The Hangman appeared with two other Enslaved Soul minions, which were surprisingly frail opponents at only 47 HP apiece. I had Bowstring use her scatter shot attack to hit the whole enemy group since that would drop both of the minions down to one-hit kill status for both herself and Smoky. The Hangman himself employs one of the game's nastiest attacks: the Death Mark. A character tagged by this will take no immediate damage, but unless the battle is won in the near future, the death mark will go off and slay the unfortunate individual immediately. Based on my experience with these death marks, they appear to go off after about three full rotations through the party, or about nine attacks later for the group. It's harmless if it appears at the end of a battle, but a real problem when an enemy opens up with a successful death mark and the rest of the fight becomes a race against time to win before it can trigger. The Hangman also has a very strong physical attack directed against a single character; it's best to hope for some failed dice rolls on that five-slot attack or a successful evade on the part of your characters. Fortunately this particular scourge is pretty slow and doesn't have any armor or resistance, which allowed my group to defeat him quickly. No one was strung up on the gallows this time.
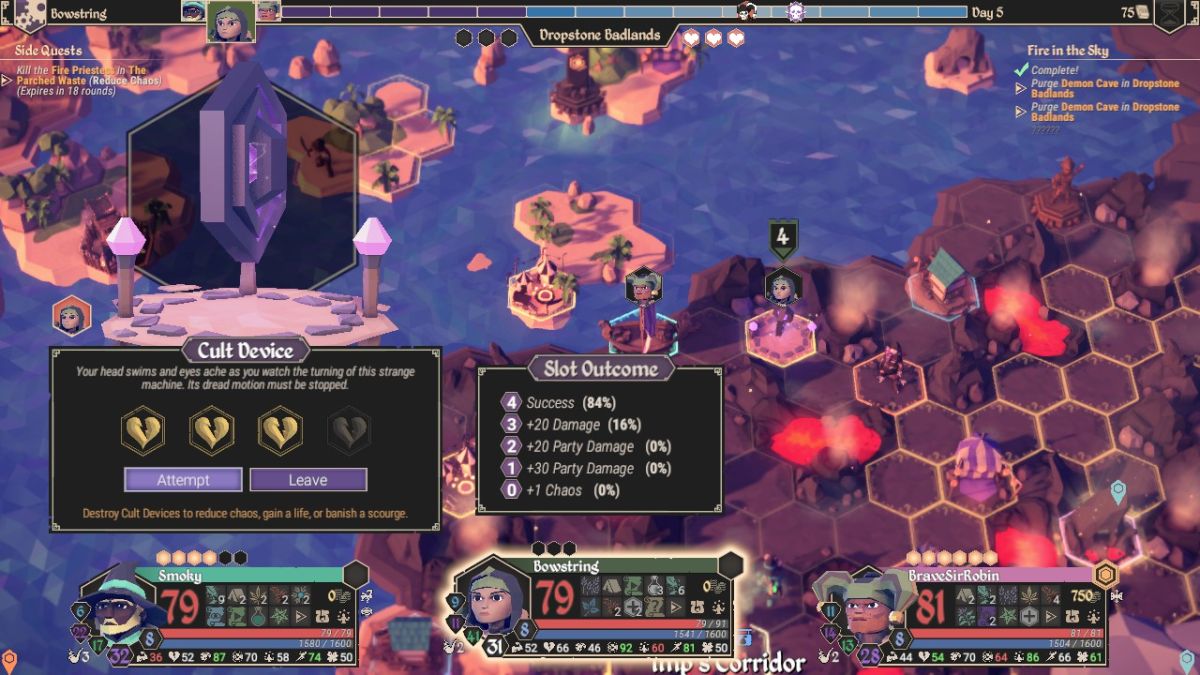
Most of my following turns were spent exploring through the Dropstone Badlands, the location of the next main quest objectives. This is a hostile land of ash and lava, with powerful and deadly opponents for the monster spawns. It's best to avoid fighting too many of the random enemies that pop up on the overworld map here unless they can be confronted near a town, as the opponents simply deal too much damage and drain too many of your resources. Using herbs is fine to get through the mandatory dungeons, but you don't really want to be burning through them in combats that can be avoided. I used my standard method of exploration in dangerous regions, keeping the party on the boat and stepping off it one character at a time to defog the area along the coast. This revealed a Cult Device that had a Vitality check to destroy it, and unfortunately none of my party members were particularly skilled in that stat. I had Bowstring use all three of her Focus points here to get the odds of success up to 85%, and she still failed this dice roll and took 20 damage. D'oh!  A little bit unlucky there. I had to fall back on BraveSirRobin and force my way through this unfavorable stat check by dumping in the maximum of four Focus points for a guaranteed success. BraveSirRobin had replaced his lost Sanctum of Wealth with a Sanctum of Focus, which is the reason why he had six Focus points to spend here. In situations where no one in your party has the stat being tested, there's often no choice other than to go hogwild on spending Focus to brute force the odds.
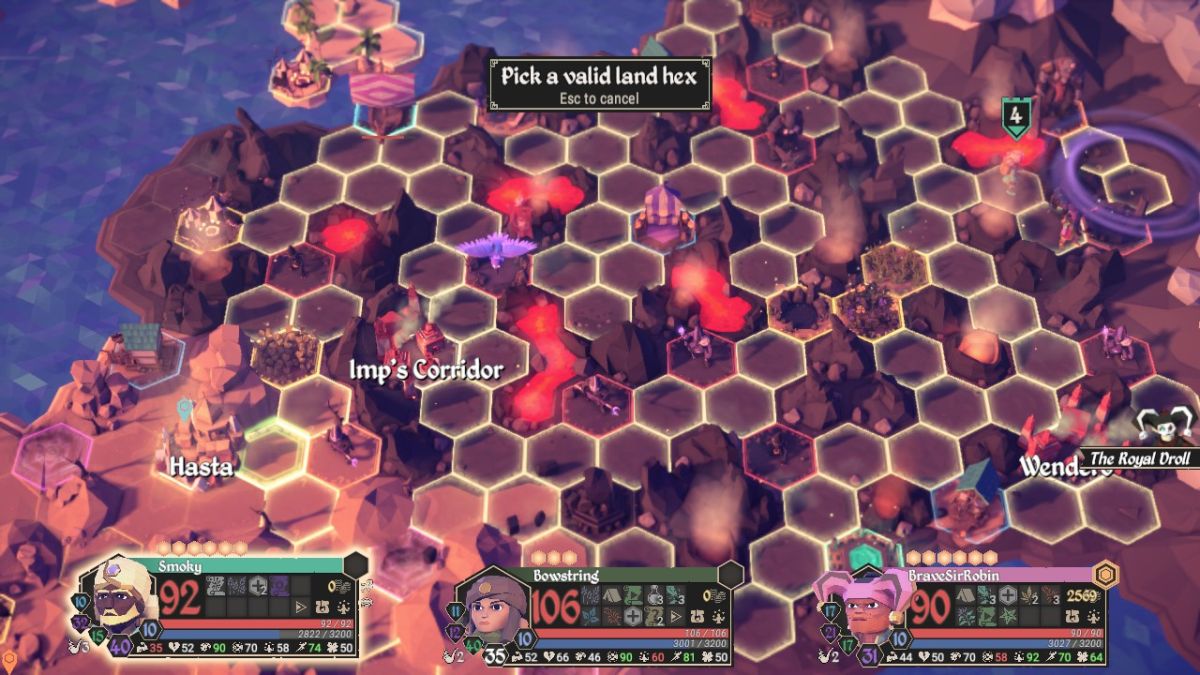
Unfortunately, most of the Dropstone Badlands were not accessible from the coast, and both of the dungeons that I needed to enter were tucked away in the middle of the region. I would have to fight my way into the center of the badlands, working from the town of Imp's Corridor located along their western edge. At least every map region in FTK always has two towns randomly places somewhere inside, although the two towns in the Dropstone Badlands were both situated along the edges of the area in awkward spots for reaching the dungeons.

This item dropped from a random encounter along the way, and whoa, what a find! The Tome of Wonder is probably the single best Intelligence-based weapon in the whole game, bringing just about everything that the player could want. The attack value is very high at 28 and comes with only three slots to check on the default attack. While there are stronger weapons in terms of raw damage, they all have four or five slots and are therefore significantly less likely to get the coveted perfect attack roll. Smoky's Intelligence stat of 87 already gave him 0.87 * 0.87 * 0.87 = 66% odds for a perfect roll, and a single point of Focus would take that up to 0.97 * 0.97 = 94% odds. I could easily count on him getting a perfect roll almost every time in a serious boss fight. Best of all, this Surge primary attack pierced resistance on a perfect roll, allowing Smoky to deal his full damage against anyone regardless of what defenses they might have brought. He'd be doing roughly 40 damage per attack every time, making him a DPS machine.
The other secondary attacks on the Tome of Wonder were also extremely powerful. Area Blast hits all enemies at half damage, useful for lightly-resistant foes or for finishing off a single opponent while still getting damage on the rest of the group. Protect shields a single party member from taking any damage from the next incoming attack; generally not too good, but situationally useful if one character is nearly dead. Rush Group is one of the game's best abilities, giving the "Rush" property to both of the other party members. In essence, this ability would sacrifice Smoky's turn to grant an extra turn to both Bowstring and BraveSirRobin in a 2 for 1 deal. Normal Rush abilities sacrifice the user's turn to grant a turn to one other party member, but this was the rare weapon that had "Rush Group" and gave an extra turn to both of them. The only drawback is that a non-perfect dice roll has no effect and simply wastes the user's turn, although Focus points can help make sure that doesn't happen. It's an incredibly abusive ability and I honestly didn't use it enough during this playthrough.
The last alternate attack, Time Warp, is a Reset-based debuff. I'll explain them in more detail in a minute. For now, I headed inside the first Demon Cave to bring back the plot token hidden inside.

Although the Demon Caves are modest in size, they pack more dangerously strong opponents. There aren't any easy fights here, and Smoky was forced to use three more Godsbane herbs on Party Heals before the area was cleared out. The boss at the end is this Ember Demon, and not surprisingly he uses a bunch of fire attacks. I equipped the only anti-fire defensive item that I had, which was the Volcano Hat dropped by Coal Heart earlier in the game back in Act Two. That protected Smoky from the burning damage over time effect, unfortunately leaving the other two characters vulnerable. The Ember Demon has a lot of health and sizable armor/resistance for protection, which makes the use of piercing attacks a very good idea. The treasure chest in the next room held this Dream Vest for BraveSirRobin, to give you an idea of what the endgame armor looks like for a Minstrel. It had balanced armor and resistance defenses along with bonuses to Talent and Luck. For whatever reason, the Talent-based armor comes with additional Luck as a stat, just as the Awareness-based armor comes with extra evasion and the Intelligence-based armor gets an extra point of Focus. The Strength-based armor is the real loser, getting additional Vitality but at the cost of a Speed penalty. Out of all these, I think that the evasion on the Awareness set of gear makes it the clear winner.

That covered the first of two Demon Caves. To heal up in preparation for the second cave, I set up another Magic Portal back to the town of Imp's Corridor, which was nearby as the crow flies but blocked by some impassable terrain and hostile monsters. The health bars tell the story here: my group needed healing in the worst way after that last boss fight. After refreshing themselves at the inn, I returned and fought my way through the second Demon Cave. This is a bit lazy on the part of the designers, as the two Demon Caves are identical in terms of size and both hold the same Ember Demon at the end. The only difference is a slightly changed line of dialog from the second boss, that's it. I suspect that they may have been running out of developer resources by the time that they hit this part of the lategame content.

My group was once again low on health after completing the second Demon Cave. I wanted to go heal at the town of Wendero, which was inconveniently placed in the corner of the Dropstone Badlands, only to be blocked by an enemy popping up in the only pass leading to the east. Fortunately I had an alternate path back to a resting point: the nearby Alluring Pool. There's one of these in each region of the map, and players can travel between them instantly after they've been uncovered, much like the waypoints in Diablo. I used this pool to go all the way back to the Poisonous Bog, where the starting town of Oarton was only a few tiles away. This allowed the party to heal in safety and then return back to the same spot in the Dropstone Badlands. The only thing that it cost me was a few turn's worth of transit time, and I had completed enough reduce chaos quests that there was no pressure from the meter at the top of the screen to move faster.
I'll also point out one other item of note: that once-huge stash of Godsbeard herbs had dwindled significantly. Remember when I had close to twenty of them stocked up? My party was down to nine remaining after fighting my way through the difficult opponents in these lategame areas. And those herbs hadn't been wasted, as I had picked up enough experience to reach Level 10 as well as amassing some 2300 gold to spend. I had plenty of resources available, now I simply needed to visit some more towns and replenish my stock of missing healing items. I would make sure to do this before venturing into the final dungeon.
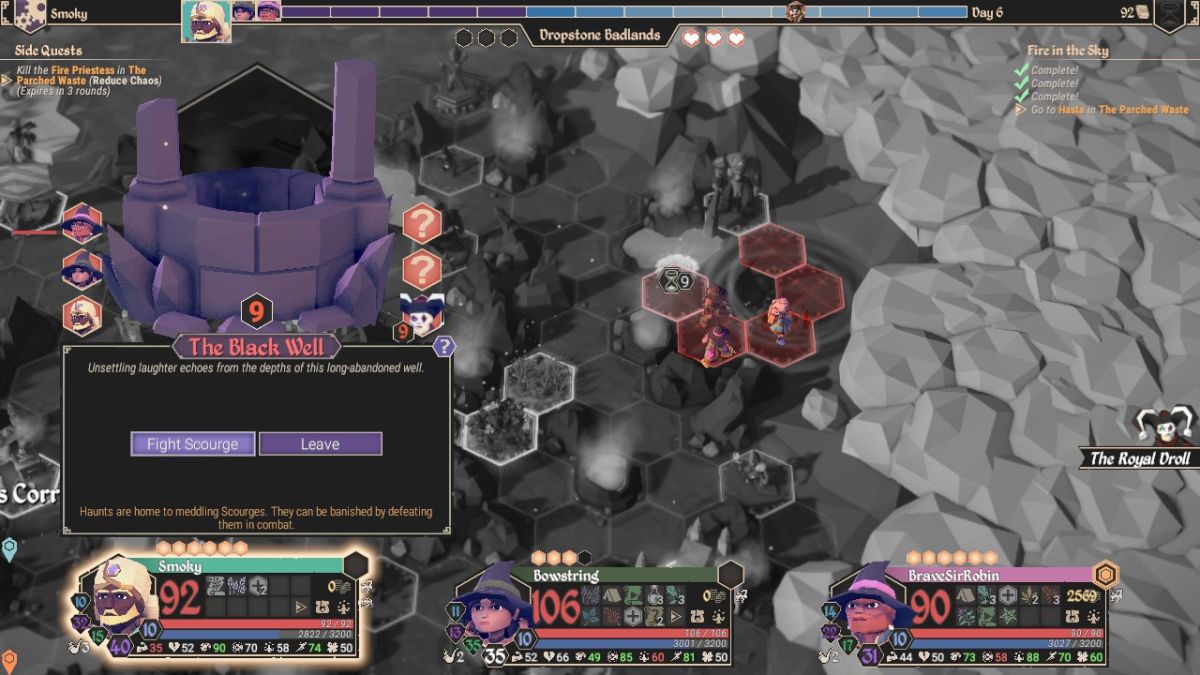
There was one other task that I needed to complete before moving onward, and that was dealing with another scourge in the form of the Royal Droll. This is the worst scourge of the bunch, with a passive ability that functions as the exact opposite of the Minstrel's Encourage. While the Royal Droll is in effect, all of your successful dice rolls in combat have a chance to FAIL instead! This ability is known as Distraction, and it's an innate function of the Minstrel's other Talent-based sibling class, the Busker. I've been repeatedly hammering home the importance of landing perfect dice rolls in combat to activate various special abilities and prevent enemies from dodging, which the Royal Droll obviously messes up in annoying fashion. This is a scourge that needs to be removed as soon as humanly possible whenever it appears in a game.
The Royal Droll made itself even more obnoxious in this game by spawning in a remote portion of the map, right up against the eastern edge of the Dropstone Badlands and far away from any towns or the coastline. I had already used a Portal Scroll to set up an escape path all the way back to Hasta, which would get me out of this region once the scourge was gone. As far as the combat itself, the Royal Droll is also the most difficult of the scourges to defeat in battle. This undead jester uses a combination of the shock debuff along with confusion to take away control of your party. I was nearly wiped out by this scourge on my first playthrough and I've given him a hefty measure of respect ever since. There is a trick to winning here: bring items that protect against confusion.

If you look at the character portraits, I've given all three party members items of some kind that protect against confusion. (That's why Bowstring and BraveSirRobin have pointy mage hats on: they ward off confusion status.) Failure to do this can result in your whole party getting confused and doing god knows what while the scourge blasts away at them. The other debuff used by the Royal Droll is a lightning-based shock attack, and shock is a temporary status that causes the first dice roll of any attack to be a failure. Nasty, nasty stuff. Fortunately there is a way to get around shock status: if you use a point of Focus, you can turn that guaranteed failed dice roll into a success instead, and shock does dissipate on its own after two rounds of combat. If you don't know about any of this, however, your party will be confused and shocked and the Royal Droll will just stomp all over them. He starts out with two "Backup Band" skeletons that are already dead in the above picture, and it can get pretty ugly with the three of them all debuffing the party.
I managed to capture BraveSirRobin (in his awesome rainbow threads) landing a successful Reset attack against the scourge. Both Smoky and BraveSirRobin had a Reset-based attack of some kind, which essentially cancels out the turn of an enemy when used successfully. Your character sacrifices their turn to prevent the enemy from getting a turn. This is incredibly powerful, and if your party has multiple different Reset attacks, it's possible to keep interrupting a single opponent so that they never get an attack off. (It's a lot harder to do if there's more than one opponent.) In fact, the combination of Party Rush plus enemy Resets can be deployed to break the combat engine completely. I saw someone on Livestream who used heavy Focus spending to ensure that the opposing bosses never had the chance to do anything for the whole battle. Rush, Reset, Rush, Reset, etc. That requires highly specific and powerful endgame equipment but it is indeed possible, although I didn't know how extensively this could be leveraged at the time while playing this venture. I hope that the designers will consider toning this down at some point because of how abusive it all is. In the meantime though, once I had the Royal Droll left by his lonesome self, I kept Resetting him and never let him get a turn of action off. I did not feel sorry about this. 

With the latest scourge removed from the map, I returned to Hasta again where I found this weapon upgrade on sale for Bowstring. The Golden Bow is another seriously sweet weapon, with a default Piercing Shot attack that only has two Awareness checks and ignores enemy armor. That was a fantastic deal, the chance to inflict a virtually guaranteed (0.9 * 0.9 = 81%) 38 damage on every attack regardless of the opponent. The other secondary attacks were nice too, with Sure Shot granting 100% odds to deal half damage, useful for finishing off weakened opponents, and a pair of multitargeted attacks in the two Spread Shot options. Add another another +10% crit chance, 6 more points of evasion, and bonus damage against two types of opponents, and this made for a sweet weapon indeed. Bowstring's evasion rating of 41% made her the dodgiest character by far on my team, and she took noticeably less damage than the other two characters despite armor and resistance values that were fairly pedestrian for this stage of the game.

Upon returning to Hasta, the reward for clearing out the two Demon Caves comes in the form of an airship. At least, the game calls it an airship, even if it looks a lot more like a balloon to me. The airship functions in mostly the same way as the boat, able to pick up characters from up to five tiles away and fly over terrain obstacles in the same way that the boat traverses the ocean. The stat check for the airship is Luck, with four guaranteed successful rolls and then four additional chances for extra movement points beyond that. I captured a picture of Bowstring on a perfect movement roll (1/16 odds with a Luck score of 50) as the party floated over the sands of the Parched Waste. Bowstring had taken a pretty good hit from my last battle, and I was returning back to Hasta for a quick health refill at the inn.
My next goal was to explore an optional dungeon known as the Buried Temple located in the same desert region. I had already found the place, and it was the sandy temple location right above Smoky's character portion in the picture above. Unlike most of the previous underground areas, the Buried Temple truly is optional and the party can head right for the final dungeon if desired. It's a very good idea to run the temple though, since it holds several important pieces of gear that will come in handy for the final boss rush at the game's end. I prepared my three characters and headed inside, with the airship making it easy to reach the place.

The Buried Temple contains three different Mummy Lord minibosses that appear along with weaker Dried Corpse minions. The main danger in this dungeon comes from curses, with all of the enemies having a chance to inflict the cursed status from at least one attack. I had prepared my party by giving Bowstring and BraveSirRobin helmets that protected against being cursed, trading a few of their normal stats for that extra safety. (The helmets were called "Tin Foil Hats" and the graphics match the name, which I find to be very amusing.) This is also an area where most of the damage is magical in nature, and extra resistance can be handy to equip if your characters have it. The Buried Temple consists of three fights in a row against these Mummy Lord minibosses, each one dropping a King's Talisman attuned to a different element. There's one each for ice, fire, and lightning which protect the party against the associated debuff associated with each element: frozen, burned, and shocked. This is a not-so-subtle hint from the game that your party will need protection against these elements for the upcoming final dungeon. As such, the Buried Temple is essentially mandatory to clear out in order to prepare for the challenges ahead. I wouldn't want to skip this place and the helpful items inside unless I was playing a deliberate variant of some kind.

Afterwards, I took my party back to town for more healing and bought as many Godsbeard herbs as they had in stock. In theory I could have continued grinding out another level because I had plenty of time left before the chaos meter increased, but I felt that it was time to head for the game's ending sequence. At best I would get one more level and spending half an hour grinding for that didn't seem like it was worth it. I directed the airship towards the tower of Harazuel, the island destination that serves as the last dungeon. It's always located somewhere in the ocean, and in this game it turned out to have spawned off the south coast of the Poisonous Bog. Castle Vakker was located conveniently close by and I made some of my final purchases in there before entering Harazuel. The ending dungeon is a one-way trip with no way to escape after entering, so be prepared before making the fateful decision to go inside.

There are a total of five battles inside Harazuel, with a chance to use a Tinder Pouch for healing after each one. This is pretty nice on the part of the designers and a lot more friendly than the dungeons that precede it, none of which have the same option after the Glittering Mines in Act One. The first encounter is the easiest of the lot, against the Harazuel High Guard and two Chaos Warriors. The warriors on either side will deal physical damage while the high guard in the center is all magical in nature. There's nothing too special about this battle, and if your party can't handle these foes it's not going to make it much further.

The second fight takes place against this Ice Revenant and its two Frost Knight minions. This is where having foreknowledge of Harazuel comes in extremely handy, as someone in the party should make sure to equip the King's Tailsman of Frost to block frozen status for the group. Frozen is a debuff that functions a bit differently than one would expect in this game, causing all future attacks to deal 25% more damage rather than slowing or incapacitating the party. BraveSirRobin had the King's Talisman equipped and made sure that this group didn't have to worry about that. I had also made one other equipment change specifically for this battle, putting the Volcano Hat on Smoky. You know, the Volcano Hat with +100% damage against ice opponents? Say hello to an 88 damage magical attack, enough to one-shot kill the Frost Knight on the right. Of course, Smoky missed one of his three dice rolls and only dealt 59 damage on the attack, bah. Should have used a point of Focus since I'd be getting some of it back anyway when I used a Tinder Pouch after the combat ended. With frozen protection and that kind of big damage coming from Smoky, this was a fairly easy fight.

The third opponent was the Fire Revenant and his bow-wielding fire skeleton pals. Starting to sense the pattern here? BraveSirRobin had made sure to equip the King's Tailsman of Fire for party immunity to the burning debuff, and that makes a huge difference against this group. Pretty much every single one of their attacks carries burning status, and it will constantly drain everyone's health if they lack that protection. As usual, I concentrated on taking out the minions first and then wearing down the boss himself. I could have done more in these combats to make use of the Party Rush ability on Smoky and the Reset attacks on both Smoky and BraveSirRobin. I tend to be a bit hesistant about using them because if you fail to get a perfect dice roll, that character's turn ends up getting wasted completely. Still, this would have been the perfect place to be more aggressive in using Focus and pull out those powerful lategame abilities to stop the enemies from getting their turns. It's something to work on tactically in future runs, assuming that I have the right equipment of course.

The fourth miniboss is a Lightning Revenant who uses shock attacks. Yeah, I bet you guessed that was coming. I figured this out on my very first playthrough the game as soon as the first Ice Revenant appeared. I didn't know whether it would be fire or lightning next, so I equipped the King's Tailsman of Lightning because I feared the shock debuff a lot more than I feared burning status. No need to worry about it here, with BraveSirRobin keeping everyone nice and safe. All of the damage here is magical in nature, and the Lightning Revenant hits hard quite aside from his shock attacks. He can easily do 35-40 damage per character if he rolls well on his area of effect attacks. Note as well how much resistance all of these enemies were packing. Smoky could ignore that because his Surge attack pierced resistance on a perfect roll, but BraveSirRobin had no such luck and his lute attack was almost worthless at 12 damage per shot against the miniboss. I had him trying to Reset the Lightning Revenant and he kept failing due to a series of poor dice rolls. BraveSirRobin's health actually ran out at the tail end of this battle, shattering his Sanctum of Purity. That was annoying since it meant that he wouldn't have that extra safety net in his back pocket for the final boss fight.
Right before facing the final opponent, the game hands out three Firesilk herbs from a treasure chest. These ultra rare items will restore a character to maximum health when used, and giving one apiece to each character makes for a bit of extra security. Then it was time to face the last boss, the evil wizard Vexor:

According to this game's scanty plot, Vexor killed the king and is attempting to destroy the world through the rampant unchecked use of chaos. Why he's doing this is not very clear, and let's face it, the plot doesn't particularly matter in FTK. There was badguy murdering to be done, and that was what my group was best at doing. Vexor himself has a ton of health and generally concentrates on doing one of three different things: damaging and inflicting some random status element to a single character, buffing the enemy armor/resistance to ridiculous levels of protection, or hitting the whole party with highly damaging area of effect magic damage. He can hit very, very hard and do as much as 50 damage to everyone at once on a perfect roll. Thankfully he doesn't pull that attack out every round and often wastes time on less dangerous abilities. There are also a pair of Chaos Hounds who have their own boatloads of health and launch physical attacks. They're pretty straightforward, and taking them out quickly is a good idea to remove two weaker enemy attacks from the battlefield.
The great advantage of this being the final battle of the game is that you can go crazy with item usage. All of those Golden Roots that have been saved throughout the game can be used recklessly, and together with any Precious Pearls that may have been collected in Sea Caves, this means that your party should have essentially unlimited Focus to play around with. The other items that rarely see use, the herbs that grant Speed or evasion bonuses, can also be consumed here with no fears of losing out. The only significant restriction is that each character can only use one item per turn; this does not use up their turn unless the item specifically states that it does, a property on a couple of powerful attack orbs. I had given Smoky a set of 14 Godsbeard herbs for use in Party Healing during the battle, then divided up the other herbs so that everyone had a couple of each type. The plan was simple: take out the two Chaos Hounds while keeping health up, while using items left and right to make the fight easier.
This was going well for the first Chaos Hound, which went down quickly. Smoky and Bowstring were pounding out the damage, both of them ignoring enemy defenses with their primary attacks, together outputting about 80 damage per rotation. Then I ran into trouble: Vexor hit Smoky with an attack that Reset him in the turn order. Yes, the enemies can use that ability too, and the final boss has it available! That was followed by two attacks from the Chaos Hounds against my poor Herbalist, then a magical blast from Vexor, and Smoky was dead in a flash:

From 81 health down to zero, just like that. What a disaster!  Let me repeat this again: Smoky had ALL MY HEALING ITEMS, 14 of the 20 Godsbeard herbs that I had painstakingly collected over the course of the game. They were totally worthless now, held in the backpack of a dead character, and I was going to have to do this with a mere three Godsbeards apiece on the other two characters, plus the single Firesilk herb that each one had just collected in the previous room. And I'd have to chew through all of that health on Vexor without Smoky's damage output, made worse by the fact that he actually had the most damage of any of my three characters. BraveSirRobin didn't have a piercing attack and could barely event dent Vexor. In fact, at the time of the picture above, Vexor had buffed his resistance up to 90 points (!) and he was invincible to anything that BraveSirRobin could do. The best that I could hope for was to Reset him and give Bowstring more time to chip away at his health. Ugh. This boss fight suddenly became a lot more interesting.
One of the most important things that I learned from earlier runs is the need for piercing attacks on your main damage dealers. Vexor is too well protected from normal attacks, and he can pull the same trick with armor that he did with resistance, taking either defensive score up to 70 or more. Trying to attack into that with anything that doesn't pierce defenses is a waste of time. There are all of these different attacks that deal splash damage, or inflict frozen/burn/shock status, or find a hundred different creative ways to not kill enemies immediately. I've reached the conclusion that FTK is a lot like FTL in this regard, where the best weapons are the ones that defeat enemies as quickly and efficiently as possible. In FTL, that meant loading up on a whole bunch of lasers and ignoring the fancy drones and ions and bombs that the online community loved to pat themselves on the back for being so clever in using. Here in this game, the same basic idea holds true: take piercing weapons and focus on killing your opponents, not hitting them with elaborate status attacks. "Death is the best form of crowd control" as we used to joke in League of Legends, and it holds true here as well.

This was a tense endgame fight. The remaining Chaos Hound was cleared out soon enough, and then it was down to a long struggle with the evil wizard. I knew that I could defeat Vexor if I could just hold out long enough to get in sufficient attacks. Bowstring was hitting Vexor for a good 40 damage on every strike, plus more on her frequent crits, and she was getting to attack more often than Vexor thanks to a Speed Down debuff that BraveSirRobin had applied. He was getting a few Resets off occasionally as well, and that helped a lot to stave off rounds of incoming enemy damage. The key question was whether my healing items would hold out long enough since I didn't have very many in stock. (I mean, I did, but poor Smoky was holding them all!) 300 health left on Vexor, 200 health left... The clock was ticking. Both Bowstring and BraveSirRobin had to eat their Firesilks, and the Godsbanes were running out. BraveSirRobin didn't even have a level 3 pipe to get the full 60 HP restore from his herbs, argh. Less than 100 HP to go on Vexor, but now all of the healing items were gone. This is going to make for a great story, but why did I have to cut things this close!!! 
Bowstring finally decided to finish things off in style:

Victory at last, whew! She was the MVP of this fight by a country mile, dealing nearly all of the damage once Smoky was taken down early in the battle. I don't know if you can see this in the picture, but FTK keeps track of the arrows fired in battle, and Vexor had about seven arrows sticking out of his chest by the end of this encounter. He was a veritable pincushion back there. Bowstring also never died a single time all game, not even once of those Sanctum-prevented deaths, whereas both Smoky and BraveSirRobin fell on multiple occasions. BraveSirRobin lost four different Sanctums over the course of the game, heh. I hope it's clear why I think the Hunter is such an amazing class. Blazing speed, excellent evasion, high damage, high crit chance, several useful innate abilities - what's not to like?
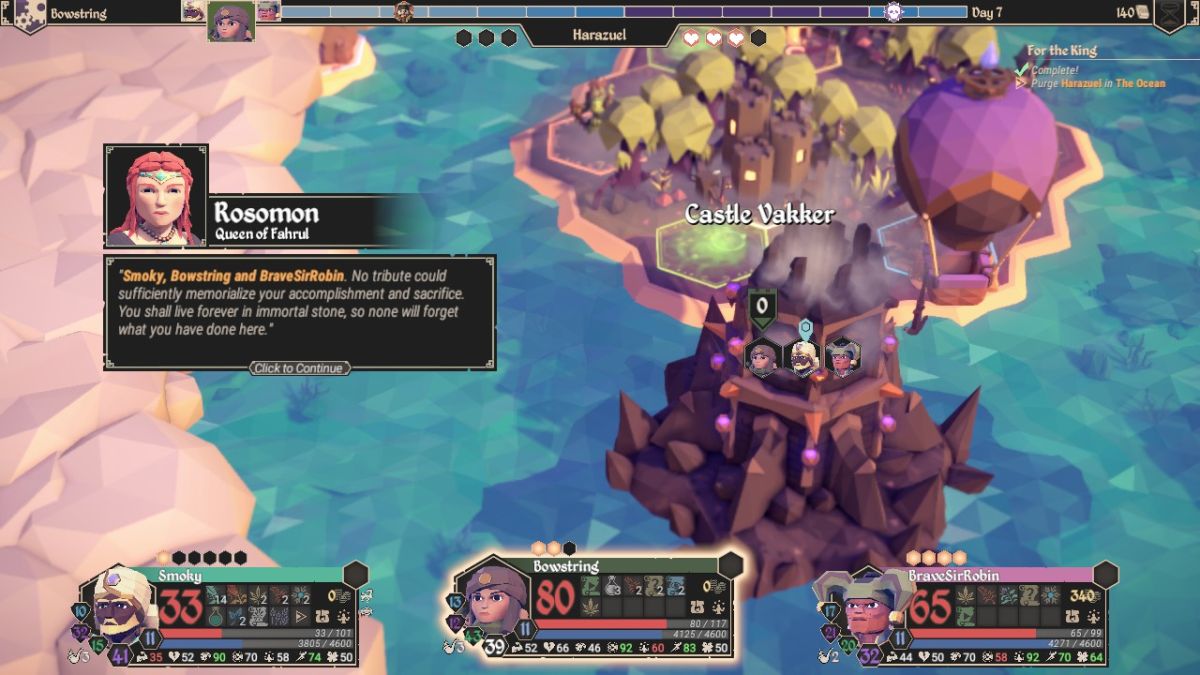
With the defeat of Vexor, his tower crumbles around him and peace is restored to the land. Unfortunately, your characters do not make it out of the dungeon before it collapses and the presumption is that they perish inside. I prefer to think that they make it out somehow without anyone knowing about it, but that's the official plot explanation. The party members are then immortalized in stone, which explains the presence of the stone heroes that dot the landscape. These are presumably victorious characters from earlier runs, and that's kind of a neat idea for a rougelike game. For a "rocks fall, everyone dies" scenario it manages to be kind of inspiring.
So that's a full Tutorial walkthrough game of For The King. I've been having a blast playing thus far, and it's a shame that this title doesn't seem to have attracted much interest thus far online. There's a lot of room for replayability with different parties, and I'd like to try some different variant groups down the road to see how far they can go. Will we manage to work up to "Master difficulty, three Hobos" in time? It should be fun to find out. Thanks for reading.


