
Livestream Link (for those who would rather watch first before reading)

Time to take a look at another new family of ships in FTL, starting with the Engi A Cruiser. This is probably one of the first ships that most people play after the Kestrel A, since it unlocks so easily. (All you have to do is reach Sector Five with any of the Kestrel ships, on any difficulty level.) I've also seen this ship floating around near the top of the FTL tier lists online; a lot of people seem to like the Engi A. It does have two powerful advantages which can help players get off to a strong run. The first of these is the starting weapon: the Ion Blast II. This is arguably the best ion weapon in the game, firing off an ion shot every four seconds at the cost of three weapons power. The Ion Blast II is one of the only ion weapons that fires fast enough to permanently remove shields. As long as the ion shots keep hitting, they will eventually take down any level of shielding. The Ion Blast II is therefore a real "fire and forget" weapon, and you can autofire the thing against enemy shields and generally do pretty well.
The second advantage of the Engi A is that the ship starts the game with a Drone Control system and a Combat Drone. This means that there's no need to search out a Drone Control system at a store, or spend the scrap needed to pick up the thing. If you can find or purchase a Defensive Drone, you're already good to go. (I've definitely had a couple of runs where I died because I had a defensive drone in inventory without a Drone Control system to run the thing - argh!) The Combat Drone is also pretty decent in its own right, as those things are the strongest of the attack drones. They will sometimes fire two shots in quick succession, allowing them to get a shot past a single shield layer, or temporarily take down two shield layers to open up a beam shot. I definitely favor the Combat drones over the Beam and Fire drones, which are great at wrecking ships that don't have shields up... but if the enemy ship has no shields, then you've already won the battle, haven't you?  It's removing the shields that's the hard part! Anyway, the Engi A therefore has a very obvious gameplay setup: use the Ion Blast to remove the shields and then have the Combat drone blast away at the helpless target. What's not to like?
Well... there's actually plenty not to like here. As nice as it is to have the Ion Blast II, the darn thing can only remove shields and ionize systems - it can never deal damage directly. There are also many problems with establishing an ion cascade for permanent shield removal. Enemy ships with high evade can simply dodge a couple of shots, removing the ionization and forcing the ion cascade to start all over again. This makes the weapon almost completely useless against those endgame auto scouts with the 40% evade. You'll never get through their shielding before they manage to dodge and reset the ion cascade. Worse yet are ships with Cloaking units, which have an even easier time breaking the ion cascade. Ships with Cloaking are very common in the later stages of the game, and the Ion Blast II is rendered almost helpless against them. (The flagship also starts with its own Cloaking too!) Not a good way to tie up three weapon power in the later stages of the game. Maybe it's different on Easy difficulty; I only play on Hard and everything has high evade + three or four shield bubbles in Sectors Seven and Eight, making the Ion Blast II almost useless.
Then there's the Combat drone itself. It *SOUNDS* great to have that thing flying around shooting at the enemy ship, but the reality can often be a major disappointment. I can't tell you how often I've seen the drone flitting about shooting at enemy Doors or Sensors or the empty hull, while their weapons and shields and piloting all remain untouched. The inability to control the Combat drone in battle is a huge detriment, and one of the major reasons why I try to avoid relying on drones to deal damage. Far too much RNG for my liking. T-Hawk has written about how the ions + drones combo is really a "Win Harder" condition; they allow you to crush an enemy that's already been defeated to an even greater extent, but they don't do that much to reach a winning position in the first place. Anything other than lasers to get past shields (followed by beams after that) isn't a reliable form of damage in FTL. That's why experienced players gravitate toward those setups over and over again.
Ultimately the Engi A is somewhat of a newcomer's ship. It has a low skillcap to be played, and there's relatively little room for micromanagement with the starting setup. Autofire the Ion Blast at the enemy shields, turn on a Combat drone, and that's about all you can do. The battles practically play themselves. This is why the Engi A gets rated so highly on a lot of tier lists: lots of inexperienced players get further with the Engi A compared to more standard ships, and assume that it's very strong. I actually thought I was missing something for a long time because I was never impressed by this ship; I had to be missing something, right? After discussing the Engi A with other players at Realms Beyond, I finally realized no, I wasn't missing anything. Engi A is a decent enough ship, but nowhere near top tier. I regard it as strictly average. It's not a ship that you'll see me playing often because I regard it as being fairly uninteresting. That's why I did over half the ships on the list before doing an online run with this one, when you would normally assume that it would be among the first ones chosen!

Sector One started off normally enough, with the Ion Blast + Combat Drone combo working well enough against the starting enemy ships. I picked up a Heavy Ion weapon in a double scrap reward from an early combat - I figured that I had enough ion damage already though! I wasn't going to go for all ion weapons and load up on offensive drones to complement them. One thing that I should mention is that the extremely short cooldown on the Ion Blast II trains up your weapons guy very fast. In fact, it trains so quickly that I spent three minutes skilling Sleepy the gunner up to the maximum against an auto scout with no shields. I could ionize the enemy weapons endlessly with zero risk, and it was too good of an opportunity to pass up. Then we had another easy battle against a Pirate scout, but the Combat drone refused to fire on their weapons system, and a Heavy Laser shot went through and hit the drone room, destroying the system and setting the room on fire. I had to stall for time while letting the fires burn out, then repair the Drone Controls, in order to get the last hit. Sheesh. Can't I get a better weapon setup?

Wow.  The very first store, halfway through Sector One, was offering a Chain Vulcan for sale. It's one of the rarest weapons in the game, and also one of the most powerful if used correctly. The Vulcan starts with a cooldown of 11 seconds, and drops by 2 seconds every time that it fires, down to a cooldown of 1 second after it has been fully spun up. This takes a while at the start of each fight, a very long 35 seconds in total, but once the Vulcan has gotten fully charged, the thing is almost completely unstoppable. You need to target the thing against enemy shields; the Vulcan will begin peeling away the shields much, much faster than the other ship can repair them. Within a short period of time, the shields will be down and the gun will begin ripping apart the hull. I have never seen an AI ship that could withstand a fully charged Vulcan. Cloaking + Weapons hack would do it, I suppose, though I've never run into that with a Vulcan setup. Outside very rare situations like that, however, the Vulcan is the only weapon that can win the game all by itself.
Now that said, the thing has a lot of weaknesses as well. It takes a long time to charge at the beginning of each encounter, and you'll be forced to sit around absorbing damage while waiting for that to happen. The Vulcan can also be knocked offline by taking bomb or missile damage, and if that happens, you have to start the charging process all over again. *ALWAYS* keep your Vulcan in weapon slot #1! The thing also struggles mightily against ships with high evade or Cloaking. In other words, the Vulcan is much like a better version of the ion cascade setup, because instead of simply ionizing enemy shields, it will be destroying them in the process. It shares the same strengths and weaknesses as an ion gameplay. This is a pretty tough weapon to use, and I've seen many a run on Livestream that purchased a Vulcan without having the proper setup and got owned shortly thereafter. Buyer beware!
The smart purchase here would have been the four-shot version of the Charge Laser. That's an excellent weapon, and a perfect fit for the weapon slot constrained Engi A ship. Instead, I took the risky option and went for the Vulcan. I had to do it - I still didn't have a good Vulcan run captured on Livestream, and it would make this game ten times more entertaining to watch. I sold the Heavy Ion and the Engi Medbot Dispersal and picked up the big, bad gun. I would need to use the Ion Blast a little bit longer, until I could upgrade weapons to level 4, but after that it would be all Vulcan all the time.

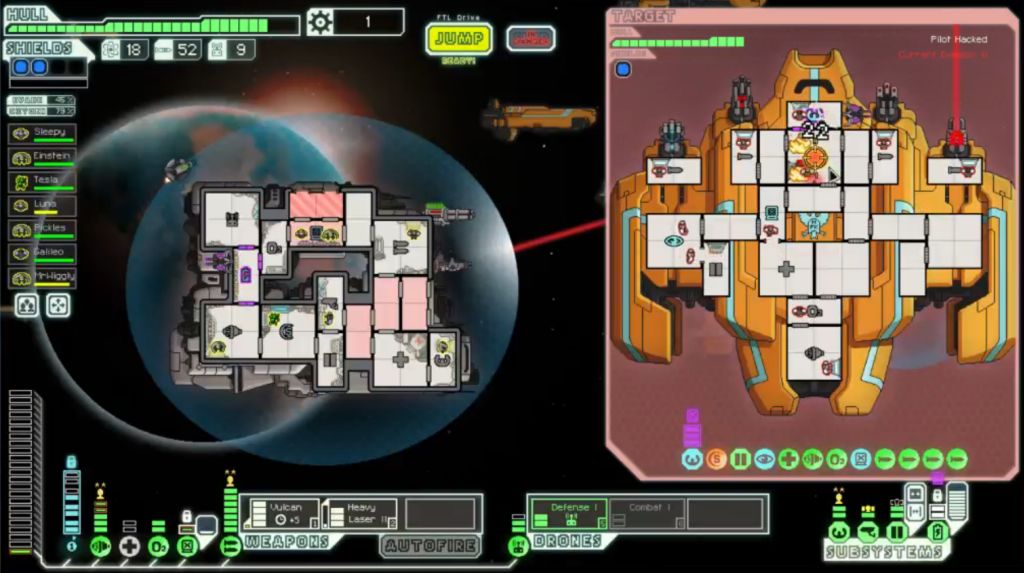
I remained using the Ion Blast + Combat Drone combo for the remainder of Sector One. The scrap at this point went into taking shields to level 4 for the second bubble. Sector Two was a Civilian Sector with a giant nebula that took up half of the map. The next target was weapons, which I upgraded to level 4 to unlock use of the Vulcan. My first attempt to use it was a failure, a stray laser shot hitting the weapons room and knocking the Vulcan offline while it was still charging. Whoops. You really shouldn't try to use the thing without having an extra level or two in weapons to use as a damage buffer. I had to use the Vulcan in the battle pictured above due to the enemy Antidrone, and you can see the results of an unfriendly missile strike hitting at the wrong time.  The ion and drone setup were otherwise better so long as the rebel ships had only a single shield layer to contend with.
Then a Heavy Laser II dropped as a battle reward towards the end of Sector Two. Just like that, I had a weapon pair that could potentially take me to the end of the game, although I would prefer a setup with more total shots than the two of them on that weapon. Having the Heavy Laser II gave me another option to use in fights, and I swapped back and forth between the Vulcan and the Heavy Laser in a number of scrapes for a little while. Once the enemy ships starting appearing with two shield layers though, I had no choice but to rely on the Vulcan. I made another crucial pickup in Sector Three, adding a Hacking system to the arsenal of the Engi A. That would guarantee that I could land the Heavy shots once the Vulcan had chewed through enemy shielding. Stores continued to pop up at opportune times for healing, and I even had enough extra money to pick up the Scrap Recovery Arm augment. This run was really starting to come together now.
Sector Four brought in more useful fights. I upgraded shields to level 6, purchased a Defensive Drone in a store for 50 scrap, and picked up a new Mantis crewmember in an event. The Scrap Recovery Arm paid for itself via a blue event that yielded up 40 scrap for free, nice. The run was tearing the game a new one when this unfortunate event popped up:
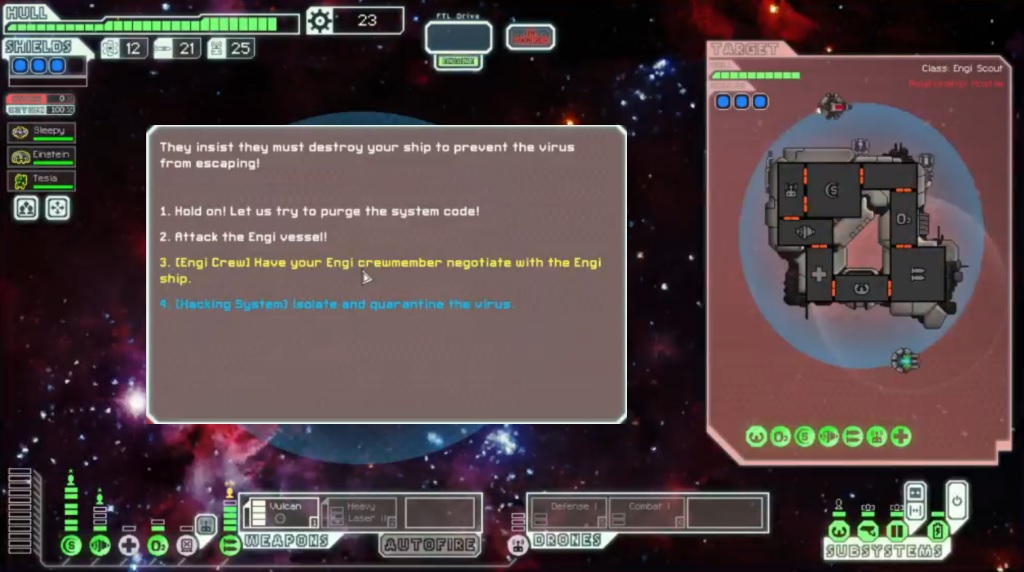
This is the hacking event, and I had two different blue options to pick between. The Engi option would cause me to lose one of the two Engi crewmembers and trigger a battle; after you win the battle, your Engi is returned with maxed out skills in every category. The Hacking option would give me a scrap reward. I wanted to pick the second option, because my two Engis had already maxed out piloting and engine skill respectively. Maxing out the other skills wouldn't serve much purpose. But the chat wanted to see the super Engi, so I picked the first option, and wow did I ever regret it. I lost my Engi pilot immediately, and was confronted by this monstrosity of an enemy ship. Three shield bubbles and a Defensive Drone II made it almost impossible to deal any damage with the Vulcan. They had a nasty weapon setup as well: two ion weapons to trigger a shield cascade and then a low cooldown two-shot laser to rip apart the hull. I realized right away that this was an unwinnable battle. I could not get damage onto their ship, even with the use of Hacking, and they were tearing me a new one with my shields in permanent ion stasis. I had no choice but to jump away, losing my Engi (who already had maxed out piloting skills, remember!) in the process.
What a miserable and unnecessary waste. 
Still, life went on, even if losing the pilot had been a major setback. It was a good lesson on why it's never a smart idea to take unnecessary risks for no reason. Our Mantis slid over to the helm and did his best to fly the ship. Sector Five started out scarce on encounters, but then I found a full sector reveal halfway through and managed to land a number of good fights en route to the exit. The strangest one took place in an ion storm that limited me to a total of 6 power, and I needed 4 of those to run the Vulcan to deal any damage. Even with the Backup Battery to kick in a little extra power, this was a tense and difficult situation where I was reduced to running one shield bubble (2 power) and zero engines at one point. Just barely won that one before everyone died from lack of oxygen. Another battle had an Ion Intruder Drone running around ionizing systems, then a Heavy Laser shot hit my shield unit and set it on fire. That was another near disaster situation; even in victory I took 11 damage (!) These battles were simply taking too long for the Vulcan to spin up to full charge; I needed to improve my weapons and get the Heavy Laser II online ASAP. I'd been looking for other laser weapons and never came across anything good. It looked like these two weapons were going to have to get the job done. [EDIT: When I went back and watched this again, I realized that I could have picked up two different Hull Laser I weapons at stores in Sector Six. The pair of them would have been a lot better than the Heavy Laser II, argh!]

A store in Sector Six allowed me to pick up an Engi with piloting skills to replace the one lost earlier. I went ahead and purchased a Human as well, since I was approaching the end of the game and a mere three crew wasn't going to cut it agaist the flagship. Most of the rest of the sector was used upgrading weapons to level 7, which finally brought the Heavy Laser II into play. The pirate ship above was noteworthy for being particularly obnoxious by having two different missile launchers at once, both of them operating on identical cooldowns. A defensive drone can only shoot down one missile at a time, and I had both my Piloting and Drone Control rooms get hit at the start of the battle. That meant no protection against a barrage of missiles until I could finally get the enemy weapons offline with lasers. Very irritating, to say the least.
The very next ship had an identical missile duo, again with the same mirrored cooldowns. This game sometimes... 
Those two battles left mere with a mere 5 health remaining on the hull. I had plenty of scrap for a complete heal, over 200 in total, but I needed to find a store quickly or see this run come to a disappointing conclusion. (The super annoying missile ships had ironically given me a free Human crewmember as a post-battle reward for winning! He hopped onto a ship in critical condition, wonder what he was thinking about that.) Salvation came halfway through Sector Seven in the form of a store:
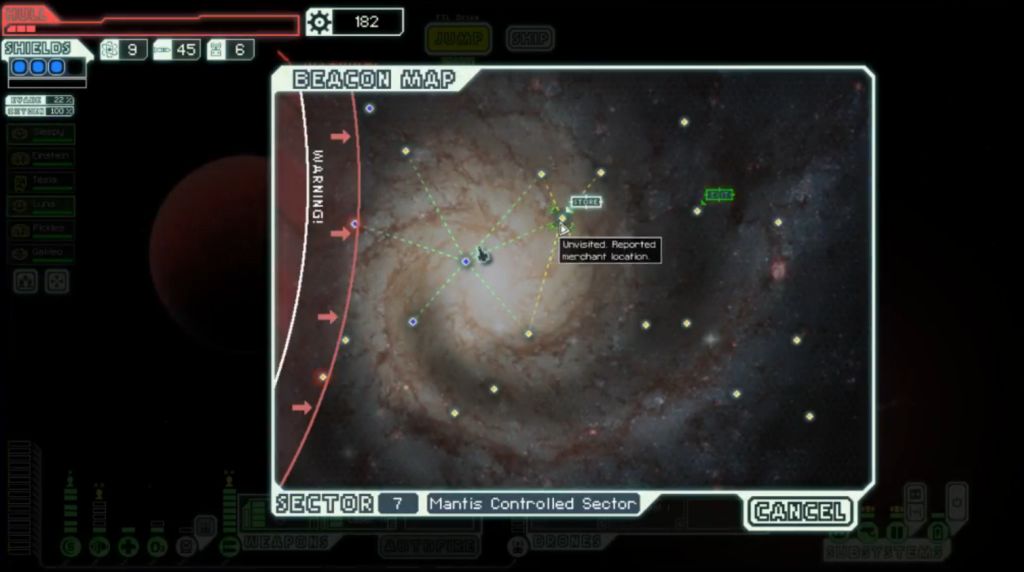
This shop was pretty barren in terms of offerings, but I didn't need to purchase anything. All I wanted was a hull repair, and that's exactly what I picked up. Now I was confident that I would at least reach the flagship and have my shot at a victory. For the remainder of the sector, I dove past the exit beacon to land additional encounter. This yielded a nice pile of scrap (used for level 8 shields) along with an Engi for the seventh crew member. Sadly this was one run where I wouldn't have Cloaking to use against the flagship.
An auto scout in Sector Eight demonstrated the weakness of the Vulcan against high evade targets. The thing had the maximum four shield layers and must have had over 40% evade, because we sat there firing at the thing with a fully charged Vulcan for seemingly ages on end. Probably should have used a Hacking drone to remove the evade, but I was low on drone parts and worried about running out. Eventually the thing's shields were peeled away and the automated ship mercifully finished off. I found few encounters along the way in this final sector. There was enough time to hit one repair station (needed for another heal and the drone parts), upgrade and damage buffer the few remaining systems, then get ready for the flagship. How would the Vulcan fare against this thing?
The rebel Hacking hit the Backup Battery, which is always funny for subtracting out two power instead of adding it. That's a fairly innocuous target for their Hacking, I could definitely live with that. I used my own Hacking on their Piloting as usual, with the goal of timing a pair of Heavy Laser shots to hit the flagship as soon as the Vulcan removed their shields. That can be tough in the first phase of the battle, since the flagship will use its Cloaking device and force the shield removal process to start all over again. The lack of Cloaking also made this vastly more dangerous. Fortunately the first few missile volleys were relatively mild; I dodge the first one entirely with the help of the Defensive drone, and the next two missile trios failed to hit anything too important. Once the Vulcan was fully spun up to minimum cooldown, I managed to trigger a perfect Hacking (almost by accident, heh) that landed both Heavy Laser shots onto the flagship's shield room, setting it on fire in the process. Even a subsequent cloak by the rebels wasn't enough to save them. The Vulcan remained fully charged, and once they came out of invisibility, it went to work carving them up. Victory over the first phase followed shortly thereafter. The Engi A took 9 damage in total, mostly due to some terrible luck at dodging ion shots which allowed the beam weapon on the flagship to punch through at one point.
I was worried for a second at the start of the second phase, thinking that the flagship's Defensive drone would shoot down all of my Vulcan lasers. Then I realized that the rebels have a Defensive Drone I in this battle, not a Defensive Drone II, and those fears immediately disappeared. Anyway, the strategy here was much the same. Without a Cloaking unit, I had to concentrate on winning as fast as possible. The Vulcan wound up to full charge fairly quickly, and I survived the first drone surge with zero damage taken thanks to a ridiculous number of dodges. Seriously, I think the little drones missed seven out of eight shots at one point (I had 45% evade). RNG to the rescue! Hacking took out the flagship's ability to evade, and the damage piled on rapidly once the rebel shields were down. The ship took 3 damage this time, and finished off the second phase just before the third drone surge triggered.
For the final phase, I had an unusual concern. Normally you worry about the rebel Mind Control and the invaders teleporting onto your ship. I was confident that I could deal with that. No, the problem this time was the greatly increased evade that the flagship has in the final phase. It starts at 33% evade (up from 20% in the second phase), and that would make it tougher for the Vulcan to chew through the shielding - both normal and Zoltan. I'd been holding onto a Combat drone ever since the beginning of the game, and I used that at the start of this phase to cut away at the Zoltan Shield while the Vulcan was stil charging. The first two rebels teleported into the easiest place on the ship to suffocate boarders, the room above the Hacking controls with direct hatches to the void of space. Then the next two teleported right next to them. Have fun not breathing up there!  Mind Control similarly hit the Human in the Sensors room, another friendly break of luck. Eventually the Zoltan Shield was destroyed, and the Vulcan began working on the normal shields, with help from Hacking and the Heavy Laser II. The timing between the two of them was actually off, as I forgot to notice that the Backup Battery powering the Hacking unit went offline just as the Heavy Laser II fired. Whoops. Well it didn't matter, because the Vulcan was the star of the show, yet again, and it proved why the thing can win games all on its own. Victory was achieved with plenty of health to spare:
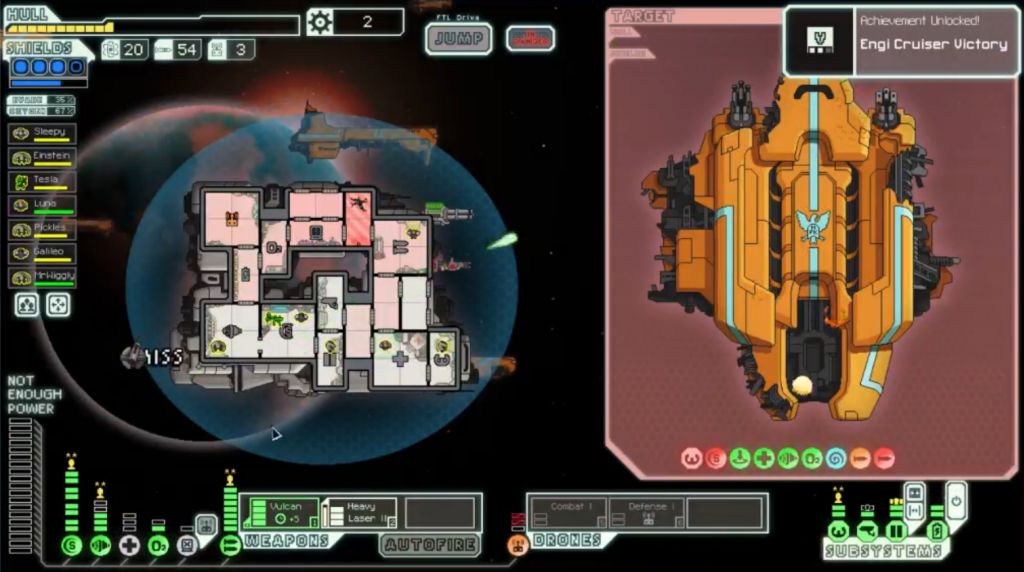
Most of that damage came from not having Cloaking for the final flagship duel. It's amazing what a difference that system makes. I also had to wait for the Vulcan to charge up in each of the three phases, and that meant taking more damage from missiles all the while. When you can't cloak through them, some are inevitably going to hit. I was lucky that none of them ever hit any key systems, weapons and shields both going untouched. Not that a stray missile hit would have lead to a defeat, but it's always nice to avoid the trouble.
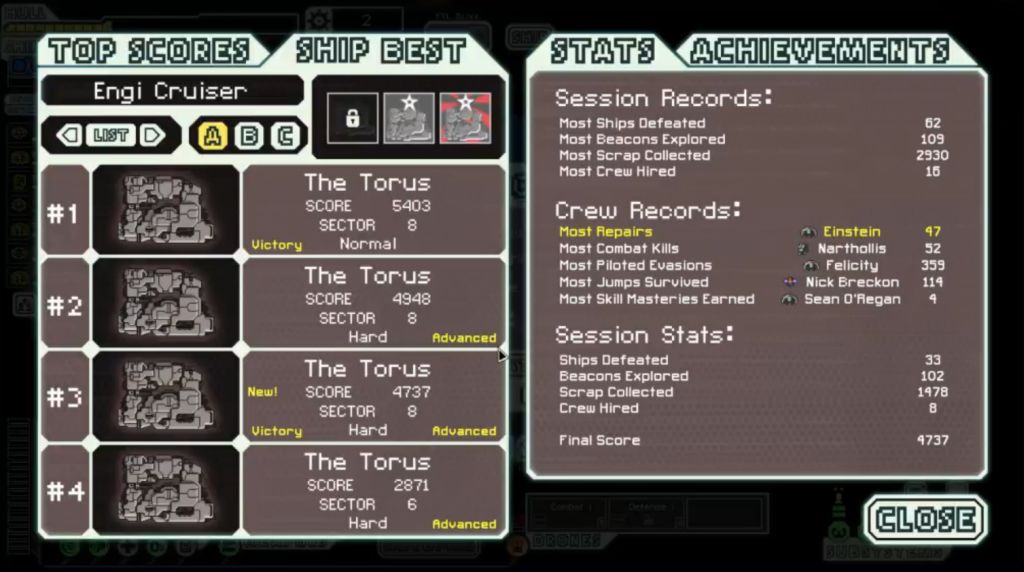
This is one of my lowest-scoring victories on Hard difficulty. It didn't even pass a score from Normal difficulty that I put up months and months ago. I can explain the low score too: I took a route that went almost entirely through green sectors on the map, lots of Civilian Sectors and Engi Sectors. That meant a relatively easy ride in terms of battles, but also a lower scrap total from fewer ships defeated. Under 1500 scrap collected meant a tight total at the end of the game. I skipped the level 8 weapons upgrade (100 scrap) and still had just barely enough.
This run was dominated by the Vulcan. It was the only weapon that I used for most of the journey, and I hope this report serves as a good demonstration of its strengths and weaknesses. I still like the thing despite its problems. You can tag along on my ships anytime, Vulcan!  Thanks again for reading and/or watching.


