
Livestream Link (for those who would rather watch first before reading)

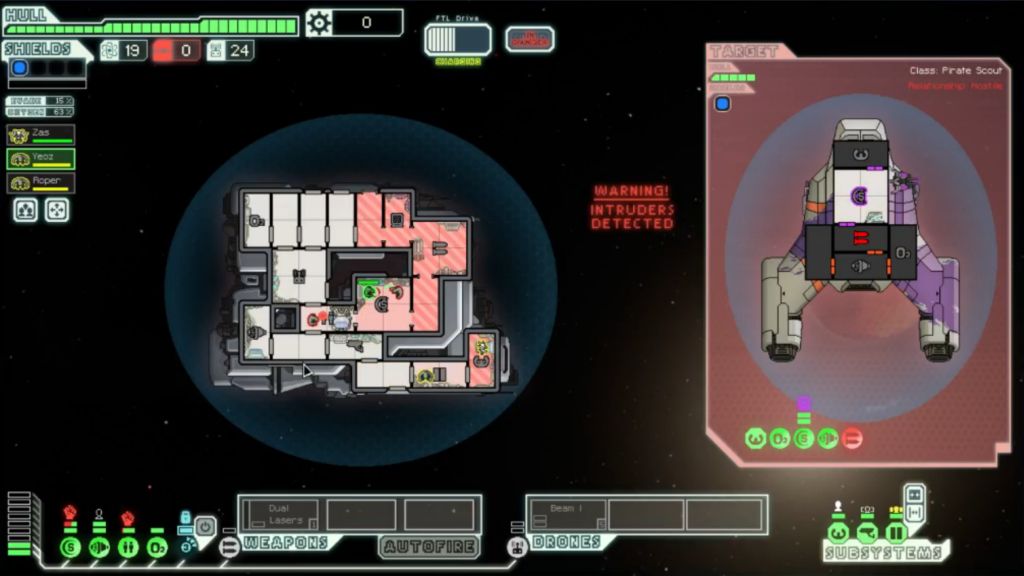
Finishing up the Engi ships is the C layout, one of the new ones added in the Advanced Edition of FTL. I believe that this is actually the best of the three ships, albeit one that takes some skill to use properly. The biggest advantage of the Engi C design is the presence of two initial systems: Drone Control and Hacking. No other ship begins the game with both of these systems installed. The Drone Control offers up the easy chance to pick up a Defensive Drone for only 50 scrap in a store, or simply find one along the way. You can mess around with Combat Drones or Beam Drones as well, although I generally prefer to stick with normal weapons for offensive output. Hacking is another amazing system to have on board, almost certainly overpowered due to its incredible versatility. You can target the Hacking against enemy piloting, shields, weapons, etc. Having both of these systems already installed at the start of the game opens up a ton of potential options for the player.
The Engi C starts with the Dual Lasers as well, another excellent starting tool. The Dual Lasers cost 1 power for 2 shots, have a short cooldown of 10 seconds, and can also ignite fires on the enemy ship. It's one of the better weapons in FTL, unfortunately not purchasable in stores. This ship also has a strong starting crew allotment (2 Engi and 1 Lanius), the standard ship setup (nothing missing), and even a Defensive Scrambler augment. That one is pretty useful, stopping enemy defensive drones from doing anything. They sway around drunkenly on the screen, not shooting down missiles or drones or whatever. Like most other augments, I've tended to find myself selling the thing for extra scrap, but it's genuinely pretty good in its own right.
The tradeoff for this ship is that you do start the game with an underpowered offensive output. The Dual Laser provides only the two shots, which means that you're dealing a max of one damage per volley against the standard one-shield early game enemy setup. If you miss one of the two shots, then you deal no damage at all! This means that the raw DPS of this ship is fairly low, at least when beginning. You will need to use Hacking and/or the Beam Drone if you want to defeat enemy ships quickly. Furthermore, if you spam the drones willy-nilly, you'll find yourself running out pretty quickly, and on Hard difficulty you can't exactly afford to purchase them at 8 scrap apiece in stores. There's also a one-time penalty of 40 scrap to take Weapons to level 2, and like all Engi ships this one only has three weapons slots, which can make an endgame setup harder to put together. Long story short, this is a ship with a high skill cap. You have lots of systems at your disposal, and you're going to need to use them intelligently to advance through the game. Inexperienced players will struggle to make progress with the Engi C. But in the right hands, this one can be very strong indeed, and quite a bit better than the Engi A. (Obviously it's waaaaaaaay better than the Engi B!)
On this particular run, the first encounter was unique as I had two enemy Engis board my ship from a pre-battle event. The dreaded double Engi invaders! We handled that without too much trouble. There were some other boarding threats, however, and they did cause a bit of a pain. With no upgraded Door controls and two Engis of my own manning the engine / weapons rooms, I lacked too many options for fighting off rebel marines. Mostly I let them roam around the Engi C, opening the hatches to drain oxygen from individual rooms while stalling for time. It seemed to work out alright. Offensively, I would use Hacking whenever a particularly nasty enemy ship design appeared. The target for these early Hacking drones was the enemy shield unit, not the piloting room like I usually do. Early game ships have one shield bubble and relatively low evade; I could only get 1 damage through by Hacking piloting, but I could potentially do 2 damage by Hacking shields if both Dual Laser shots hit. The laser shots also had the good fortune to start a number of fires, making my life easier. I made it through Sector One with only two damage taken to the hull, although with a fairly pedestrian total of 92 scrap.
There was a store at the outset of Sector Two, surrounded by nebula beacons where I could look for more encounters. In the process of visiting them, I came across a "Manually search the wreckage for survivors and equipment" event dialog. Normally I skip these since they have the chance to lose a crewmember, but with a Cloning Bay on the Engi C, there was no risk factor. There was a major reward floating out there in space:

A free Defensive Drone, excellent! Now I could put that Drone Control system to use. (I hadn't touched the Beam Drone to this point in the game.) Unfortunately the store had no weapons for sale... and another Defensive Drone for purchase. No thanks, we already found one of those. All I could do was repair and soldier onwards for the time being. I had 130 scrap sitting around unspent, more than enough to purchase additional goodies. Still, if I didn't manage to upgrade weapons before the start of Sector Three, things were going to get a bit dicey.
And then the very next battle after visiting the store dropped a free Halberd Beam:
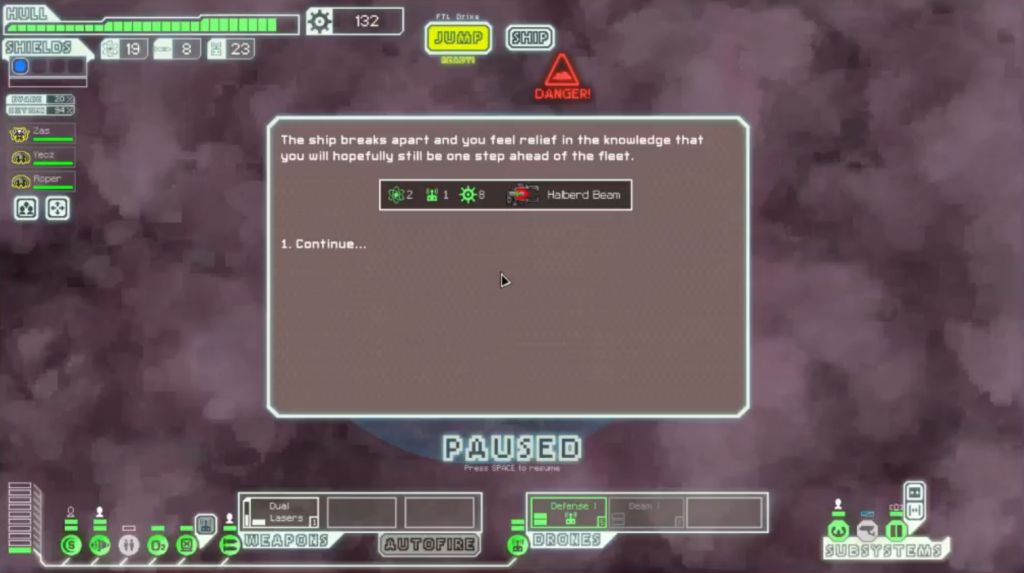
Jackpot!  With a 1 power laser weapon already in hand, the Halberd Beam was the single best weapon that I could have found. I would have room to add on a pair of 2 power weapons to fill out the remaining slots. Well, I could if this wasn't an Engi ship with only three weapon slots, dang. But that was no reason to undersell this incredible stroke of good fortune. The Dual Lasers + Halberd combo would carry me through at least Sector Four, plus this was the Engi C with Hacking already installed, plus I *ALSO* already had a Drone Control system with Defensive Drone. So, ummm, yeah. Pretty hard to screw this one up. This wouldn't be one of those runs where everything was one step away from disaster. Lady Luck was shining on this voyage.
I upgraded Weapons to level 4, immediately allowing my ship to employ both weapons at once. You can pretty much guess how that went:

And that was more or less what the next few sectors looked like.  (Micromangement note: see how I moved the Lanius pilot into the Door room in order to suffocate the poor rebel boarders? Little moves like that can add up over time.)
Anyway, I upgraded shields and engines to level 4, found a free Rock crewmember from a pirate event, and upgraded the reactor to get more power as necessary. At least, "enough power" for me, anyway - oxygen was often optional in these fights. The Defensive Drone was worth its weight in gold, shooting down innumerable missiles that targeted the Engi C. I did stupidly lose my engine room Engi when a Solar Flare hit the Cloning Bay while he was reviving inside. That was pretty unlucky, although I could have avoided it with better micromanagement of enemy boarders. Bah! I did upgrade the Door system shortly after this, probably later than I should have done so. The combination of the Dual Laser + Halberd Beam + Hacking allowed me to deal with all threats, even when a ship appeared with three shield layers at the start of Sector Four. Hack their piloting, land the two guaranteed laser shots, then the Halberd Beam still hits for 1 damage per room. Nice and easy.
This store that I came across a little bit later was nothing short of ridiculous:

When you see wares like these and you don't even need most of them, you know that your game of FTL is going well. I went with the safer option of the Burst Laser II over another Halberd Beam and one of those crazy beam-only strategies. (I did have Hacking so it would have been viable.) But 5 laser shots and a Halberd Beam was plenty good enough for this run. Then the next store had Long Range Scanners for sale, and... do I even need to finish writing this report?  I think you get the idea by now. My luck was disgustingly good.
I only needed level 6 weapons to make use of this particular trio, and they were online by Sector Five. I added level 6 shields for the third bubble along with a Backup Battery for more power. I had found Distraction Buoys augment earlier, granting an extra FTL jump in each new area before the rebel fleet began their pursuit, yet another little extra advantage that this Engi C run didn't particularly need. The biggest problem throughout the run had been enemy boarders, but even that problem was easily solved with time, as I was able to find several more crewmembers through events: a Mantis, another Rock, and a Zoltan. That gave me a group of six which was more than sufficient for defensive and repairing purposes. I would purchase another Burst Laser II at a store in the beginning of Sector Six, and now things were well and truly disgusting. Burst II + Burst II + Halberd, yikes! If the Engi ships had a fourth weapon slot, there would have been room for the Dual Lasers as well, 8 shots plus a Halberd Beam. I'd have to settle for 6 guaranteed hits plus a two-damage beam. What a shame.
Guess what we found floating in space in Sector Seven?

Seriously game, cut it out! This is TOO MUCH good luck for one run.  I can't even use that Burst Laser II, there's no place to put it! Can't we somehow channel all of this crazy good luck into some of those Engi B and Zoltan C runs?! (I found another free Defensive Drone at the next beacon. Seriously, go watch the recording - I am not making this up!)
I did find Cloaking at a store in Sector Seven for the last piece of the puzzle. Let's just skip ahead to the flagship battle, shall we? I certainly wasn't going to die to anything before that:

I farmed up so much scrap in Sector Eight that I could take engines all the way to level 7, something that I almost never have the resources to do. No damage taken en route to the flagship either. In the first phase, it was a bit unfortunate to see the Hacking drone land on my engines. At least it wasn't weapons or shields, the two most dangerous systems to be Hacked. My first volley put up the expected results, 10 hull damage along with major system damage to the rebel shields, piloting, and missile launcher. Looking at this in retrospect, I should have targeted one of the two Burst Laser IIs against the rebel missiles. Along with the Halberd Beam, it would deal a certain 3 damage and knock that weapon completely offline until it could be repaired. I fired both of the Burst Laser IIs against the rebel shields, which was a bit of a waste since there would still be two shield bubbles remaining regardless. I'll keep that in mind for the future. On this occasion, I would take a single point of damage from the first phase, from a missile that hit through Cloaking thanks to that Hacked engine.
In the second phase, my Defensive Drone failed to shoot down the first enemy Boarding Drone. It landed in the Weapon room, which would have been a bad thing, except that I had a full crew and could get 4 vs 1 odds in there. The invading robot was torn apart quickly. I played around with some of my own drones in this battle, running a Combat II Drone that I'd found earlier for some extra damage, then setting up double Defensive Drones to deal with incoming missiles. They performed perfectly on the only missile volley that I saw, shooting down one missile each as I dodged the last one at 51% odds (level 7 engines hype!) Offensively, the lasers and beam combo did their thing as usual, with the Combat II Drone getting the last hit while the rebel shields were down. Zero damage taken!
With 29 hull remaining on the Engi C, there wasn't a lot of suspense for the final flagship phase. I used the Combat II Drone to cut through the rebel supershield quickly, and it didn't last long. The biggest issue was one of my Mantises getting hit by Mind Control; I kept feeding the superfluous crew to the bug to keep it busy, then reviving them with the level 2 Cloning Bay after they died. All I needed to do was buy time for the weapons to do their thing. I used Cloaking to dodge the laser superweapon, I turned on the double Defensive Drones any time that rebel missiles appeared, and my full complement of shipmates backed by reviving capabilities had little trouble dealing with the rebel marines. I took one point of hull damage in the third phase, for a grand total of 2 HP lost overall:

This was apparently the first time that I had won with the Engi C on Hard difficulty. I think that this is another ship that tends to fall through the cracks sometimes, as there isn't anything too noteworthy about it. The Hacking + Drone Control combo is the main unique feature, and expert players tend to prioritize getting both of those systems anyway in most games. The one thing holding back the Engi C is the lack of direct damage capabilities, since it only starts with the Dual Lasers and that crummy Beam Drone. If the ship can get hold of some good weapons, then it can be very powerful indeed.

The score for this run was mediocre and certainly didn't reflect how dominant it had been. That's due to the fact that I picked up so much scrap for free, which doesn't count for the endgame tallies. I was honestly out of things to purchase with scrap by the end, and that almost never happens on Hard difficulty. The sheer number of free weapons found on this run bordered on the ludicrous. And it's not like I was picking up the Heavy Ion or the Stun Bomb here. I was landing Halberd Beams, Burst II Lasers, and Defensive Drones - multiple free Defensive Drones! That's just silly. On a day like this one, I really should have purchased a lottery ticket. Or maybe not - my University of Maryland Terps played West Virginia University in the 2015 NCAA Basketball Tournament on the same day, and they got absolutely pasted in that game. I guess FTL swallowed up all my good fortune for the day. Sorry about that, team! 
Thanks for reading. Not the hardest game, but a memorable one nonetheless.


