
When I wrote my initial FTL Introduction page back in 2014, I had no idea that the game would eventually wind up with so much content on my website. During the gaming lull between my League of Legends burnout and the release of Civ6, I needed to find something to play, and FTL ended up becoming my personal title of choice. FTL has a fantastic format for Livestreaming in particular, with a single run lasting roughly the length of a typical Livestreaming session (2-3 hours) and the viewers able to play "backseat driver" and second-guess decisions about where to go, what to buy, which event option to pick, and so on. The net result is that I wound up playing a lot of FTL, and it was gaming time well spent. FTL is one of the finest strategy games I've ever played, with Hard difficulty level in particular almost perfectly calibrated so that the player has exactly enough resources - and no more - to win the game. It's a game that I can sit down and play for a couple of hours at any time and always get a challenging and exciting outcome, even after hundreds of runs. Along with the original Master of Orion, FTL is one of the very few games where I've never felt any need to do much in the way of oddball variants, simply because the core gameplay is already so excellent.
As a result of playing all of these games of FTL, I've found myself slowly improving over time. I was able to win on Hard difficulty very quickly, but at first it typically took choosing one of the stronger ship designs or getting some key breaks of luck to achieve victory. When I go back and look at my early written reports on the website now, I can see some of the mistakes that I used to make, particularly in terms of how to spend scrap (the single most important strategic element in FTL). Originally, I would guess that I was winning somewhere in the 40-50% range of my games on Hard. Some of the weak ships in particular were disasters from a success standpoint; I think it took ten tries to win with the Zoltan C ship, and almost as many tries with the Federation C Cruiser (admittedly two of the worst ships in the game).
My win rate has improved significantly since then. Right now, I've won over a dozen games in a row on Hard, using different ships on every run, only avoiding the ships that use the Teleporter since I don't enjoy that aspect of FTL's gameplay. Most of these victories have been relatively easy sailing, with each ship hitting the upgrades that I know are necessary to win in smooth progression. About a quarter of them have not been easy at all, but still I managed to struggle over the finish line by the skin of my teeth. These are the games that would have been losses previously, and which I've been able to turn into wins through greater familiarity with FTL strategy. (See the Livestream run of my "Abduction Special" Lanius B game for a good example of this.) While it's true that not every game is winnable, the overwhelming majority of FTL runs can, in fact, be turned into victories with enough knowledge and hard work. An expert player can work around the random elements of the gameplay and still find a way to win in nearly all cases. I used to scoff at people online who claimed to have win rates of 80-90% on Hard difficulty, thinking that was impossible. And yet, now I find myself reaching that same position as well, much to my own surprise. It really is possible to win almost every game, even on Hard difficulty.
With that background out of the way, this report is designed to be my "Advanced Strategy" page for FTL. The Introduction page has all of the basic information about how to play the game. This will be a deeper dive where I hope to cull what I've learned across all those games into readable form. Let's dig in.
The single most important aspect of success in FTL is having a good weapon setup. With strong weapons, I can win the game no matter how many holes might exist elsewhere (missing key systems, few crew members, no augments, etc.) Why are weapons the most important component towards achieving success? Generally speaking, it's because a good offense also serves as a good defense. With a bunch of lasers and flak weapons, I can shoot out the enemy weapons before they get a chance to damage me, therefore achieving both offense and defense with one stroke. In contrast, sitting back and trying to set up an impenetrable defense generally doesn't work in FTL. The ships on Hard difficulty are simply too well outfitted, and way too many of them pack missiles or bombs that Defensive drones are no guarantee of stopping. Cloaking similarly has a 20 second cooldown, and can't be used to dodge everything. There are also bad pre-battle events which will knock out your engines or shields for a single fight, and environment hazards like ion pulsars and solar flares that can render defenses void, plus lots of ships that try to run away and must be destroyed before they can escape. Turtling up defensively doesn't work in any of those scenarios. Most importantly of all, the rebel flagship has too many weapons to make a purely defensive setup viable. The triple missile launcher, the drone surge, and the laser superweapon are all deadly perils. They will typically overwhelm normal defenses and deal at least some damage whenever they appear. The key to success is to defeat the flagship quickly, or at least use strong weapons to knock out the missile weapon in each phase. The weaker your weapons, the longer the final battle will last, and the most damage your ship will incur.
When I see FTL screenshots posted by other players online, I always check out what weapons setup they're using in their games. Over and over again, I see poor or gimmicky weapon loadouts from the online community. There are always lots of posts on FTL Reddit about how unfair it is to fight the rebel flagship... and then the poster adds a screenshot showing weapons never upgraded past level 4 or level 5, with some bizarre mixture of lasers and bombs and missiles serving as their offensive output. It's easy to see why weapon setups like this aren't successful.
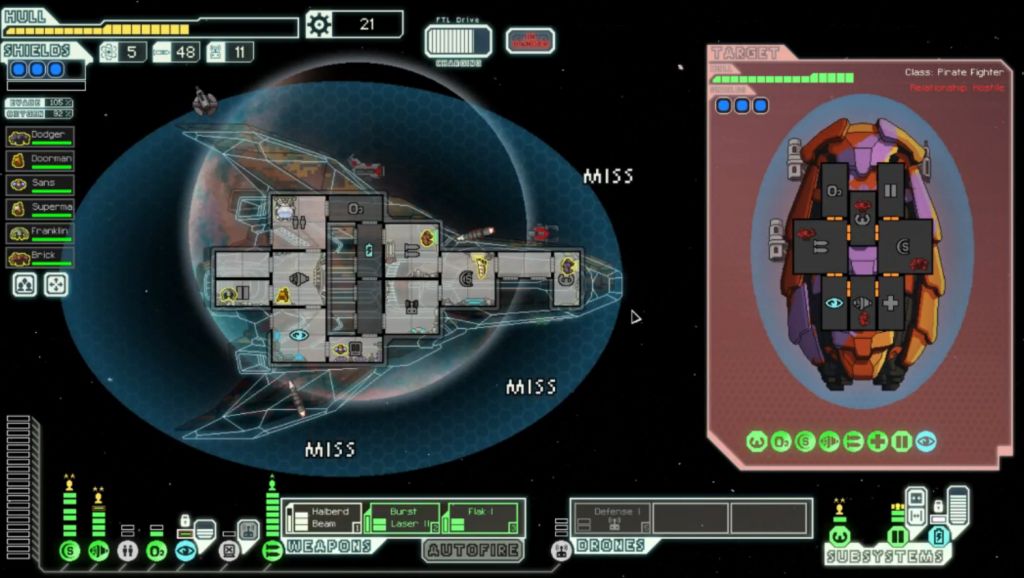
Anyway, the point of this is not to taunt those who are still in the process of learning FTL, but to focus on what DOES work in terms of achieving victory. The short version goes like this: get as many lasers and flak projectiles as possible, with beam weapons for complementary damage once there are enough lasers/flak to get through enemy shields. End of story. This is the only consistently reliable way to deal damage in FTL, and as a result, my runs gravitate towards these setups over and over again. The best weapons are of course the holy trio of FTL: Burst Laser II, Flak I, Halberd Beam. They are all worth having on any setup in all situations. But really, any laser weapon that you can point at the enemy ship will work reasonably well. Charge Laser, Chain Laser, Hull Laser: they all work just fine. I've slowly fallen out of favor with beam weapons other than the Halberd Beam, as they spread out damage across multiple systems on an enemy ship as opposed to concentrating it in one place. It's obviously better to deal 6 damage concentrated on an enemy's Weapons or Shields or Piloting system, rather than doing 1 damage to each of them and 3 more damage to empty parts of the hull. For this reason, I will certainly make use of Pike Beams or Hull Beams, but I tend not to go out of my way to get them. I'd rather have another laser weapon and two more shots - it's just more consistent and less susceptible to a bad RNG streak which leaves an enemy shield bubble intact and that beam weapon sitting there doing nothing.
The key target for the end of the game is the ability to deal a guaranteed 7 damage. That's enough to get through the rebel flagship's 4 shield layers and then deal 3 more damage to the missile weapon, enough to knock it offline. There are innumerable weapon setups that can do this, and dealing more damage on top of that is always nice. However, this should be the bare minimum that the player targets in each run. Consistently taking out the flagship's missile weapon is the key to success on Hard difficulty level (it's not enough to do it once, the rebel crew will keep repairing it). Hacking obviously helps enormously in this endeavor, and there are weapon setups that would not be viable without Hacking to remove enemy evade or shields.

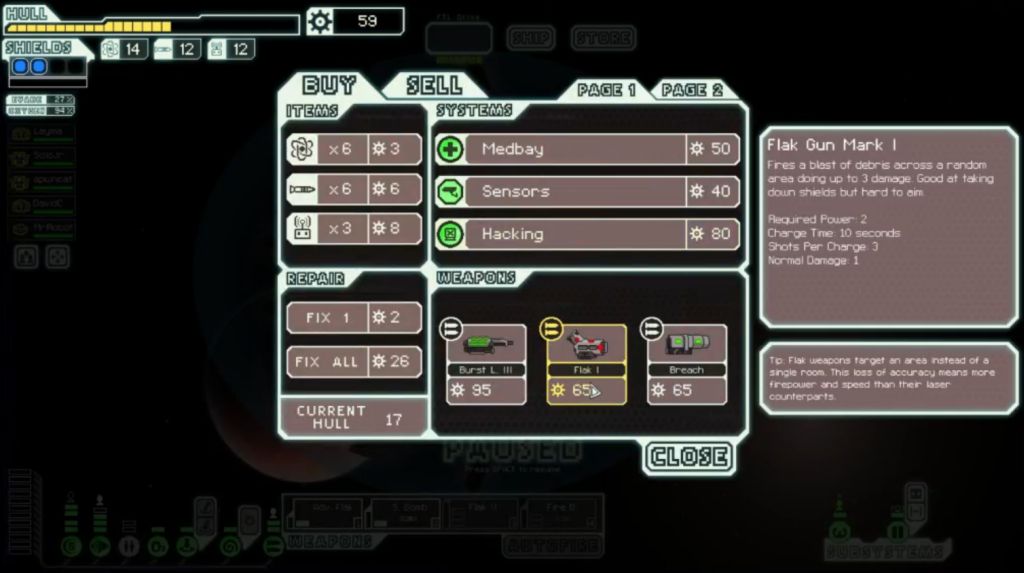
What doesn't work reliably in FTL? The short answer is anything else.  Missiles and bombs use up ammunition too quickly to serve as a main form of offense. They also do not synergize with lasers/flak/beams at all, and tying up one of the few weapon slots on missiles or bombs therefore wastes a slot that could have been used on another, more reliable source of damage. I tend to use them only in the early game, to fill an empty weapon slot at the end of a run, or in extreme emergencies. Offensive drones are a similarly weak option, as they also rely on the limited quantity of drone parts for use. On Hard difficulty, there isn't enough scrap to be buying more drones at 8 scrap apiece in stores. Besides, those drones are needed for Defensive drones and Hacking drones instead! Drones are further maddening because the player cannot target where they deal their damage, and that's a giant problem. A good weapon setup deals a massive volley against a critical system on the enemy ship at all once. In contrast, drones flit around dealing small pinpricks of damage to random systems. Offensive drones are a recipe for disaster; remember that if you're relying on them for your main damage, you're putting your fate in the hands of random chance that they'll go after the enemy systems that you want. I do not recommend this.
Ions are another weapon type that are strictly weaker than the lasers/flak/beams setup. Ions do not deal damage themselves but instead take enemy shields and systems offline for a short period of time. They rely on what I call the "ion cascade" to function properly; that is, the player must keep applying ion damage repeatedly until enemy shields are offline. As long as the ion shots keep hitting the target, the ionizing will keep stacking up and reduce enemy shields. However, if the ion cascade gets interrupted for any reason, the ion cascade has to start all over again from the beginning. This means that ions get vastly weaker as the game progresses. Against a single shield bubble, ions look pretty awesome: land one shot and the shielding is gone! Against two shield layers though, the player needs to apply 3 ion damage to remove the shields. Against three shield layers, the player needs to land 5 ion damage, and so on. The odds that the ion shots will keep hitting gets smaller and smaller as the enemy shielding increases, and it takes longer and longer to get the shields down. Ions are also nearly helpless against enemy ships with Cloaking (which resets the ion cascade) or Defensive Drone IIs, which will shoot down the incoming projectiles. Of course, you can mitigate this by bringing more ion weapons so as to have more ion shots chaining together as part of the cascade, but that ties up even more weapon slots on ion weapons that don't actually deal damage. On an Engi ship with only three weapon slots, do you really want to use two of them on ions? Long story short, ions are a damage over time (DOT) effect. And all other things being equal, burst damage is always better than DOT damage. I only use ions situationally or when I have no other choice. (By the way, the Vulcan is essentially an ion weapon that deals damage, as it has its own cascade effect. This is why expert players tends to agree that the Vulcan is not very good.)
FTL is therefore filled with all sorts of inefficient weapons. The FTL community seems to love all of these oddball options, playing around with ions and drones and Fire Bombs and so on. I used to think that I was missing something, and that these weapons must somehow be stronger than I thought. That is not the case. As T-Hawk has put it, the FTL community loves coming up with elaborate ways to not kill the enemy quickly and efficiently.  When playing seriously, however, stick to the basics. Keep stacking lasers and you won't regret it.
One final note here about use of the Teleporter system for offense. A Teleporter game is significantly different from a normal game, as your crew becomes the weapon of choice. It can therefore be worthwhile to purchase more crew early on with these ships, especially ones like Mantis B or Mantis C, which are limited mostly by the number of boarders that they can send over to the enemy ship at once. Upgrading the Teleporter system is also a wise choice, as it allows the player to pull their attackers back to safety if something goes wrong, or alternately get a faster cooldown to send even more invaders over to the enemy ship. That's not to say that standard weapons are irrelevant for a Teleporter game either, only devalued in importance. Normal weapons are still extremely useful for shooting out enemy weapons and removing those pesky Medbays and Cloning Bays. You can get by with less though, and boarding synergizes well with a lot of the bomb weapons. Expert use of the Teleporter tends to involve a lot of micromanagement of the crew in fights and exploiting how the AI functions in hand to hand combat. For example, it's possible to kite enemy Rockmen around endlessly and never take any damage if done properly due to their slow movement. I don't enjoy this gameplay very much and try to avoid engaging in it, but if you find it fun, it's worthwhile experimenting to understand how it all works. Purchasing a Teleporter is one way to work around a game with poor weapons or no weapons appearing in stores.
The decision of how to spend scrap is the most strategic and difficult aspect of FTL's gameplay. Since scrap serves as both "gold" and "experience" in FTL, there's a constant tension between saving it to pick up something nice at a store versus upgrading the ship to become stronger immediately. Anyone who has played this game has agonized over what to purchase at a store when a bunch of strong options are available; this is always the single biggest viewer discussion topic on my Livestreams. I've already discussed weapons in the last section, so here I'll mostly try to focus on the other systems and augments as well as where a ship typically needs to be in terms of upgrades throughout the game. There is no correct answer to the question of how to spend scrap though, and this is one of those things that requires developing a "feel" over time. I've eventually gotten a sense of what I need to get at any one moment in time, and try to base my decisions accordingly.
First and foremost in terms of scrap prioritization should almost always be weapons. I emphasize having strong weapons and enough upgrades to use them in the vast majority of situations. In the context of a typical run, this means upgrading from the starting weapons before reaching Sector Three, where most enemy ships will start appearing with two shield layers. (They can appear as soon as Sector Two but that's rare.) Most ships require an upgrade from their starting layout in order to be able to handle this challenge. Enemy ships with three shield bubbles will start appearing regularly in Sector Four and Sector Five (although very rarely they can appear in Sector Three!) and they'll have the full four shield layers starting in Sector Seven (rarely Sector Six). This means that the player's ship will most often upgrade weapons in Sector One or Two, and then again in Sector Four or Five, and then perhaps one more time in Sector Six or Seven. A lot depends on what you're finding, of course. The basic rule should be: able to deal with 1 enemy shield (Sectors One and Two), able to deal with 2 enemy shields (Sectors Three and Four), able to deal with 3 enemy shields (Sectors Five and Six), able to deal with 4 enemy shields (Sectors Seven and Eight). "Deal with" in this sense means the ability to dish out consistent damage, not "I have a Burst Laser II with 3 shots so that's enough to fight a ship with two shield bubbles if all 3 shots hit." If your setup is too weak to handle those benchmarks, then your ship will be unable to keep winning regularly and will start to fall dangerously behind The Curve.
Defensive upgrades are the reverse of this same process. On a ship with strong initial weaponry, like the Kestrel B, I will upgrade shields to level 4 and engines to level 4 immediately, since there's no need to worry about offense for a while. This is my preferred way to open the game, and I see it as a common suggestion on FTL forums. However, the ships with weak offenses can't afford to spend the roughly 100 scrap it costs for these defensive upgrades at the start of the game. A ship with atrocious starting weaponry like Rock A or Engi B needs to fix its weapon problems immediately; there's no time to sink scrap into defensive upgrades first. All the shields in the world won't help once Engi B runs into a ship with two shield bubbles, as there won't be any way to deal damage. Weapons must come first. These weak ships therefore become doubly dangerous, as the player must risk progressing forward with minimal defenses to ensure that an offensive upgrade can be purchased at a store. The alternative is crossing fingers and hoping for a good weapon to drop randomly, and that's not a recipe for success.
Leaving that discussion aside, spending 50 scrap for the second shield layer is absolutely a good idea, and should be done as soon as possible. Because the AI doesn't fire its weapons in coordinated volleys in FTL, the second shield layer makes your ship enormously safer than having a single bubble, even against ships which should be able to get through your defenses. Engines are also always a good choice, and the early upgrades (10 scrap to level 2, 15 scrap to level 3, 30 scrap to level 4) are generally quite cheap. If nothing else, spend the minimal scrap to reach level 3 engines, since there's a big jump in cost from level 3 to level 4. The only time that you will see me not getting these upgrades is when the need for weapons overrules them, as explained above.
After that, further defensive upgrades become more subjective. If I'm not satisfied with my weapons situation, I will sometimes use level 4 shields / level 4 engines for a very long time. At a bare minimum, I've found that you do need level 6 shields (the third layer) by Sector Five, as the enemy ships will pack too much of a punch to survive for long with only two bubbles. Only violate this rule if you have a Zoltan Shield or Cloaking or something else defensive to help out. I usually delay level 8 shields (the fourth layer) until Sector Seven or Sector Eight. They are not necessary to win the game at all, but they do make the flagship battle much safer. Facing the flagship with less than level 6 shields is essentially suicidal; while it's been done, don't push your luck. On the engines side, I will almost always upgrade to level 5, after which engines hit the point of diminishing returns. The time to upgrade from level 4 to level 5 tends to be variable though. That upgrade costs 40 scrap, and I'm often desperately saving for weapons or a key system, reluctant to spend that cash. Level 4 engines is enough to get a perfect cloak (100%) with maxed out crew in Piloting and Engines, and level 4 engines is also fast enough to escape the rebel fleet while facing only a single ASB missile. As a result, I often find myself sticking with level 4 engines for longer than I probably should. Of course, if your ship lacks a Defensive drone or Cloaking, then upgrading engines becomes a higher priority to dodge missile damage.
When it comes to systems, there are three key targets. Drone Controls are desirable for the Defensive drone's missile defense. That's the Defensive drone version 1, mind you, the one that doesn't waste its efforts going after lasers. Those defensive drones are worth their weight in gold, and almost always worth getting. Cloaking is the other amazing defensive system, and well worth having too. The biggest deterrant of Cloaking is the cost at 150 scrap, which causes me to avoid purchasing it until Sector Six or Sector Seven in most games. It's rare that a run is in a strong enough position to drop that much money on a system in the first few sectors. To use the Engi B example again, even if I have 150 scrap, I'm not buying Cloaking early on because I need to spend on upgrading weapons and staffing the hull with more crew. The Drone Controls with Defensive drone combo is significantly more affordable at 85 scrap, or 100 scrap if purchased separately. In comparing these two systems, here's my rule of thumb: Cloaking is better for the rebel flagship duel, but the Defensive drone is better at ensuring your ship survives to reach the flagship. Ideally, I will get both of them. When that's not possible, the choice tends to come down the specific situation at hand and what's available. Just make sure you don't miss out on both systems: I have *VERY* few victories where I lacked both of these systems. 
Hacking is the other outstanding system and deserves its own separate discussion. Hacking is the most versatile system in FTL, and can be used for all sorts of useful ends. The most traditional use is Hacking the enemy Piloting system, which reduces evade to zero percent and ensures that every shot will hit the target. This is the one-stop solution for all those obnoxious auto scouts with 45% evade in the last few sectors. Using Hacking against enemy piloting in this fashion opens up the possibility of using some weapon setups which would otherwise be untenable, something like Flak I, Heavy Laser II, Heavy Laser II. Without Hacking, there's a good chance that those 7 total shots will struggle to get through 4 shield bubbles, maybe getting one of them through on a typical volley. With Hacking, that's a guaranteed three Heavy Laser shots hitting the desired target for six system damage and all of the burning/breaching/stunning effects associated with that damage type. Hacking also opens up an all-beam weapon layout if upgraded to level 3 and directed against the enemy Shield unit. This is kind of a niche usage but really fun when pulled off successfully. For certain weapon setups, Hacking can be even better than Cloaking, as it provides the offensive power to kill the flagship quickly as opposed to a long, drawn-out fight. I've also gotten great use out of Hacking enemy Weapons systems to slow down their weapon charges, and lock the doors of the room to prevent repairs. And Hacking can furthermore be directed against enemy healing systems when boarding, or Drone Controls to stop a particularly annoying drone, or even Oxygen to slowly suffocate your opponents. It's a truly amazing system and well worth mastering the use of.
The other systems in the game are significantly weaker. The Teleporter is its own thing, which I tend to ignore since I don't like the boarding gameplay. To be fair, the Teleporter isn't really weaker, I suppose, only different. Mind Control is another story, and rarely worth purchasing unless hitting the end of the game with a spare system slot and nothing else available. Using Mind Control against enemy crew is more amusing than truly effective in most situations, and I haven't found it to be that difficult to work around my own crew being Mind Controlled. Scrap is better spent elsewhere. Similarly, when it comes to swapping your Medbay for a Cloning Bay or vice versa, save the 50 scrap and use whatever your ship starts with. The difference is not large enough to justify the expense.
Most augments are also money sinks that aren't worth purchasing. The main exception here is Long Range Scanners, which is very cheap at 30 scrap and pays for itself quickly in additional encounters found. Scrap Recovery Arm is something that I've soured on a bit over time. While the extra income is very noticeable, dropping 50 scrap on the augment early on the game can set a build behind substantially. It's a "win harder" condition, the Mejai's Soulstealer of FTL. If you're already behind The Curve, or playing a weaker ship, the Scrap Recovery Arm tends to weaken an already poor position that doesn't have scrap to spend on luxuries. And that's what most of the augments are: luxuries. Nice to have, not essential. I will pick them up when I'm in a comfortable position and otherwise ignore them. The big daddy, the Weapon Pre-Igniter, isn't even very good against the rebel flagship. That's 120 scrap that almost certainly could be better spent on something else.
When I'm about to face the rebel flagship, I typically want to have level 8 shields, level 5 engines, level 8 weapons, and at least two out of three of the key systems: Defensive drone, Cloaking, Hacking. In addition, it's very important to upgrade all the minor systems to level 2 (Piloting, Doors, Medbay/Cloning Bay, Oxygen, etc.), which serves as a way to "damage buffer" them, i.e. a random missile hitting the Cloaking system will only knock out half of it, not remove the system offline altogether. This tends to cost right around 1700 scrap, which is about what a typical run on Hard difficulty will collect. It's amazing how often I'm damage buffering the final systems just as I'm about to face the flagship, with FTL's challenge level perfectly calibrated. As far as reactor power goes, the general rule still applies: as little as you can get away with using. In practice, that tends to be around roughly 20 reactor power, with fewer bars invested there if the Backup Battery or Zoltans are present. I almost never find myself buying the reactor bars that cost 35 scrap; if you're routinely getting them, you probably spent too much on the reactor.
One final note here: pathing through individual sectors is extremely important. It's useful to scan the map at the beginning of each sector and determine a rough plan to follow. It's very easy to think that two beacons connect and then find out later that they don't, with multiple hostile encounters with the rebel fleet required to work around that error. This has killed quite a few of my runs.  It's also important to take a path that maximizes the number of nebulas passed through (to get more total beacons visited via slower rebel fleet pursuit), and to increase the chance to find stores. You typically want to hit a store about once per sector to repair and see what's available for purchase. Try to take a path which will reveal what's located at each beacon, even if you choose not to visit a store due to lack of scrap or no need.
Similarly, it's often worth it to dive past the exit for more encounters, especially if it allows a visit to an additional store. Facing the rebel fleet at the exit beacon, while dangerous, can be managed with some planning. The most important thing is upgraded engines: level 4 gets the ship out with only 1 ASB faced, and level 6 engines are fast enough to avoid any ASB shots at all. Cloaking is also very helpful to dodge them. Hitting the rebel fleet with level 1 or level 2 engines tends to be a deathtrap, avoid at all costs! Generally speaking, the later your ship reaches in the game, the less dangerous the rebel fleet becomes. In later sectors, your ship will have more engine levels, more crew to repair damaged systems, potentially upgraded Piloting, and so on. The rebel fleet is most dangerous in the first two or three sectors. I usually take extra pains to make sure I don't hit the rebel fleet in the first few areas. If you get trapped or stuck and must face the rebel fleet unwillingly, upgrade your engines as far as they can go and get out of there ASAP. (Don't forget to run from other battles too if things are going really badly. This is another reason why upgrading engines is a good idea. Sometimes FTL will roll something stupidly overpowered for a random encounter, and there's no point in losing a whole run over this.

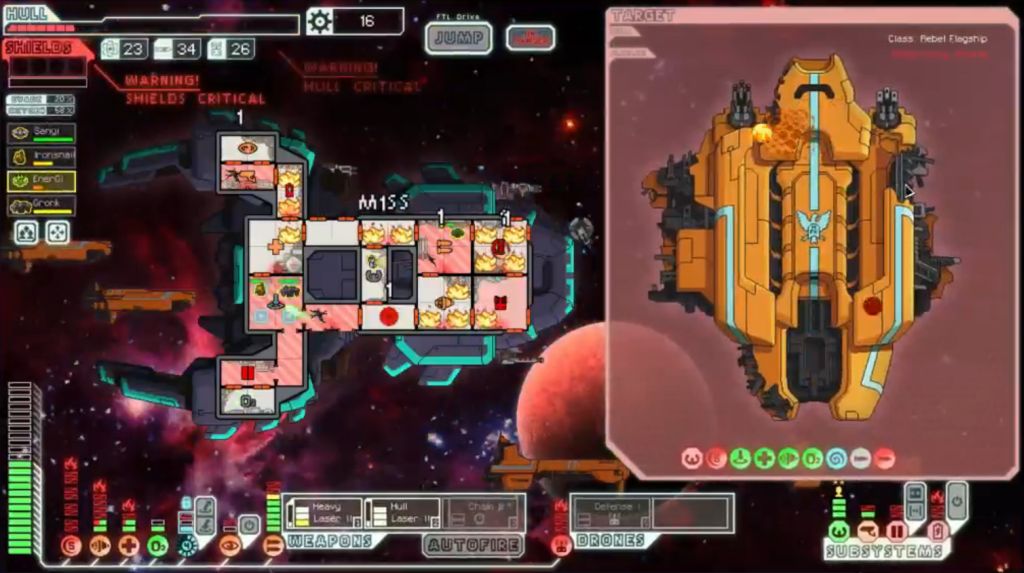
The rebel flagship deserves its own discussion section. The whole point of the game is to build up a ship strong enough to defeat the flagship at the end. No matter what you do, it will always be waiting there as the final boss, and it presents the same challenges in each game. The flagship is a wonderfully designed way to conclude each run, and it can be very difficult to defeat if your ship is not sufficiently prepared for the task. In my FTL Introduction article, I went through the basics of each of the three phases and provided some general tips about how to work around the obstacles that each one creates. This time, I'll try to explain the mechanics of the flagship duel in a bit more detail. This is a battle that I've effectively "solved" at this point, and there are a number of small tips and timing windows that can be used to get some fairly weak ships past the final rebel dreadnought.
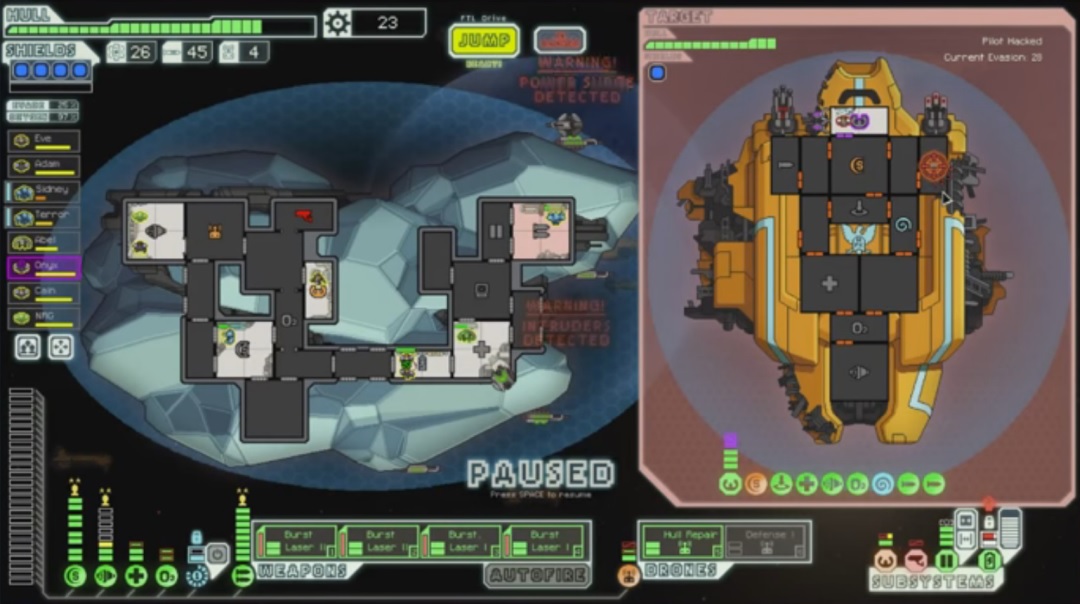
The first obstacle in the first phase of the flagship battle comes in the form of a Hacking drone, which will randomly target one system on the player's ship and periodically take it offline. About half of the systems are fairly benign targets for the flagship's Hacking, with Sensors probably being the least dangerous along with Doors, Medbay/Cloning Bay, and the Backup Battery. As a side note, always remember to upgrade Oxygen to level 2 before this battle, or else a Hacking of the Oxygen system can result in a lost run. The worst systems to get hit are Piloting/Engines, Shields, and Weapons. Losing all evade during the period when the Hacking drone is in operation makes it very difficult to avoid the flagship's missiles, and even the ion + laser + beams combination can often get through and deal damage. Having the Shield system get hacked is even worse, as there will be a period of several seconds where even level 8 shields will be drained away to nothing. This turns the flagship's lasers and beam weapon from afterthoughts into serious threats. The Weapons system is the worst possible target, however, as the combination of the flagship's Cloaking and level 3 Hacking makes it very difficult to get any attacks off at all. I will usually try to jump out of the flagship fight if either Shields or Weapons are the target of the Hacking drone, although sometimes the Federation base will be about to be overrun, and there won't be enough time for a retreat. This is one of the biggest random elements of a whole run, and it's useful to try and plan around it accordingly. Pray that RNGesus has mercy. 
After the Hacking drone goes off, the flagship will proceed to use a combination of Cloaking and its four weapon attacks: ions, lasers, missiles, and beam. The triple missile attack (Weapon #3) is by far the most dangerous of these three options. I've found the best strategy to be the simplest one: knock the missiles out of commission as soon as possible. Barring a Weapon Pre-Igniter or a Zoltan Shield, the flagship will always be able to get the first missile volley off before the player's ship can fire. This is therefore the time to use your own Cloaking unit if you have it. If your ship lacks that option, put up a Defensive drone and max engine power and hope for the best. As mentioned earlier in this article, the goal is to be able to land 7 hits on the flagship, enough to get through the four shield bubbles and then deal 3 system damage to the missile weapon. That will knock it offline, forcing the rebel crew to repair it (which they will do very quickly, unfortunately). However, by the time that they have it repaired and charged up again, the player's own weapons should be ready to knock it offline again. Rinse and repeat until the battle is over.
For a while, I experimented with trying to target the flagship's Shield unit instead of the missiles, under the logic that knocking out their shields would cause subsequent volleys to be easier to land, and therefore end the battle faster. I've changed my mind, and I no longer think this is a good idea. It exposes your ship to multiple missile volleys, and any missile that lands can set fires and start a system failure cascade. It's the same reason why it's almost always a good idea to put up a Defensive drone to stop missiles in random encounters even if your ship has plenty of hull intact. Taking avoidable damage is simply a bad idea. As a result, targeting the flagship's missiles really does seem to be the way to go, and I've had better results when pursuing this tactic. The flagship's other three weapons rarely present any danger; just keep knocking the missiles offline repeatedly and you should be able to win. The first phase is therefore the most defensive phase overall, with the flagship difficult to damage (due to its Cloaking and huge crew available for repairs), but also somewhat weak in terms of its offensive output.
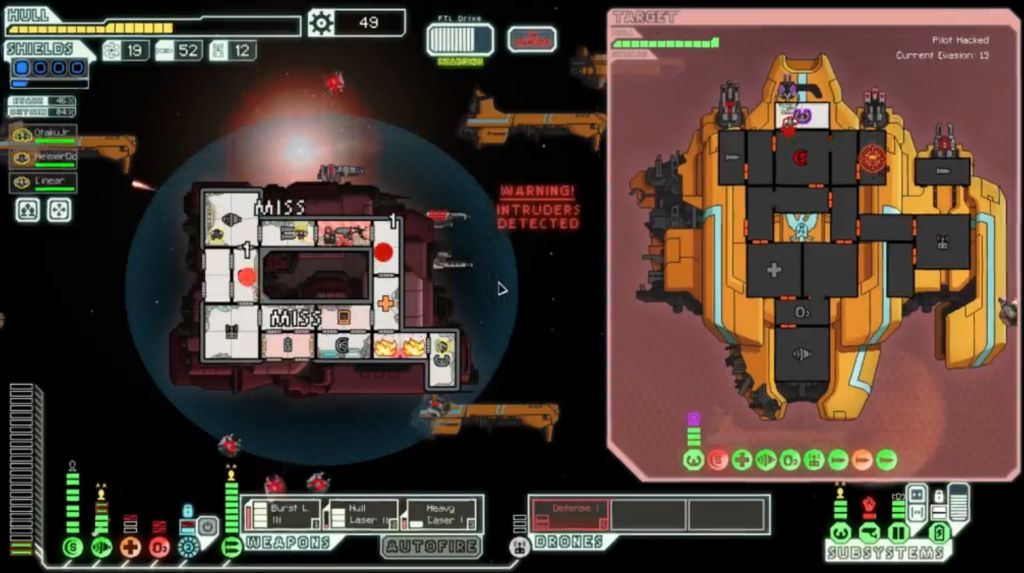
The second drone phase ramps up the threat level considerably. The flagship will begin by sending out a Boarding drone immediately; if you have a Defensive drone available, put one up at the start of the battle to shoot it down. The Defensive drone will successfully stop it from landing about 80 percent of the time, and it makes the rest of the phase substantially easier if the Boarding drone can't get through to the player's ship. (The flagship will keep sending more Boarding drones throughout the phase. Keep powering the Defensive drone every time that a new enemy drone launches. This is very easy to forget in the craziness of this encounter.)
With no Cloaking for protection, the flagship will be vulnerable to attacks from the very start. If your ship has Hacking, I suggest using the depower trick to get a Hacking drone over to the boss as soon as possible. Most weapon setups will be able to get a volley off before the flagship can launch its first round of missiles. Knocking out the missile system before it can fire helps significantly in this battle. The main reason is that it allows the player to save Cloaking for the drone surge, which will produce 6 random drones to attack the ship. The drone surge can be really, really nasty if there's some bad RNG on the shots from the enemy Combat drones, as once shields are done the Beam dones will go to town on the player's unprotected ship, and there's always a few of them around to pile on the damage. This is one place where an Antidrone can be useful, as it will disable one or two of the attacking drones. If your ship lacks Cloaking, this is the time to cross your fingers and pray for the best.
Because the drone surge is so deadly, the key to the second phase is speed. Get that first weapons volley off before the flagship's missiles can fire, keep pouring in more volleys to ensure it stays offline, and chew through the flagship's hull before it can release too many drone surges. You do not want a long, drawn-out encounter here.
The third and final phase begins with the rebels throwing up a Zoltan Supershield that has 10 points of shielding. That's doubly bad because the flagship's missile launcher will be hiding behind that shielding and can't be eliminated right at the start of this duel. It can be tricky to get past the Zoltan shielding because the flagship has significantly higher evade in this phase, I believe about 30-35%. Beam weapons are very good at deal with the shielding because they automatically hit and don't have to worry about evade. I have sometimes kept a Combat drone or Beam drone turned up along the course of a run specifically to help chew through the flagship's Zoltan Shield faster. This is one of the few areas in the game where Beam drones truly shine, and it may be worth saving one specifically for this purpose. The sooner that the Zoltan Shield goes down, the sooner the player's ship can start targeting the flagship's missile launcher once again.
Of course, the most infamous aspect of the third flagship phase comes in the form of the Teleporter and Mind Control systems. The flagship will immediately Mind Control a random crew member (with the level 3 upgraded version of the system) and begin beaming over its own crew to attack. This can be fairly benign if an Engi gets hit with the Mind Control, and terrifying if a Mantis gets hit instead. One of the worst aspects of this attack is that your Mind Controlled crew member can walk right through closed doors, removing the option to use air locks and venting to control the situation. (Fortunately, any rebel marines who teleport over will still be blocked by closed doors.) The AI programming here is also interesting, as the rebel invaders will always attempt to join up with the Mind Controlled invidiual, even ignoring your own crew in the same room to knock on the doors and try to reach their brainwashed minion. This is another area where chance can play a giant role, as the target of the Mind Control is random and the location where the rebels arrive from their Teleporter is also random. A best case scenario would be them appearing on the other side of your ship in an easily-vented area, where they can be asphyxiated as they helplessly attack doors. The worst case scenario is having your pilot or weapons guy be the target for the Mind Control, followed by the rebels beaming into the same room. It's extremely difficult to keep these critical systems online when that happens.
Fortunately there is a way to deal with bad luck from the rebel boarders: run away!  If your ship jumps out to another beacon, any rebels on your ship will come with you and will remain permanently dead afterwards. Jumping to another beacon also ends the Mind Control on your own crew, naturally. I've been able to use this tactic to turn some flagship encounters from certain losses into fairly routine victories. Here's the best way to set this up: make sure to fight the second phase at the Federation base. That will cause the flagship to jump away to another beacon, and allow your ship to follow and trigger the third phase away from the base. If it goes poorly, your ship can them jump back to the safe space of the Federation base, bringing those unfortunate rebel marines along with you. The rebels tend to arrive in pairs, and I like to pull this retreat after the third pair (six total attackers) arrive. For a good demonstration of this in action, check out the report or video I put together for the Engi B game, where I managed to get through this phase with a measly three crew, one of them Mind Controlled.
Assuming that the Teleporter threat can be managed, there's still the flagship's existing weaponry to worry about. The final phase has the standard triple lasers and triple missiles plus the "power surge" superweapon, a collection of seven shots that fire all at once. I generally don't find the power surge to be that bad, as a ship with full shields and 45% evade can often avoid any damage at all. The danger is that the player's crew is often Mind Controlled or fighting rebel attackers, and the superweapon often lines up with the laser weapon to put 10 total shots in the air at once. There's a very important Cloaking timing to use here in the final phase: DO NOT use Cloaking on the first missile volley. Put up a Defensive drone and/or just hope the engines dodge the three shots. You want to save Cloaking at the start of the battle. Just after the second missile volley goes off, that's the time to initial a level 2 cloak for 10 seconds of safety. This will dodge the second missile volley, an attack from the laser weapon, and also the first power surge. All of them go off at almost the same time, and Cloaking will avoid a truly ridiculous number of shots. If you don't have Cloaking, well, cross your fingers and pray the damage isn't too bad.
On the offensive side of things, I suggest the same strategy as before: knock out the missile launcher as soon as possible. There will be fewer rebels to repair it in this phase, since they'll all be over on the player's ship attacking in melee combat. The missile launcher also has 4 system health in this phase rather than 3 system health, requiring one extra point of damage to depower. It's still worth targeting as quickly as possible, as the missiles will keep pinpricking for additional damage every 18 or so seconds if they aren't removed from the fight. After that, I will typically go after the flagship's Piloting, Shields, and Mind Control systems in some order depending on what's taking place. With a good Cloak timing to dodge the first power surge and fast removal of the flagship's missile launcher, this can turn into a pretty easy phase. I've actually often found myself taking more damage from the second phase than the final one. No matter what happens, keep your own guns firing and hopefully it will be enough to capture victory.
I'll link here to a YouTube video I recorded of a perfect flagship duel: zero damage taken in all three phases. While it does require a little bit of luck, it can be done with the right setup. I've got about half a dozen of these under my belt now, and it still feels awesome to pull off every time it happens. 

FTL is a truly outstanding strategy game. It's one of those rare titles that I'll always be able to come back to months and years later, with the gameplay still feeling fun and engaging. I don't expect to write anything more about it, since I think I've gotten down just about everything that I possibly could say about the game. However, I'll still be streaming the game from time to time, and playing it in my spare moments when I want to go back to an old favorite. This is one of the few evergreen title that always remains fresh. For a game that costs less than 10 dollars, you owe it to yourself to give this one a try if you somehow haven't already done so.
I hope you've enjoyed the ride with this game. This was a fun one.


