
Livestream Link Part One
Livestream Link Part Two
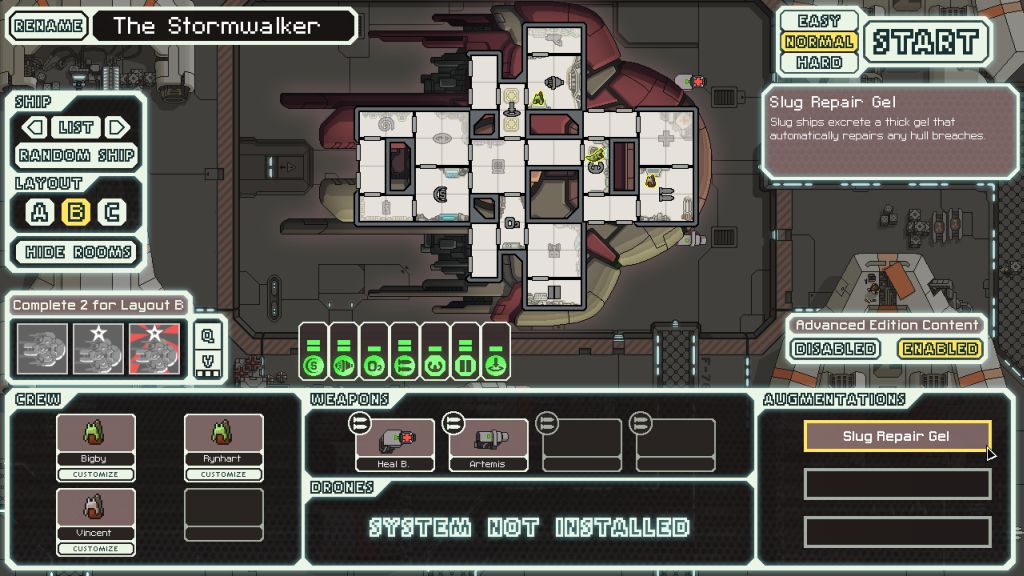
The Slug B Cruiser was the last ship with which I tried to achieve a victory on Hard difficulty. This setup has the dual disadvantages of being one of the weakest ships in the game, and also one of my least favorite designs to play. I tried to put this one off for as long as possible before finally coming back to complete the full list of winning with all ship designs. What makes the Slug B an unattractive setup in FTL? For starters, it's a boarding ship that starts with a Teleporter, and longtime readers / viewers know that I dislike the boarding gameplay in FTL. The AI for the enemy crew is fairly weak, and much of the invasion gameplay is based around exploiting their programming. I find it a lot less interesting than the ship vs. ship combat which is the meat of FTL's design. In addition, the Teleporter gameplay also tends to be very micromanagement intensive and takes significantly longer real-world time to play out. A game with the Kestrel B takes me about two hours to play, while the Mantis ships are more like three to four hours. The extra time is a noticeable drag in the later sectors, where all of the enemy ships have Medbays or Cloning Bays that have to be taken out.
Anyway, Slug B is a boarding ship, but it's not a particularly good boarding ship. For starters, your initial crew is made up of Slugs, a race that has no particular advantage or disadvantage in melee combat. There are no Mantises or Rocks or Lanius or Crystals to make this easier. More importantly, there's a glaring weakness that makes the Slug B stand out from all other ships in the game: it begins with no Medbay and no Cloning Bay!  So here we have a Teleporter ship based around melee combat without any kind of systems to heal your crew. That sounds impossible at first glance, and it would be if it weren't for the inclusion of a unique weapon in the form of the Healing Burst. This is a bomb that deals no damage and instead heals friendly crew to full health upon exploding. It can be used on your own ship (at a perfect 100% hit ratio) or rolled as a normal attack on enemy ships. The idea is to board with your Slugs, then use the Healing Burst when they get low on health. Needless to say, there are a lot of problems with that idea... the biggest one being that Healing Burst could simply miss, and then what are your poor Slugs supposed to do?
The only other starting weapon on the Slug B is the Artemis Missile. While this is indeed one of the best missiles in the game, dealing 2 damage per shot for 1 weapon power on a short 10 second cooldown, the fact remains that the Artemis is still a missile weapon, with all of the drawbacks associated with that class of attack. They can be shot down by enemy defensive drones and every shot requires expending ammunition. Of course, the Healing Burst is classified as a bomb, so it also expends ammunition with every use for healing. This creates a situation akin to the Rock A, where the Slug B absolutely has to do something about its weapon situation before running out of missiles or the game is simply lost. Fortunately the missile crunch isn't quite as bad, with Slug B not requiring as many shots per battle as the Rock A. (Typically, the player will need to use the Artemis Missile to take out the enemy weapons, and at least one Healing Burst for restoration, so 2-3 ammunition per fight.) That said, these are lousy weapons indeed, and the player also will need to purchase a Medbay or Cloning Bay at some point, which requires spending another 50 scrap. With the need to swap out the weapons, buy a healing system, and also get the standard defensive upgrades to shields and engines, Slug B starts the game in a very deep hole indeed.
The advantages of this design are few and far between. Slug B has the Artemis Missile, and it does start with a Teleporter. If the player is able to consistently get enemy crew kills, that opens the path to greater scrap rewards and more frequent free weapons or crew additions. It's only the default two-tile Teleporter though, not the godly four-tile version on the Mantis B, so keep that in mind. This ship does also start with Slug Repair Gel augment, which can be sold for 30 scrap in stores (I strongly advise doing so). And the design does have four weapon slots, so it can be built eventually into something good down the road. But let's not kid ourselves here. This is a very weak ship, and there's a reason why I have it down near the bottom of my tier list, at 25th place out of the 28 total ship designs. There are a ton of things that can go wrong with the Slug B, and it takes real skill to win with this ship on Hard difficulty.

I had an example of what can go wrong at the second beacon of my initial Slug B attempt. This encounter took place in an asteroid field against an enemy ship with a Zoltan Shield (uh oh) and two Heavy Lasers (oh no!) This is one of those setups which is completely innocuous if the player has the second shield bubble, and deadly dangerous if the player does not. Adding in the asteroid field made things significantly worse, and the presence of that Zoltan Shield compounded the issue a thousandfold. I couldn't use the Teleporter, and the Artemis Missile couldn't shoot out the enemy weapons. Their very first volley hit my shields, and from there the system failure cascade was on. The two Heavy Laser shots on the second volley hit weapons and piloting, and that was game over right there. No ability to dodge shots, no shields to protect my ship, and no ability to shoot back. GG, try again.  Granted, this incredibly nasty situation would have killed most other ship designs as well, but it does drive home the weakness of the Slub B's starting weaponry. Launching a missile or using the Teleporter were both useless here!
Anyway, starting out again on a new run. At least I didn't waste too much time on that doomed voyage... The first encounter on this next trip was another ugly battle against a ship with a Burst Laser II and a bomb, where the enemy crew's first volley managed to hit my shields and knock them offline again. Fortunately, the first Artemis Missile had taken their Burst Laser II offline as well; I grabbed a surrender offer there for the minimal 10 scrap and got out of dodge without taking further damage. Even with a Teleporter available, sometimes it's better to avoid boarding and live to fight another day. The next battle was against an autoscout, where I used Artemis Missiles to destroy the thing. There was a shop nearby, and I did some quick math and saw that I could sell my Slug Repair Gel for enough scrap to purchase a Medbay or Cloning Bay. (Shops are guaranteed to sell one or the other if your ship lacks the system, just like how the Stealth ships can always purchase a Shield unit if they're missing one.) That seemed like it would be worth doing, so I hopped over to the store.
There I was confronted with an interesting decision:
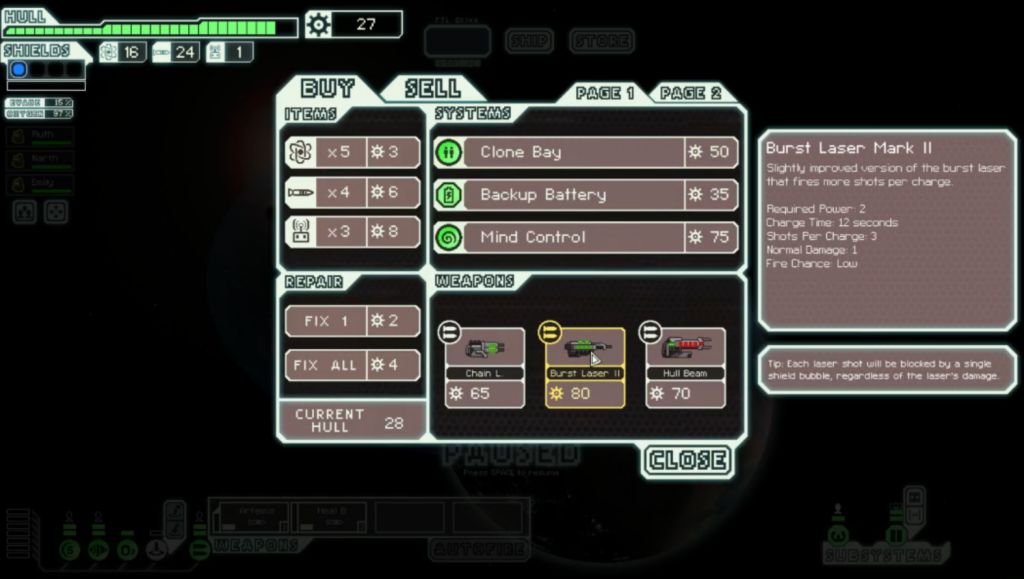
Why hello there Mr. Burst Laser II. More tallying of numbers led me to the realization that I could purchase the weapon - but only by selling everything that I had, the Slug Repair Gel along with the Artemis Missile and the Healing Burst. The stream viewers correctly pointed out that this would leave my crew with absolutely no way to heal themselves if they took damage. This was a very tough decision. All manner of things could potentially go wrong: enemy crew boarding my ship, fires caused by a battle over a sun, an unsealable hull breach due to inability to heal damage taken from oxygen deprivation, etc. You get the idea. Was it worth the gamble? Well, one of the things that I've learned over many months of playing this game is that strong weapons tend to be the single most important factor in success or failure. Powerful guns allow the player to take out enemy weapons before they can deal damage, therefore providing both offense and defense at the same time. The rebel ships on Hard difficulty are simply too strong to sit back and hope that your defenses will protect you from damage. I've almost always done better by taking the fight to them, destroying targets before they can hurt my ship. In other words, give me that Burst Laser II and we'll sort everything else out in time! I made the purchase.
Now I had to ride out the next few battles without my crew dying, unable to fix any damage that they might take. If I could get to 50 scrap and make it to another store, some kind of healing system was guaranteed to be there. Just had to survive long enough to make it there. First encounter came against an autoscout with a Chain Laser and Heavy Laser; my initial volley knocked out the Chain Laser, and that was that. Better yet, a victory there dropped another useful weapon: a Hull Beam! Very nice. I could survive on Burst Laser II + Hull Beam until the end of Sector Four even if nothing else turned up. The next skirmish was against this rebel ship:

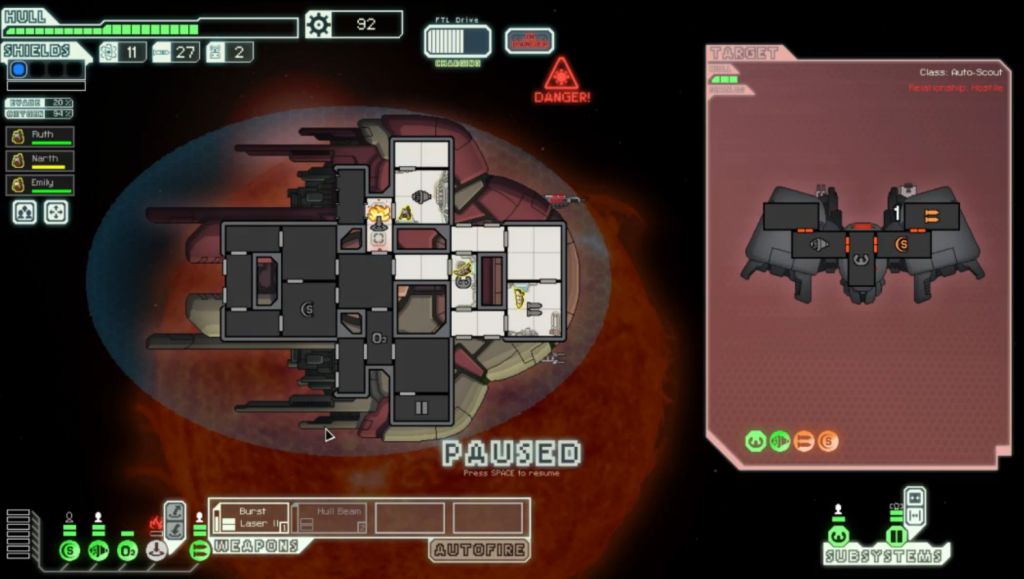
This would have been an easy fight, except that the enemy ship was trying to run away, forcing me to fire on their Piloting system instead of their weapons. As a result, I took several missile hits throughout the combat, including this one that nailed poor Narth. That was 15 health that the Slug engineer could never get back! Fortunately no one else was hit and I managed to win without any crucial systems getting damaged. Third fight took place in an Ion Pulsar event, which could have been disastrous. Thankfully the ion pulses never hit my Weapons system, and I was able to eliminate the enemy ship's guns (sporting their own Burst Laser II!) before I could take much in the way of damage. Whew. Fourth battle took place against a weak autoscout, which kindly dropped a Defensive Drone after blowing up. Very nice!  Although I would still need to purchase a Drone Control system to use the thing, that was a very kind break of fortune indeed. This run was off to an excellent start. You know, if my guys could make it to the next store...
Fifth battle took place against another autoscout, this time over a sun. That held the potential for more RNG disaster if a crucial system was set on fire and my Slugs were forced to take damage to put it out. (Imagine shields and weapons getting burned, ugh!) Instead, I caught another friendly break of luck:
The only flames popped up in the easily-vented Teleporter room. No need for weak Slug flesh to be exposed to the burning heat. I was able to defeat the autoscout and escape from the beacon before the next solar flare went off. Dodged another potential bullet there, whew. And that was enough to reach a store hiding next to the exit to Sector One, where I purchased a Cloning Bay for 50 scrap. Just what I was looking for! That ended the most dangerous and most unique part of the run. Although the store had some nice goodies for sale (Heavy Laser, Chain Laser, Hull Laser II, etc.) I decided that it would make more sense to fix up the Slub B's damaged hull and spend the remaining scrap on pushing for level 4 shields and the second bubble. There was no pressing need to buy a weapon because I already had the Hull Beam waiting around ready to be used. Investing further into weapons that I couldn't even use would have been overkill at this point.
Amusingly enough, this is when a series of construction workers needed to enter the apartment where I was streaming, kicking me out for 30 minutes.  I would have to come back a little bit later and finish the run in a second session, thus the division into two videos above. It's one of those little things that helped to make this particular run unique.

OK, picking back up where the first abbreviated part of the run left off. The Burst Laser II carried me through most of Sector Two, with occasional boarding using the Teleporter in situation where the enemies were unable to heal. One of these crew kills resulted in a Mantis prisoner appearing, and that gave my invasions some real punch for the first time. The picture above was taken in a fun battle where the Burst Laser II was able to set a fire in the enemy Weapon room, and the rebel ship's Mantis occupied himself trying to put out the flames with their Rock stood around fighting in hand to hand combat. Not the smartest use of racial abilities right there... I was able to purchase the Backup Battery at another store, and a blue event from having the Teleporter produced a Zoltan crewmember, perfect for taking over control of the Shield room. I also upgraded the Cloning Bay to level 2, both to damage buffer the system against a potential disaster and also for the extra crew healing on each beacon jump. I would not have invested this 35 scrap if I hadn't been doing a lot of boarding (and therefore needed the extra healing) and if I had been missing another weapon to pair with the Burst Laser II. However, since I was in pretty good shape overall I could afford this upgrade to the Cloning Bay, which was somewhat of a "luxury" purchase.
I started Sector Three with shields at level 4, engines at level 3, and sporting the Burst Laser II + Hull Beam combo for weapons (level 4 as well). The fact that I wasn't further ahead than this despite an excellent opening two sectors demonstrates the steep hole out of which the Slug B Cruiser is forced to climb. One of the next few encounter served up this tasty reward for victory:

Another Mantis for the stabbity team, this one already coming with combat skill! Very nice. As I've mentioned before, the additional crewmembers that boarding ships tend to pick up are a major benefit for that style of gameplay. Unfortunately I didn't find any fuel from this enemy ship, and so I actually ran out here despite my best efforts. I had been getting a lot of crew kills and purchased some fuel in the previous sector; kind of weird how sometimes you can still run out of fuel with bad luck on the drops. Fortunately, I was able to get another crew kill against the rebel ship that appeared to investigate the distress beacon, and that produced a very tidy sum of 5 fuel and 28 scrap. That was enough to get the Slug B off and rolling again.
At the next store, I had a very difficult choice between picking up a Flak I or a Drone Control system. (Remember I already had a Defensive drone that I found back in Sector One.) This was a tough decision between a very strong offense and protection against missiles. After thinking it over, I decided that the Drone Control was simply too good to pass up, especially for a boarding run. Getting crew kills with the Teleporter tends to take some time to pull off, and defensive systems become stronger as a result. Conversely, weapons are devalued somewhat because you can win battles with your invaders much of the time. Then I saw that I could also get the Flak I weapon by selling my Hull Beam, losing about 35 scrap in making that weapon trade. Was that worth it? Ummm, the Flak I is part of FTL's holy trio of weapons - of course it was worth it! I made that trade as well, and now the Slug B was sporting the incredibly powerful Burst Laser II + Flak I combination. Six shots on a very short cooldown, scary stuff.
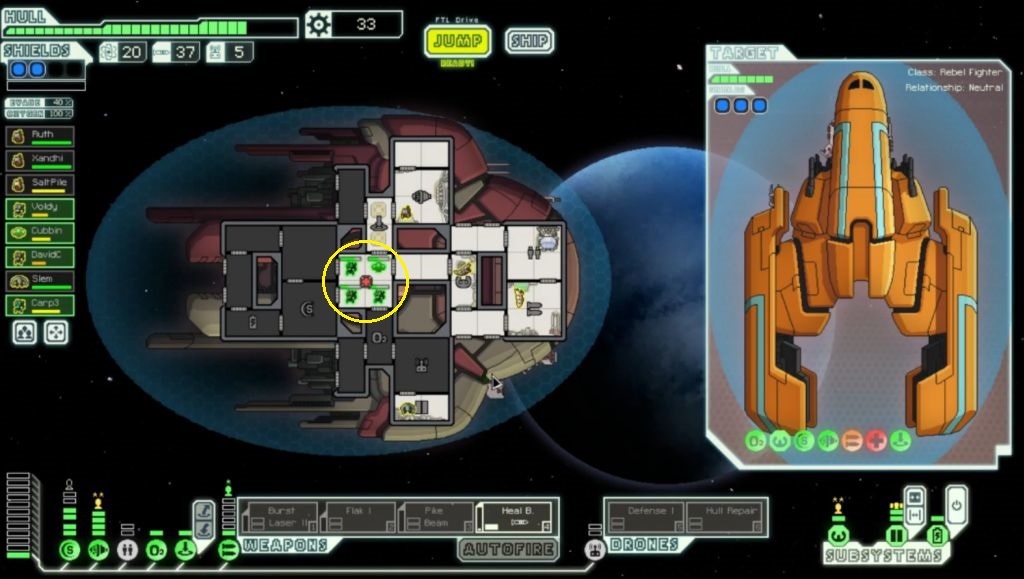
More and more humanoids kept trying to join my ship, and I had a full crew before the end of Sector Three. Most battles tended to look like this:

First I would use my weapons to take out anything dangerous on the enemy ship, typically their own weapon room. Then I would send my Mantises over to their hull to start killing their marines, while using my guns to smash out any Medbays or Cloning Bays that might be present. There was another neat little micro trick in this battle; I moved my Zoltan into my own Cloning Bay so that it would always be powered, despite the Ion Pulsar going off in the background. Call it an insurance policy, heh. Battles tended to take a while but had otherwise settled into a routine mode. Eliminate weapons, eliminate healing, eliminate crew.
By the time that Sector Five began, I had very strong defensive capabilities: level 6 shields (three layers), level 4 engines, and a Defensive drone. I also had more crew than I knew what to do with, as I'd been forced to turn several new hires away. Could have used them on some other runs, let me tell you! The thing that I was lacking now was weapons, as I was still relying on the Burst Laser II + Flak combination. That pairing was strong enough that I was still doing okay even against three shield bubbles, but I was definitely on the hunt for an upgrade. Eventually I found a store that had a Pike Beam for sale (along with Long Range Scanners, yay!) and that complimented my existing weapons nicely. I had also found another Healing Burst after a battle earlier, and with a gazillion missiles in the hold, I was able to use the thing to heal my Mantis attackers. It was a bit like having a Cloning Bay and a Medbay at the same time:
Very appropriate for the Slug B ship, of course. I find it amusing that I sold the initial Healing Burst at the start of the run, and here I was much later on, using a different Healing Burst to restore my crew after using the Teleporter. FTL works in mysterious ways sometimes... 
I also managed to find the unfinished rebel flagship event, which I defeated for another gigantic scrap payout that I didn't really need. This Slug B run had long since gotten out in front of The Curve, and I was flying high on easy street. Did I mention that I had also found a Hull Repair drone along the way? Yep, it's true. Along with the Cloning Bay and the Healing Burst, I had more health restoration than I knew what to do with. Fights were lively and interesting through Sector Six without being particularly dangerous. The crew kill bonus definitely helped as well; over the course of a full run it adds up to a big difference.
When I failed to find a useful weapon or Cloaking at a store towards the end of Sector Six, I went ahead and made this purchase instead:
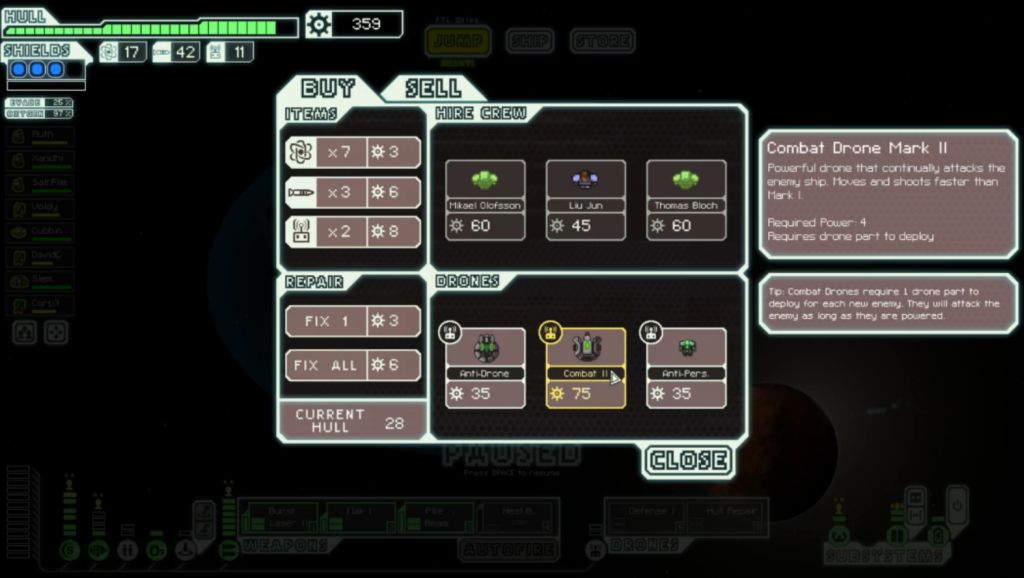
I rarely invest much into offensive drones, but with plenty of scrap to burn and only limited opportunities to hit stores before reaching the flagship, this seemed like a good opportunity. Combat II drones do a very good job at keeping shields from recharging after a normal weapon volley temporarily knocks them offline. The enemy ship takes so many shots that their shields rarely have a chance to recharge all the way. And of course if you can get the enemy Shield unit completely depowered, then the Combat II drone will eat through their hull in nothing flat. (Combat and Beam drones are also really good at getting through Zoltan Shields, very helpful for the final flagship phase.) This was another luxury purchase that I would not have picked up if scrap were tight. However, with 350+ scrap burning a hole in my pocket, might as well.
There were some more entertaining hijinks in Sector Seven, such as the enemy Zoltan who killed both of my Mantises with his death explosion! Good thing the Cloning Bay was ready to patch them right back up again. We also had the continued adventures of Slem the Engi, whose sole purpose was to sit in the Door control room and repair things when they broke. That Slem guy, number one doorman extraordinare. Finally I found a store selling more weapons, and a very nice group indeed. I sold the Pike Beam and purchased a Halberd Beam and Heavy Laser combo, uniting the holy trio of FTL weapons together again. I would also manage to purchase a Cloaking system from another store at the very end of the sector. So there you go again: Burst Laser II, Flak I, Halberd Beam, Defensive Drone, and Cloaking. The best choices for an FTL run rear their heads yet again. This is probably the biggest weakness of FTL's gameplay, the way that successful runs tend to converge together and start looking more and more similar. The ship designs might start out looking different, but unfortunately they often end up looking the same by the end. There's a reason for that, of course: these weapons and systems work really well!  I also think that there's enough randomness in the gameplay that things stay relatively fresh on most runs, as there's usually not much room for error on Hard difficulty. But this is an issue, and it bears mentioning.

I managed to fight quite a few battles in Sector Eight before reaching the flagship. They provided enough scrap to finish upgrading shields to level 8, damage buffer all of the key systems, and take Drone Control to level 4 to enable the Combat II drone. Somehow I also managed to turn up a Repair Burst and a Stun Bomb in the sector as well - uh, not planning on using either of them in the final showdown. Thanks, I guess? Finally it was time for the flagship itself. The big thing went after my Drone Control system with its Hacking, which was something that I could live with. There were much worse targets that could have been hit. I went after the flagship's missile weapon with my first volley, and had the good fortune to see the Heavy Laser set a fire in that room. That allowed me to send my Mantises into the hallway next door, ready to take on anyone who tried to repair the system. Both of them would die eventually, but so what? I had a Cloning Bay for that. They stopped the rebels from getting their missiles repaired, and the missiles were the only thing that could damage my ship. Zero hits taken in the first phase.
I had the same philosophy for the second phase: remove the flagship's missile launcher and cloak through the drone surges when they popped up. The enemy Boarding drone made it past my Defensive drone, but that wasn't exactly scary with three Mantises waiting to slash it to bits. That poor robot went down fast. Once again, I successfully smashed out the rebel missiles before they could fire, and again set flame to the little cubbyhole room. My Combat II drone kept the rebel shields largely offline, and even some suspect volley timings on my part weren't enough to cause any problems. Another perfect phase with no damage taken.
Because I had done such a poor job of killing the rebel crew in the first two phases, I went ahead and pulled the little retreating trick in the third phase. I let seven of them board my ship using their Teleporter then jumped back to the Federation base. Those poor saps were all brutally slain, and then I waited for the flagship to return, sans most of its crew. I even had that Hull Repair Drone to fix up the minimal damage that I had taken in the retreat. Now unfortunately on the return engagement the rebel Mind Control hit Voldy, one of my Mantises with maxed out combat skill, and the bug monster was just killing my own crew left and right. They all revived in the Cloning Bay so there was no danger here, but still, scary stuff watching one guy after another getting hacked apart. I was glad that I didn't have to deal with rebel boarders at the same time. My Combat II drone did a lovely job of removing the flagship's Zoltan Shield while I cloaked through the rebel missiles and power surge. The flagship managed to line up its weapons one time, getting off the normal laser's three shots just before the power surge's seven shots, followed by a missile volley. The net result of all that was 3 damage taken, and none of it to crucial systems. On my own first volley post-Zoltan Shield, I had an excellent roll of RNG luck, getting though all four rebel shield bubbles and destroying their missile launcher. It takes 4 damage to take it offline in the final phase, not 3 damage, so that was some truly nice shooting from the gunner. With only one rebel remaining on the flagship, they had no way to repair that damaged system, and the missiles would remain offline for the rest of the battle. The very next volley ended the duel in victory:
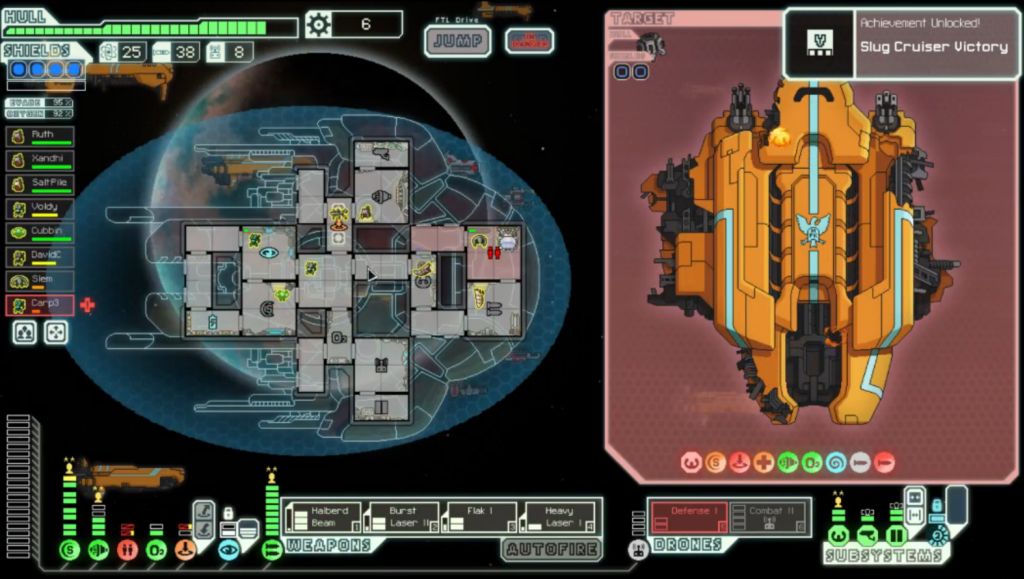
That was a nice and easy flagship battle, nothing unusual or unexpected. I feel like this is an endgame boss that I've effectively "solved" by this point, in the sense that I'll nearly always win if my ship is properly upgraded beforehand. Of course, due to the nature of FTL, sometimes you make it to the end of the run with an underpowered ship, one that has poor weapons or is missing Cloaking, and then the flagship can bring interesting times in the worst way. It's a very well designed culminating challenge for the end of an FTL game.
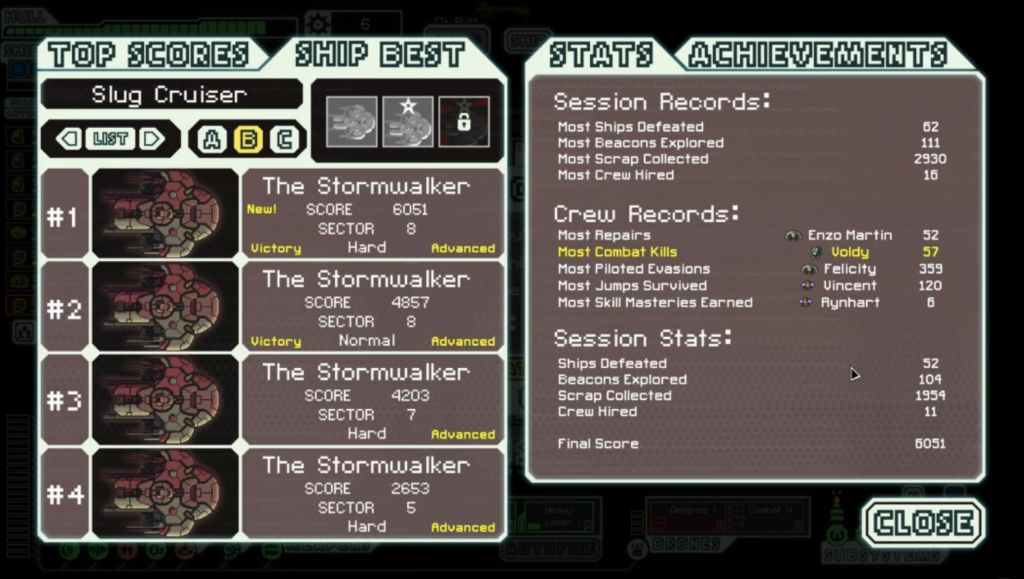
The final score finished just over 6000, which is above average for a Hard victory. All of those crew kills definitely did add up over the course of the run. I also managed to accumulate almost 2000 scrap, and that's more than enough to make for a comfortable endgame. Note that I only have two total wins with the Slug B, once on Normal and once here on Hard. It's definitely not one of my favorite designs; I simply don't take this one out for a spin that often. Voldy the Mantis also set a new record for most crew kills, which is pretty funny since several of them were kills of my own dudes when Voldy was Mind Controlled in the final fight! Apparently they also count towards the total, heh. It's very rare for me to break any of the records on this screen after 300+ games of FTL, and fun having that particular record go to a Mantis named after a longtime Livestream viewer.
With the completion of this run, I achieved my goal of winning a game on Hard difficulty with all of FTL's 28 ship designs. I have a Livestream run saved for all of them, and a report on this website about most of them, with some of the more average ships having only a report stub with video link. I don't think that there's too much else to accomplish in FTL at this point. Anyone who has read or watched the content that I've produced should have no trouble winning on their own. I'm essentially out of new things to say at this point. As far as I'm concerned, FTL is one of the best strategy games to come out in the last ten years, and it's been worth its minimal purchase price a hundred times over. I can't recommend this game to others highly enough. (Of course, if you're reading this, chances are you already own FTL!) I think that I'll be playing this game for many more years to come, if perhaps not quite so often. FTL is one of those rare games that can be played forever.
Thanks for joining me on this journey. What game should I write about next? 


