
From the moment that Rogue Legacy 2 went into Early Access on Steam, I knew that the moment would eventually arrive when I wanted to revive my class legacy series from the original game. The idea behind this variant is to play through the whole game with only a single class, getting a better sense of the strengths and weaknesses of each one, in order to prove that they're all capable of defeating every boss. The logical starting point for this variant in Rogue Legacy 2 was the default Knight class, the character that plays most similarly to the heirs in the first Rogue Legacy. The Knight also happens to be one of the strongest classes in Rogue Legacy 2 with great base stats and a highly useful class talent. I'll be using this playthrough to help determine the rules for future class legacy runs since it's going to require some adaptation to the different circumstances of Rogue Legacy 2. I'm definitely not playing through the game EIGHT times in a row to face all of the prime estuaries, that would take way too long and it would quickly get tedious. My plan is to play through the game three times to match the same structure of the original Rogue Legacy, using the burdens system to dial up the challenge in New Game Plus mode to match the old NG+2 system from the first game. I'm also not planning at the moment to run through Rogue Legacy 2 with all 15 classes but we'll see what happens in time - you never know!

The Knight is the game's default starting class so I was able to snap this screenshot of the base stats during the tutorial section of the game. Everyone stats with 15 Vitality, 15 Strength, 15 Intelligence, and 5 apiece of Dexterity/Focus (which handle critical strikes for physical and magic damage respectively). Unlike in the first game, the name of the initial heir is randomized which means that players no longer begin as Sir Lee every time. As for the Knight class, these are the numbers underlying how it functions:
Health: Vitality * 10 + 100
Mana: 150
Weapon (Great Sword): Strength * 2
Skill Crit (Dashing): Strength * 2 + Dexterity * 2 * Skill Crit Scaling (Dex)
Class Talent: Shield Block
Class Passive: 5% weapon crit chance
Mastery Bonus: Equipment Weight
Knights have excellent health and get full scaling from Vitality, each point of Vitality translating into 10 more HP. This is one of their biggest advantages as almost every other class has lower health and only the Barbarian has higher health at Vitality * 12 scaling. More health is always a good thing and this does translate into how much additional HP the class gains from taking Blessings of Life out in the dungeon. The Knight's class weapon in the Great Sword which functions in the same fashion as the sword swing from the original Rogue Legacy. It has a fast animation and it's particularly good at hitting targets above the Knight's position since the hit box of the slash extends upwards. Knights are also highly maneuverable since they can attack while moving without suffering any penalty at all, something that most other classes can't do. Add in the very high damage of the sword with Strength * 2 scaling (most other classes are lower than this) and the result is a fast, durable, high-damage class that lacks any obvious weaknesses.
The skill crit for the Knight class is also pretty easy to pull off: attacks will always crit when dashing. This adds Dexterity * 2 damage to the normal Strength * 2 value along with the skill crit scaling percentage visible on the statistics screen above (an initial 110% value). Although the general feeling is that it's pretty easy to pull off skill crits with the Knight class, it's something that I almost never do while playing with this class. I don't like dash-attacking because I tend to dash right into monsters and take damage which makes the extra damage very much not worth it. As a result, I don't plan on investing much into Dexterity or a crit build with this class, something that won't be the case with other classes. The Knight does get an innate 5% chance to crit with its sword at all times which makes Dexterity and crit stuff slightly more appealing than it would be otherwise, still not enough to change my mind here.

The class talent for the Knight is the Shield Block which functions similarly to the Paladin's shield from the original Rogue Legacy. Knights can hold down the talent button to raise their shield which lowers damage taken by 50% and emits a shockwave that destroys nearby mid-sized projectiles, deals minor Intelligence-based damage, and applies Vulnerable status to enemies hit for 2 seconds. That's already quite useful but raising the shield right before an attack hits will trigger a Perfect Block that nullifies all damage taken (and less importantly increases the damage dealt by the shockwave by 100%). It's relatively easy to pull off the Perfect Block and block all incoming damage completely which obviously proves to be an insanely useful class talent. The only real downside is that the shield goes on a 10 second cooldown after use before it can be raised again. This is the other reason why the Knight is such a great class: it has one of the best talents in the game to go along with amazing base stats and a great weapon in the sword. Believe me, other classes are nowhere near as lucky as this.
One final note: part of this variant involves never paying to unlock the teleporters or make use of the Architect to lock down the dungeon. Every character starts with a completely fresh map and has to make their own path through it. This isn't as bad as it sounds since clearing the dungeon offers up the chance to find relics and Blessings of Life to increase overall max HP for the rest of that character's journey. I will always be trying to full-clear as much of the dungeon as possible throughout this series. I also won't be using the rooms that switch to alternate class weapons and talents since that would invalidate the purpose of testing out each class one at a time. We want to assess the power of each class, not swap everyone over to the best stuff and get past the bosses using only the strongest options. With that introduction out of the way, it was time to get started with the first Knight heir in this line of succession:

Knight #1: 15 Vitality, 15 Strength, 5 Dexterity, 0 Armor, 15 Intelligence
I made it through the whole Citadel with only two hits taken, both in the same trapped room with fireballs coming from the floor. I managed to complete two fairy chest challenges for a Stone Rune and a Haste Rune, neither particularly useful. The Scholar Cape dropped at the end of the Citadel for the first piece of gear. At this point I had to go back and do the heirloom challenge for the air dash since it's not possible to make it through Axis Mundi without it. For the first character, I try to save the heirlooms until needed since they provide an HP refill upon entry but it wasn't possible to skip this one any longer. Then I had to do the heirloom in the gatehouse at the start of Axis Mundi as well in order to upgrade spin kicks into echo kicks. The big bridge continued to go well as I reached the halfway point without taking a hit, killing the first two commanders of the run (both blob fish) along the way. I was also able to take 75 damage to increase max HP by 38 at one of the Blessing of Life choosing points, it looks like the math is taking 30% of your current max HP total in damage to gain 15% more max HP. Then I was able to do the same thing a second time towards the end of Axis Mundi, dropping current health all the way down to 89 HP but increasing the max up to 325 HP. The Scholar theme kept continuing as I found the Scholar Helmet and Sword in the back half of the bridge. Then I traveled back to the Citadel to grab the last heirloom for the full HP refill at Aesop's Tome. From there I teleported back to the Axis Mundi throne room, bypassing the boss and sneaking past the gate into the Kerguelen Plateau. The monsters were starting to get very difficult here but I was able to find a Soulsteal Rune from a "defeat all enemies" room challenge. I kept heading to the right since that's where the double jump heirloom is hidden and found it right next to another Blessing of Life room. I took the damage option once again, falling all the way down to 25 current HP, then entered the heirloom challenge for another full health refill - ha! I went inside a red portal which almost certainly wasn't worth the 150 HP that it cost from taking two hits inside. Fortunately I did manage to find two Lilly of the Valley relics to open the door to Naamah's throne room. This initial Knight was finally cut down by a wolf when I played a large room poorly, bringing back just over 9000 gold. Not too bad for the first character.
9082 gold, 231 monsters slain
Back at the docks, I purchased the Scholar Sword + Helmet along with the initial Lifesteal, Soulsteal, and Magnesis runes. Then I tried to get as much Strength and Vitality as possible, having enough gold to hit 25 Strength for another point of HP restoration off the single Lifesteal Rune. There wasn't enough gold to start purchasing armor which would have to wait for the next character.

Knight #2: 23 Vitality, 26 Strength, 5 Dexterity, 0 Armor, 15 Intelligence
This Knight also had no traits and no relics, another Sir Lee redux. The main goal for this character was unlocking the extended void dash from the heirloom found up in the Stygian Study. Attacks now did 52 damage as opposed to 30 damage on the last Knight which resulted in many of the monsters in the Citadel dying in a single hit. It took some time to find the entrance to the Study; I came across the Tower of Lights room and grabbed the insight 15% damage bonus against Lamech in the hopes of facing him later with this character. A fairy chest platforming challenge yielded a Reinforced Rune (8% more total Armor) which would be super useful once I started to find more gear with Armor bonuses on them. The Study is a weird place to pass through before having the void dash since you can't dash through the bouncing spiked balls or the void projectile from the tier 2 enemy knights. I also found the observatory with the hidden insight for estuary Enoch but couldn't access it since there was a void barrier at the entrance! The Study always has a room with a Blessing of Life (the only one of the six biomes where this is guaranteed to appear) and I took the extra HP as usual, hoping to find the heirloom room afterwards for the full heal. I had the good luck to land a Bounty Rune from a fairy chest challenge near the top of the Study, that would mean +10% gold generation forever on future runs. I cleared 95% of the Study before finding the heirloom room but eventually made it there with 92 HP for the full health refill, whew. I decided to use that full HP to take on the Gonghead Twins and that proved to be a bad decision, I took 300 damage and nearly died before finally polishing them off. I used the Citadel to restore some health, finding Lamech's boss room in the very last room where the Leather Chest was sitting in one of the two chests. I've fought Lamech enough times that he isn't very tough and pulled off a perfect fight, even using the Lightning Storm spell for the armor break and extra damage. Lamech reminds me a bit of the Botis miniboss from the original Rogue Legacy, with practice the player should be able to defeat the boss in perfect or near-perfect fashion every time.

My Knight character took another Blessing of Life that I'd saved in the Citadel, then used Axis Mundi to rebuild health again at 3 HP per monster kill. The most interesting find on the bridge was the Leather Trinket which is my favorite early item in that slot. I was close to full health by the end of Axis Mundi and teleported back to fight Murmur in the Study, successfully guessing that I'd be able to defeat the miniboss without taking damage while finding some additional meat drops along the way. With full HP in hand, I fought the Void Beast duo estuaries and annihilated them in maybe my best encounter ever with them, taking no damage at all and winning in maybe 30 seconds. The Lightning Storm spell was incredibly useful here since it was trivial to land the armor break while raining down blows. The Kerguelen Plateau was next where the Warden Helmet and Warden Sword dropped early on for a modest upgrade. I fully cleared the biome to complete full clears of the first four areas of the game. This is a big difference between Rogue Legacy 2 and the first game: you can make it much further with the early characters this time around. The rooms tend to be a bit easier / fairer with fewer places where it's impossible to make progress without taking hits along the way.
In any case, I headed into the Sun Tower now for lack of other places to explore. My best find of the run appeared right away with the Ammonite Cape popping up in a silver chest, excellent!  Bonus Armor from the Cape slot was an ideal fit for Knight characters. The Ammonite Trinket appeared shortly thereafter - now I just needed the Ammonite Chest for the unity set bonus. (The Sword or Helmet slots would also grant it, of course, but the Ammonite set is weak in those two slots.) Then the Ammonite Sword did drop which would still be worthwhile to unlock the set bonus. I'd rather have the Crescent or Drowned Swords for their higher Strength bonus but I could make due with the Ammonite Sword for the time being. After some fancy platforming, I made it all the way to the top of the Sun Tower for another full clear. Not bad for the second character who had absolutely no Armor at all! Rather than confront any of the bosses at a mere 95 HP, I teleported back to one of the heirloom rooms in the Citadel where I was able to take the Future Successor's Bargain relic for another 10k gold. The Future Successor's Bargain kills your character instantly in exchange for 30% more gold; this was a rare situation where that felt like the best option. This was a super successful run and a great second Knight heir.
41,958 gold, 381 monsters slain

There was a ton of gold to spend but I needed to use it wisely for the most effective benefits. I started by purchasing the Bounty Rune and one additional rune weight upgrade to put it on. The Reinforced Rune was going to cost 40 more rune weight (four more upgrades) which didn't feel worthwhile at the moment for 8% additional Armor. Over at the Blacksmith, I purchased the Ammonite Sword, Warden Chest, Ammonite Cape, and Ammonite Trinket. I had to convert 500 aether into 250 ore at the Soul Shop to have enough ore to purchase everything and then it still took five more equipment weight upgrades to put on these things - and that was with the Knight's mastery bonus providing 50 equipment weight for free! I actually had to hold off on wearing the Warden Chest for the moment since it would have required another five equipment upgrades. However, wearing three pieces of the Ammonite set (one of them the trinket) was enough to unlock the set bonus: 30 additional Armor. My Knights were going from 0 Armor all the way up to 54 Armor at one stroke! 

The Drift House also meant that the scar challenges were available for the first time. These are additional tests for the player where the stats for each class are always normalized, making it impossible to level your way past the difficulty. (There's something called empathies that can be found in the dungeon to make them easier although making use of those empathies comes at a score penalty.) For the moment, "A Simple Start" was the only scar unlocked, which I was able to complete easily with the Knight class for a perfect S++ rating. I would have gotten the absolute maximum score of 50,000 points if I hadn't taken a single hit. Scoring points in the scar challenges will grant Bronze, Silver, and Gold Trophies that award additional souls, with the expectation that the player will complete these challenges with a bunch of different classes and tally together the points for the higher tier trophies. Obviously that won't be possible for the single class challenges; my thinking is that I'll try to finish the scars one time with each class, and if that score is too low to achieve the Bronze Trophy, I'll use another class to unlock the required points needed. Basically I'll claim the Bronze reward if I'm good enough to finish the challenge so that it's worth making the effort to do these things. "A Simple Start" was easy enough that there was no need for any other classes here.

Knight #3: 27 Vitality, 29 Strength, 6 Dexterity, 52 Armor, 20 Intelligence
This Knight once again didn't have any traits but did start the game with the Boxing Bell relic which adds combo to your attacks. This causes each additional attack against the same target to deal 2% more damage and reaching 15 stacks causes every attack to skill crit for extra damage. Of course the biggest difference for this character was the 52 Armor that I'd piled up via the Ammonite set of equipment which substantially reduced the damage taken whenever the Knight took a hit. The entrance to the Study was sitting there in the very first room of the Citadel so I headed upwards immediately in search of the always-present Blessing of Life room. Unfortunately I ran into a disaster right away against a commander with the Shredder trait which stripped away some of my Armor when I took a pair of hits. I didn't have the rune yet which allows you to restore lost Armor from mana flasks and thus my poor Knight was down to 44 Armor just like that.  Amusingly, I did find a Quenching Rune to fix this problem about halfway through the Study however that couldn't be used until the next character. In terms of equipment, I kept finding different Leather +1 items that weren't too useful along with some Sanguine gear that similarly wasn't likely to be purchased. More helpfully, I came across a second random Blessing of Life and increased health twice, then went back into the Citadel to fill up the lifebar again. I found a THIRD Blessing of Life in the Citadel which knocked my Knight down under 100 HP again; I was going to have to stop taking them soon!

Because of the precarious status of my health, I went for the challenge of Charon's Trial relic: the player must defeat 15 enemies without taking a hit or they will die instantly. If 15 enemies can be successfully defeated, however, the cleansed version of Charon's Trial grants 20% additional gold, ore, and aether for the rest of the run. The Citadel was easy enough that I pulled this off successfully, not without some nervy moments though. A pizza dropped in the last room of the Citadel and gave me enough health to teleport back to the top of the Study and face estuary Enoch. Having the Boxing Bell relic was excellent for this boss fight and I stacked it up to the maximum combo of 30 at one point. That was a good thing since my shield blocking was lousy in this fight and I failed to get the perfect block multiple times, argh. Estuary Enoch is a two-part boss fight and I'm afraid that I didn't play either half very well but I had enough health stacked that my Knight was still above 200 HP remaining at the end. Messy while still being successful.

Axis Mundi was feeling generous on this passage as it dropped a series of meats that each restored 40 HP. (The basic health recovery formula is Intelligence * 2 in this game.) I was back to full health by the midway point of the bridge and felt comfortable heading up into the Sun Tower again. That area proved to be highly uneventful without any tough areas or anything useful in terms of equipment or runes found. I was feeling confident and headed inside the boss room at the top to confront estuary Irad. I kept my combo stacked up to the maximum value of 30 for the whole fight and defeated the entire boss without ever taking a hit. Flawless victory! Maybe I should have put the footage from this fight on YouTube since it was pretty sweet. Defeating estuary Irad allowed me to pick up the Sun Lantern and enter Pishon Dry Lake for the first time, making use of the fact that my Knight still had a full lifebar for the moment. This was clearly a more advanced zone as some of the Crescent equipment began to appear for the first time, starting with the Sword and Helmet slots. I made it through about half of the Dry Lake before a pair of zombie commanders knocked me down to 20 HP - ouch! - and I realized it was time to beat it out of there to a safer part of the dungeon.
I save the breakables in the teleporter rooms for emergencies like this and managed to scrounge up two meat items to get back to 100 HP which was enough to finish the back half of Axis Mundi safely. I continued into the Plateau afterwards still trying to restore health and fought a "defeat all monsters" fairy chest challenge where there was a spear maiden commander with the shield banner property: all other nearby enemies are immune to damage. There was no option other than killing the commander first and I took four or five hits pulling that off since she was dead in the center of the room with surrounding monsters everywhere. After that, it took most of the Plateau to restore health back to full so that this character could face the boss of the area, estuary Naamah. That fight went reasonably well with a couple of hits taken and a total loss of about 120 HP, not bad at all. I'd been trying to defeat as many of the estuaries as possible with this Knight since he had the 20% bonus to gold/ore/aether thanks to completing Charon's Trial earlier. This was also an unusually good heir at boss fighting since he had that Boxing Bell to apply combo status and that made a real difference. Some of these screenshots show my Knight dealing over 100 damage per swing with the combo stacked all the way up when base damage was only 58 at present.

Pishon Dry Lake is the largest of the six biomes by a good margin and I methodically cleared out the remaining rooms that hadn't been explored previously. Once everything was finished, I stopped to grab the Pearl and Onyx Keys to open the doors to the two minibosses; this is needlessly annoying because each of the keys costs 45 resolve to pick up and going under 100 resolve will reduce your max HP accordingly. (At least the resolve does go back to normal after using the keys to open the miniboss portals.) I'll usually clear the whole Dry Lake and only then pick up the keys one at a time to open the two miniboss chambers. After dropping off the keys, I went back to my saved breakables at the teleporters and found a few more meat drops to restore some health, then fought both of the minibosses. These come in two pairs, huge versions of the flying axes/shields/hammers/daggers that estuary Tubal created for automated mining in the subterranean basement. Both of the miniboss fights went well and I was able to polish them both off at the cost of a little over 100 health. The only remaining foe in the whole dungeon was now estuary Tubal and I wasn't optimistic about beating him with a character having these stats. The boss fight went reasonably well but I lacked the damage or health to finish him off. I cut through about two-thirds of Tubal's lifebar before finally falling which was better than I'd been expecting. I'd have to try again with the next heir who would have better equipment and more total stats.
78,632 gold, 633 monsters slain

That run brought back a lot of resources and left me with some decisions about what to purchase. The first place that I usually start back in the town area is the Soul Shop since additional levels there can affect how many upgrades are available for purchase back at the main "castle" upgrade tree. I started by spending 100 souls on a rank of "Absolute Strength", which increases the maximum number of upgrades possible in the Strength and Dexterity stats. This allowed me to then purchase "Preferential Treatment" for 200 souls which lets the player to lock a desired class in the right-most slot of the heir selection screen. I hadn't rolled a Knight this time around and would have to kill off one sad individual before having Knights permanently available going forward. (At least Rogue Legacy 2 has a "Retire Hero" option to do this rather than needing to kill yourself by running into monsters.) The last run had been great for bringing back ore and aether in addition to gold, letting me spend 2500 of each in exchange for another 150 souls. This is the "Strange Transaction" option and it increases in price every time that the player does the conversion: first 2500 ore/aether, then 5000 of each, then 7500 and so on. I used the new souls for another level of Unbreakable Will which is the one with the Vitality, Armor, and Gold Gain levels. Most of my souls were going to be heading into that category and Absolute Strength from this point forward.
As far as rune and equipment upgrades, the big addition was the Reinforced Rune which allows for shredded armor to be restored when picking up mana potions. It also causes mana potions to restore 2.5% of max HP which becomes a very big deal as Vitality keeps scaling upwards over time. Eventually the mana potions will become much better than meat drops for Strength-based characters since the meats scale with Intelligence and physical fighters won't be increasing that stat. I continued to hold off on the Reinforced Rune at the moment as the 40 rune weight felt too expensive. One of the major downsides of playing a single class is the lack of additional rune weight from gaining Mastery bonuses with multiple different classes. On the equipment side, I hadn't found the Ammonite Helmet or Chest yet and that required me to keep most of the same stuff in place. The one place where I could make an upgrade was switching from the Scholar Helmet to the Crescent Helmet for +8 Vitality = 80 more base HP on a Knight. I didn't even need to purchase more equipment weight thanks to the Knight's Mastery bonus granting nine ranks in that stat for free. For the actual upgrades, I sank a very expensive 31,000 gold into two more ranks of Gold Gain to take the permanent bonus up to 20% plus the 10% I was getting from the Bounty Rune for 30% total. Everything else went into Strength and Vitality in equal measure, scaling up both stats with whatever was cheaper at the moment, along with a final point in the "Mediation Studies" category to restore 40% of max HP when entering a boss door. That last stat is really important when facing the final bosses who weren't much further away on the horizon.

Knight #4: 48 Vitality, 37 Strength, 6 Dexterity, 54 Armor, 20 Intelligence
Another heir with no traits, this was pretty crazy that I hadn't been seeing any of them yet. I actually had two Knights on the selection screen, the guaranteed one on the right-hand side and another in the center, only to have both of them lack any traits! I found the entrance to Pishon Dry Lake almost instantly and headed down, then opened a silver chest to discover the Ammonite Chest, just what I was looking for! That would allow me to drop the Ammonite Sword in favor of something more useful while retaining the unity bonus. The rest of the Dry Lake was pretty routine; it cost about half of my lifebar to clear the whole thing out. This is the point at which both the original Rogue Legacy and its sequel can start to get somewhat tedious, the need to clear out the whole dungeon even though the monsters don't pose much of a threat any longer. I spent the rest of the dungeon mostly looking for more Blessing of Life rooms to increase max HP along with a strong relic to use for boss fighting. I didn't have much luck finding those Blessing of Life rooms, finding only the guaranteed one in the Stygian Study before finally coming across two more at the top of the Sun Tower. This was enough to run max HP up 841 to although it took the rest of the dungeon to fill it back up again. In terms of relics, I never found anything that I really wanted and eventually decided on the Red Sand Hourglass (75% more damage on a weapon attack every 5 seconds) and then Hector's Helmet (20% more damage when under half HP) which both cost 25 resolve. This should have been more than enough to win the boss fight against Tubal but I played it horribly, taking a bunch of needless hits and dying with Tubal down to maybe a quarter of his lifebar. This is the worst part of Rogue Legacy 2: needing to spend 90 minutes of real world time building up your character to fight the boss with relics and Blessings of Life only to spend 60 seconds playing badly and then having to do it all over again. Sigh. At least I brought back lots of gold for more upgrades.
65,316 gold, 573 monsters slain

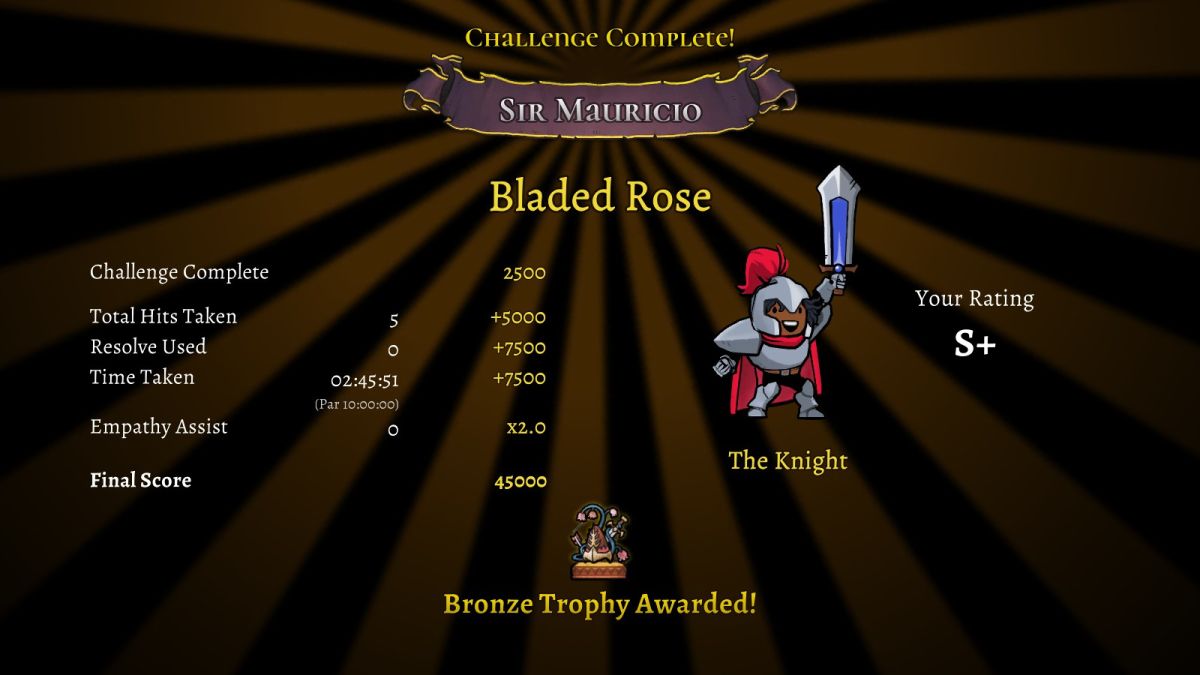
I began my usual between-run shopping spree at the Drift House and decided that I'd try my hand at some of the scars that I'd recently unlocked. My main objective was named "Bladed Rose" and unlocks when finding the scar hidden underneath the heirloom statue in the Far Shores portion of the Kerguelen Plateau. This scar tasks players with fighting both Lamech and Naamah together at the same time which is considerably harder than facing either of them individually. This was one of the first scars added in Early Access development and thus I have a lot of experience fighting this boss pair. I've found the best strategy to be focusing on killing Lamech first since he's much more aggressive at charging the player. Going after Naamah also tends to be a bad idea because she adds two of the glowing red Nightmares to the boss room when she drops below half health. The scar challenges can be made easier by picking up the random relics that spawn inside and by using the emphathy assists that can be found in the dungeon. I eschewed both of these options and simply fought the boss pair with the normalized base stats for the Knight class. I barely won the first time for an "A" rating then tried again and did much better with an S+ mark which scored enough points for the Bronze Trophy. That was one of my best scores ever for Bladed Rose which is no easy encounter.
That excellent performance in the scar chamber gave me 400 additional souls to spend which I turned into a level of Master Smith (used to increase the max level of equipment weight and rune weight) followed by a level apiece of Unbreakable Will and Absolute Strength. This let me finally put on the Reinforced Rune at a cost of three more rune weight upgrades for 8% additional Armor. Over at the Blacksmith, I was able to switch to the Ammonite Chest which let me pick up the Crescent Sword for a higher Strength rate. The Ammonite Chest was quite heavy though and required six more equipment weight purchases - good thing I picked up the first rank of Master Smith to make that more palatable! Next I wanted to get to 50 Strength to gain another point of lifesteal (the Vampire Rune provides +1 HP per kill for every 25 points of Strength) and invested eight upgrades into the Strength stat. The remainder went into Vitality and Armor with a few more levels of each. I didn't have enough money to invest into additional Gold Gain levels (officially named "Massive Vault" in Rogue Legacy 2) and preferred to get more real stats in the hopes of finishing off Normal difficulty as soon as possible.

Knight #5: 51 Vitality, 51 Strength, 6 Dexterity, 73 Armor, 20 Intelligence
This Knight had the Nature trait which has no in-game effects whatsoever, only flavor text. I found one of the Blessing of Talent rooms at the outset of the Citadel which would have allowed me to trade out the Knight's shield for the Valkyrie's defensive spear spin. That was something else that I was forbidding by variant rule though: no changing the weapon or talent of these classes. There would be no point to playing a Bard or whatever if I could simply trade out to a better weapon or talent and overcome all issues that way. I went into the Study early and found Demeter's Trial in the relic room next to the guaranteed Blessing of Life. This is another cursed relic that will kill the player in one hit unless they can find a health recovery item to cleanse it. The trick here is to save up all the breakable objects at the teleporters and hold off on taking Demeter's Trial until a bunch of them are available. With enough breakables saved up ahead of time, it's virtually guaranteed that some kind of health recovery item with drop to purify the relic. I came back to claim it after exploring the whole Study and was able to cleanse the thing without trouble for 183 max health and 50 max mana. I was further able to find another Blessing of Life in the Study and then a Folded Rune in a fairy chest: increases Armor's maximum blocking cap by 4%. What a great first biome!
The Citadel was purely an area to farm more HP by this point although it too had a third Blessing of Life to take my Knight over the 1000 HP mark. I was close to doubling the starting health value now, sheesh! The Dry Lake was up next where I found Clotho's Spindle relic which grants a flat 10% additional crit chance for weapons and spells. Maybe I should have held out for something better since I had so little Dexterity to increase crit damage but I went ahead and grabbed it. There was another Blessing of Life down there as well which prompted me to retreat to Axis Mundi where the bridge proved to be exceedingly generous in dropping recovery items. I gained 800 HP just on the first half of the bridge and thus could return back to the harder basement area. I would later find two more Blessings of Life in the Dry Lake and the Sun Tower, bringing me to half a dozen of them over the course of this run.

I left the Plateau unfinished for the moment as a place to restore HP after (hopefully) defeating Tubal and headed inside the dragon's belly for the last estuary. This Knight had more than 1300 HP to play around with and I fought reasonably well this time, handling the flying minions that Tubal summons pretty well for the first half of the conflict and then a bit less well afterwards. There was plenty of health banked to be able to tank through this opponent and I survived with about 800 HP still remaining - not as close as I had feared. Now I finished up with the Plateau and wouldn't you know it, there was a seventh Blessing of Life in there. My Knight was all the way up to 1434 max HP after starting out with 610 HP, crazy stuff. I also used my remaining resolve to double up on a second Clotho's Spindle relic for another 10% crit chance. Combined with the Knight's innate 5% crit, my character was all the way up to 25% crit odds now. Those critical strikes only did 115 damage as opposed to 102 damage from the normal sword swings which wasn't terribly impressive; I never found anything else that I preferred in terms of relics though.

Once the whole Plateau was complete it was time to take on the final bosses. Jonas is a really creative opponent who uses lots of the player's weapons against them, swinging with axe and bow and katana and even spoons and pizzas. (The pizza attack is the hardest one to avoid, believe it or not!) I've gotten vastly better at facing Jonas over time with the trick being to watch which weapon he's bringing out. There's enough time to react and dodge appropriately once you recognize which one of his attacks is coming. It also helps that you can walk through Jonas himself without taking damage and can therefore stay right up in his face whenever he's not attacking. I only took two hits and won the battle pretty easily.

There's another boss door before the true last fight which was enough to restore all of the health lost against the traitor. Jonas is followed by the Immortal King Cain in a sequence extremely similar to the original Rogue Legacy. The Immortal King has about half a dozen different big flashy attacks that he telegraphs ahead of time, then after losing 25% of his health he switches over to a different set of big flashy attacks. The first group of these are the "light" version of his moves followed by a second set of "dark" moves, with neither group being innately worse that the other. Once he falls under half health, he can pull out any of those dozen attacks (either light or dark) with only minimal warning ahead of time. All of them can be dodged if played correctly but unfortunately I was pretty shaky on this boss fight and took a lot of hits. I was especially bad at using the shield and flubbed the perfect block over and over again. Maybe I was nervous since I'd been playing this character for almost two hours now and didn't want to have to start all over again. In any case, stacking all that bonus HP was what carried me through the battle as I had enough on hand to survive with 380 HP remaining. This would have been a sure loss without all of those Blessings of Life that I found back in the dungeon. I finished up with the escape sequence from the castle and that was that for Normal difficulty.
It only took five total Knight characters to clear the initial difficulty level and I was able to full-clear the dungeon as soon as my third character. Rogue Legacy 2 is significantly faster to complete as compared with the first Rogue Legacy in this respect even as each individual character run takes much longer to play out. Obviously I was helped here by the Knight being one of the game's strongest classes, arguably the second-best after the extremely overpowered Duelist. Thanks to the Early Access development time I was also much more familiar with Rogue Legacy 2 at the time of official release with Steam saying that I had something like 400 hours played by the date of launch. In any case, I planned to continue into NG+1 and NG+2 difficulties while dialing up the burders higher than strickly required to simulate the experience of playing the original game. The journey of the Knight Legacy will continue on the next page.


