
Olberic's quest was drawing rapidly to a finish now, with only the Chapter 4 bosses remaining to be completed. Before jumping into that set of challenges, I decided to test out some of the other optional bosses in various side quests that Tressa hadn't visited earlier. Many of these optional bosses will only unlock as part of a quest and Tressa hadn't been able to access them for most of her journey since I'd been ruling out the Path Actions of the other characters. I started out with the "Shadows over the Sands" side quest which eventually ends in a battle against a Giant Python and his human handler. I remember this pair for being one of the very few opponents to force a game over for my non-variant initial Octopath Traveler team. The gimmick here is that the big snake will put your entire party to sleep and then cut them apart with physical attacks. Knowing this ahead of time, Olberic equipped a Wakeful Stone and blocked the status from occurring, then tore apart the Giant Python with more use of Brand's Thunder. This proved a surprisingly easy challenge to overcome. It was too bad that the resulting treasure (the Transcendent Bow of Shadows) was useless for Olberic, Tressa really would have liked that weapon.
I also needed to spend some time traveling to the various towns out in the third ring. Aside from Grandport I hadn't visited any of them with Olberic up to this point in time, not because he couldn't reach them but because I'd been busy clearing out the side quests and assaulting the townspeople in the second ring towns. I found a Guard in Riverford with a 10 star rating who dropped a Revitalizing Jam on defeat, the stronger BP-restoring companion of the Refreshing Jam, only to find that the Revitalizing Jam never appeared again. After fighting six more battles and failing to get any more copies of the item, I came to the conclusion that it only dropped on the first victory. Oh well, would have been nice to stock up a bunch of them. I did make another key Challenge-related discovery in Riverford, however:

Note the two NPCs circled in the above picture. This was taken on the eastern screen in Riverford, near the entrance to the Chapter 4 dungeon in the sewers. The Elderly Woman on the left side of that screenshot dropped a Medium Shadow Soulstone upon being defeated, and the Merchant hiding in the background dropped a Medium Light Soulstone. I crossed my fingers that these items could be farmed repeatedly, and much to my delight, it turned out that they could indeed! Again, this wasn't terribly necessary for Olberic since he could brute-force his way past virtually any opponent. However, there were other solo characters who would be much weaker and might need access to light or dark elements for breaking purposes against certain bosses. This effectively meant that every character in the game can open up light/dark elements as needed if they're willing to spend some time farming item drops.

Other optional bosses in side quests included the J�tunn in the "Slumbering Giant" sequence. This was an enemy that Olberic likely should have taken on at an earlier point in time, back when he was doing the Chapter 3 or even Chapter 2 stories, as the J�tunn fight turned into somewhat of a joke. The strongest "Big Freeze" attack from the boss did just over 100 damage and Olberic easily one-shot the ice giant after breaking through his shields. (He did 48,000 damage against a boss with 30,000 HP - yikes.) The scaling in this game has some brutal math: if your numbers are too low, expect to die almost instantly, whereas if your numbers are too high you basically end up invincible. For the contest against Leviathan in the "Scourge of the Seas" optional quest, Olberic needed protection against both unconsciousness and poison statuses. I had forgotten to equip the Conscious Stone initially and Olberic was perma-stunned into death on my first attempt. Once that was ruled out, Olberic easily cut through the urchin minions of Leviathan and then hacked apart the big octopus with more use of his Divine Skill. I also took the time to find the Adamantine Hat in the Maw of the Ice Dragon optional dungeon. I'm convinced by now that it's the best helmet in the game against anything other than a pure melee opponent, with the highest elemental defense in the game, excellent physical defense, and a boost to elemental attack. It was a great helmet for Olberic even if the last property was useless for him.
I'd had plenty of time to think over which of the Chapter 4 bosses I wanted to take on first, and I ultimately made the decision to pursue Werner. This was starting out with Olberic's own storyline instead of ending with it, and there was good reason to do so. Olberic would gain access to several juicy pieces of equipment if he could defeat Werner and that would make the remainder of the Chapter 4 bosses easier to overcome. I had no trouble passing through the sewers and Lord's Manse to reach the boss, and then the duel was on:

Werner is a difficult opponent for two main reasons. The first and simpler of the two reasons is that he hits really, really hard with his physical attacks. I capped Olberic's physical defense at the maximum possible 999 value, buffed up with Stout Wall for the physical defense up property... and Werner still did 600+ damage on his attacks. This is one of those points in time where I really wish that the game would track stats beyond three digits, as I could have gotten Olberic up to about 1100 physical defense by shuffling gear around and that would have been a major help. The second reason why Wenrner is a tough cookie comes from his status attacks: he uses terror on practically every attack and mixes in unconsciousness as well, forcing any solo character to equip both Calming and Conscious Stones to counter. This locks up both accessory slots and rules out additional defensive gear. Not everyone is fortunate enough to have Olberic's absurd 6400 HP total to work with.
This was also a tough fight for Olberic because Werner didn't have a weakness to swords or spears. Neither of his two weapons were effective! The best that I could do was use an Abide-boosted Brand's Thunder for roughly 25k damage against an unbroken boss. This was also tougher than it sounded because Werner kept using his "Oppression" attack, which simultaneously debuffed both physical attack and physical defense. I was trying to keep Stout Wall in place at all times and it was hard to maintain that while also setting up Abide for the big Brand's Thunder attacks. Remember, every turn spent using Abide or Stout Wall was a turn not spent attacking or doing something more useful. I was able to save some turns by ignoring any uses of Medium Healing Grapes and relying solely on Refreshing Jams for health restoration. I could farm more back in Grandport and gaining back all 6400 HP at once was what Olberic needed right now.
Like most of the other endgame bosses, Werner gets significantly more dangerous when he drops below 50% HP. He increases his actions from 2 per turn up to 3 per turn and starts using the "Terror of a Tyrant" physical attack for more heavy damage. Fortunately, there was a way that I could work around this by playing the battle a bit smarter. I had Olberic use a bunch of soulstones to hit Werner's lightning, wind, and light element weaknesses, dropping the boss down to a single shield remaining. This was in preparation for breaking him later. Two Brand's Thunders against the unbroken Werner did a combined 50k damage and knocked the boss below half health. This triggered Werner's AI shift up to 3 actions per turn, but with only a single shield remaining, he was perfectly set up for a massive Brand's Thunder conclusion to the fight. I buffed up Olberic with Abide, popped one last soulstone to break the boss, and let fly with the Warrior's Divine Skill:

Just short of 50,000 damage - awesome.  Werner has 101k total HP and therefore this final application of Brand's Thunder finished him off at a stroke. I tell you, I'm going to miss being able to exceed the 9999 damage cap when playing characters other than Olberic after this. Many abilities hit more than once to work around this restriction but it's just not the same. The whole thing worked out as I'd been hoping and Olberic only needed to drink three Refreshing Jams in total. Not bad at all.

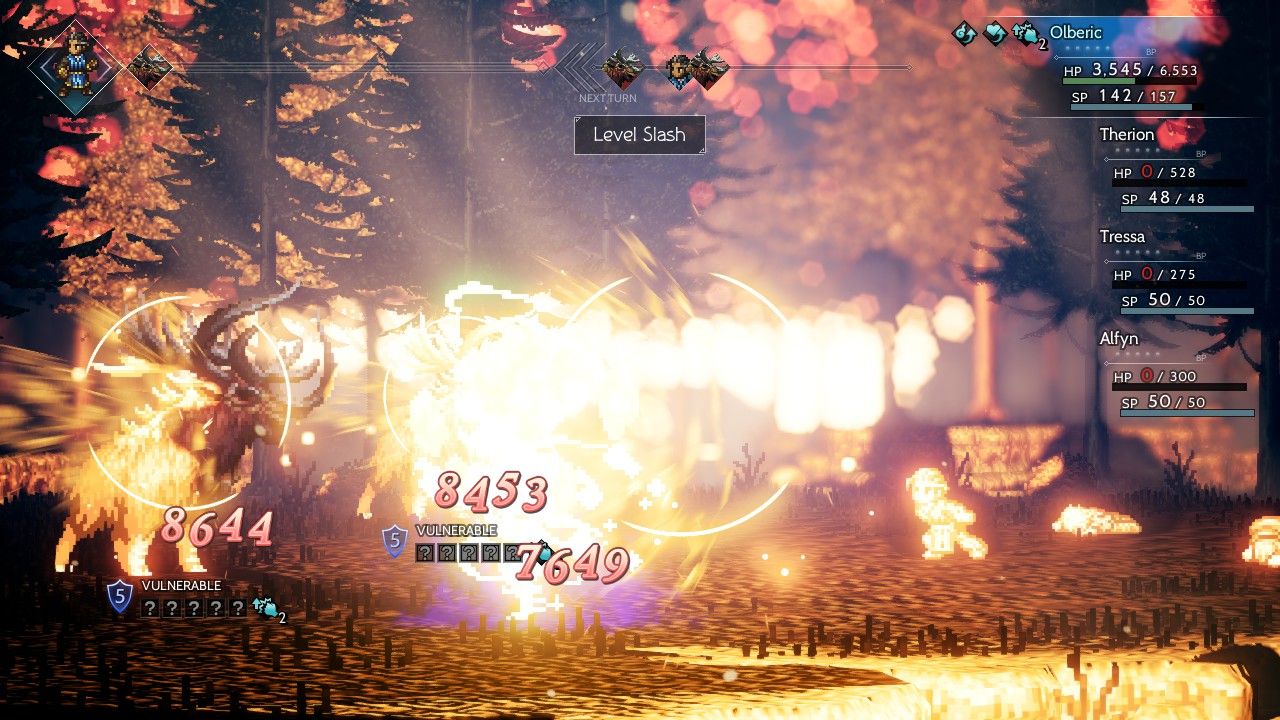
The item floodgates opened up in the wake of Werner's death. I started out by acquiring the Crystal Armor, the chestplate with the highest physical defense in the entire game, right in Olberic's starting village of Cobbleston. This item is purchased or stolen from Gaston (the Chapter 1 bandit villain for Olberic) and he won't appear until after Werner is defeated. Similarly, the Battle-tested Shield (the best shield in the game) also doesn't appear for Purchase/Steal until after Olberic completes his storyline, although it can be obtained as a 2% drop from Challenging the 10 star NPC in Flamesgrace as my solo Tressa had done. The Battle-tested Shield has the highest physical defense of any item in its slot, and although it lacks any elemental defense, it more than makes up for this by restoring 200 HP and 8 SP after every turn of action. I mentioned in some of the previous sections of Olberic's report how he was limited by having a small SP pool (Olberic has the lowest SP growth of all eight characters) and this relegated him to auto attacking for most of the game. The Battle-tested Shield fixed that problem in a huge way: Olberic now received 8 SP at the end of every turn, allowing him to use his abilities with reckless abandon. From this point forward, Olberic simply used Abide on the first turn of most battles followed by Level Slash on the second turn. This would deal roughly 7000 damage to all enemies and wiped out nearly all random encounters instantly. The only serious weakness of this character was now gone and Olberic's fury was unleashed on his unfortunate antagonists.
As far as the other items go, Olberic picked up a second copy of the Battle-tested Blade from Erhardt in Wellspring, another NPC who won't show up until after finishing Olberic's story. There was no need to have two of these swords since Olberic could only hold one at a time, but hey, why not. Challenging Erhardt resulted in another Revitalizing Jam, which was fantastic and yet sadly not repeatable. Much like the Guard NPC in Riverford, it looks like you can only get this item once. Finally, Olberic was able to Purchase another excellent armor (the Crystal Vest) and another Large Tough Nut off of Ned in Victor's Hollow. The Crystal Vest is the best-performing armor that has both physical and elemental defense on it, making it a great item for general use when not tailoring equipment specifically for a boss fight. Olberic wore this most of the time for random encounters.

The last remaining item that I wanted was the Battle-tested Spear. While it was also available via endless Challenge fights against a 10 star opponent, I wasn't keen to run that 2% drop rate experiment again. Instead, Olberic could unlock it by completing the Chapter 4 storylines of several of the other characters and then Purchase/Steal it in the village of Rippletide. Lucia, the boss pictured here, was not one of those opponents who needed to be defeated, but Olberic had ventured into the Ruins of Eld to pick up the Void Amulet inside and I figured he might as well finish things off while he was there. I had figured out the optimal way to defeat Lucia on my previous solo game with Tressa, with the trick being *NOT* to break through the starting 30 shields on the boss. This was particularly easy for Olberic to do, as Lucia had a weakness to swords and each use of Brand's Thunder resulted in 26,000 damage. Lucia hit almost as hard as Werner and her Pulverize attack had the ability to drain BP when it landed. I stayed calm, made sure to use Refreshing Jams whenever Olberic dropped below 2000 HP, and broke out Energizing Pomegranates to counter when Pulverize drained away Olberic's boost points. Four uses of Brand's Thunder and three more Refreshing Jams resulted in victory.

One of the bosses who did need to be vanquished to claim the Battle-tested Spear was Esmeralda, the opponent at the end of Tressa's story. I went into this battle with the Inferno and Void Amulets equipped, blocking the heavy fire and dark elemental damage that Esmeralda can dish out with some of her colorful blade abilities. As a quick note on these amulets, I've discovered that they reduce damage of the appropriate elemental type by 99%, wow! No wonder putting one of them in the accessory slots completely neutralizes that type of damage. Anyway, Esmeralda's gimmick is that she locks out different actions on the part of the player when her attacks land. Red Blade prevents the target from using normal attacks, Blue Blade prevents the target from using physical abilities, and Violet Blade prevents the target from using elemental abilities. Pictured above was my worst case scenario, with Olberic blocked from using auto attacks and also stopped from using physical abilities. That was literally every type of damage that he had! These lockouts would go away on a break of the boss, except that Olberic had no way to break Esmeralda. Maybe he could use soulstones, I guess? What was I supposed to do here?
The good news is that Esmeralda keeps using these blades repeatedly. Evidently the designers felt that they needed to limit how many debuffs applied to the player at one time because when Olberic was hit with Violet Blade, the effects of the earlier Red Blade disappeared. Whew, that was a relief. No matter how bad things might be, Olberic could defend and wait until he regained the use of his abilities again. Esmeralda didn't make this easy though, debuffing Olberic's physical defense with Raven's Flight and then pounding him with Five Strikes. That last move might be the single worst ability amongst any of the Chapter 4 bosses, causing more than 2000 damage even with physical defense boosted. (If physical defense was debuffed instead, it would deal about 1000 damage per strike for roughly 5000 total, yeouch!) I used the starting spears weakness on Esmeralda to get in an early break and a 50k Brand's Thunder walloping, then two more unbroken Brand's Thunders into her followup swords weakness at about 30k damage apiece. This was enough to finish off the boss for good at the cost of two Refreshing Jams. The ticking death timer that Esmeralda put over Olberic's head never mattered since he finished the battle before it could hit zero.

The last boss to be downed in this sequence was Darius. The enemy thief has a weakness to spears and I thought that this would be pretty straightforward: get in some unbroken shots with Brand's Thunder, then break him with spears and land the big 50,000 damage attack to finish him off. Unfortunately the battle proved to be quite a bit tougher than that. Darius starts out the boss encounter by stealing your items, and the only way to get the items back is to break through his shields. Since Olberic had no method of healing outside of using grapes and jams, he had no choice but to break Darius right away before his health bled out to zero. I came up with a simple way to do this: use Abide on the first turn followed by Thousand Spears (with no boost points invested) on the second turn, and then Brand's Thunder on the third turn while Darius was broken. Again, so far so good, pretty easy stuff.

After coming back from his initial break, however, Darius locked out three of his five weaknesses - including spears. This left poor Olberic with no easy way to break the enemy, as the only remaining options were daggers (which he could never use) and wind element. Darius also went up to six shields after recovering from a break and the notion of sitting and using six Wind Soulstones in a row didn't feel very appealing. Well, what about not breaking Darius at all then, why not simply hit him with two more uses of Brand's Thunder and be done with it? Unfortunately this wasn't an option either, as Darius would pull out his "Call Comrade" ability after falling below 25% HP remaining, an ability which would leave Therion alone as the only character and result in an instant game over. I tried this approach and that was exactly what happened, Call Comrade appeared when Darius fell low on health and instantly ended the game.
The only viable strategy (outside of reviving Therion as solo Tressa had done) was to blast through the remaining health bar of Darius, dropping him from 30-40% HP down to zero in a single terrible blow and never letting Call Comrade appear at all. This was absolutely within the power of Olberic to accomplish... but it required breaking Darius to land the big 50k Divine Skill to hurdle over the dangerous zone of boss health. And breaking Darius meant using Wind Soulstones one at a time to get through those six shields. This was a semi-comical process, watching Olberic use one soulstone at a time while keeping his health topped off as needed with Refreshing Jams. It was also nerve-wracking since Darius was going to get around to using "Steal Item" again any turn now and cut off item usage entirely. I stopped maintaining Stout Wall protection because it used up precious turns that were rapidly running out. Eventually, after doing a fair bit of trial-and-error testing to get everything lined up correctly, I ended up with the screenshot pictured above: the last shield on Darius breaking with Abide in place and enough boost points to use Brand's Thunder on the following turn. This was a case where practice made perfect. (Fun fact: Olberic was wearing the Enchanted Circlet helmet with +53 SP in the above picture since Darius was stealing away too many SP with his attacks. This is the only screenshot of mine where Olberic had more than 200 max SP.)
The Battle-tested Spear doesn't appear until finishing Tressa and Therion's Chapter 4 stories and then also completing the following "Mikk and Makk Make Good" side quest. The eventual result:

Captain Leon Bastralle shows up again in Rippletide and has the Battle-tested Spear available for Purchase/Steal. This weapon has nearly the same attack value as the Battle-tested Sword (+390 as opposed to +400) and virtually the same critical bonus (+148 on the spear against +150 on the sword). The Battle-tested Spear has a notably worse bonus ability, however: instead of causing all physical abilities to deal 30% more damage, it has the somewhat lame property of occasionally blinding targets. The darkness status is fantastic when it kicks in, but the odds are too low to be reliable (I'm guessing about 5-10% chance per hit) and it only applies on auto attacks, not physical abilities. Needless to say, auto attacking bosses and hoping for darkness to kick in at low odds does not make for a viable strategy. Even with this said though, the Battle-tested Spear was significantly better than the old Forbidden Spear that Olberic had been lugging around forever, and I happily made the switch. Now he was back to dealing the same damage on his auto attacks with both swords and spears.
I could finish the remaining four bosses in any particular order and chose to complete Alfyn's quest next. The Forest of Rubeh dungeon was noteworthy for having a random encounter that didn't wilt immediately to the boosted power of Level Slash. The Devil Deer monsters (the ones that look like evil moose) were a legitimately dangerous opponent, buffing up their own physical attack and then hitting like a truck for well over 1000 damage. They also had 8800 HP and no weaknesses that Olberic was able to exploit, outside of burning through more soulstones which wasn't practical for a random encounter. In the picture above, they were able to tank a Level Slash that did more than 8000 damage and keep on trucking. This was exceedingly rare at this stage of the game and Olberic had to eat some Medium Healing Grapes in between fights to stay healthy.

The boss at the end of the Forest of Rubeh was the colorful Ogre Eagle. This can be either an easy boss or a difficult one depending on how much damage the player is able to output. The easy part comes from equipping a Tempest Amulet, which completely eliminates two different wind element abilities (Wind Slash and Storm Slash) that the boss uses over and over again. The difficult part comes from the "Double Rend" ability that hits twice and can inflict any of four different statuses or debuffs: chance to inflict poison, darkness, and physical/elemental attack down. I opted to block darkness status with a Bright Stone alongside the Tempest Amulet in the other accessory slot and crossed my fingers that Olberic would dodge the physical attack down debuff. The other big threat comes from when the Ogre Eagle drops below 50% HP remaining, after which it breaks out the bizarrely-named "Poison Rainbow" ability. This reduces maximum HP (not current HP) by 8% each turn and puts a time limit on the rest of the battle. Low offense variants can run into real trouble here.
Fortunately solo Olberic was not a low offense variant. The dangerous part of the battle would come when the Ogre Eagle dropped under 50% HP and initiated the use of Toxic Rainbow. I worked around this in the same fashion used against Werner earlier: reduce the shields on the boss with repeated soulstones and set up for one final massive strike against a broken target. For the Ogre Eagle this involved using Ice Soulstones, the only weakness on the creature at the start of the encounter. I knocked the boss down to 1 shield remaining, then used Brand's Thunder twice at about 25k damage per pop. This was enough to trigger Toxic Rainbow as expected, leading to one final Ice Soulstone breaking the last shield and then the big finishing blow at the by-now expected 50,000 damage. This was one opponent where I didn't need to experiment, with Olberic winning on the first try without much difficulty.

This screenshot captures the default equipment setup that I was running with Olberic whenever he didn't need to customize things for specific opponents. The Battle-tested Blade/Spear combination naturally occupied the two weapon slots, and note that with the addition of a Mighty Belt in the second accessory slot, Olberic actually managed to cap out physical attack at the maximum 999 value. (Again, I could have pushed up well beyond this with an alternate gear setup which is why having the completely pointless three digit restriction felt so annoying. It's not like this was a DOS game with strict memory limitations!) The Battle-tested Shield and Adamantine Hat were the default best-in-slot choices for their respective gear types, along with the previously highlighted Crystal Vest to cap out physical defense at the same 999 value. The other accessory was a new item that I hadn't mentioned before: the Blessed Blazon grants +100 physical and elemental defense, making it one of the best items in the whole game. It can only be obtained after completing both Tressa and Therion's storylines, which is unfortunate since I would love to have access to it earlier.
With this defensive equipment in place, the vast majority of the monsters in the game couldn't hurt Olberic at all. Their weak attacks would bounce off his armor and the trickle damage would instantly be healed away by the Battle-tested Shield's 200 HP per turn regeneration. When combined together with the constant Level Slashing that Olberic was using in every combat, taking full advantage of his infinite SP regeneration, my solo character felt like a genuine terminator, an unstoppable death machine who couldn't be touched. Perhaps it was due to my growing familiarity with the gameplay, but Tressa had never been this dominant during her solo run. The remaining bosses were the only foes worthy of concern for Olberic.

The next target was Simeon in his hideout at Everhold, the last opponent standing in the way of Primrose. This is a small town and I hadn't made any effort to arrive earlier due to a lack of interesting items for Olberic. I followed the usual process by Challenging every NPC in town, and quickly spotted that the Ardent Actor on the right side of the village dropped a soulstone. Not just any soulstone either, a Large version of the Thunder Soulstone! I had Olberic fight the poor actor several more times and confirmed that yes, this is a repeatable fight: the player can get infinite versions of this large soulstone if desired. Then I found that the Old Man blocking the house in the northeast corner of town also dropped a Large Soulstone, the shadow type this time, and it could also be repeated without limit. Then Olberic Challenged the Usher on the bridge into the Amphitheatre, and he was *ALSO* carrying a Large version of the Fire Soulstone. Three different types of soulstons, all of them the rarest and best type, all of them infinitely repeatable!  This was flat-out amazing and I added my findings to the reference documents that I'd been accumulating for Octopath Traveler. I had now found a repeatable source for the all-important Refreshing Jams along with five different types of soulstones (two medium/three large and four different elemental types) along with a repeatable source for Medium Energizing Pomegranates. The hours that I had spent beating the snot out of every townsperson in the world had been completely validated by the end of this journey.

As for Simeon himself, this boss is the only one of the main story opponents to have two separate phases (until the final hidden boss in the extreme endgame). The first form of Simeon pops up with two marionette minions who become much more powerful after they fall below 50% HP. The Dancer Marionette only used dark element attacks and was easily countered by Olberic's equipment setup (make sure to bring an Articulate Stone to prevent silence and a Void Amulet to block dark element damage), however the Father Marionette used physical attacks and hit pretty hard, even through Stout Wall protection. The easy solution here was never to let them fall below 50% health, slapping them with a few auto attacks each and then using Brand's Thunder for 25k damage for the one-shot overkill move. First form Simeon uses dark element abilities almost exclusively and went down quickly afterwards.
The pictured second half of the battle was definitely more difficult. Although Simeon does waste a lot of actions trying to use dark elemental abilities and the silence status ailment, he will buff his own physical/elemental attacks and eventually combine this with 3 actions per round and defensive debuffs directed towards the player. Simeon becomes far more dangerous after he falls below half health and I took steps to set him up for the quick-kill that Olberic had already used against Werner and the Ogre Eagle. Look closely at the image above and you'll see Olberic using a non-Abide version of Brand's Thunder. That was a deliberate choice on my part and not an accident, chosing to deal 17k damage instead of 26k damage from having Abide in place. Simeon has 96,450 HP and therefore he goes into his more dangerous AI routine when he falls below 43,225 HP. Two Abide-boosted Brand's Thunders would barely tip over that margin and leave Simeon with just under half his health in place - not good. Instead, I dealt 17k, then 26k, and then another 26k damage to leave Simeon with only 27k health remaining, enough so that a few basic attacks and one final Brand's Thunder would deal him in.

The easy solution for Simeon would seem to be ignoring all this math and breaking him for one of those big 50k damage bursts. Unfortunately, that wasn't an option because the only weakness of Simeon in his final form was daggers, a damage type that Olberic lacked. (There are other weaknesses but all of them are locked at the start of the battle, and Simeon has to be broken to open them up. Completely impossible for Olberic.) So instead it had to be the dog-and-pony show described above, using Brand's Thunder without Abide in place to initiate the AI routine shift when Simeon had as little health remaining as possible. Pictured above was Simeon's strongest attack named Act of Impulse, worth about 1500 damage when he had his physical/elemental attack buffed. This is listed in the online Octopath Traveler reference materials as a physical attack but Stout Wall didn't seem to do anything so I suspect it's an elemental attack of some kind (not dark element). Anyway, Olberic had to use one Refreshing Jam to keep his health topped off and otherwise managed to land the final Brand's Thunder needed to finish off this opponent.

By way of contrast, Simeon's partner Mattias was almost a joke. He has a weakness to swords, never locks that weakness, and never shuffles the weakness to something else: easy prey for Olberic. The gimmick in this battle is that Mattias keeps summoning successive rounds of minions to harass the party. For some reason though, Mattias never summoned any of them throughout this whole encounter! I think that this is due to the fact that his summoning is triggered when falling below certain health thresholds, and Olberic was unloading on this scrany religious fanatic so quickly that he never had time or space to use them. The first Brand's Thunder did 33k damage against the unbroken boss, a second repeated the pattern, and a third use of the Divine Skill after Mattias was broken finished things off for good. 33k + 33k + 50k damage = one dead boss. When combined with a Void Amulet to neutralize the dark elemental spells from Mattias, this ended up being a total cakewalk. Zero jams needed and Olberic won the battle with most of his health intact.
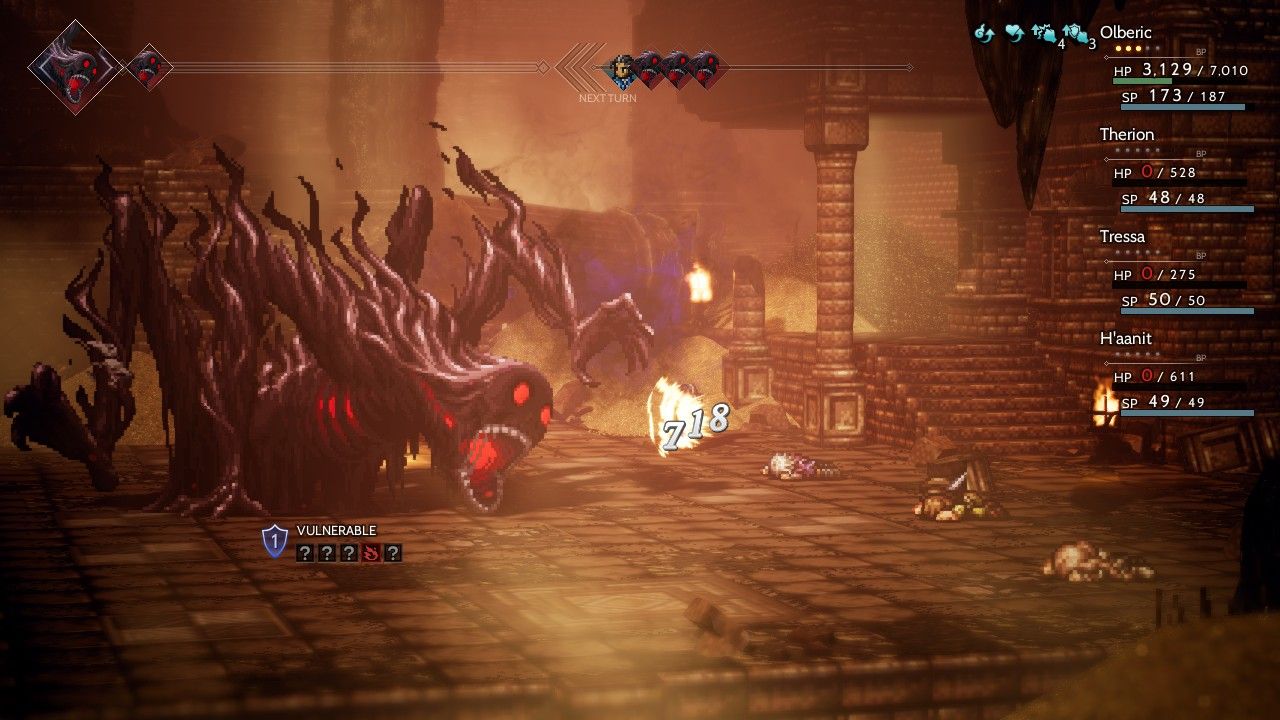
The only remaining Chapter 4 boss at this point was Redeye, the opponent waiting at the end of H'aanit's storyline. Redeye is one of the easiest of the Chapter 4 bosses so I didn't anticipate any trouble dealing with this last obstacle - and I would be right. I tried to enjoy the time spent exploring the Grimsand Ruins knowing that Olberic's days as a solo character would soon be coming to an end. Mostly I was just Level Slashing everything to death so it wasn't terribly exciting. (This felt a bit like my solo Samurai Kambei from Final Fantasy 5, who had used the overpowered "Slash" ability to cut through the random encounters in the later stages of that journey.) When Olberic finally made it to Redeye, he was confronted with another somewhat gimmicky opponent. Redeye is supposed to turn your characters to stone and the plot spends a lot of time discussing this mechanic, but the boss never uses this ability at any point in time. I suspect this was removed from the game at some point because players could find themselves with an unwinnable battle if they lost or sold a single quest-related item from earlier in the game.
Since Redeye doesn't turn your party to stone, the creature instead uses the gimmick of a shifting weak point system. Redeye has three different sets of weaknesses and it cycles through them every single turn, swapping in order from set 1 to set 2 to set 3 and back to set 1 again. This isn't dangerous in the least if you have a chart of all the weaknesses sitting in front of you, which of course I did and planned around accordingly. I made sure that Olberic had protection against the darkness and unconscious statuses that Redeye could inflict and maintained Stout Wall at all times to defend against the otherwise all-physical attacks of the boss. (This was easier than many other boss encounters since Redeye doesn't try to debuff the party's physical defense.) I followed standard procedure here, two Brand's Thunder attacks leveled against the rotating swords weakness of the boss, then a final Brand's Thunder when the boss was broken:

Game, set, and match. I was wondering if Olberic would be able to top 50,000 damage against one of the Chapter 4 bosses (who have higher physical defense than random critters) and it turned out that yes, he was just able to cross that bar. Olberic was sitting very close to the 999 physical attack cap and this was about as high as he would ever be able to go. It was an appropriate finishing point for his journey.
Now there are other optional endgame opponents that go beyond the Chapter 4 bosses, and given the strength of Olberic, I was tempted to see if he could defeat any of them. This turned out not to be practical, however. The four superbosses protecting the secret hidden jobs in Octopath Traveler (Starseer, Runelord, Warmaster, Sorcerer) all had far too much health and too much damage for Olberic to have any realistic shot at defeating them. I think that Winnehildn the Warmaster goes up to six actions per round at one point. I'm not saying that it's impossible for a solo character to win these battles, only that I wasn't keen on trying them myself. I did take a peek at the M�nagarmr superboss to see how that would go:

But the answer was "poorly", it went poorly for Olberic. M�nagarmr locked out its spears weakness at the start of the battle and that was a real problem since Olberic had no other way to break the creature. The boss kept summoning more wolves as minions (each one with 30k HP!) along with debuffing Olberic's physical attack and physical defense. Oh, and did I mention that M�nagarmr hit really, really hard? That's the boss dealing 1300 damage above with Stout Wall protection in place. It sure would have been nice to be able to go over the 999 physical defense limit here! Anyway, I realized almost immediately that Olberic was just too outgunned here. He had to keep buffing his physical attack and physical defense and then stopping to heal, and he never had an opportunity to attack. This encounter only reinforced what I had suspected all along: the solo games are viable to complete all four chapters for each character but not viable for the endgame superbosses. This wasn't a feather that I was going to land for my cap.
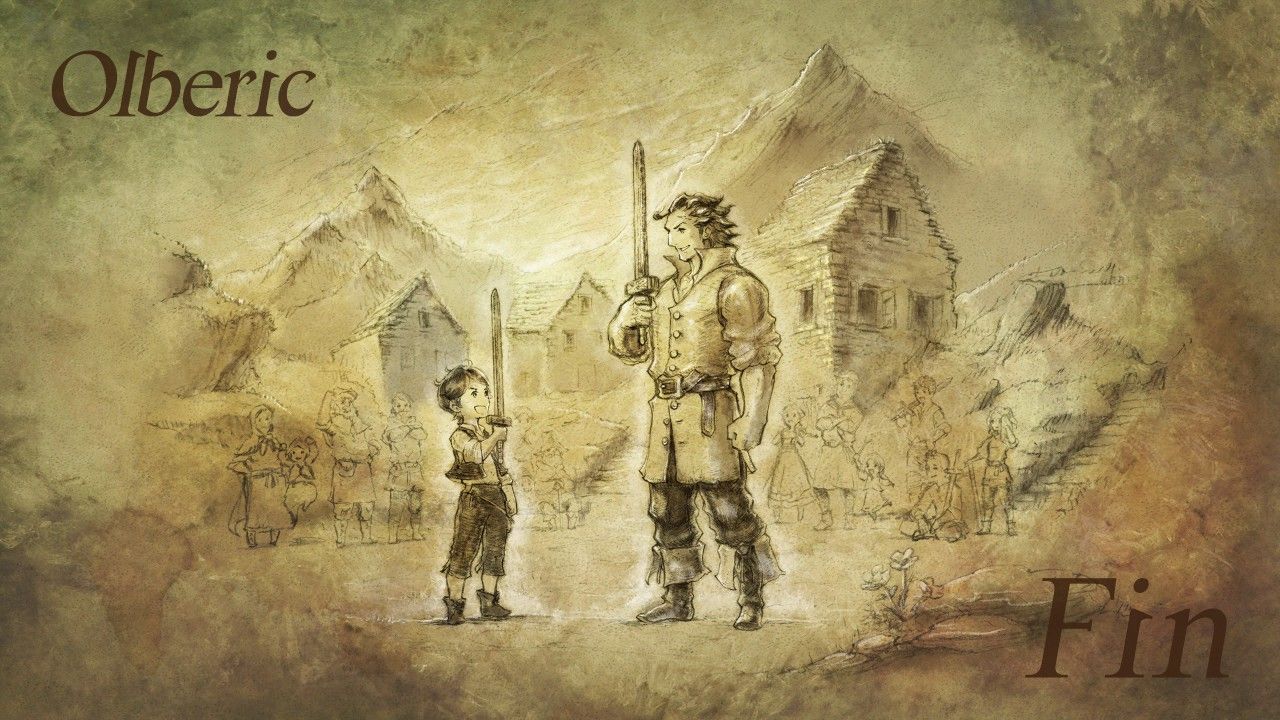
Thus the journey of solo Olberic came to a close. I knew before starting that Olberic would be a powerful choice for a solo game and he somehow managed to exceed all of my expectations. I had a significantly easier time with Olberic than I did with Tressa, and while I think a huge part of that was knowing much more about Octopath Traveler's gameplay, not to mention using Path Actions throughout the game instead of solely at the finish, I do think that the Warrior class probably grades out ahead of the Merchant class for a solo game. The big thing that I had missed about the Merchant class is that the damage from Hired Help never improves over time. It remains locked at the same (very powerful) level for the whole length of the solo run. By contrast, Olberic seemed to scale up alongside the bosses and never stopped getting stronger right up until he crashed into the 999 physical attack numerical limit. The biggest turning point came when he (eventually) obtained the Battle-tested Blade and gained the 30% additional damage property. From that moment forward, every boss could be defeated in 2-3 uses of Brand's Thunder, up to and including the Chapter 4 opponents. Someone like Werner just isn't that tough when he has 101k HP and your character can deal 50k HP in a single attack. I'm really going to miss that when I play another character down the road!
Olberic was a true blast to use as a solo character. This might well end up being the most fun character for Octopath Traveler when all is said and done. Olberic's gameplay is simple, effective, and brutal: hit things with sword as hard as possible. If only everything in life could be so easy.


