
Following the completion of the Chapter 2 stories, I took a break from Starseer Primrose's journey for about three months of real-world time. This period coincided with the busiest part of the year at my work, and that stressful period combined with the release of Hades 2 meant that I didn't have any free time to devote to this game. Once things settled back down a bit and I had spare time available for more report writing, I returned to this quest and picked back up with Primrose once again. If I'm being honest, I've always found that the Chapter 3 stories are the toughest ones to write about for Octopath Traveler. The first two sets of stories have lots of space to discuss new skills opening up for each class (both active and passive ones) while the Chapter 4 stories can focus on the toughest opponents and the strategies necessary to defeat them. The Chapter 3 stories are caught in the literary version of no-man's land, long past the discovery phase without reaching the final endgame tests. I'll do my best to keep things interesting if you happen to be reading along here, just know that it can be a bit of a challenge for this author!
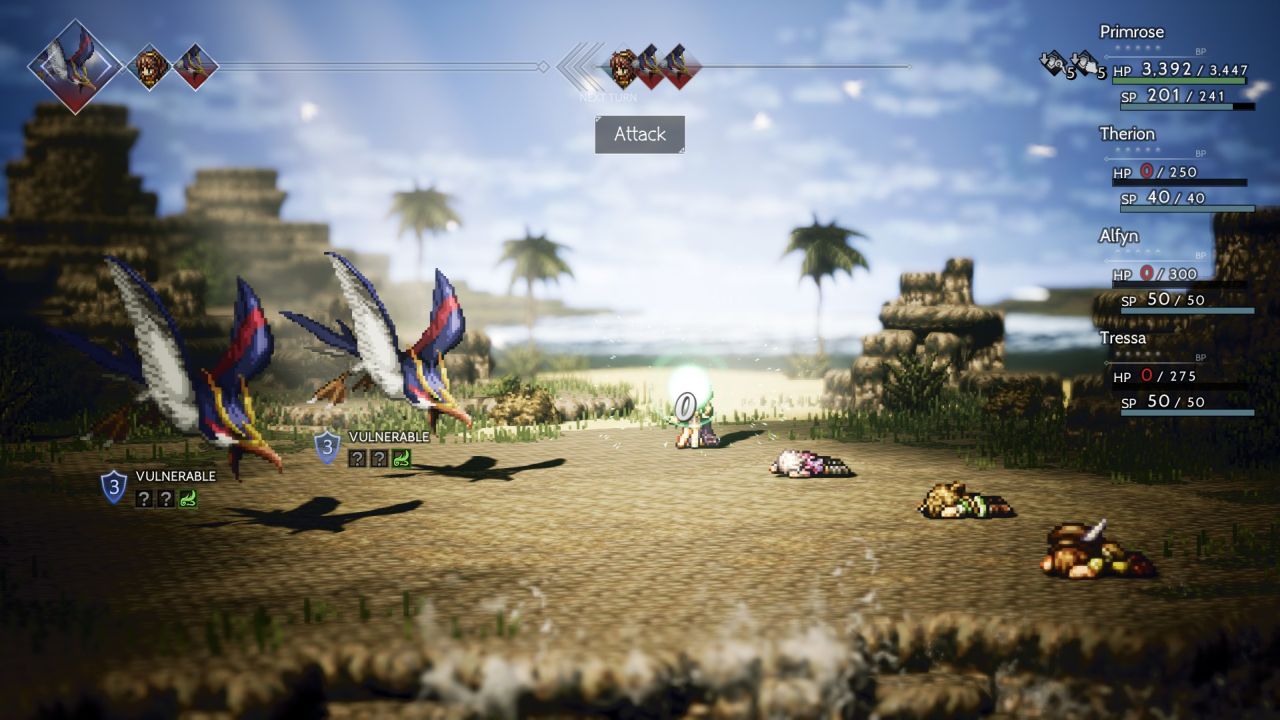
Anyway, I usually start this portion of the gameplay by making the run out to Grandport. That outer ring town has a ridiculous assortment of useful equipment available for purchasing or stealing, not to mention half a dozen of the stat-boosting nuts to claim. The biggest obstacle is making it out to Grandport itself due to the difficult monsters that solo characters will inevitably encounter along the way. Many of my solo characters have had to run away screaming in terror along this path, having to repeat the mad dash to the outer town repeatedly until they get lucky on their retreat rolls. Starseer Primrose had absolutely no such problems to speak of, confidently dodging or Divine Aura nullifying nearly all of the attacks directed her way, then cooly eviscerating her opponents with blasts of Shooting Stars. I made no attempt to run away from these fights and simply killed everything along the way, only coming close to death once when Primrose failed a series of dodges in close succession. This brought her to the gates of the port city:
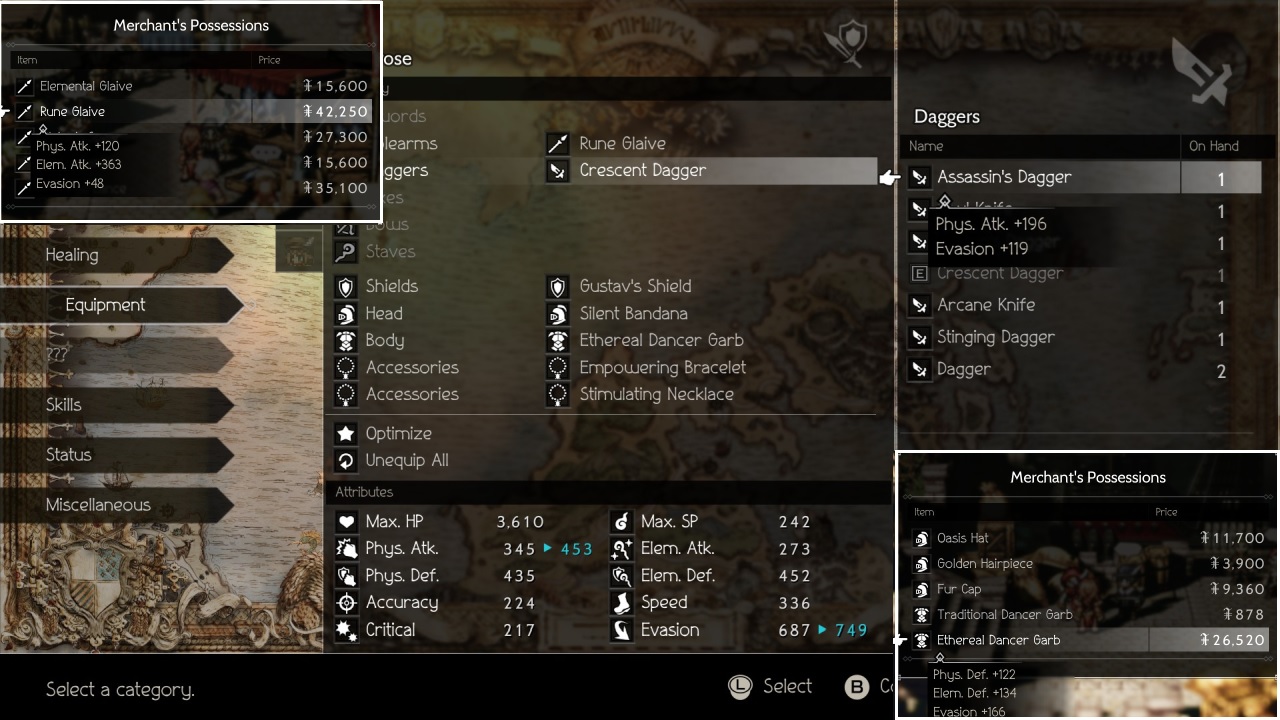
There were so many goodies to pick up in Grandport that I had to be careful about running out of money. In addition to those stat-boosting nuts, Primrose was able to acquire equipment upgrades in both the spear and dagger slots. The Rune Glaive was the new spear was a massive bonus of 363 to elemental attack which was better than anything I could have gotten from the daggers option. This meant that I wanted to get as much evade as possible on that dagger, with the Assassin Dagger boasting 119 additional points. When combined together with the Ethereal Dancer Garb, the armor with the highest evasion value in the game, I was able to take Primrose up to a staggering 749 points of evasion! She would assuredly hit the cap of 999 points in that stat before this run was complete and could have gone ever higher if Octopath Traveler's engine allowed it. Notably I did not have enough money to Purchase all of these items so I had Tressa legitimately obtain the Ethereal Dancer Garb followed by Therion save-scumming the two weapons at 3% odds apiece. RNG was working in my favor as Therion grabbed the Rune Glaive on his 41st steal attempt, thus allowing me to have all five steal attempts available when repeatedly trying to lift the Assassin Dagger. It costs 100,000 money to restore your reputation in Grandport so I couldn't afford to have five failures.
There was one item that I did not pick up in Grandport: the Forbidden Shield. This item has some of the highest physical and elemental defensive values in the game, however it also carries a penalty of -171 evasion which made it pretty useless for Primrose's character build. There was exactly one boss fight where it would be useful (the Shady Figure / Mystery Man pair since they never attack) which meant that I could safely skip this item. Next it was time to start roaming through the various optional side dungeons located in the second ring, starting with the Tomb of Kings:
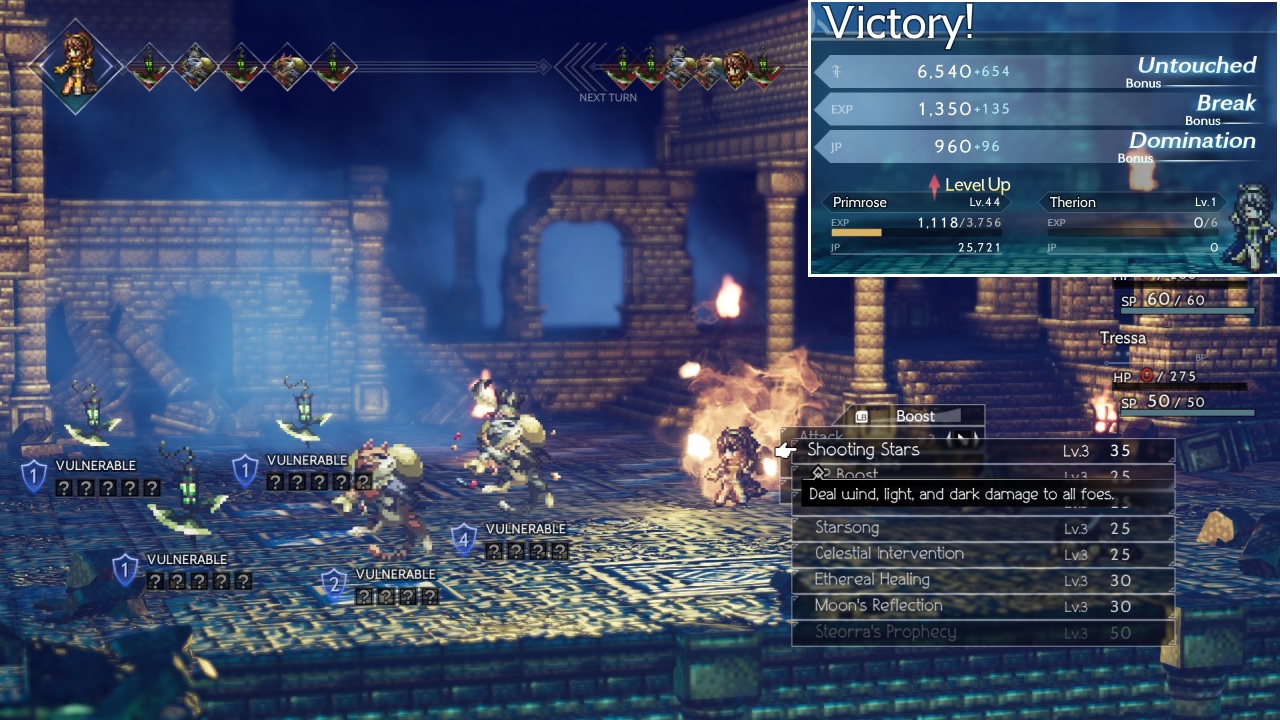
This place was notable because Primrose kept getting the pictured double Cait encounter with a normal Cait along with a Cultured Cait. Thanks to the BP Boost support skill, Primrose started out every fight with two boost points in her pocket, and that was enough to flatten both of the Caits immediately before they could run away. I fought this exact encounter three different times in the Tomb of Kings for a big payout of money and experience and job points each time. The job points were useless by now but the other two commodities were quite nice indeed. These quick victories led me to another realization: wait a minute, if Primrose could immediately cast a triple boosted Shooting Stars and wipe out this encounter... couldn't she do that in other random battles as well?
And that was when the true slaughter began.  I mentioned on the previous page of this report about how Primrose could defend on the first round of combat and then cast a max boosted Shooting Stars on the second round of combat, with typical fights going Defend -> Shooting Stars, Defend -> Shooting Stars, etc. She had moved beyond a need for that initial defensive round, however, as the damage on Shooting Stars had scaled upwards to a thoroughly impressive output. The new tactic dropped any need to defend and instead simply went Shooting Stars -> everything dies, next fight Shooting Stars -> everything dies. On and on in glorious fashion, the monsters cut down like wheat before the scythe. I cannot recall any other class having the ability to win quite this fast, with the extra boost point from BP Boost making the key difference here. Since I also run these solo quests at triple the normal gameplay speed, traversing the overworld and exploring the side quest dungeons flew past at incredible speed. The random encounters were literally concluding in about five seconds, with the monsters barely loading onto the screen before getting wiped by Shooting Stars. The whole thing was honestly kind of frightening to watch as Primrose ruthlessly exterminated entire races of monsters.

I felt confident enough to have Primrose take on the Giant Python boss in the Quicksand Caves, despite this being by far the toughest of the optional areas in the second ring. My main goal during this battle was to keep Primrose's Starsong protection in place as much as possible, with this amazing skill buffing her evasion and physical/elemental defenses. When Primrose's boost meter was full, I would hit the Giant Python with a max boosted Shooting Stars even if the snake hadn't been broken ahead of time. So long as Starsong was in place, the Giant Python basically couldn't touch Primrose at all, whiffing on something like 80-85% of its attacks and dealing lesser damage on the rare occasions that it managed to break through. The tricky part was needing to spend rounds pausing to restore SP with an Inspiriting Plum (the medium ones restore 80 SP) since Primrose's core skills were very expensive to cast at 25 SP for Starsong and 35 SP for Shooting Stars. Then I also had to drop in the occasional round to heal with Medium Healing Grapes, all of which definitely kept me on my toes. It was too bad that I couldn't grab the Hunter's Patience support skill for some extra bonus turns!
The other downside to using Shooting Stars is that it hits everything on screen, whether or not the player wants that to happen. I could not avoid killing the Snake Charmer before the Giant Python, something that the player does not want to do as the snake gets much more dangerous after its master is gone. The Giant Python increased to three actions per round and started using a move called Big Bite that hits five times in a row. Primrose couldn't quite manage to juggle item usage alongside Starsong and Shooting Stars in this more dangerous environment, and I had to consume a single Refreshing Jam for safety before finishing off the battle with a victory. Winning on the first try with only a single Refreshing Jam expended was an excellent result and now I could claim the completely useless quest reward of a new bow that the Starseer class couldn't equip, heh.
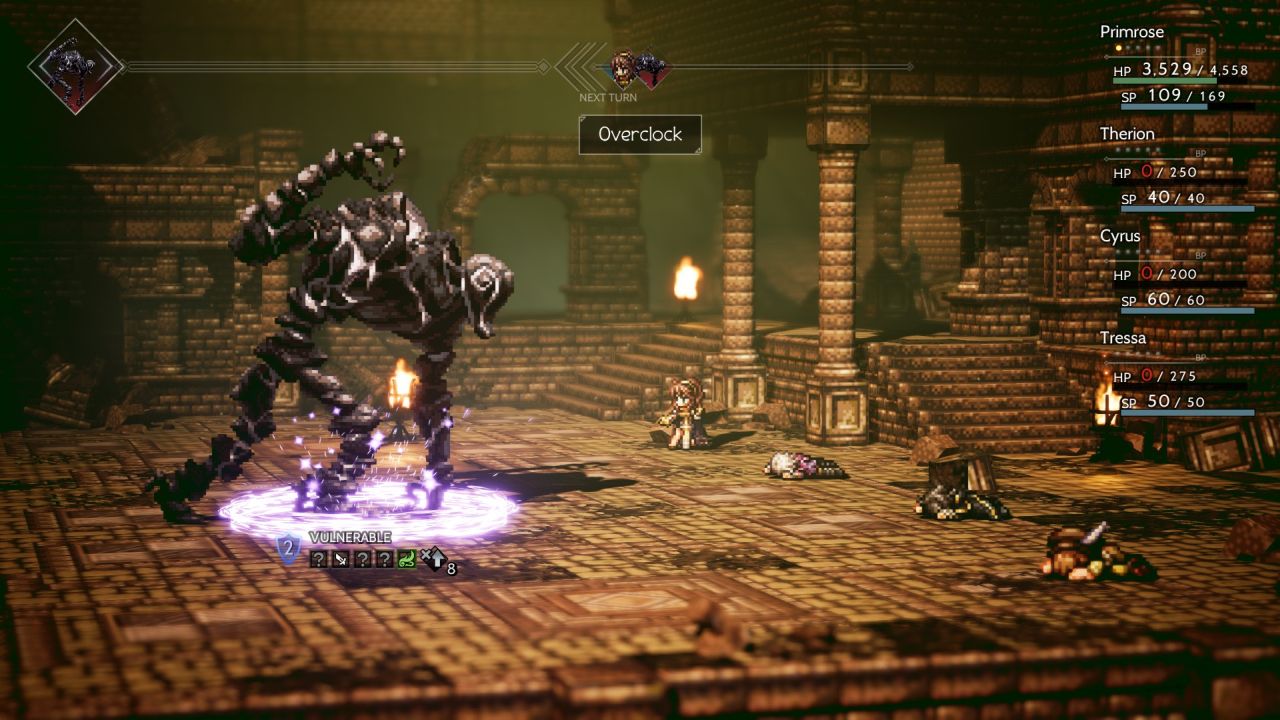
I continued onwards with the remainder of the optional side areas in the second ring. All of these dungeons proceeded in exactly the same fashion: a random encounter would start, Primrose would flatten everything instantly with Shooting Stars, then back to more exploring again. Some of these dungeons didn't have bosses so Primrose simply killed everything in places like Farshore until all of the treasure chests had been opened. The Behemoth in the Tomb of the Imperator didn't fare much better, failing to hit Primrose as I cut through its shields, broke the beast, then eliminated it with a max boosted Shooting Stars. The pictured Throne Guardian in the Hollow Throne dungeon was more fun as I was able to block its Overclock buff with a well-timed Celestial Intervention. Overclock is basically the monster version of Starsong, buffing both attack and defense in the physical and elemental categories; without it, the Throne Guardian was a total dud and fell quickly. Then for Manymaws in the Derelict Mine, the Starseer class had no way to get through its shields so Primrose simply brute-forced a solution with three casts of Shooting Stars in quick succession. None of this opposition posed any kind of challenge for Primrose as she clearly had to go further afield to face actual threats.
As another test of her abilities, I made one additional trek out to Northreach at the extreme top edge of the map. This is another remote town that requires a long climb up a snowy mountain, a test that Primrose passed once again with flying colors. I did have to Defend for one round against these enemies as a triple-boosted Shooting Stars didn't have quite enough punch to defeat everything, fortunately the final boost point for max boost was enough to get the job done. I also had Primrose stop briefly in the Maw of the Ice Dragon dungeon to grab the Adamantine Hat, usually the best helmet in the game for spellcasters, though I continued to wear the Silent Bandana on Starseer Primrose most of the time because evasion was such an important stat for her. Within Northreach, I Purchased the Empowering Necklace accessory with its +1000 HP bonus as well as earning a Large Nourishing Nut in a quest reward. This pair took Primrose up to about 4500 max HP which felt like a comfortable margin for the remainder of the Chapter 3 stories.
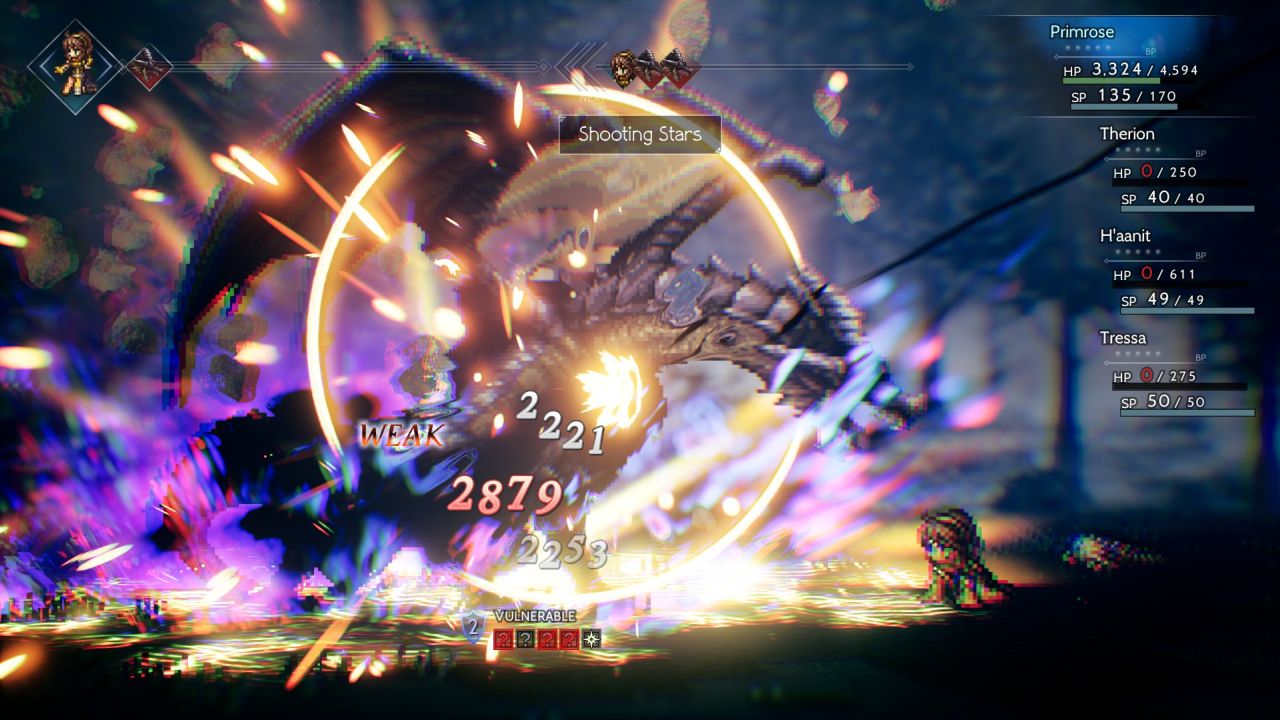
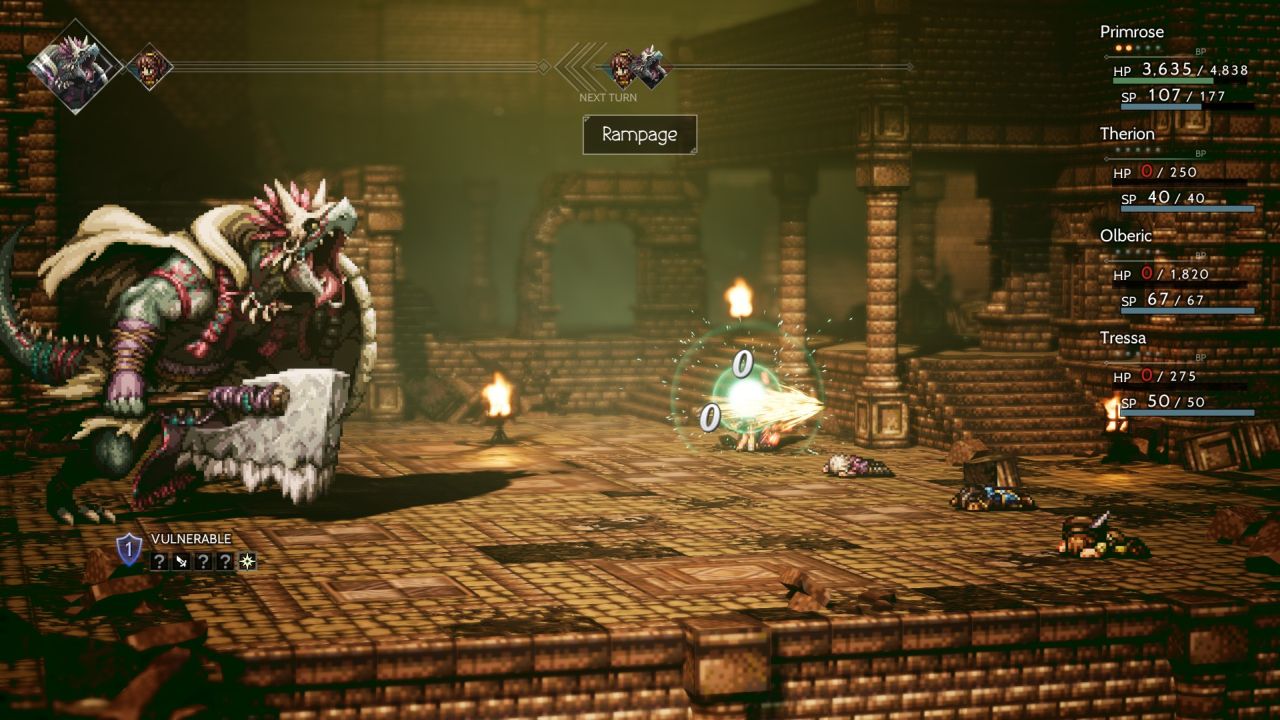
With all of that optional content out of the way, I could dive into the Chapter 3 stories themselves. I decided that I would run through these stories in clockwise fashion, starting in the Frostlands and then cycling all the way around the world until wrapping up in the Woodlands. I'd never faced the bosses in this order before and it seemed like it would be fun for a change of pace. This meant that the first story sequence featured H'aanit and her Dragon boss at its conclusion. (I won't bother discussing the various dungeons associated with the Chapter 3 stories unless something unusual happened, Primrose continued to one-shot every random encounter in mere seconds.) The Dragon necessitated bringing an Inferno Amulet as usual to protect against its fire breath and otherwise I had Primrose continue to lean on her evasion gear to dodge the creature's physical attacks. This she accomplished with great success as the Dragon could barely touch her at all. It was missing close to 90% of the time when Starsong protection was in place, either Primrose evading its blows or canceling them out via Divine Aura.
I had less success offensively since the only weakness Primrose could hit was light element, something that only triggered once per casting of Shooting Stars and which was often blocked out by the Dragon. I decided to ignore trying to break the Dragon's shields and instead simply cast Shooting Stars whenever full boost points were available. This resulted in the rather pedestrian damage output captured above, a little over 7000 damage in all, except for the one time that repeated uses of Shooting Stars wore down the Dragon's shields and I was able to hit with a max boosted ability against a stunned opponent. The low damage output didn't really matter though since the Dragon basically couldn't touch Primrose at all. Its flame breath was useless and its melee strikes landed so rarely that I could easily heal with items to stay in the safe zone on health. This opponent was a lot easier than the Giant Python had been even with the inability to do much shield breaking.
Next on the docket was Primrose's own Chapter 3 story hosted in Noblecourt. After racing through the Obsidian Manse dungeon in record time, Primrose equipped the standard Bright Stone accessory and squared off against Albus. This guy never seems to cause problems for my solo characters and he was especially vulnerable to the Starseer class by having dagger, wind, and light element weaknesses. I broke Albus initially with a single max boosted Shooting Stars and a bunch of dagger attacks, then hit him with another max boosted Shooting Stars for 5000 x 3 = 15,000 damage when the shields were down. That was enough to drop Albus to half health at which time he summons a pair of Obsidian Officer minions. Those two new opponents proceeded to do, uh, almost nothing at all as they had virtually no success at hitting Primrose while her Starsong protection was in place. Only a handful of attacks managed to get through before they were blown off the stage by more Shooting Stars casts, followed by Albus meeting an untimely end as well.
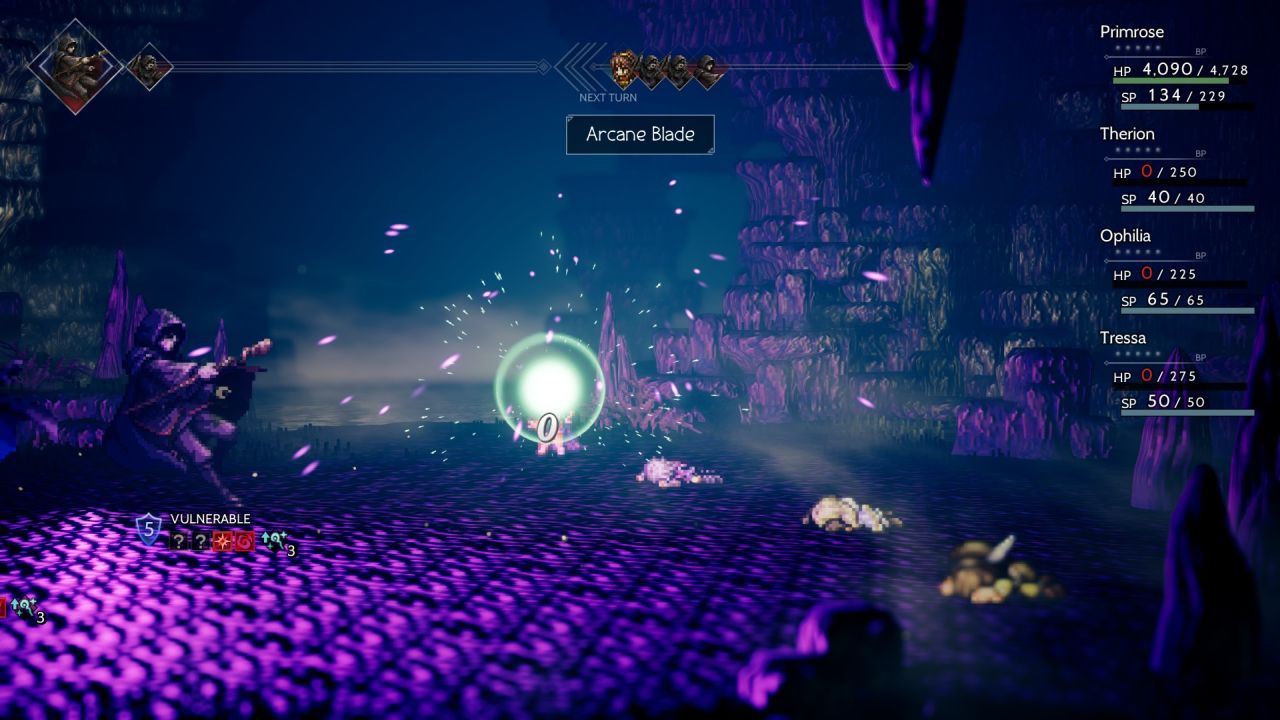
The Shady Figure and the Mystery Man at the end of Ophilia's Chapter 3 tale were more interesting opponents. They never use physical attacks and instead exclusively cast spells (this was the one place where the Forbidden Shield would have been helpful) and therefore I gave up a bunch of Primrose's evasion gear in favor of stacking additional elemental defense. The Shady Figure will also heal this pair for exactly 800 HP at the end of every round which can cause real problems for low-offense variants; I often save this story sequence until the end of the Chapter 3 set due to its difficulty. These two opponents will also buff their own elemental damage and debuff the player's elemental defense to stack up more than double the normal damage from their abilities, plus you don't want to leave just one of them alive as they will swap over to more dangerous attacks if one of the two gets eliminated first. All in all, there's a lot of dangerous stuff here that a solo character needs to be wary of.
....at least, for most solo classes. Starseer Primrose had ample tools at her disposal to counter these threats, starting with Starsong to cancel out the Break Spirit elemental defense debuff and Divine Aura fully blocking a quarter of the enemy spellcasts. It was really noticeable when that passive skill triggered on big attacks like the pictured Arcane Blade above, nullifying a hit that would have dealt 600-700 damage under normal circumstances. Offensively, Primrose had no realistic way of breaking the shields on the bosses since they locked out all of their elemental weaknesses. However, a max boosted Shooting Stars was still hitting for roughly 6000 damage even against the unbroken bosses, plus it was hitting both of them simultaneously instead of being forced to focus on one target at a time. This was far more damage than needed to outpace the healing from the Shady Figure and it didn't take long to wipe out the pair with minimal fuss. I thought that this battle would go well and it still managed to exceed my expectations.
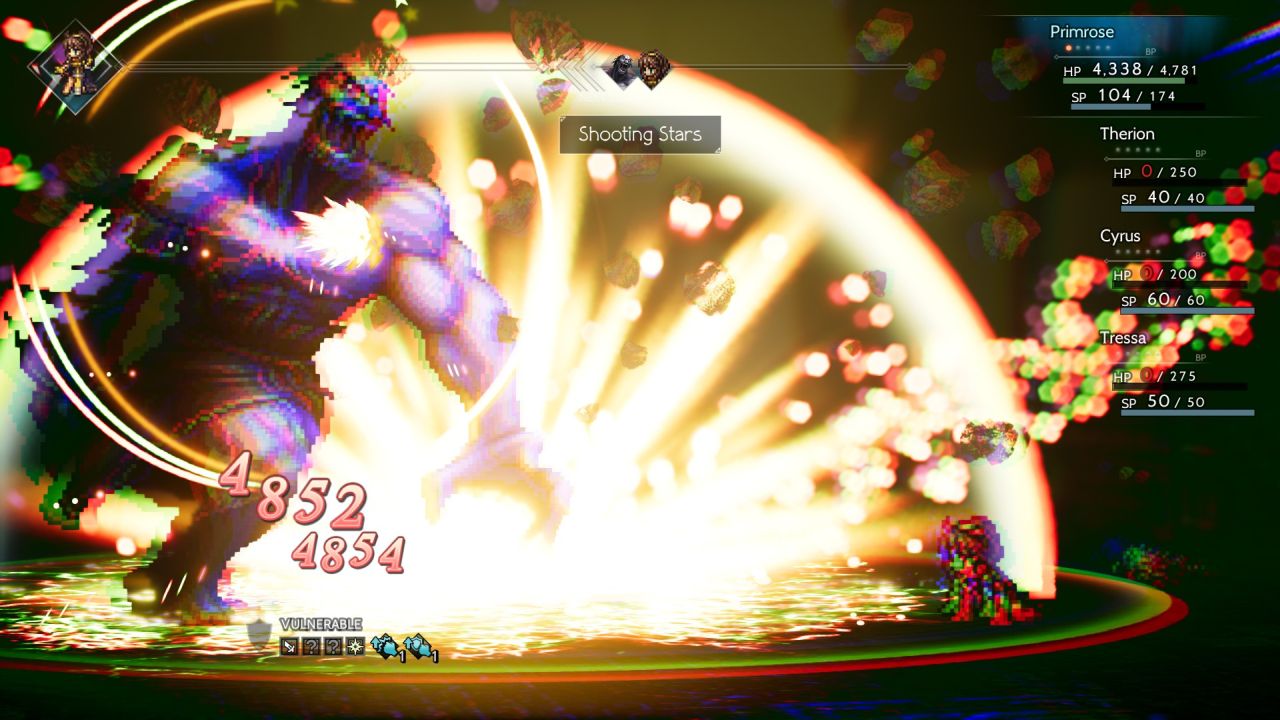
I have less to relate about the next two story sequences in order, starting with Cyrus' Chapter 3 story. The dungeon attached to this tale was another utter joke, everything dying in mere seconds as Primrose continued to speedrun her way through this portion of the gameplay. Yvon was the boss at the end and I think that his two Research Fellow minions were more dangerous than he was. Those two minions exclusively cast wind elemental spells (unfortunately I did not have a Templest Amulet yet) which would always hit Primrose unless her Divine Aura triggered. Primrose was wearing her usual evasion-based equipment setup which meant less in the way of elemental defense, causing those spellcasts to pack a bit of a punch. They died quickly though and Yvon never summons them back a second time. He only uses physical attacks of different kinds and, well, that simply didn't work against Primrose. Between her evasion gear, Divine Aura, and Starsong for even more evade, Yvon simply could not touch Primrose as she carved him apart with dagger strikes and Shooting Stars. I'm not even exaggerating when I say that the two minions did more damage than Yvon himself!
The poor Lizardman Chief at the end of Olberic's story sequence was even sadder. The creature summoned two more minions on the first turn of the fight, only for Primrose to immediately wipe them both out on the next round with a max boosted Shooting Stars. The Lizardman Chief is another opponent that only uses physical attacks and, yeah, you already know what that meant by now. The occasional blow made it through Primrose's defenses but certainly nowhere near enough to worry. I had been equipping an Elemental Augmentor accessory for the random encounters to get even more damage on Primrose's first-turn burst, and I probably could have used it for this boss fight as well though I did have Primrose take the usual Conscious Stone just to be on the safe side.
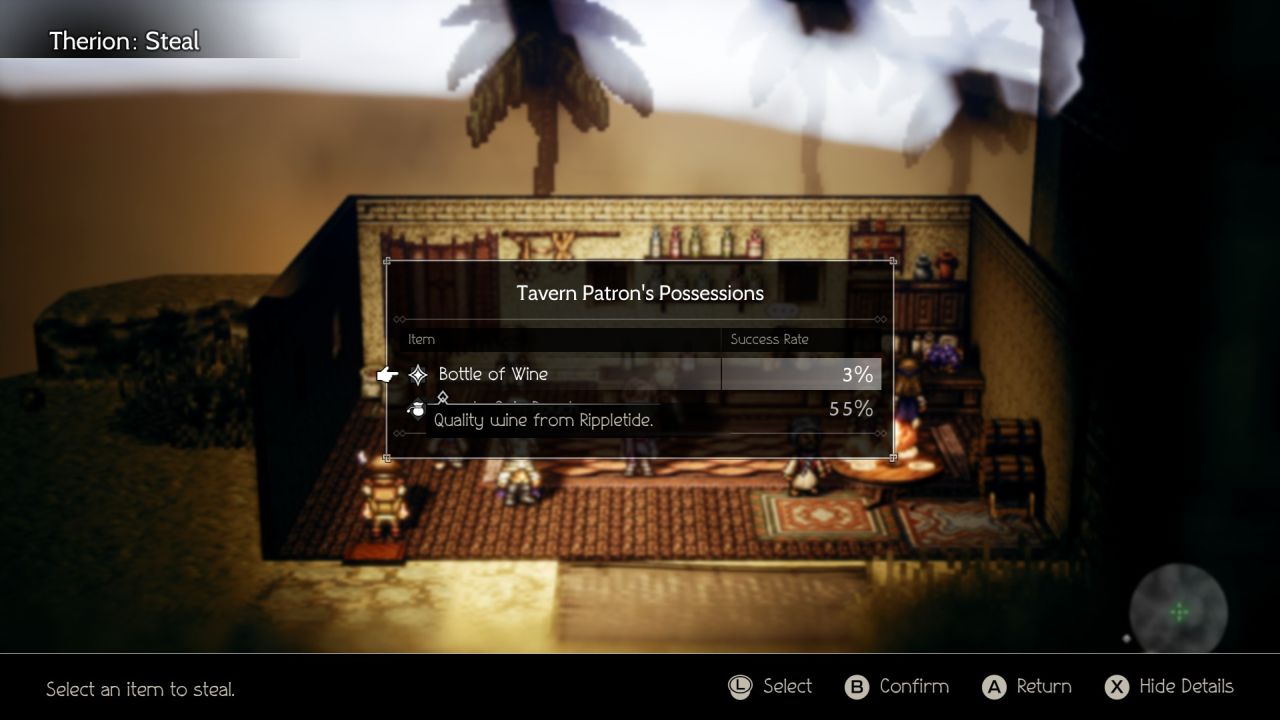
The other story sequence in Wellspring is associated with Therion and unfortunately all of Therion's plot sections are a real pain to play through in solo games. This is because they require stealing plot token items at low (3%) odds and that can take a while; obviously the developers never thought that someone would be taking Therion through these sections at Level 1! I bring this up because I had a particularly bad run of luck at stealing a stupid Bottle of Wine from an NPC in the town inn, not landing this item until the 70th try, sheesh! Then I had to steal another mask later at the same 3% odds though that one arrived after a more normal two dozen steal attempts. It was all more noticeable because Primrose was advancing so quickly through each dungeon; this was another case where I spent more time on those blasted steal attempts than completing the Black Market dungeon.
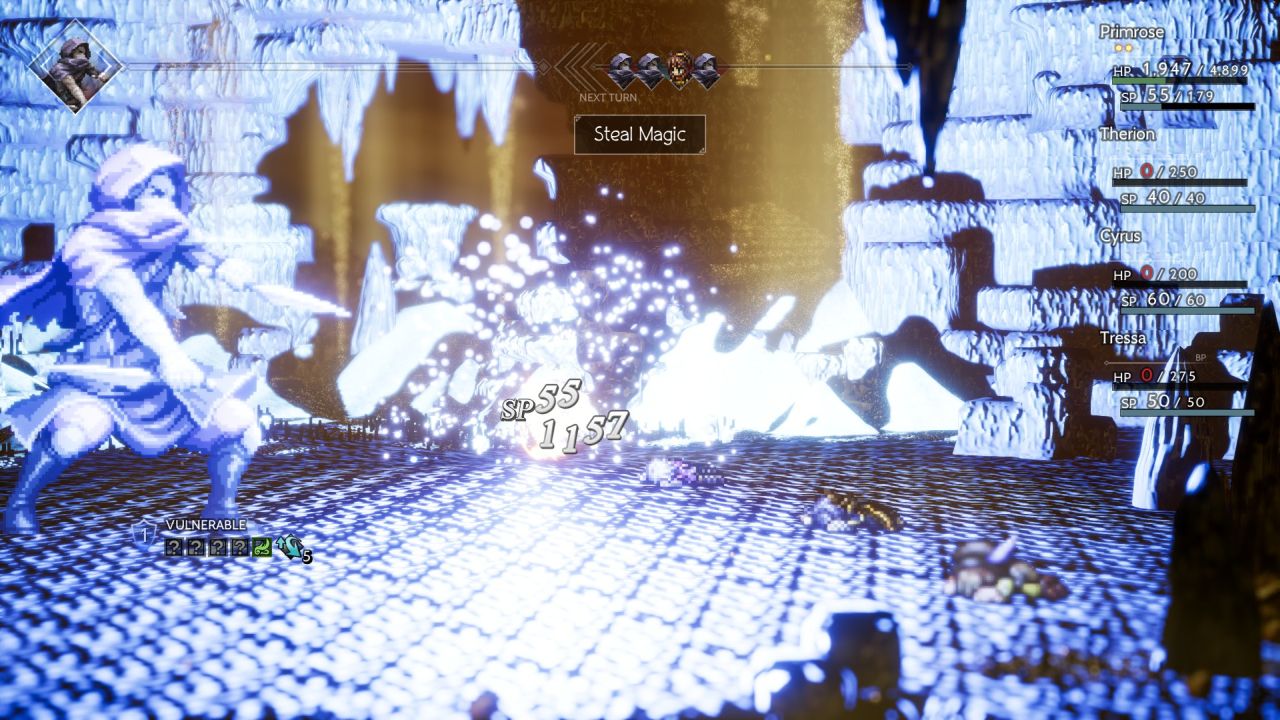
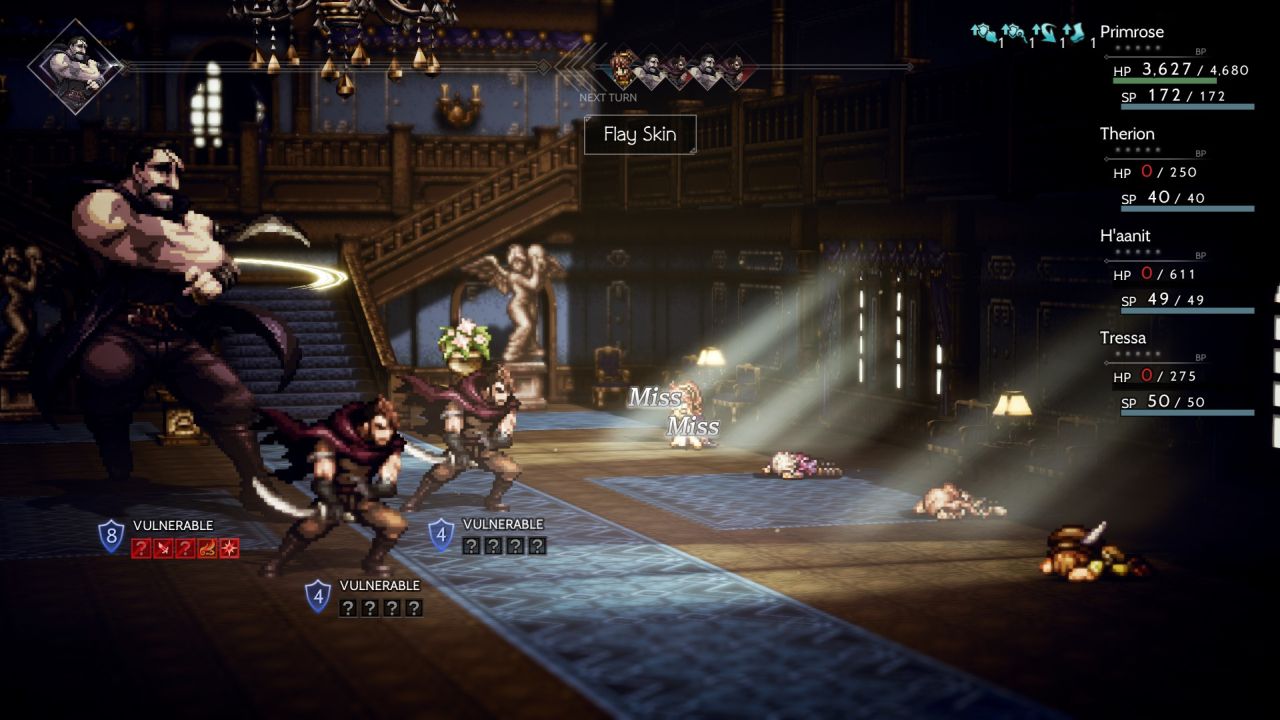
Anyway, Gareth was the boss at the end of this section and he was not a joke, instead causing the most problems of any opponent throughout the Chapter 3 stories. Gareth is a mini-Darius who will steal away the player's health, spirit points, and eventually the chance to use items. You can get those items back by breaking Gareth but he lacked a daggers or spears weakness, and Primrose could only hit his wind element weakness if she happened to have SP remaining which was far from a guarantee. This is another one of those battles where the player does *NOT* want to kill the two minions hanging out with Gareth, except of course that Shooting Stars would wipe them off the field quickly no matter what I did. I probably should have used some Wind Soulstones to break Gareth and then hit him with a max boosted Shooting Stars to shorten the fight, though that also would have been tough since Gareth's minions can snap him out of a shield break. Not a lot of great options here, unfortunately.
I was annoyed to find that Primrose had real issues at dodging the pictured Steal Magic attack. Her success at avoiding this move was only about 50% and it could sap away as many as 70 SP when it landed. Given the high cost of Shooting Stars and Starsong, Primrose was running herself out of spirit points in a real hurry. My best option was to knock out the minions quickly and then alternate between Starsong and Shooting Stars depending on how many boost points Primrose had available. There was no way to avoid using at least a few Refreshing Jams here as Primrose needed to restore both health and SP simultaneously if she was going to survive. I was trying to set up Gareth for a shield break into a max boosted Shooting Stars which would take out about half of his total lifebar. It took a little fiddling with the turn order before I was able to pull this off; I did win my first attempt at the battle at a cost of three Refreshing Jams, then reset the game and won again on a second try with only two of the items expended. That seemed good enough for now and I was glad to have this fight behind me.

There was nothing else nearly as challenging remaining in the last two story sequences. Miguel is another heavy physical opponent where I've often chosen to stack high physical defense with past solo characters rather than using an evasion setup. Primrose had terrible stats for physical defense though so I stuck with my evasion build and it once again worked quite well. Miguel's flurry of hurled spears had very low odds to hit Primrose, with something like 80% of them once again failing to find their target. Their damage is usually amplified by Miguel's Twin Spears attack, an ability that debuffs physical defense but which was countered by Primrose's good old Starsong buff. Without having that debuff in place and with most of his slashes hitting nothing but air, Miguel turned into a flimsy opponent barely worth mentioning. It helped that his initial form had weaknesses to both wind and light elements, allowing Primrose to chip away at his shields every time that she used Shooting Stars. When Miguel had only a single shield remaining, I set him up for a triple boosted Shooting Stars into a max boosted Shooting Stars on the next turn when the shields were down. That resulted in roughly 30,000 combined damage and wrapped things up for good.
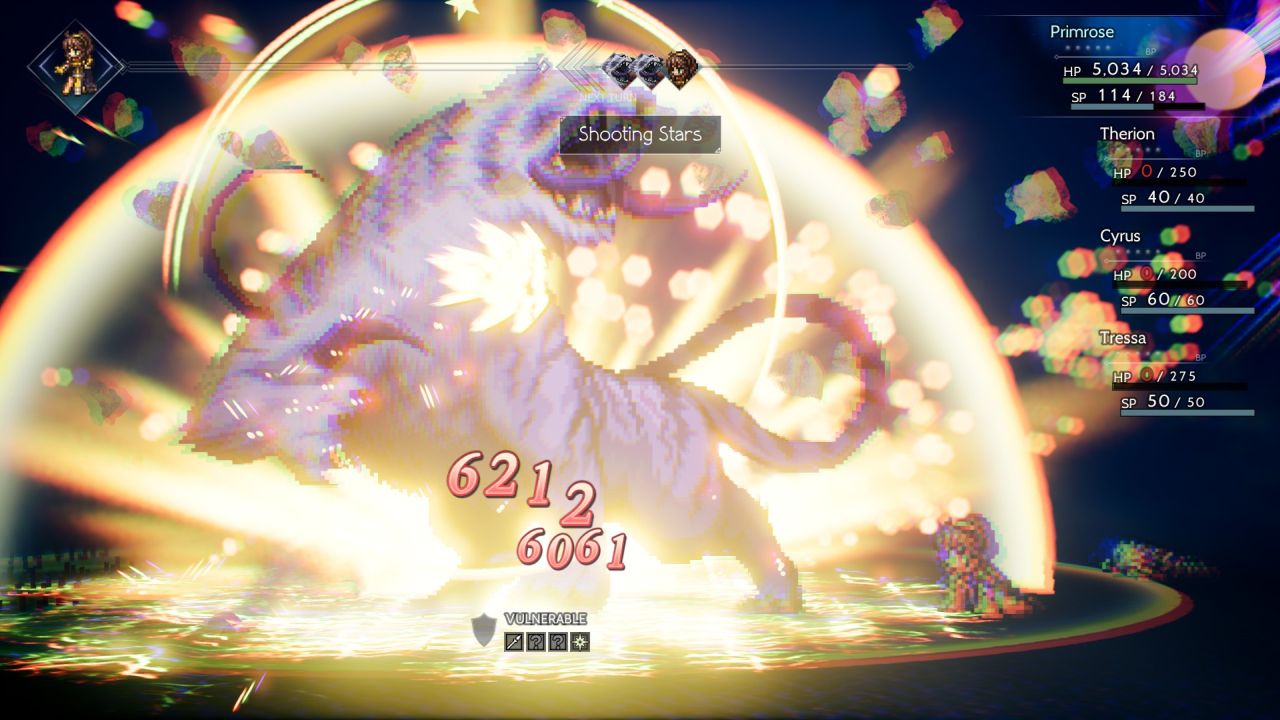
And to make things even more anticlimactic, the last boss was the Venomtooth Tiger at the conclusion of Tressa's Chapter 3 story. This is usually one of the first bosses that I face since it's a pretty easy opponent after equipping an Antidote Stone, and the unfortunate tiger proved to be just as hapless as I had been expecting. This is another boss that doesn't really do anything other than launch physical attacks and try to inflict its Peerless Poison, with the latter part countered by that Antidote Stone and the former part countered by Primrose's near-invulnerability to melee strikes. I know I keep saying this but the Venomtooth Tiger could - not - hit - Primrose. Yes, the occasional random attack snuck through but nothing on any kind of a consistent basis. That gave Primrose plenty of time to stab through the big cat's shields with her spear followed by a max boosted Shooting Stars for almost 19,000 damage. Rinse and repeat a couple of times for the easy victory. I guess there's a reason why I usually fight this boss first, heh.
That brought an incredibly fast end to the Chapter 3 stories for Starseer Primrose. I don't think I've ever gotten through an entire chapter's worth of stories quite this fast; I made it through all of this stuff (including all of the optional side dungeons) in a mere *TWO* days of real world time - including the time spent writing this report for the website! I literally started on a Monday and finished on Tuesday morning, then did the writeup on Tuesday afternoon and evening. That was only possible due to how fast Primrose was clearing every dungeon, as little as 10-15 minutes apiece which allowed me to complete half a dozen of them in one gaming session. It was all remarkable for me to experience as a player even if those of you reading will have to imagine Primrose mowing down each random encounter in a handful of seconds. Could that continue against the harder opposition in the Chapter 4 stories? Let's find out!


