
With solo reports completed for 25 of the 26 classes in Final Fantasy 5, and T-Hawk supplying a report for the final White Mage job that I have no desire to play out for myself, it's time now to turn to one of our favorite exercises: creating a solo class tier list. The idea behind a tier list is to rank each of these jobs against one another as played throughout the game with a solo character. Tier lists are often misunderstood online; a tier list that ranks the Ninja class above the Time Mage isn't claiming that the Time Mage is inherently bad or that the game can't be completed with it. The tier list is simply stating that a solo Ninja has a much easier time beating the game than a solo Time Mage, something that I don't think would be in much dispute. By weighing the advantages and disadvantages of each of the 26 classes against one another, we can arrive at a more accurate evaluation of how they stack up in terms of overall strength.
One of the most important things to do when creating a tier list is to define the criteria that will be used very carefully. Those stupid clickbait articles that plague the Internet will often leave their criteria deliberately vague to generate controversy and discussion. For this tier list, I will be evaluating the FF5 jobs as played by a solo character from the beginning of the game up to its conclusion, not including any of the optional superbosses or the Gameboy Advance bonus dungeons. The assumption is that these classes will be played at an optimal level, and classes with a higher burden of knowledge like the Chemist with its Mix ability are not penalized in this tier list for requiring more expert knowledge. However, classes do get penalized base on their ease of use; the need to hunt down various ingredients for the Mix ability adds an extra burden not present when attacking away with something like the Knight's Double Grip ability. Similarly, if a class needs to rely on breaking rods or making heavy use of the Dancing Dagger / Magic Lamp to progress through the game, their ranking takes a minor hit on the tier list. We're trying to evaluate classes based on their own abilities, not turning into a pretend Black Mage or Summoner lite, although having access to rod breaking is still better than not having it available at all. The main criteria used for evaluation is the ease or difficulty that each of these classes experiences when playing through the entire game from start to finish. The easier a time that a solo class has in progressing through the game, the higher the ranking in the tier list, and vice versa for the solo classes that struggled along the way.
When I put together tier lists, I usually conceptualize them into five broad categories: the very best, the above average, the average, the below average, and the very worst. I found the FF5 jobs matching up nicely within this same framework, although I needed to add a sixth tier for one class that holds a special place by itself at the absolute bottom of the pyramid. The data naturally sorted itself into a normal distribution, with the largest categories grouped together in the middle and the extremes at both ends holding fewer entries. This is what we would generally expect to see, with most of the game's jobs falling under the description of either "average", "above average", or "below average". The solo classes presented here are also ranked within each tier, although there's less difference in relative strength between codes within the same tier than between classes in different tiers. This allows for a ranking from 1 to 26, with larger jumps along the way when moving between different tiers of power.
Finally, this is obviously highly subjective and intended for fun. Feel free to let me know what you think but don't take anything in this list too seriously. I can only give you my impressions after playing through so many of these solo runs over the last decade. Let's get started.
Tier 1These are the absolute best classes possible to use for a solo game. They encounter very little difficulty clearing the game from start to finish, and possess overwhelming advantages that the other jobs simply lack. For anyone who might be interested in doing a solo game for the first time, one of these classes would be the best place to start.

The Samurai is the strongest class for a solo game in Final Fantasy 5 and it's not particularly close. I considered creating a separate "God tier" just for the Samurai before deciding that it would be better placed at the head of the top tier. The Samurai has all sorts of advantages that make it perfectly suited to serve as a solo class. This starts with one of the innate class abilities: the "Evade" innate grants Samurai 1/4 odds to dodge all physical attacks. This combines very well with the fact that the class can also equip shields for further physical evade, easily ending the game with roughly 50% odds to avoid all incoming physical damage. (It can often go even higher than that in the endgame since the Samurai doesn't need to equip a weapon to deal damage and doesn't need the Running Shoes for Haste status, opening up the weapon and accessory item slots for more gear with physical evade.) Shields also mean that the Samurai can equip the Aegis Shield for petrification defense and 1/3 chance to dodge all incoming spells, or the Fire/Ice Shields for elemental defense, or a Genji Shield for even more physical evade. This is also a class that uses the Heavy armor set for further damage reduction upon taking hits, and a class with high Vitality for more total health. These defensive abilities make the Samurai a very difficult class for opponents to injure.
Samurais use katanas for their weapons in addition to the default daggers. Katanas tend to be great weapons due to a combination of a high base attack value and the innate chance to critically strike, something that nearly all other weapons in the game lack. The Masamune, the legendary katana weapon, has an attack value of 107, an innate crit chance of 15%, grants the "First Strike" ability when equipped so that the Samurai gets to act first in every battle, and can be used as an item to caste the Haste spell in battle. It's probably the best of the 12 legendary weapons and ridiculously useful for a solo class. If that doesn't work then the Samurai can go right ahead and use the Chicken Knife like most other solo classes, or simply keep it equipped for its +5 Agility boost.
For random battles, the Samurai can cut through virtually anything with its "Slash" ability once the job class maxes out. Slash is an instant death attack that hits all enemies on the screen at once and has a base chance of 85% to slay them instantly. The only downsides are an inability to hit anything with the Heavy flag in the code, and the need to spend one round charging the attack before it goes off. With the Masamune's First Strike ability though, that doesn't take very long and my solo Samurai spent the whole third world annihilating every random encounter with ease. For boss encounters, the Samurai has the marvelous GilToss ability. The base damage is ((Level + 10) - Defense) * 150 and that's a gigantic number indeed, 1650 base damage at Level 1. There's really no stopping GilToss as it works against pretty much everything throughout the whole game from start to finish. GilToss and Slash allow the Samurai to use every equipment slot on defensive-focused gear while still benefitting from a godly offensive output. And they're stupidly easy to use, abilities that don't need to be targeted and require zero thought whatsoever. Move the cursor down one slot, click GilToss or Slash, and watch everything die.
I struggled to come up with any weaknesses for the Samurai class. I suppose it's not the fastest class, at least not until gaining the Masamune in the third world, and there are relatively few katanas to pick between. The one and only somewhat difficult battle in the whole game comes against Necrophobia, who has high enough Defense that GilToss only did about 2500 damage per use. However, my solo character still had enough physical evade to dodge most of Necro's attacks and won the battle on the first attempt, so this wasn't exactly a roadblock boss. I dunno, I'm struggling to see much in the way of weaknesses here. This is an insanely strong solo class and it clears the whole game without breaking a sweat. Go try it for yourself if you don't believe me.

The Ninja class ranks second in my solo rankings behind only the Samurai. With those being the best two jobs, it's almost like this game was made in Japan or something. The Ninja benefits from a variety of strengths that make it one of the game's most exacting killers on offense. The first and most important of these is the innate 2-Handed ability that lets the Ninja attack with a weapon in both hands. This immediately doubles the attack value of the Ninja as compared to most other classes and allows for all sorts of fun weapon combinations. The Ninja can sit in the back row using the Thief/Ninja only weapons like the Full Moon or grab two Ninja-only daggers and go to town from the front row. In the endgame, the Ninja uses the Double Lance + Chicken Knife combination to attack three times in each round of combat and never suffer the Flee effect. This is the sort of damage that most other solo classes can only dream about. However, the need to equip a weapon in each hand rules out the use of a shield (which Ninjas can't equip anyway), and that does make the class more vulnerable to damage. This is a major reason why the Samurai grades out higher than the Ninja on the tier list.
Ninjas also benefit from being extremely fast, the second-fastest class in the game after the Thief. Ninjas fill up the action bar noticeably quicker than most other classes, and their "Preemptive" ability grants them double the normal chance to get a "strike first" battle, 1/4 odds instead of the standard 1/8 chance. The class has a further useful ability in "Smoke" which provides a guaranteed retreat from combat when selected. This is handy in some of the game's most dangerous areas. Rounding out the list of abilities, the Ninja also gets "Image" which duplicates the White magic spell of the same name. This provides a 100% chance to dodge the next two physical attacks that would hit the Ninja, and while it's not particularly great for a normal game, Image becomes downright awesome for a solo run. By alternating Fight/Image in succession, the Ninja can often lock out physical damage altogether and this helps to overcome the otherwise frail nature of the class. Who needs heavy armor or a shield if your Image clones are the ones taking all of the blows?
The innate command for the Ninja is "Throw", another ability that holds a staggering amount of usefulness for a solo game. Throwing Shurikens and later Pinwheels / Fuma Shurikens is the one-stop solution for dealing with the game's hardest bosses; my solo Ninja was tossing those things against Neo Exdeath for more than 8500 damage per pop... and from the safety of the back row. The Ninja scrolls that can also be thrown are cheap to purchase and deal solid damage, especially when used into elemental weaknesses. They might not be viable in endgame scenarios but they certainly help the Ninja get there. Like Image, Throw is one of those abilities that simply gets better in a solo game as compared to normal play.
Unlike the Samurai, there are recognizable weaknesses to the Ninja's setup. The biggest weakness comes from magical damage of all sorts, which the Ninja has no protection against other than an overwhelming offense. The class also suffers from low Vitality, if not as bad as some of the magely classes, which makes it harder to survive some of the nastiest boss attacks. The Ninja's inability to equip shields also leave the class vulnerable to certain status ailments, especially White Hole's petrification status during the Exdeath Tree form. I similarly found that if my solo Ninja's Image clones were Dispelled away by Neo Exdeath, he was suddenly very vulnerable to getting smashed by Vaccuum Wave attacks. Without the protection of those images this is a very fragile class. Nevertheless, the Ninja is able to overcome these issues through extreme speed and devastating offensive power. There are zero roadblock bosses for the Ninja and my solo character was never seriously challenged. This is the ultimate glass cannon class in FF5 and it has little trouble clearing all hurdles along the way.

The Chemist is one of the game's most unique classes, and the one most affected by the change in real-world technology between FF5's release in 1992 and the present. The Chemist's power is almost entirely concentrated in the Mix ability which lets the Chemist flat-out break the game. There are Chemist mixes that do everything: full HP and MP restoration, removal of all status ailments, protection against virtually all elemental damage and instant death attacks, enormous damage capacity, and so on. Chemist mixes can even do things like increase the Chemist's level, set the Heavy flag in the code, and override AI scripting by inflicting Berserk status on monsters and bosses who are supposed to be immune. Drain Kiss alone would be enough to clear the whole game on its own. The Mix ability is wildly, stupidly overpowered and it never would have made it into the game if FF5 had been created in the current era. Mix was an ability designed for the pre-Internet age, with its power being locked behind the need for each individual to discover the Mix formulas independently through trial and error. Now that anyone can download a list of all the mixes in a few seconds of online searching, the ability breaks the game wide open. A character with Mix can do absolutely anything that they want.
Chemists also get a lot of value out of their innate "Drink" ability, which combines well with Mix. Some of the Chemist-only drinks allow the class to gain Haste status, double its HP, and even increase its stats and levels within battle, although the one that increases attack power is bugged and doesn't work. (The leveling drinks work just fine though.) Most of the other non-Mix Chemist abilities are useless, however, since they require giving up Mix to pick up abilities like Pray and Revive, and there's no reason ever to give up Mix since it can duplicate what all of the other abilities do. Revive in particular has anti-utility for a solo game since it only revives characters that must stay dead for the duration of the run. The "Medicine" innate ability that doubles the effectiveness of Potions and Ethers is handy though, especially in the early portions of the game before the full set of mixes is available.
The real question concerning the Chemist class is why I have this ranked third instead of first on the tier list, and there are several reasons behind that decision. The first is that the Chemist class does require a certain amount of setup to use the Mix command effectively. Most of the best mixing formulas involve using Turtle Shells or Dragon Fangs, which must be gained in drops from defeating certain types of monsters. While that doesn't represent a huge chore, it does create an additional step to make full use of the ability and forces some degree of ingredient grinding on the player. The Chemist also has a relatively weak selection of weapons between only daggers and staffs, and while the class overcomes that easily with its awesome drinks and mixes, that does reign in the Chemist's innate power a bit when compared to the other classes at the absolute top of the tier list.
Still, if it were only those issues, I would strongly consider choosing the Chemist as the top class. There's a more serious problem though: the biggest issue with the Chemist class is that it takes a little while before it can obtain all of the mixing ingredients and start breaking open the game. Karlabos in particular must be done with only a dagger and Elixirs for healing, prompting a significant number of retries for my solo Chemist, while Siren is no easy picnic either. My criteria for this tier list was to evaluate classes over the whole game, and the Chemist struggles against the first few bosses in a way that the Samurai and Ninja never do. In addition to this, although it's true that the Chemist can take down the endgame optional superbosses much more easily than any of the other classes, that doesn't grant the class extra bonus points according to this set of criteria. It's nice and all, but I don't really consider Omega and Shinryuu to be part of the game proper, and the Chemist doesn't get a higher ranking for being able to defeat them. I summarized this in my written report by stating that the Chemist was the game's most powerful class, able to do things that no other class can accomplish, but that doesn't make it the best when evaluating who can make it through the main game with the least difficulty. The Samurai and Ninja classes are superior by that metric.
As a result, the Chemist has to settle for this spot at the bottom of the top tier. There's no shame in that though; the Samurai, Ninja, and Chemist all stand notably above the other classes in the game, and there's a clear drop from these three to the jobs in the next tier in the "above average" group. I agree that Mix is the best ability in the whole game, even if I don't place the Chemist class in the top spot for a solo game.
Tier 2The classes in this tier are still very strong in their own right, and they encounter few difficulties in making their way past the game's various challenges. However, they lack the dominant power of the classes in the top tier, and this group sometimes encounters bosses that can be difficult to defeat, including roadblock opponents on rare occasions. One thing that helps set the jobs in this tier above the rest of the field is an ability to equip shields. Nearly all of the classes in this tier can use them, and shields are extremely helpful both for physical evade and Aegis Shield protection in the lategame. When combined together with the generally high Vitality of these classes, shields help to distinguish the above average classes from the merely average ones.

I've placed the Cannoneer at the top of the second tier of solo classes. It might be surprising to see one of the new GBA classes listed here, and that I rate the Cannoneer higher than the more heralded Gladiator class, but when I played out the solo Cannoneer it surprised me with how capable the job proved to be. The innate ability of this class is Open Fire, an attack which shoots off a cannon at opponents with one of four different random effects. The base attack value for Open Fire mostly comes out at 115 (above Excaliber's 110) with a chance to go even higher on the rarer shots, and the multiplier has a unique formula not used anywhere else in the game based on the Cannoneer's level. (It's officially M = [Level * Level] / 256 + 4.) In practice, this means that Open Fire starts dealing high damage at the start of the game, around the 600-1000 range, and never stops being a viable attack right up until the finish because the multiplier continues to scale up quickly as the Cannoneer's level increases. The Open Fire shots contain some helpful status effects as well, with a chance to poison or confuse or even inflict instant death on the target. The ability is considered magic damage and can be used at no penalty from the back row, and since it doesn't rely on stats at all, only the Cannoneer's level, this allows the class to equip defensive equipment rather than needing to worry about offensive numbers. The only real disadvantage is the inability to control which of the four shots appears, which is purely random. But Open Shot is just great overall, and the Cannoneer would rank in the middle of the tier list if it had no other abilities at all.
Of course the Cannoneer does have other abilities, with Combine serving as the signature one. This is a shameless reworking of the Chemist Mix ability, with the Cannoneer selecting two items and then combining them together to get some kind of result. The difference is that one of those two items must be a form of cannon shot (Buckshot or Blastshot or Blitzshot), each of which does the same thing at three different levels of attack value. The resulting Combine shots deal excellent damage, with a base attack value around 200 when using Blitzshot, and they have a variety of secondary effects. A bunch of the shots are tied to different elements, they can inflict Darkness or Old or Mini status, one of them inflicts Slow status, some of them deal double damage to Dragons or Humans, and so on. Combine always hits all opponents and it uses the same multiplier formula as Open Fire, causing it to scale up very fast with more character levels. As a result, Combine is outstanding at taking down the endgame bosses.
Unfortunately, Combine requires the use of cannon shot to function, and they don't become available until the Cannoneer job itself unlocks... which is after claiming all twelve legendary weapons in Kuzar Castle. This means that Combine can only be used for the final dungeon (and the bonus GBA content) which keeps the ability offline for the vast majority of the game. Combine also suffers from the limited amount of ammunition available, with the Cannoneer only able to carry 99 Blitzshots at once. If the class tries to use Combine willy-nilly in random battles, that stock of ammunition starts to run out quickly. This means that Open Fire typically remains the main tool of choice for random encounters and that reigns in the power of the class notably. Finally, the Cannoneer also suffers from the same issue as the Chemist, with a need to stock up on items for use in Combine. Once again some of the best formulas involve Dragon Fangs and Turtle Shells, although unlike the Chemist mixes most of the Combine ingredients can be readily purchased in stores and don't need to be farmed off monsters. This is still a rather annoying aspect of the class, however.
Elsewhere, the Cannoneer benefits from an excellent selection of equipment options. Non-Knight swords would be handy if the class ever needed to engage in melee combat, which it doesn't because Open Fire is so great, and the inclusion of shields helps enormously with additional physical evade. My solo Cannoneer kept the Guardian dagger and the Elf Cape equipped for much of the game along with a shield and he was a difficult character to hit. Having access to both the Medium and Light armor sets is also nice for extra flexibility. The last Cannoneer ability, "Exp Up", simply grants 50% additional experience and can be used at no penalty for most of the game before the Combine ammunition goes on sale. This tended to keep my solo Cannoneer about three or four levels above the normal pace for a solo game, and the ability synergizes very well with the Open Fire / Combine multiplier formula which is based entirely on character level.
This is a class with few weaknesses. I couldn't put it in the top tier along with the three best jobs, however, because there were a few places where the Cannoneer did struggle. The inability to use Combine for most of the game means that the class lacks multitargeted damage prior to the final dungeon, and the Puroboros were a difficult encounter to clear. The Vitality of this class is only mediocre and lower health is always a bad thing for solo characters. The randomness of the four different shots for Open Fire and the limited quantity of ammunition for Combine also serve to reign in the overall power of the Cannoneer. Nevertheless, this remains one of the best classes in the game and the Cannoneer stands above all but the most broken jobs.


The Gladiator is another one of the game's best classes, and if I wanted to create more tiers for this list, I could theoretically add another one separating the Cannoneer and the Gladiator from the other physical-heavy classes in this group. Those two are a slight cut above the rest of this tier. Getting back to the Gladiator though, this class is defined by its signature ability in the form of the Finisher command. Finisher produces one of three results: Attempt Failed (which does nothing), Critical Hit (which is not a true critical hit but effectively deals double damage), or Elemental Attack, which deals 9999 damage every time. The damage is attuned to the crystal element of each character with Bartz = Wind, Lenna = Water, Galuf/Cara = Earth, and Faris = Fire. Obviously the chance to deal the maximum possible amount of damage on each use of Finisher makes this a very strong ability, and downright gamebreaking when accessed from the start of the game.
However, even Finisher isn't a complete panacea for all woes. Much like using the Dance command and hoping to pull Sword Dances, it's a random skill at heart and it's always possible to pull long strings of "Attempt Failed!" messages at the worst possible times. The starting odds are 6/16 for the attack to fail, 6/16 for the critical hit, and 4/16 for the elemental part. The odds for Elemental Attack improve with every job level (not character level) of the Gladiator class, eventually finishing at 4/16 for attempt failed, 4/16 for critical hit, and 8/16 for the elemental attack. Even at the end of the game the Elemental Attack therefore only pops up 50% of the time, and that lowers the expected damage down to something in the 5000 range, which is easily matched or exceeded by many other endgame classes. Furthermore the elemental nature of the damage can be resisted or absorbed by opponents, and the wind immunity of Byblos, Sol Cannon, and Archaeoavis created some problems for my solo Gladiator that required planning to get around. Lenna's water element nature would be the best here since so few enemies have any resistance to that element; Galuf and Faris would be worse given the widespread resistance to earth and fire elements.
Outside of Finisher, the Gladiator benefits from several other useful abilities. "Long Reach" lets the class attack from the back row with no penalty, perfect for use in boss fights. It effectively grants Armor status for free any time that the player wants it. "Blade Blitz" hits all opponents on the screen at once with a slightly weaker attack, with M = (M * 3 / 4) for the attack multiplier. I found that it was great against random enemies and I spend most of the game swapping between Long Reach for bosses and Blade Blitz the rest of the time. "Lure" increases the rate of random encounters, which I suppose would be useful for grinding but never had any effect for my solo character. Well, at least the other two abilities are pretty awesome.
The abilities of the Gladiator class only tell part of the story though. This job has an absurdly wide selection of equipment to choose between: all swords (including the Brave Blade), spears, axes, and bows make for a staggering collection of useful tools second only to what the Bare/Freelancer job can wield. My solo Gladiator was making use of the Ancient Sword for Old status, the Darkness Bow to blind opponents, the Doom Axe for instant death attacks, the Flame Tongue to heal with a Flame Ring, the Holy Lance for holy element damage, and so on. Add in shields for tons of physical evade and Aegis protection, the Defender Sword for Armor status, and Long Reach to hide in the back row at no penalty, and the Gladiator becomes almost invulnerable to physical damage in the lategame. As if that wasn't enough, this class can also equip both the Heavy and Medium armor sets for more flexibility as the situation dictates. Then there are the stats for the class, with the Gladiator tying the Monk for the highest Strength in the game, and tying the Ninja and Magic Knight for the second-fastest Agility in the game. Only the low Vitality stat for poor HP growth limits this class a bit. It all adds up to quite the total package, and T-Hawk showed that you can remove the Finisher ability and still have a powerful solo class left over.
The only reason that the Gladiator doesn't leap up to the highest tier is due to the ineffectiveness of Finisher against certain bosses. Byblos and Sol Cannon were more difficult opponents than anything confronting the Samurai or Ninja, and the Gladiator lacks the sheer brokenness of the Chemist's Mix ability. I also found that the Cannoneer had a smoother path through the game than the Gladiator since it could avoid the randomness from Finisher. A lot of this is splitting hairs, however. The Gladiator remains an absurdly strong class that can deal with almost everything along the way.

With the Mystic Knight, the tier list has started to reach classes that are merely very good instead of game-breakingly powerful. The Mystic Knight combines the best aspects of the Knight and Black Mage jobs, creating a hybrid class with strong physical attack and elemental damage capabilities. The signature ability of this class is "Magic Sword", which allows the Mystic Knight to enchant their melee weapon with various different spells. The most basic version of Magic Sword is Fire/Ice/Bolt Sword, which unlocks along with the first-level Black magic spells in the game's starting village. Fire Sword has no effect against normal opponents but it will deal double damage versus targets weak against fire, and the other spells function the same way for their respective elements. Later on, Fire 2 Sword deals triple damage against foes with a fire vulnerability, and Fire 3 Sword simply kills them instantly, unless the target has the Heavy flag in the code, in which case it deals quadruple damage. The Mystic Knight gains access to fire, ice, lightning, poison, and holy elements via Magic Sword, and anything that's weak against these elements will be torn apart in a hurry. Since this collection of five includes the most common elements in the game, the Mystic Knight gets a lot of opportunities to use these spells. Even better, the Mystic Knight can use Fire Sword to self-attack with a Flame Ring for endless healing in a way that few other classes can match.
Other Magic Sword spells will buff the Mystic Knight's attack with status-inflicting properties. Sleep Sword will put targets to sleep, Mute Sword will stop them from casting spells, Break Sword will petrify anything vulnerable and inflict instant death, and so on. One of the best aspects of the Mystic Knight class is the fact that these status ailments will ALWAYS be successfully inflicted on a melee attack; Neo Exdeath Part #2 has a weakness to petrification, but it's nearly impossible to apply it normally through the 95% magical evade that the part possesses. One attack with Break Sword, however, and it's dead. Drain Sword allows the Mystic Knight to steal HP from the target, gaining back health equal to the damage dealt, and Psych Sword does the same thing if for some reason the class needs extra MP. (Be careful of undead though: Drain Sword will work in reverse and damage the Mystic Knight against them!) Finally, the ultimate spell for the Mystic Knight is Flare Sword, which adds 100 to the current weapon's attack value and quarters the enemy's defense. This does enormous damage to everything whether or not it has an elemental weakness, and makes the Mystic Knight one of the game's best endgame classes.
The Mystic Knight has a rarely-seen second ability in the form of "Barrier", which puts the class into Shell status when a character falls to near-death status (under 1/8 of maximum health). This doesn't occur often enough to be too useful, which is a shame because of how good Shell status happens to be. It appears to be a wonky ability since I was often unable to trigger it manually through self-attacking. The class also benefits from having an above average equipment selection, getting access to non-Knight swords and shields along with the standard daggers. The Heavy armor set (and the Bone Mail) is another nice benefit. The Mystic Knight class is blessed to have one of the best stat allocations in the game as well, with high Strength, Agility, and Vitality combined together. No other class gets such strong bonuses to all three stats. The Mystic Knight is as fast as the Ninja and as beefy as the Dragoon, while still retaining Strength well above average.
The class has two major weaknesses. The first is the need to waste a round casting Magic Sword at the beginning of each battle. This is clearly subpar as compared to other class ability that can start dealing damage immediately, and the fast speed of the Mystic Knight only partially makes up for this. The more serious weakness takes place in situations where the Mystic Knight can't take advantage of an elemental or status vulnerability. This class absolutely destroys anything with a weakness to fire/ice/lightning, only to look very pedestrian against opponents that have no such exploitable flaw. The Exdeath battle at the end of the second world is a huge problem for the Mystic Knight, where Drain Sword functions as the only useful Magic Sword and the class has no obvious way to deal damage. I was only able to get past that roadblock by equipping the Dancing Dagger and repeating the fight until a bunch of Sword Dances popped up. The Gilgamesh/Enkidou battle was also somewhat difficult, again due to a lack of any kind of elemental or status weakness to exploit. That makes the Mystic Knight a bit of a binary class before the lategame when Flare Sword carves apart anything, but most of the nasty bosses do indeed have elemental flaws to exploit (e.g. Byblos, Sol Cannon, etc.) and as a result the class still grades out as among the best.
I'll also mention that this is among the most fun solo classes to play, everything except the second world Exdeath fight anyway. Buff up with Magic Sword and then lay waste to your foes - what's not to like?


The Knight is one of the most basic classes in FF5, designed around pure melee fighting and nothing else. Fortunately for the Knight, the combination of powerful weapons, sturdy armor, and beefy HP growth is enough to add up to a strong overall package. The Knight's signature ability is Double Grip, which lets the class forgo using a shield to deal double damage (technically this doubles the multiplier M and not the attack value itself). Double Grip provides the Knight with powerful offense at essentially every stage of the game, and so long as the Knight can refrain from ever running away in battle, it opens up the use of the Brave Blade in the third world for truly disgusting endgame killing power, on the order of 7000-8000 damage per swing. Double Grip is also more versatile than it might appear at first glance, with the Knight able to equip or unequip a shield in mid-battle to gain or lose the extra damage. As long as Double Grip has been set as the extra class ability ahead of time, it will continue to function. This works particularly well for situations like the final boss, where the Knight can use the Aegis Shield against the Exdeath Tree form and then drop it for some Double Grip smashing against Neo Exdeath. There's no reason ever to pick another ability for this class.
The other great advantage of the Knight class lies in the equipment that they have available. As this game's version of the Fighter class from the original Final Fantasy, Knights get to employ all types of swords along with the standard daggers. The Knight-only swords are very powerful indeed, including elemental weapons like the Flame Tongue and Icebrand as well as Excaliber (with holy element property) among the legendary weapons. Many of the non-Knight swords have useful properties as well, like the Ancient Sword (Old status), Slumber Sword (sleep), and Coral Sword (lightning element). Perhaps the best of the lot is the Defender Sword, which casts Armor when used in battle and makes the Knight almost impervious to physical damage. Knights also have access to shields for further elemental absorb and physical evade properties (Aegis Shield Hype!), as well as the Heavy armor set. A solo Knight can even make use of serious self-healing once the Flame Tongue sword appears near the end of the second world, using either the Flame Ring or the Flame Shield to self-attack for huge life restoration. The Bone Mail causes no problems for this class since the Knight can swap in both a fire sword and a fire shield at any point in time, then swap them both back out again on the next turn.
Balancing things out somewhat, the non-Double Grip abilities of the Knight class are almost entirely useless. "Cover" protects other party members who are in near-death status, which is useless for a solo game. "Guard" gives up the Knight's turn to make him completely invincible against incoming physical attacks, all of them doing zero damage. Unfortunately, a solo character needs to be able to attack to deal damage, and that makes Guard pointless in nearly all situations. I did make use of it to stop certain telegraphed high damage attacks, with the best example being the Cleaver! move of the Tonberris in Istory Falls. All of the other learned abilities involve equipment that the Knight can already use as an innate part of the class, useless stuff that might as well not exist. As for the stats associated with the class, the Knight gets Strength and Vitality in spades, while suffering from lousy Agility and horrible Magic Power. This is a melee fighter where what you see is exactly what you get.
The biggest weakness of the Knight class is an inability to deal multitargeted damage. Knights do all of their damage via the Fight command, and that only hits one target at a time. This concentrated damage works great in most situations, but it causes the class to struggle against the Puroboros bombs and Hiryuu Plant flowers. The Knight's reliance on physical attack also makes the class susceptible to enemy buffing and debuffing spells that protect against melee fighting. Byblos in particular was a very difficult foe for my solo Knight, with the enemy casting Armor in response to physical strikes and combining that with Slow and Sonic Wave / Dischord debuffs. It's the classic trope of how to deal with beefy fighter types: use magic to take them down via indirect status effects and debuffs. The game's coding also has a number of places where monsters will have some kind of a nasty response to the use of the "Fight" command, with the best example being the Unknowns in the Great Trench dungeon. Since the Knight never uses anything other than the "Fight" command, this opens up the class for dangerous counterattacks in some places. It was bad enough that my solo Knight couldn't do that one dungeon at all, though T-Hawk later pointed out that I could have simply Phoenix Downed the undead enemies in there. Whoops, overlooked that solution. 
The total result adds up to produce a simplistic job that nonetheless still excels at most of the game's challenges. Knights make a great addition to a normal party, and it turns out that they can solo the game just fine on their own too.

The Blue Mage is a spellcasting job that doesn't fit the pattern of the other classes in this tier. I had it down in the next tier when initially putting this list together, only to decide that it did belong here after going back and reading through the solo report for the class again. The Blue Mage is an oddball class based around learning spells from enemies by getting hit by them in combat. Blue Magic has access to a little bit of everything in its spell repetoire: you have healing magic (White Wind), direct attack magic (Aero), status inflicting magic (Frog Sony/Tiny Song), brutal buffs (Mighty Guard) and debuffs (Dark Shock/Guard Off), and finally some spells that are just difficult to put in any particular category (Goblin Punch). There are 30 spells in all, more than any of the other traditional spell casting classes, and a Blue Mage who can hunt them all down becomes a powerful customer indeed.
A Blue Mage game doesn't play out anything like the other classes, except possibly the Red Mage because it also involves the use of a lot of status-attacking twinkery. Blue Mages typically must pay a lot of attention to their current HP as opposed to their maximum HP, since a lot of Blue spells involve the two of them in some fashion (Vampire, ????, White Wind, etc.) There's relatively little in the way of direct damage spells in the Blue arsenal, with Aqua Rake, Emission, and the three Aero spells serving as the primary tools in that category. This gives the Blue Mage some useful options to play around with, such as self-healing with Emission and a Flame Ring, or equipping the Air Lancet dagger to apply the Magic Up property for wind element to the Aero spells. Most of the time, however, the Blue Mage is forced to chip away at monster health with subpar direct damage capabilities. This is a class that takes a long time to defeat monsters and lacks the raw power of other classes in this tier.
And yet with that said... the Blue Mage never really struggles in progressing through the game. You could even make an argument that this class should be rated higher than the Knight and Mystic Knight because both of them have roadblock opponents on rare occasions (Byblos and Exdeath respectively) while the Blue Mage always seems to be able to coast through with a little creativity. Ultimately I kept those classes higher because they have so much more raw power, especially in the lategame. As for the Blue Mage, the class just has a plethora of options available to deal with FF5's various bosses. Flash for Darkness status works against almost every physical attacker, including Neo Exdeath at the end of the game. Planning ahead of time with Goblin Punch for the 8x damage bonus at the same level was enough to defeat some of the toughest customers that bedevil other classes. White Wind makes it easy to heal when the Blue Mage has a decent chunk of health left, and Vampire makes it easy to heal on near-death status. Magic Hammer ruins the day of several bosses that rely on casting spells. The Level spells (Level 2 Old, Level 3 Flare, Level 4 Quarter, and Level 5 Doom) work against a surprisingly large number of foes, and Atomos is famously vulnerable to the Dark Shock + Level 5 Doom combination. Mighty Guard isn't available until the end of the solo run, but wow, it certainly makes things enormously easier in the lategame. Shell and Armor status together in one package is almost too good to believe. Many of the classes in FF5 tear it up against random encounters and then struggle against difficult bosses. The Blue Mage is the opposite, a job that suffers from slow and deliberate random encounters but then has little trouble confounding bosses with its wide variety of spells.
One of the things that tipped the Blue Mage into the bottom of this tier is the excellent selection of available equipment. Blue Mages gain access to both Rods and the non-Knight swords along with the standard daggers, letting them engage in both rod-breaking shenanigans and use of the status-ailment inflicting properties of some of those swords (Ancient/Slumber/Coral/etc.) Shields are as awesome as ever, and this is one of the very few mage classes that gets to use them. The stats for the Blue Mage are a lot weaker, unfortunately, with poor Agility and Vitality along with a huge penalty to Strength. That painful -8 to Strength ensures that this class will never be a melee fighter despite the ability to equip non-Knight swords. This class does get to equip both the Medium and Light armor sets though, and that's a big plus given the usefulness of the Bone Mail for a solo game. The weak stats for this class along with its poor direct damage capacity reign it in and prevent the Blue Mage from appearing higher on the tier list.
If you're looking for a versatile and entertaining class though, the Blue Mage is the way to go. It's basically a much better version of the Red Mage job, with similar equipment and stats together with a more interesting selection of spells.
Tier 3The third tier is the home to the "average" classes in FF5, the ones that grade out somewhere in the middle. Typically these classes excel at large portions of the game only to suffer from serious roadblocks along the way in a few places. The overall power level of these classes is also lower than the ones in the higher tiers, and the solo characters in these classes were more likely to be forced into breaking rods or making use of the Dancing Dagger to deal with situations that would otherwise be unbeatable. I ended up placing many of the game's spellcasting classes in this tier, rating them lower in most cases than the game's melee fighters. There are two major reasons for that. First, the spellcasting classes invariably have lower Vitality and less health than the melee classes, which inherently makes them more vulnerable. Second, the spellcasting classes tend to have weaker available equipment selections, in particular an inability to equip shields. Feel free to disagree, but if you've been wiped out by White Hole against the final boss as often as I have, you'd have a strong appreciation for the use of shields too.


The Dragoon is one of the most basic classes in FF5. It has only three total abilities, and one of them is simply the innate "Equip Spears" that comes along naturally with the job. The Dragoon's signature ability is "Jump", which causes the class to leap up into the air and become untargetable, then land and deal double damage after a delay. The amount of time spent up in the air is exactly the amount of time needed for the action bar to fill back up again, lasting shorter when a Dragoon is in Haste status and longer when a Dragoon is in Slow status. The bonus damage from using Jump doubles the multiplier M and not the Dragoon's attack value, and it should be pointed out that this benefit only kicks in when using a spear, not any other type of weapon. Because of the delay inherent in jumping, the Dragoon is not an especially fast character and this class combos very poorly with other jobs in normal casual play. This is a tanky class and if your tank is up in the air, then it's not taking for the party, is it? However, the Dragoon is much better for a solo class game where none of that matters, and the chance to become untargetable is very useful indeed for dodging all sorts of dangerous enemy attacks. Sol Cannon's Surge Beam, Exdeath's Condemn, Neo Exdeath's Grand Cross - they are all avoidable with the right timing. Jump is a versatile ability and quite handy for a solo game.
The other class ability is Dragon Sword, an attack wherein the Dragoon gets a free use of the combined Drain and Psych (Osmose) spells. Dragon Sword is literally identical to those two spells, the only difference being the cool-looking graphical effect wherein a glowing blue dragon appears on screen. Dragon Sword works well in the earlier portions of the game for keeping the health of the Dragoon topped off via the Drain component, and the Psych aspect can defeat certain bosses by stealing away all of their magic points, most notably Byblos. Unfortunately, the terribly low Magic Power stat on the Dragoon class means that damage from Dragon Sword will barely increase over the course of the solo run, and that makes this ability virtually useless over time. It would be awesome on a mage class but it's pretty sad in this context.
Dragoons have the typical stat assortment of melee fighters, with excellent Strength and Vitality to go along with the aforementioned weak Magic Power. Dragoons are a little bit faster than Knights and slightly less strong/tanky to compensate. Dragoons use spears for their weapons along with the standard daggers, and spears are pretty solid overall . The advantage of spears is having two excellent choices for the lategame, the Holy Spear with its holy element property, and the Dragoon Spear, which deals double damage against dragon opponents in addition to having 119 (!) attack value. These are both great weapons and let the Dragoon torch the ending portions of the game. However, the disadvantage of spears is that there are very few of them in the early stages of the game, and only one available at all in the whole first world. Since the Dragoon class doesn't unlock normally until defeating Archaeoavis, the designers only put one of them (the Trident) in the first world. That means a solo run has to go a long way using daggers alone, which do not get the doubled damage property from Jumping. This is a major setback for the class that knocks them down a tier from a lot of the other melee-oriented jobs that I have ranked higher. My solo Dragoon was forced to run Byblos out of magic points using Dragon Sword to get past him, and Archaeoavis was almost as bad. Fortunately the Dragoon class does get to use shields and the Heavy armor set, both of which are always excellent options.
One other thing I'll mention about this class is that it benefits enormously from Haste status, even more so than the other solo jobs. The addition of the Running Shoes lets the solo Dragoon time his/her Jumps with much more precision, since the total time spent in the air gets cut in half. That's a good thing, not a bad thing, and it makes it easy to leap over incoming attacks. Groups of monsters generally tend to attack at the same time when their invisible action bars are full, and with a little practice I was able to time it so that my solo Dragoon consistently avoided nearly every attack. It's impossible to lose at the game if you never get touched. This along with good stats and a strong equipment selection were enough to boost the Dragoon to the top of this particular tier, even as the weaker early game and poor initial selection of spears kept it from reaching a higher one.


The Hunter class finds itself in the opposite situation from the Dragoon class, a job that functions much better in a typical party setting than it does on a solo run. The Hunter is the fighting class that uses bows for a weapon, and it ends up with a different stat and equipment distribution than most of the other melee classes. Hunters have good Strength and excellent Agility, tying with Ninjas for second place in the latter category and outdone only by the Thief. However, the tradeoff is a poor Vitality stat that leaves them with little health and practically forces the Hunter into the back row, where bows fortunately do work with full effectiveness. The bows themselves are very good weapons, with a wide selection of different types to choose between offering different elements and status-affecting properties. The Fire/Ice/Thunder Bows all pop up during the first world, while the Darkness Bow offers one of the few ways to inflict a useful status ailment against enemies. Bows are one of the very rare weapon types that have a chance to critically strike and deal huge damage. Unfortunately, because the Hunter is not one of the game's starting classes, no bows at all are available until halfway through the first world, and it can be challenging to navigate through the game with a frail class like this until they show up. Making matters worse, the two-handed nature of bows rules out the chance to equip a shield, which makes things much more complicated for the Hunter class in the lategame. The lack of Aegis Shield protection is very noticeable for the final boss.
The innate class ability is "Aim", which increases the to-hit rate of the Hunter to 100%. The intention is to use this with bows, which are otherwise inaccurate weapons, but Aim can be used with anything that the Hunter can equip. The use of Aim cancels out the Flee effect of the Chicken Knife (which is keyed to the use of the "Fight" command) and it's great for dealing with evasive opponents like the Ninjas in the Dimensional Castle. Early in the game the Hunter can make due with "Animals", an amusing ability where the class can "Call upon our forest friends" for assistance. Animals uses a formula based around rolling a random number between zero and the Hunter's current level, with a number of different effects ranging from single target damage via "Squirrel" to self-healing restoration via "Nightingale". The low damage and random nature of the Animals ability makes it impractical as soon as the Hunter gains access to a bow, although it is one of the funniest abilities in the game to use.
The Hunter's signature ability is "X-Fight" (Rapidfire), on the very short list of the best abilities in the whole game. X-Fight lets the Hunter attack four times with the multiplier cut in half (M = M / 2). Like Aim, X-Fight always hits the target and it ignores the Defense stat of the enemy being hit. It will also never trigger the Flee effect from the Chicken Knife, and with the Hunter having such high Strength and Agility stats, the Chicken Knife + X-Fight + Running Shoes combination makes this class an unstoppable killing machine. My solo Hunter was getting off two X-Fights before the monsters even got to act, dealing out roughly 20,000 damage before their turns began. They, uh, rarely survived long enough to do anything. The traditional endgame boss gauntlet fared little better and were carved up one after another. You really need to see the lategame Hunter in action at some point - it is downright TERRIFYING to watch. 
So why is this class only ranked as the tenth best then? For starters, most of that lategame power doesn't arrive until near the end of the solo run. When using a normal bow and not the Chicken Knife earlier on, X-Fight is only an excellent ability and not a gamebreaking one. For that matter, X-Fight requires a lot of ability points to unlock, and it wouldn't have arrived until well into the second world if I hadn't been forced to do a lot of grinding to unlock it earlier. The Hunter class also consistently struggles with a number of difficult bosses in a way that stronger classes can avoid. Animals is a slow and unreliable way of defeating opponents in the early game, and Byblos can't be defeated at all without setting up a Fire Bow drop from the Tornado form of Liquid Flame. The Puroboros were a huge obstacle for this class, forcing my solo Hunter to grind out about 100 extra ability points just to have X-Fight on hand, and even then it was still a heavily luck-based endeavor to get past the little death balloons. The low Vitality on the Hunter class had my solo character in constant danger of being wiped out.
And I still haven't mentioned the biggest flaw of X-Fight: the four attacks are distributed randomly amongst the Hunter's opponents. You cannot control where the damage goes. That's fine against most bosses because there's only one thing to target, but it causes major problems in certain places. Stalker's multiple images, the piggy trio in the Great Trench, the four Barriers at the start of the Necrophobia battle, and most importantly, the four Neo Exdeath parts are all places where X-Fight's uncontrolled damage causes serious issues. Most of the time the Hunter is doing so much damage via X-Fight that it doesn't matter. In places where the class needs precision though, X-Fight has to be given up in favor of Aim, and that converts the Hunter back into a moderately strong ranged fighter instead of an insane death god. I had to use the Yoichi Bow for the Neo Exdeath battle for this very reason, and that was slow going (1700 damage on normal hits and a hair under 5000 on critical hits). As a result, this is a very binary class overall, reminiscent of someone who would put all of their skill points into a single category in Diablo 2. Your all-fire sorcie would annihilate anything not immune to fire, and then stand around looking helpless against anything that was immune. Similarly, the lategame Hunter can kill anything with ease so long as it doesn't matter where the damage goes, only to look much more pedestrian in the situations where it does. Add in the low Vitality, lack of shields, and weak early portions of the gameplay, and even one of the game's best abilities can only get the Hunter to the higher end of the "average" tier.

The Black Mage is one of the classic jobs not just in FF5 but in the entire Final Fantasy series more broadly. Sporting pointy hats and hiding their faces in shadow, Black Mages have been one of the most popular features of the series dating back to the 1980s. In this particular incarnation, Black Mages are one of the strongest magic-using classes and a powerful offensive weapon throughout the run of a solo game. Black Mages have access to the three primary elements, fire/ice/lightning, at each of three different strengths. The tier 1 version of these spells has an attack value of 15, the tier 2 version has an attack value of 50, and the tier 3 version has an attack value of 185, each one being a bit more than three times stronger than the next. Many of the game's bosses have a weakness to one of these three elements, and the Black Mage is therefore able to skate past bosses like Byblos, Ifrit, and Sol Cannon which would otherwise cause serious problems. Black Mages are also able to acquire rods that grant their basic attack spells the "Magic Up" property from an early date, adding another 50% additional damage to their fire/ice/lightning blasts. This class can furthermore heal via a Flame Ring and self-castings of the three fire spells, and one good self-casted Fire 3 / Firaga is enough to max out HP in all but the worst of circumstances. One thing that the Black Mage class is never lacking is direct damage and multi-targeted spells.
In addition to their primary elemental attack magic, the Black Mage has a number of other useful spells that come along for the ride. Bio has a spell attack of 105 and slots in perfectly between the tier 2 and tier 3 elemental attack spells, granting access to poison for a fourth element and with its own Venom Rod to grant the Magic Up property. The Venom spell allows the Black Mage to inflict actual poison status, while Sleep and Toad open up two more useful status inflictions. Not that the Black Mage uses either of them very often; this class can simply blow away opponents with raw damage and doesn't need to resort to indirect status twinkery. Then there are the instant death spells: Break is one of the few ways to inflict petrification while Doom kills the unlucky recipient instantly. Drain will steal health from targets while Psych does the same thing for magic points. Finally, Flare is non-elemental and pierces enemy magic defense, although that's not as useful as it might sound and a Flame Rod-powered Fire 3 will do more damage in nearly all situations. This is an excellent spell selection and one of my favorite parts of the Black Mage class is how smooth it all feels. At every stage of the game, the Black Mage is upgrading from one powerful spell to the next, never really going through any period without something explosive to toss at enemies.
Of course, the Black Mage class suffers from serious weaknesses as well. The biggest problem comes against opponents who lack elemental weaknesses to exploit, or worse yet, the few bosses who are immune to the normal elements of fire/ice/lightning. Flare might be non-elemental in nature but it doesn't arrive on the scene until the final 15% of the solo run, and anything that's immune to elemental damage before that has to be conquered with physical attacks. The final form of Archaeoavis in particular causes major problems for the solo Black Mage, and even the Gilgamesh/Enkidou ship battle can be difficult because they have no elemental weaknesses to target. The Black Mage also shares the vulnerabilities common to nearly all of the casting classes, with poor stats and a weak equipment selection. While the Black Mage has awesome Magic Power, this class stinks in every other statistical category, and the horribly low Vitality means a dangerously weak health total. The equipment options are similarly poor, with only the standard daggers to go along with rods and the Light armor set. No Bone Mail for this class, and that's a real shame because self-healing with Fire 3 + Flame Ring + Bone Mail would be great. At least Black Mages do get a ton of use out of rods, between the Magic Up property on elemental damage and the Wonder Rod's versatility in the lategame. Still, even the one-time use of Shell status from the Wonder Rod only does so much to stop Exdeath's White Hole, and this class has no shields to rely on for physical evade or petrification defense.
The net total is that the Black Mage grades out as roughly average in terms of power for a solo class. It dominates many of the boss encounters but struggles at enough of them that it can't claim a ranking in the higher tiers. That said, this is another class that's a ton of fun to play on a solo run and I highly encourage anyone reading this to give it a try.

Back when I wrote up my report on the solo Summoner, I stated that the Black Mage was a slightly stronger class for a solo game, and I still stand by that judgment. The Black Mage and the Summoner are the two classes that are the most similar in FF5, both of them offensive-oriented spellcasters with poor equipment and a frail health total. The best way to evaluate the Summoner is in reference to the Black Mage class since they have so much in common. The Black Mage gets access to four elements (fire, ice, lightning, poison) while the Summoner gets six of them (fire, ice, lightning, earth, air, water). While that might sound like an easy advantage for the Summoner, it's not quite as clear cut. The Black Mage may have fewer total elements, but he has multiple different strengths on each of them, with Fire 1/2/3 options to play around with in each of his primary three attack spells. In contrast, the Summoner only gets exactly one spell of each element, and the Ifrit/Shiva/Ramuh summons are all but useless by the halfway point of the game. The Black Mage can keep upgrading his spells as he goes and fares better in elemental versatility at the end of the game, with three different powerful spells to choose from. The Summoner is pretty much stuck with just Syldra (air) and Leviathan (water) by the third world, and Leviathan is much less useful than it should be because there are no items that give the "Magic Up" property for Water element. Flare vs. Bahamut is of course a wash, as they both do exactly the same amout of damage and have the same magic defense piercing property.
The Black Mage also has a much smoother progression in terms of increasing the power curve over time. The starting Fire/Ice/Bolt spells are a huge help at getting through the early game, and that's a major factor in the Black Mage's favor. The Summoner has to get past Karlabos, Siren, and Magisa/Forza without any spells, relying on a class with terrible Strength and Vitality to attack with melee dagger. To be fair, the power curve of the Summoner does increase starting at Worus, which is where the Summoner job unlocks normally, but the Black Mage leaps up in usefulness as well immediately thereafter at Karnak, so that's pretty much a wash. The second world is where the Summoner is really supposed to shine, since he has access to the powerful Titan summon, and yet I still found that the Black Mage held up extremely well in the comparison. My solo Black Mage was able to purchase Bio (spell attack 105) immediately at the start of the second world in Rugor, and that was virtually identical to Titan (110) but without Titan's extremely irritating inability to hit flying targets. Then later on in the second world, the Black Mage gets Fire/Ice/Bolt 3 at Mua, and then completely dominates the comparison until the Summoner can get Syldra after the Pyramid in the third world, and even that only pulls the Summoner even with the Black Mage, not ahead. Kick in the fact that the Black Mage can heal himself with Fire spells plus a Flame Ring, and it's not even a comparison: the Black Mage has an easier path for a solo run.
Now that's not to say that the Summoner doesn't have some great abilities too. The Summoner has two excellent utility spells in Golem and Carbunkle that provide powerful defensive protection. Both of these work better in party setting than a solo one, however; Carbunkle can be duplicated for a solo character with a Wall Ring, and Golem can be cast via the Magic Lamp. In fact, that's one of the biggest drawbacks for the Summoner class in general: you can get access to all of the Summon spells just by using the Magic Lamp. The Summoner has Shoat to kill enemies weak against stone attacks, but the Black Mage has Break, again a wash. And the Black Mage has Sleep, Toad, Drain, and Psych, the potential to steal magic points being particularly useful. The Summoner counters with the Conjure ability, which is really good in a party setting where you don't want to waste magic points, and certainly more useful than the Black Mage's MP +30%. However for a solo character, the Black Mage's extra magic points are actually probably the better of the two. I almost never used Conjure with my solo Summoner, as I needed the enemies to be dead right away.
The comparison ends up pretty even on the whole between these two classes, at least for a solo game. The Summoner is a bit better for the endgame due to the usefulness of Golem, but the Black Mage has the smoother and easier overall path from the beginning to the end of the solo run. Like the Black Mage, the Summoner has the same cruddy stats and poor equipment selection, and unlike the Black Mage, the Summoner is forced to use them more often due to the delayed arrival of Summon magic. This is still a great class overall, just ever so slightly weaker than the Black Mage when all is said and done.


The Necromancer is a study in contrasts. This is a class that spends much of the game absolutely crushing everything in its path, only to find itself almost helpless in other situations along the way. The Necromancer is another spellcasting class that specializes in the use of "Dark Arts" magic, which is most similar to Summon magic in terms of how it operates. In order to learn one of the Dark Arts spells, the Necromancer must seek out and defeat certain enemies, learning the applicable Dark Arts immediately after winning the battle. Half of these Dark Arts spells can only be found in the Gameboy Advance bonus dungeon and therefore can never be used during the length of a normal solo run. That said, the ones that do unlock are extremely powerful, with Hellwind (air), Evil Mist (poison) and Meltdown (fire) having a spell attack of 190 comparable to the damage done by Fire/Ice/Bolt 3 or Syldra. Furthermore, like Summon magic the damage from most Dark Arts spells is not cut in half when targeting more than one enemy at a time. When the Necromancer has the appropriate weapon equipped to grant the "Magic Up" property to these spells, the class can absolutely blow away random encounters - and many of the game's bosses - like they're not even there. I've rarely seen any class as dominant as the Wizard Rod-equipped Necromancer annihilating every random encounter with Hellwind after Hellwind in succession.
The biggest problem with Dark Arts as an ability is that none of the spells unlock until the halfway point of the game. Hellwind and Evil Mist can be found in Bal Castle basement and the Hiryuu Valley respectively, both of which are a long way into a solo run. Prior to reaching this point in the second world, the Necromancer must rely on the other class ability of "Oath", a frustratingly random ability that causes one of four monsters to appear and use an ability. Fortunately, the odds are 25% that one of these will be a Flaremancer who casts the Flare spell for about 1000 damage against a single target, easily enough to defeat almost anything in the first world. Unfortunately the other three options are much weaker and they show up 75% of the time, with luck alone dictating what pops out of the ability. The damage from Oath is also fixed and never increases with additional levels, making it much worse than the other starting abilities on the GBA classes like Open Fire and Condemn. Because Oath is so limited and Dark Arts arrives so late, the Necromancer is forced to break rods over and over again to make progress against difficult bosses. Byblos and Sol Cannon would both be completely impossible without resorting to this kind of rod-breaking. The need to do this is one of the reasons why I've placed the class here instead of higher on the list.
I've been tiptoeing around the greatest weakness of the Necromancer class thus far. Here's the glaring problem: the Necromancer is an undead lich who can't be healed under normal circumstances. Potions and Elixirs will hurt the Necromancer instead of healing the class (although Ethers and the MP restoration component of Elixirs work just fine). This is the same way that the Bone Mail works, although the Necromancer actually can't wear the armor because this class is stuck with the Light armor set. That's a bit of a cruel joke since the Necromancer would otherwise be perfect for it. The main way that Necromancers deal with this weakness is not to deal with it by killing opponents with overwhelming Dark Arts damage before their own life runs out. This works in the vast majority of circumstances, including against a good chunk of the game's bosses. Where this doesn't work, the Necromancer is forced to use a Dark Arts spell called Drain Touch, which injures a single opponent for roughly 1000 damage and heals the same amount back to the Necromancer. Drain Touch is much weaker than the rest of the Dark Arts employed by the Necromancer, however, and the need to keep pausing from spamming 5000+ damage multi-targeted Hellwinds to use Drain Touch against a single foe causes a serious downgrade to the offensive power of the Necromancer. It also makes all of the act-ending bosses very difficult opponents for this class even as the Necromancer powers through most other enemies without breaking a sweat.
The Necromancer is the only class in the game to combine together high Vitality with high Magic Power. And I mean really high Vitality: the Necromancer has higher Vitality than the Knight and the Samurai, with only the Monk having a larger HP total. The class certainly needs all of that extra health too given that it can't make use of normal healing. As for the equipment, this job has the standard for an offensive spellcaster with access to rods along with the default daggers. Once again, the lack of shields is a real setback and contributes to the physical punishment that this class often takes. I found that the Necromancer class had a terribly difficult time with the final endgame boss, where the huge health totals of the Exdeath Tree and Neo Exdeath forced many long rounds of Drain Touch healing, and therefore opened up the class to constant White Hole / Grand Cross danger. The Necromancer even has to worry about running out of MP in the last battle, since Elixirs can't be used for health restoration and even having a Gold Hairpin equipped isn't enough to stop all those Dark Arts spells from running the class dry. It's hard to put in words how binary this class can be from a difficulty perspective, where the solo Necromancer can blast through the entire third world in an hour or two with no trouble... and then spend those same two hours trying to get past Exdeath at the end of world two or world three.
This was a difficult class to rank. I ended up placing it here in the middle of the tier list, under the logic that the huge trouble with endgame bosses and the weakness of Oath in the early game were countered by the extreme ease with which the Necromancer was able to blast away most opponents after acquiring Hellwind and Evil Mist. I could see a case being made to rank this class both higher and lower depending on how an individual weighs the ranking criteria. For better or for worse, this is one of the more unique classes in the game.

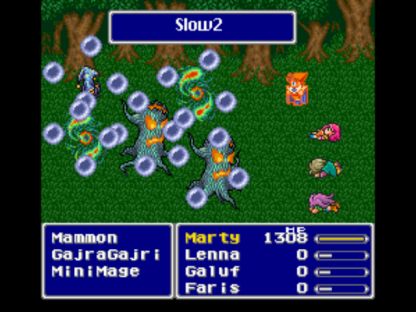
The Time Mage is my favorite class that I've ever done for a solo game in FF5. The Dimensional magic that Time Mages employ makes them the king of buffs and debuffs in this game, controlling the battlefield through various indirect forms of attack. The Haste and Slow spells alone are arguably the best two spells in the game, and mastery of this pair is enough to make the Time Mage a formidable opponent all on their own. I wrote in my solo Time Mage report that the first world has to be done with little more than Haste and Slow... and that pair was plenty to get the job done. Haste lets the player take twice as many actions as normal, while Slow similarly reduces the enemy to half speed. Stack them together and even normally fearsome opponents like Byblos wither away into helplessness. Speed is everythinig in FF5, and with enough of an advantage in it the player can work miracles.
There are plenty of other useful Dimensional spells beyond Haste and Slow. Regen is a cheap way to get health back in fights, and I used it constantly with my solo Time Mage because battles tended to be extended affairs. Float comes in handy against Titan and Catastrophe, while Old takes down Omniscient's speed and regeneration. The Demi and Quarter spells will remove huge chunks of enemy health, and they work against more bosses than one would think, most notably Byblos, the Crystal seals, and some of the Archaeoavis forms. Void (locks out magic usage) and Reset (restart battles over again from the beginning) are weird spells that were not continued in future Final Fantasy games, largely due to their abusive potential. One of the weaknesses of Dimensional magic is the lack of direct damage spells, with the only two candidates being Comet and Meteor. Both of them roll a random number between 50 and 200, then multiply that number by the spell's multiplier (M = 8 for Comet, M = 14 for Meteor). Meteor is much stronger since it carries out that calculation four times in a row, at the tradeoff of costing a hefty 42 MP. The damage from the four Meteor hits is also applied randomly to enemies, which can be awkward in situations where the player wants targeted damage. Both spells deal damage completely indepedent of character level or Magic Power stat, handy against monsters packing Sonic Wave / Dischord. Finally, the unique Quick spell grants two consecutive free actions to the Time Mage immediately after casting, with Quick/Meteor/Meteor being the standard lategame max damage combo. I found that this would do roughly 10,000 damage when used against most foes, although the magic point cost was astronomical for anything other than boss fights. (77 MP for Quick plus 42 MP per Meteor adds up to 161 MP per combo - consider equipping a Gold Hairpin!) It's an unusual group of spells with a lot of fun applications over the course of a solo run.
As much as I love this class, the Time Mage is a slow and plodding warrior prior to gaining access to Meteor near the end of the game. The class has a low Strength value, and melee attacks with daggers don't impress the monsters very much. That's not to say that a Time Mage is necessarily threatened very much though, even as a solo character with miniscule Vitality. In most boss fights, my Time Mage would stack the Haste/Slow/Regen buffs and quickly reach a state where he was unkillable, particularly with the Healing Staff on hand for endless self-healing. However, it took an extended time to defeat anything that had the Heavy flag in the code and couldn't be hit with Demi/Quarter. I wrote down that it took about 180 rounds of combat to defeat the Adamantium turtle at 11 damage per attack, which isn't an experience I would want to inflict on anyone else. Slow and steady won that race... eventually. While the Time Mage does have an answer for nearly all situations, I can't describe this in good faith as anything resembling a power class.
One of the advantages of the Time Mage is the ability to equip staffs as well as rods and the standard daggers. The Healing Staff provides the most useful such example in this category, and my solo Time Mage never had to use a single healing item for the rest of the first world after grabbing it in Tycoon Castle. Access to the Chicken Knife, Assassin Dagger, Wizard Rod, Wonder Rod, and Sage Staff provides decent flexibility in the latter stages of the game. However, the Time Mage still can't use a shield and remains stuck with the Light armor set common to most mages. No Bone Mail for this class either. Other weaknesses of the class come in the beginning and ending stages of the game. Like the Summoner, the Time Mage is forced to make it through the first three dungeons without any spells on a class with terrible Strength and Vitality. Defeating Karlabos and Siren with a dagger and a bucket full of Elixirs is not a fun task. The Time Mage's lack of direct damage also forces some rod and staff breaking at times, necessary to get past the Puroboros and Exdeath at the end of the first and second worlds respectively. And even though it pains me to admit it, the Time Mage struggles to deal with the final Neo Exdeath fight. There's no defense against White Hole in the Tree phase of the battle, and the untargetable nature of Meteor makes it unreliable against the four parts in the second phase. I was forced to have my solo Time Mage move into the front row and hack away with the Chicken Knife, which required nearly a dozen retries until I could get everything to line up correctly.
Therefore the Time Mage can't be classified as one of the truly powerful jobs in FF5. I have it grouped in with most of the other mage classes in the "average" tier, a great and fun class that suffers from some noticeable weaknesses. This was most similar to my Iron Fists variant group from the original Final Fantasy, a setup with low offensive power that made a living through defense and buffing abilities. That group didn't have the Quick and Meteor spells to play around with at the end of the game though.


One of the interesting options about FF5's gameplay is that your characters are never required to adopt any jobs at all. The default Bare / Freelancer class has no abilities and gains no statistical advantages or disadvantages, compensating instead with one crucial edge: you can equip every weapon and armor in the game! This provides a vast array of flexibility and customization that no other job class proper can match, combining together the best gear from literally everything else. Excalibur? Check. Masamune? Check. Aegis Shield and Ribbon? Check. All the Genji gear? Check. You can even take your pick of the Brave Blade or Chicken Knife, either one can be used. And since the Bare job can equip everything, that means that all of the items that function as spells are also in play. You've got your Healing Staff for Cure 2, Defender Sword for Armor, Ancient Sword for Old, Darkness Bow for blind status, Doom Axe and Killer Bow for death spells, paralyzation status from whips, all the stuff that comes out of the Wonder Rod, not to mention the ability to break rods and staves to cast high-level attack magic. That also doesn't include all of the weapons that have elemental properties, like the Flame Bow (fire), Icebrand Sword (ice), Trident (lightning), Air Lancet (air), Venom Rod (poison), and Excalibur (holy). In other words, the Bare job doesn't really lack special abilities at all - it's overflowing with all sorts of crazy little tricks for the savvy player.
To provide a further sampling of how these equipment options functioned over the course of a run, I'll detail a few examples from my solo run with the Bare class. The Flail took care of the early bosses from the safety of the back row, then the Katana found in Tycoon Castle was a huge attack upgrade. The Ribbon hidden in the burning Karnak Castle sequence upgraded defenses and took care of most status ailments, while the Healing Staff addressed the need for life restoration. Guardian dagger + shields provided plenty of physical evade even before the Darkness Bow entered the mix. The Fire Bow, Ice Bow, and Coral Sword eliminated the bosses in the first world with elemental weaknesses, while the Ancient Sword and Sleep Sword inflicted critical status ailments. The Sleep Sword and broken Fire Rods combined together for a rare legitimate kill of Atomos in the second world. The Flame Tongue sword and the Flame Shield could heal for a lot of health in the second and third worlds, and then the floodgates truly began to open with all of the legendary weapons available. There was the Masamune for Haste status, Defender sword for Armor status, the Woden Rod and the Aegis Shield, breaking Venom Rods against Apocalypse's poison element weakness, the Dragoon Spear to attack dragon opponents, plus the Brave Blade to top it all off. There seemed to be a solution to every problem along the way with some kind of equipment combination.
With all that said, the Bare class still lacks any abilities and has practically nothing in the way of stats. This class gets a score of 24 in everything, modified only by the small bonuses of each individual character (for example, Bartz gets +4 Strength, +1 Agility, +3 Vitality, and +1 Magic Power). The Bare class can also never do anything other than select the Fight and Item commands. Although that might seem boring to many people, I found that the limitation on abilities and character stats forced me to be more creative with the various equipment choices, still leading to an entertaining solo run. I couldn't place the Bare job any higher on the list because this class doesn't carry a lot in the way of raw power. Even with the maxed-out Brave Blade, physical attacks were only doing a little over 2000 damage with each swing to the final bosses. This was a class that had to rely on twinkery and creativity to deal with the game's various challenges. The Bare class also did have to fall back on breaking rods and staffs on several occasions to get past several bosses, another sign that this was a job with lower overall damage output. Nevertheless, the fact that taking no job at all could score this highly on the tier list is impressive. Having access to all equipment - with a final setup wielding the Brave Blade, Aegis Shield, Ribbon, Genji Armor, and Running Shoes - made for a character that was nigh-unkillable. This was one of those few solo classes that defeated the ending boss on the first try and was never truly threatened.

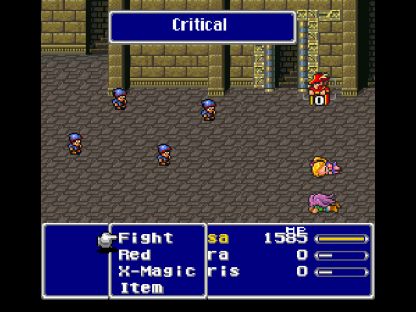
Speaking of twinkery, the Red Mage is the class most associated with attacking the gameplay from odd angles and bending the rules to achieve victory. As the jack-of-all trades and master of none, the Red Mage finds itself with a little expertise in every area but no true strengths to rely upon. The Red Mage does gain access to the first three levels of White and Black magic, containing a surprising amount of goodies between the two schools. White magic provides Cure and Cure 2 for healing power, Size and Charm for some indirect forms of status attacks, and the best spell of the lot: Armor. That spell cuts physical damage in half and served as an integral component of my solo Red Mage run. Black magic mostly consists of Fire/Ice/Bolt in their tier 1 and tier 2 forms, along with Venom, Sleep, and Toad. Both of the latter two status attacks work in more places than you might think, and the Sleep + Venom combination is one of the more amusing ways to kill opponents. Poison them, put them to sleep, then stand around waiting until they bleed to death.
The signature ability of the Red Mage in FF5 is X-Magic, also known as Doublecast in the GBA translation. This allows the Red Mage to cast two spells in a row with one action, and the standard non-variant setup is to master the Red Mage job to pass this ability on to a Mimic for multi-casting of Black or Summon magic. For a solo Red Mage limited to the first three levels of spells, it's unfortunately a lot less powerful. Even so, I was surprised to find that the Red Mage was still able to hide in the back row and act as a spellcaster throughout the third world. Doublecasted Fire/Ice/Bolt 2 would deal about 800 damage per casting or 1600 damage per use of X-Magic to all opponents, and with Haste status that was just enough to be viable. Just barely. Where that didn't work, the Red Mage could also make use of Armor status and engage in melee combat from the front row, relying on the Chicken Knife to deal damage. Red Mages are highly versatile in their equipment setup, getting to use both rods and staffs along with non-Knight swords and the standard daggers. In this regard the class was most similar to the Blue Mage, and in many respects the Red Mage is a weaker version of the Blue Mage class. However, Red Mages gain access to staffs at the expense of using shields, and that's a poor tradeoff indeed since the Red Mage can already cast Cure 2 and doesn't particularly require the Healing Staff. At least this class can equip both the Medium and Light armor sets, and depending on the need for physical or magic damage, the Red Mage can shift their gear around at the drop of a feathered hat.
Red Mages suffer from two huge drawbacks. The first and more obvious issue is the lack of much in the way of direct damage capabilities. Red Mages have mediocre Strength and Magic Power, with their modest skill in both areas meaning that they're not particularly good at either physical combat or spellcasting. (I also found that the solo Red Mage was frequently on the verge of running out of magic points because the low Magic Power stat resulted in a small MP pool.) The only legitimate lategame physical weapon that the Red Mage can equip is the Chicken Knife, and this class has zero abilities to boost the damage beyond what normal attacking will produce. Similarly, the spells that unlocked at Karnak Castle in the first world aren't very impressive from a damage output in the ending stages of the game. There are a lot of different equipment setups to play around with, but even that can only take the Red Mage so far. My solo Red Mage was forced to break rods and staffs repeatedly throughout his run to compensate for his weak damage output, the sign of a somewhat underpowered class.
The other major problem comes from the low Vitality on this class. There's no beating around the bush here: the Red Mage has absolutely terrible HP growth. Only the Bard and the Dancer are worse in the whole game. This makes it difficult to engage in melee combat, even with Armor status, and constantly leaves the Red Mage in a vulnerable position. Yes, the Red Mage has a lot of twinkery to exploit between monsters with elemental weaknesses and the various different status ailments that can be inflicted with spells or gear. However, the Red Mage is essentially forced into those tricks because the class has no choice otherwise. This is a class with a high skill cap to pull off, as it's forced to do all sorts of crazy stuff to compensate for the lack of direct power. The overall combination is just enough to avoid falling down into the next tier, but only by a hair. I have this job rated as the worst of the "average" category for a reason.
The gameplay for this job ultimately reflects the personality of the Red Mage class: no terrible matchups because of the wide range of class abilities, but no crushing damage in any one area either. Average at everything.
Tier 4This tier is the beginning of the classes that are underpowered compared to the rest of the list, jobs that I consider to be "below average" for a solo game. This group contains classes that have weaker or more niche abilities, underwhelming equipment selections, or poor character statistics. These are the jobs that don't benefit from a smooth path through the solo run, instead encountering frequent obstacles or serious roadblock opponents. Some of these classes required a lot of trial and error to defeat the game's most difficult bosses, and they are not recommended for anyone trying their hand at a solo game for the first time.

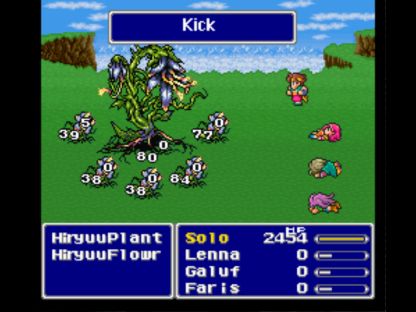
I wrote above that these are not classes to pick when trying a solo game for the first time, and of course, here's the one that I chose for my own first solo venture. Well, the Monk may be a bit of an exception to that rule. This is one of the game's premier physical fighting classes, with many of the same mechanics carried over from the Black Belt in the original Final Fantasy. Monks never equip any weapons and fight with their fists, with damage increasing purely as a function of their level. The base attack value for the Monk is double the character level, which theoretically makes Monks a bit stronger in a solo venture (where the character level is higher) as opposed to a normal party setting. In practice though, the inability of Monks to equip any weapons largely cancels this out, and their damage output is roughly comparable to the other physical fighting classes. Since Monks are never tied to the finding of new weapons in treasure chests or stores, their damage goes up unrelated to anything taking place in the plot of the game. This can be both a blessing and a curse at times: there's no sudden jump from reaching the Chicken Knife or a similarly powerful tool, but it's also always possible for the Monk to level their way past a challenging opponent. This does mean that enemy attacks that reduce character level, like Sonic Wave / Dischord or Dark Shock, pose a special problem for the Monk. Even the Antlion miniboss can be tricky to defeat. On the other hand (heh), Monk punching attacks always have an 8% chance to critically strike, and that can be a big help in many situations.
Monks have the highest Strength and Vitality in the game paired along with average speed and abysmally low Magic Power. This class ends up with ludicrous amounts of health and that proves to be one of the biggest advantages of playing as a Monk. They can increase their health even further by adopting the "HP +10/20/30%" abilities, and the HP +30% ability tends to be the best choice for general endgame situations on this class. My solo Monk ended up with more than 9000 HP at the end of the game and I didn't understand at the time why Almagest was even a threat, since that Neo Exdeath attack was tickling my character for about 1600 damage with each use. The Monk innate command is Kick, which deals a low amount of damage to all opponents on the screen at once. It's useful in a few situations such as the Puroboros and the Hiryuu Flowers, but too weak to see general use. The Monk typically does better by concentrating punching damage against one enemy at a time. "Mantra" provides a weak self-heal that scales horribly into the later portions of the game because it's based off of the terribly low Magic Power stat. It's only useful in the very early stages of the game. "BuildUp" lets the Monk pause for one round of attack, then attack at double strength (literally M = M * 2 on the multiplier) in the next round. BuildUp came in surprisingly handy in some situations to work around scripted AI behavior, like getting a double strength BuildUp attack against Byblos before he could cast the Armor spell, or using BuildUp to hit Gilgamesh on the Big Bridge before the boss went into his buffing spells. BuildUp attacks also retain the normal 8% chance to critically strike, and the solo Monk can therefore increase the variability in a battle by using BuildUp and hoping to get crits, much like a Dancer hoping to get lucky and pull Sword Dances. My solo Monk ended up defeating a number of the game's worst bosses by repeating the fights until BuildUp crits appeared at opportune moments.
The Monk ability that has the biggest effect on the gameplay is Counter. This grants the Monk 50% odds to respond with an attack when hit by physical damage from an opponent. In a number of situations, the best option is to defend or use healing items while sitting back and waiting for Counter to kick in. One thing that I didn't fully appreciate the first time that I played through the game is that Counter doesn't trigger scripted AI responses. For example, I defeated LiquidFlame by having my solo Monk defend and rely on Counter for damage against the Hand form of the boss. These Counter attacks never triggered any of the form shifts from the boss, and an experienced player can manipulate the AI scripting in several situations by making use of this. On the other hand, Counter ALWAYS activates half of the time when taking physical damage, even in situations where the player might not want it to do so. This makes some encounters much more difficult, in particular the Neo Exdeath battle where it essentially forces the Monk to defeat the physical Part #3 first since Counter will eventually kill that part regardless. Generally speaking though, Counter adds a lot of extra damage and is one of the best parts of the class.
With all that said, I've still placed the Monk here at the top of the "below average" tier, and I believe there's a clear gap between this class and the ones in the tier above it. The biggest reason is the inability for Monks to equip any weapons at all. This is a crippling disadvantage that severely limits the class. It's not just the lack of damage that the best weapons provide, although that's a problem as well. The Monk also lacks the chance to make use of weapons that function as spells, or inflict any kind of elemental damage whatsoever (outside of weak damage from the Magic Lamp). Even classes that have nothing but daggers can still use the Guardian / Main Gauche for physical evade, the Mage Masher to Mute enemy targets, the Chicken Knife for endgame damage, and so on. The Monk gets nothing, forever. Obviously this class also cannot use shields, and it gets tied to the Medium armor set. Monks are always a sitting duck throughout the whole game for status ailments and instant death attacks, which often render the huge HP totals of this class irrelevant.
Furthermore, precisely because the Monk is reliant solely on character level for damage, this is a class that has to undergo a ton of leveling to be effective. Most other solo classes are able to complete the game in the Level 55-60 range, with only a few of the weaker ones going much above that. For the Monk though, even at Level 60 the class is only doing a little over 3000 damage per round of attack (1500 damage per strike), and that really isn't too great for the lategame. Especially not for a supposed physical bruiser. With no weapons at all to use for assistance, I found that my solo Monks had to gain a whole bunch of extra levels to defeat the final bosses. My initial solo Monk beat the game at Level 75, which was certainly excessive, but then a few years later I revisited the solo Monk... and again didn't complete the game until Level 71. This is just a class that has to pile up lots of extra levels because of the way that the damage formula for their class works. The Kaiser Knuckle accessory is worth 25 levels worth of damage (+50 attack) and would be perfect for the Monk, however using it requires giving up the Running Shoes for Haste status, and of course that's not worth it. The Monk therefore ends up in this awkward status with vast amounts of health only to find that it's all nearly useless in the last battles because White Hole and Grand Cross don't care about a solo character's HP total. As a result, as much as I like this class I can't put it any higher than this spot at the top of the fourth tier. Although Monks are a ton of fun to play, they're far from being the best class for a solo game.
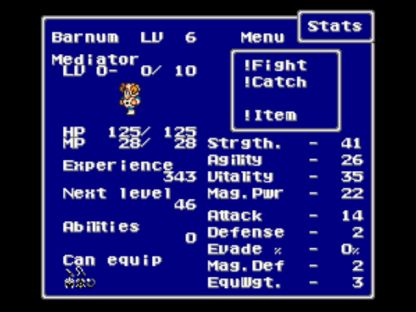

The Beastmaster is a class based around catching and controlling monsters of all types, a sort of precursor to the Pokemon games from an era that predated even the Red and Blue versions. The default class ability is "Catch", which will literally suck up a single enemy when it reaches near-death status, after which it can be "Released" to do some sort of special attack. Almost every critter in the game can be caught in this fashion and has its own Release move, with the exception being anything that has the Heavy flag in the code. It can be tricky to Catch opponents at the start of the game because they must be taken below 1/8 of max HP in order for Catch to work. Using this ability at any other time on a monster simply does nothing. Fortunately there's an item called the Corna Jar that becomes available about halfway through the solo run in the second world, which enables Catch to function when enemies are below half health as opposed to below 1/8th health. Dealing with bosses for the Beastmaster class normally involves Catching an appropriate monster ahead of time and then Releasing it at an opportune moment. There's a good deal of variability in terms of what different foes will produce: physical damage Fight attacks, elemental damage of all types, status attacks like Darkness and petrification and instant death attacks, and so on. Some of the most useful enemies simply deal a percentage of max HP in damage, like the Breath Wing of the big Zuu birds with their 1/4 max health damage, since bosses generally tend to have large HP amounts to chew through. Unfortunately the Beastmaster can only have one enemy Caught at a time, and after it's been used against a boss, there's no way to get a second opportunity until the next random encounter.
The other main ability of the class is "Control", which takes over an enemy and replaces the Beastmaster's normal command window with new commands associated with that opponent. The base chance for this to work is 40%, with the Coronet helmet raising this to 70% odds when equipped. Control tends to be a slow and unreliable ability to use; it misses a good chunk of the time and even when it succeeeds, the Beastmaster has to wait for the action bar to fill back up again before making use of the enemy skills. Naturally Control also doesn't work against anything with the Heavy flag in the code. It does still have its uses, however, with a number of the dragons in Exdeath's Castle and the Land Crawls in the desert portions of the third world open to being Controlled and then used to kill themselves. The Shield Dragons in Kuzar Castle are also vulnerable and can be farmed for huge amounts of gold and experience in the second world, if you're the kind of player who likes that sort of thing. Generally speaking, Control only sees occasional use during the solo Beastmaster run. "Tame" is an ability that attempts to inflict Stop status on the target, and for a solo Beastmaster there's almost no place worth using it. You give up your turn to stop the enemy from getting a turn, and the cycle repeats endlessly without making any progress. It's not worth dropping Control for this.
Beastmasters are strongly associated with whips, the only class able to use this weapon type. Whips are similar to bows in dealing full damage from the back row, and they also have a chance to inflict paralyzation status on a successful attack. Unfortunately most bosses are immune to paralyzation in FF5 and the effect wasn't as useful as I had hoped going into my solo Beastmaster game. Like spears and axes, there are relatively few whips in the game and the Beastmaster often must go for long stretches of time before getting a weapon upgrade. Whips are unusual in having three different weapons that all see use in the ending stages of a run: the Beastkiller (double damage against "beasts"), the Flame Whip (1/3 chance to cast Fire 3 on attack), and the Dragon Whip (double damage against "dragons"). None of these weapons are particularly strong though, with the Dragon Whip having the highest attack value of the lot at 92. That's significantly lower than the legendary weapons that most other classes get and contributes to the modest overall damage output of this class. Outside of whips, Beastmasters have the standard daggers and the Medium armor set. Much like the Hunter class they also don't get access to shields, but unlike the Hunter class there's no X-Fight awesomeness to fall back upon.
The monster cannon provided by Catch/Release works quite well throughout the first world before starting to lose steam in the second world. By the third world, it's only able to contribute a one-time damage boost and most of the heavy lifting must be done by the Beastmaster's physical attacks. The reality is that the Beastmaster is a gimped fighter with a kooky Catch/Release ability tacked onto it, and this becomes more and more apparent as the game progresses. While Strength and Vitality are both decent, neither one is particularly great for a physical attacker. The ability to use whips from the back row is also nice, but again it only helps so much. I repeatedly found myself running into difficult and dangerous roadblock bosses with my solo Beastmaster towards the end of the game. The Exdeath battle at the end of the second world was a nightmare, solved only through moving into the first row and gambling on getting Sword Dances out of the Dancing Dagger. Necrophobia and Neo Exdeath were also very tough obstacles for this class to overcome. For that matter, even defeating Sol Cannon required drinking 10 Elixirs at a very high level of 38. The Beastmaster just isn't that great of a class, badly overshadowed by most of the other physical damage dealers. It makes due for a while via creative Catch/Release options, and then tails off sharply as the game progresses.
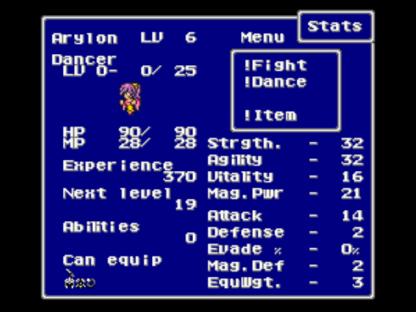

The Dancer is one of the most random classes in the game. It's also one of the most basic, with the whole setup entirely revolving around the Dance ability. This produces one of four different results at 25% odds for each selection. "Jitterbug Duet" is exactly the same as the Black magic spell Drain, stealing a modest amount of health away from the target and restoring it to the Dancer. It tends to be the second-best Dance result, although it backfires against undead opponents (healing them while hurting the Dancer) and can't be used reliably in those areas. "Mystery Waltz" does the same thing for magic points, imitating the Black magic spell Psych / Osmose. "Tempting Tango" duplicates yet another spell, the White magic spell Charm, and confuses the target if it lands successfully. The fourth and final result is "Sword Dance", which deals quadruple the normal damage of an attack (doubling both the multiplier M and the base attack value, one of the only abilities in the game to affect both). Sword Dance is overwhelmingly the most desired result for the Dancer, and the gameplay for this class typically consists of selecting the Dance command and praying for Sword Dances to appear at those 1 in 4 odds. There are a few pieces of Dancer-only equipment that appear in the third world which replace Tempting Tango and take Sword Dance up to 50% odds to appear from the Dance command, and these are awesome when they finally show up. Unfortunately the first 80% of the game has to be completed without any of them, and much of that journey is frustratingly random.
The only other active Dancer ability is "Flirt", which provides another chance to confuse opponents. (Amusingly, when this succceeds the text will print out a message that says "Throbbing!") Flirt doesn't work against anything with the Heavy flag in the code, and it's too weak even to qualify as variant material. Dancers do get the unique class ability of equipping Ribbons (and the related Dancer-only gear), which are very nice indeed. The Ribbon is the game's best helmet with high defense value and immunity to the following status ailments: Dead, Stone, Toad, Poison, Darkness, Aging, Berserk, and Mute. The Rainbow Dress equipment that replaces Tempting Tango with Sword Dance will eventually add an immunity to Charm/Confuse status as well, making the lategame Dancer almost immune to status ailments. 16 of the 18 possibilities from Grand Cross are blocked by the Dancer's equipment setup - this is the one class that has little to fear from that attack. Otherwise, the Dancer simply uses the standard daggers and the Medium armor set. Dancing ignores the Flee effect from the Chicken Knife, and Sword Dance puts out absolutely insane damage with it equipped: 9500 damage from the BACK ROW. With virtual status immunity and the upgraded 50% odds of pulling Sword Dance, the Dancer is actually among the better endgame classes.
Unfortunately, getting to the final portions of the solo run can be a real pain. The Dancer suffers from two gigantic flaws that drag it down the tier list. The first of these lies in the class stats: the Dancer has the worst Vitality score in the game at -10 points from the default. This results in an extremely low HP total and keeps the Dancer in serious danger at all times. With the Dancer being a physical damage class who wants to be in the front row, this is a very bad situation indeed. My solo Dancer spent much of the run one step ahead of disaster, with even normal random battles teetering on the edge of a game over solely because the class had such a tiny amount of HP. I was forced to go through excessive leveling mostly to get more health for boss battles, and as a result my solo Dancer didn't finish the first world until Level 39, and didn't complete the second world until Level 59. That's much higher than normal for solo characters and reflects the difficulty that this class experienced.
The other huge weakness of the Dancer class is the randomness. Oh my goodness gracious, the randomness of that Dance command. As you may well imagine, pinning the success or failure of each boss fight on an ability that has 1/4 odds of delivering the desired result causes a whole lot of repetition. There's almost no way around the need to repeat boss fights over and over again, as a string of "Mystery Waltz" and "Tempting Tango" results quickly lead to defeat. I also ran into exceedingly difficult roadblock bosses on multiple occasions with my solo Dancer, with the Puroboros and then Exdeath at the end of the second world requiring hours and hours of repeated attempts to get past. These battles already require repetition for most other classes because they need to avoid the worst boss abilities from showing up. The Dancer adds even more randomness, needing to dodge the killer boss moves while also hitting on the correct Dances at the same time. The best way I can think to describe this is through an analogy: imagine playing two different games of chance at the same time. You need to throw Snake Eyes with a pair of dice while at the same time hitting a straight draw in a game of poker. How many iterations of each game do you think you would need to run to land both at once? Yeah, that's what I thought. It drove me crazy at times while playing.
The Dancer therefore grades out as a below average class overall. The awesome endgame power of repeated Chicken Knife Sword Dances isn't enough to make up for the randomness and pitifully low health that the class suffers from during most of the solo run. Way too much of the gameplay for this class is outside the player's control.
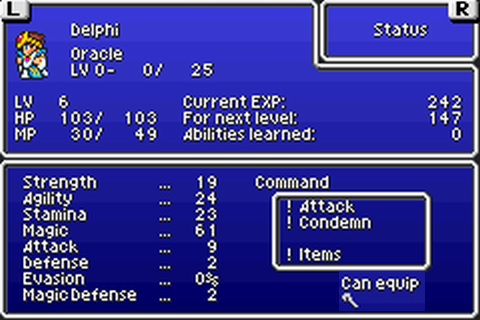

Even amongst the generally weird classes that make up FF5's job system, the Oracle stands out as a particular oddball. This is one of the new classes added for the Gameboy Advance port, and it's mostly known for being an otherwise-useless class that gets an even higher Magic Power stat than the Summoner, establishing a new value for the highest in the game. The innate ability of the Oracle class is Condemn, which functions similarly to the enemy skill of the same name. A timer appears above the target's head and counts down to zero, at which time one of eight different effects takes place. Three of them deal modest amounts of elemental damage attuned to fire/ice/lightning, one of them inflicts Toad status, and one of them inflicts Stop status. None of these are very useful beyond the early stages of the game. Two of the more helpful Condemn curses are "Rejuvenation", which heals the target for about 1000 HP, and "Recuperation", which functions as a Heal / Esuna status restoration ability. Best of all is "Doom", which functions exactly the same as the Doom spell: when the ticking clock hits zero, the target dies. Condemn doesn't work against anything with the Heavy flag in the code and that rules out most bosses, but it works just fine against everything else and Doom crushes random encounters from the beginning to the end of the solo run. Even better, as the Oracle gains more levels in the job, the timer on Condemn decreases. It starts at 20 seconds and eventually drops to 5 seconds after mastering the class. The timer will also increase or decrease depending on whether the target is in Slow or Haste status, which means that an endgame self-targeted Rejuvenation curse goes off in 2 seconds with the Running Shoes. That's pretty handy to have around, and the ability to drop nearly any random opponent in 5 seconds is amazing. Condemn is surprisingly a pretty good ability, and one of the best features of this class.
Against Heavy targets where Condemn doesn't work, the Oracle must use the signature ability of the class: Predict. This is the single most difficult ability to use in the whole game, and on a casual playthrough it appears completely random, hitting both the party and enemies for wildly varying amounts of damage. Most people correctly throw up their hands and go back to annihilating their enemies with X-Fight and Magic Sword and whatnot. Anyway, Predict chooses one of ten different predictions based on the last digit of the Oracle's MP total. These all have varying degrees of usefulness, ranging from strong non-elemental damage (Cleansing) to multiple different types of elemental damage that hit everything on the battlefield (Deluge/water, Eruption/fire, Rockslide/earth, Hurricane/wind) to several different predictions that heal the party (Healing Wind, Blessing) and then finally one disastrous prediction that does nothing to the monsters and savages the party (Pestilence). The best prediction is likely Divine Judgment, which damages enemies with holy element while healing the party at the same time. The strength of these predictions is based on the last digit of the target's HP, with a "0" digit having almost no effect and a "9" digit producing very powerful results. Predictions can be used with three different timer lengths, with the fastest costing 7 MP and the slowest costing 1 MP, with an additional in-between result that costs 3 MP. The key to using the Oracle class is therefore to cycle between predictions, queueing up the desired ones ahead of time by setting the Oracle's MP total where the player wants it, and then choosing prediction combinations that keep the MP digit on the correct number. This requires skill and planning to pull off, and can be thrown awry by enemy Psych / Osmose spells or Magic Hammer. Unfortunately these timers also can't be sped up and Predict is a slow-acting ability in the lategame. Predict is therefore a very difficult ability to use effectively.
The two other abilities on the Oracle are both passive in nature. "ABP Up" does exactly what it suggests and grants 50% more ability points with each victory in battle. While that might be great for the GameFAQs crowd that likes to grind endlessly, it's pretty useless for a solo run because taking ABP Up requires dropping Predict as an ability. "Read Ahead" enormously reduces the rate of random encounters, and that does prove helpful in a few cases for a solo run. I was able to run all the way from the save point in the Dimensional Castle up to Necrophobia without facing a single random encounter, which made it easier to retry that battle (and the Apocalypse one that preceded it at the prior save point) with less wasted time. Nevertheless, these are minor utility skills that don't hold much value. Every major boss fight has to be conquered with Predict.
Condemn and Predict themselves are mostly OK as far as abilities go, even factoring in the serious difficulties of using Predict effectively. The real problems with this class lie in the character stats and equipment selection. The Oracle has terrible stats in every category other than Magic Power, with horrible Strength and one of the worst Vitality stats in the game. The Oracle even gets a speed penalty for no clear reason. It might seem that this is compensated by having the game's highest Magic Power stat, but there's a nasty surprise waiting for the Oracle in that regard: neither Condemn nor Predict use the Magic Power stat in any way. The Oracle can get up to 70+ Magic Power and it's almost completely worthless. This has to be some kind of cruel joke on the part of the designers; at least the Magic Power comes in handy for Magic Lamp and Healing Staff use. On that note, the Oracle is further crippled by the lack of any weapon other than staffs. No daggers means no Chicken Knife for lategame damage, and no Rods means no rod-breaking shenanigans to fall back upon. The Oracle is pretty much stuck with Predict for damage, with the breaking of Light Staffs and the Magic Lamp as the only other options. This is therefore the class with the highest skill cap to use in the whole game, and quite frankly for non-expert players the Oracle belongs another tier further down on the list, roughly comparable to the White Mage. I only have it here because intelligent usage of Predict can navigate past most of the game's major challenges, and Condemn is consistently excellent at handling random foes.
In addition to the difficulty in using Predict, the ability also deals damage completely independent of the Oracle's stats and level. The damage from Predict is fixed and never increases or decreases. This works well for most of the game, where a handful of predictions will defeat bosses, but it really starts to fall off in the endgame, with Apocalypse causing major problems, and fails completely against the final boss. The Oracle has absolutely no defense against White Hole or Grand Cross, not even a one-time use of Shell out of the Wonder Rod, and my solo Oracle was forced to do mass breaking of Light Staffs to defeat the game. This was a very hard class to win with and stretched my limits as a player. However, Condemn and Predict were still powerful enough that the Oracle was able to avoid being placed among the weakest classes in the game. With enough setup ahead of time, Predict could indeed get the job done, which is more than I can say for some of the other solo classes.
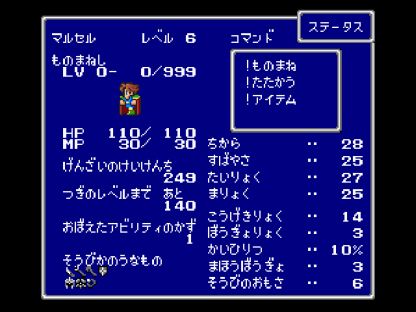
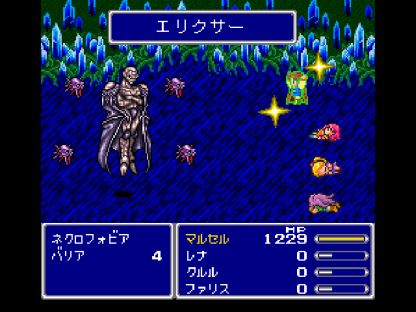
The Mimic is the hidden secret class in FF5, found as an optional side quest in the third world underneath the sunken Worus Tower. The Mimic is most similar to the Bare / Freelancer non-job, sporting no bonus to character stats and the chance to wield a much wider equipment selection than normal. Unlike the Bare job, Mimics have their own unique ability named, well, Mimic. This causes the character to repeat the last action taken by a member of the party. In a normal full party, it's possible to chain Mimic commands together to have the party use all sorts of powerful and game-breaking combos, like having one character use X-Magic followed by double Bahamut summons and then Mimic that on a character that doesn't even have X-Magic or Summon as selected abilities. Mimics can also bring over any abilities learned as a part of other classes, but unlike the Bare job they aren't required to take "Fight" and "Item" as commands, and can take up to three abilites from other jobs instead of two. All of this is mostly wasted for a solo Mimic, unfortunately, who never gets to use anything but the basic Fight and Item commands along with the class-specific Mimic. You can Mimic your own Fight command from the last round, which does absolutely nothing different from simply picking the Fight command a second time. The only real trick for a solo Mimic involves the use of items: you can drink an Elixir and then Mimic that drinking on subsquent rounds, only consuming one item in the process. I called this the "bottomless cup" tactic and it was useful at times to reproduce a poor man's version of the Bard's Hide ability and run dangerous foes out of magic points. Since this was a very slow process and the Mimic was fully targetable the whole time, I only used it in a few places. It is not possible to Mimic rod breaking, and an actual item does have to be consumed each time for that move.
Speaking of which, Mimics have access to rods and staffs along with the default knives. They also get to use the very small selection of Thief/Ninja weapons, although the Double Lance tends to be the only one in that group worth equipping. Thankfully they do get to use shields and all of the non-Dancer armor in the game, without which I would have placed the Mimic in the next tier down. This is certainly helpful and the opportunity to use all of the game's shields opens up some useful opportunities for this class in the later portions of the game, between the Aegis and Fire and Ice and Genji Shields. Unfortunately, most of the really useful gear that can be used in battle happens to be weapons of different types, and the Mimic is excluded from most of them. With mediocre stats in every category, the Mimic is forced back on breaking rods and staffs far too often. I had to resort to that option over and over again on the Mimic run despite my best intentions. This is a class that doesn't have a lot of other options.
The Mimic is essentially a crippled version of the Bare job. The Mimic command barely even qualifies as an ability, and aside from that, this is the same non-job with an enormously reduced selection of available weapons. The main way to make progress with the Mimic is through aping the Dancer with the Dancing Dagger or to become a pretend Black Mage via rod breaking, both of which I've mentioned before knock down the scoring of a class on this tier list. There weren't a lot of roadblock bosses, but only because I kept resorting to the powers of other classes instead of anything that the Mimic could do itself. I think my favorite trick with this class was breaking Venom Rods onto the solo Mimic to heal while wearing the Bone Mail. That was fun. I also came up with a creative strategy to run Exdeath and Neo Exdeath out of magic point by running the emulator on Fast Forward all night while Mimicking the drinking of hundreds of thousands of Elixirs. When a solo class is restoring to those sorts of tricks, it's definitely among the weaker entries on the list. I have the Mimic as the worst of the "below average" classes, just barely managing to escape the ranks of the truly underpowered classes.
Tier 5The classes in this group sit at the bottom of the tier list, the weakest of the lot for a solo game. Most of these classes are very solid choices in a normal party setting and only fall apart when asked to shoulder the load of a solo venture. These jobs are intended to provide utility skills and defensive abilities, not offensive output. Only the craziest individuals would be foolish enough to try using them for a single character, single class challenge. These jobs experience immense difficulties making it through the full length of a solo run, repeatedly running into roadblock boss obstacles and requiring herculean feats of experience/item grinding to continue onwards. In fact, several of these classes are so weak that they can't even fight random encounters consistently, and are forced to raise levels in special areas suited to their abilities. These classes often get past difficult bosses by running them out of magic points, spending hours on end slowly wearing down their opponents in marathon sessions. These are simply the worst options possible for a solo game - save one special job ranked even lower.


The Thief is a utility class in FF5, with a whole bunch of useful abilities unrelated to combat. The signature Thief ability is "Steal", which uses a round of combat in an attempt to pilfer some kind of item from an opponent of the player's choice. Nearly every enemy in the game has a stealable item of some kind, and in fact the vast majority of them actually have two stealable items, a "Common" steal (96% odds) and a "Rare" steal (4% odds). There's no way to get a Rare steal other than trying over and over again while hoping to get lucky, and only one item can be stolen from each opponent in each battle. The base chance for a successful steal is 40%, with a unique accessory called the Thief Glove doubling this to 80%. Despite a lot of misinformation out there on the Internet, nothing else affects the chance to steal in any way. With more levels in the job Thieves can open up the Capture command, which is a combined Attack + Steal together, very nice for not having to waste a round of action purely on stealing without dealing damage. As far as what can be stolen, there's all sorts of miscellaneous gear out there that the Thief can pick up, often getting certain items earlier than they would otherwise be available. A handful of rare items can only be obtained via Steal, with the Genji equipment held by Gilgamesh being the most famous example. The solo Thief suffers here from the innate restrictions of the class: most of the really good stuff that the Thief can swipe isn't equippable by the Thief class, including all of the Genji gear. (This is the pathos of the solo Thief.) When I played out this solo run, my character spent most of his time stealing Hi Potions and Elixirs in the first world before they became readily available. The best steal is the Double Lance in the basement of Bal Castle, one of the few Thief/Ninja weapons and a very strong option throughout the second world. Generally speaking though, the Steal command isn't as good as it might sound for a solo Thief.
The other Thief abilities are mostly unrelated to combat. "See Passages" does what the name indicates, making hidden passages visible on the screen. This is pointless for an experienced player who already knows where they're all located. "Escape" can be pretty handy, providing a guaranteed run from random encounters. This is useful in a number of places with difficult opponents that the party doesn't want to fight. "Dash" lets the Thief move faster on the overworld map screen, which is nearly useless considering that emulator Fast Forward has the same effect. The Gameboy Advance port made Dashing an innate feature of the game always available to everyone, and the Thief ability a super-fast version that's almost too rapid to control. This also doesn't do anything to help win battles. "Caution" blocks the Thief from ever getting Back Attacks, again a nice utility feature to have but nothing to write home about. "Agility" isn't an ability at all, simply the name that the game provides for mastering the job and passing on its stats to the Bare/Mimic jobs. This probably should have been "Equip Thief weapons" if this class followed the pattern of most other jobs. In any case, it's useless for a solo Thief who always has the innate Thief stats regardless, although it has its uses for passing along high Agility to other jobs in non-solo ventures.
On the subject of those character stats, the Thief has the highest Agility in the game and it's very noticeable while playing that this class is a bit faster than everyone else. Oftentimes the Thief can get in one more attack before a boss acts, or move faster than an opponent who normally goes first. Unfortunately that's about the only positive thing that can be said about the stats of this class. Strength is simply awful for a class that has no magical spells and must do all damage via melee weapons. Vitality is also quite low, especially for a class that has to spend much of its time in the front row to deal damage. Even Magic Power is bad, not that this class really needs that last stat though. The low Strength and Vitality combine to create a serious problem for the Thief, and I spent much of the game doing everything possible with gear to raise that Strength number a bit higher. Thieves have access to the unique Thief/Ninja weapons like the Full Moon and the Rising Sun, which can be used from the back row and can be helpful at times in the solo run. More often the class will be using the standard daggers though, since there are so few weapons that fall into the previous category. The Double Lance is definitely the strongest of the Thief/Ninja weapons and helps drag this class through the second world. By far the best weapon for the Thief is the Chicken Knife, which can avoid the Flee effect by using Capture and finally takes this class up to respectable status on damage. However, for much of the solo run the Thief is forced to make due with subpar weapons, and lack of access to shields causes a lot of deaths against the final endgame bosses. White Hole took out my solo Thief 47 different times, and that was despite a ridiculously high character level of 68.
The solo Thief struggles again and again to make progress in a solo run, largely because the class has terribly low Strength and zero abilities that boost damage in any way. The solo Thief has no choice but to run Byblos out of magic points, and unlike the Bard (who can Hide) and the White Mage (who has Armor status and plenty of healing capabilities), the Thief simply has to tank the damage and guzzle down endless stolen healing items. From my notes on the battle, my solo Thief had to inflict almost 8000 total points of damage at under 30 damage per attack, while drinking 10 Elixirs and 87 Hi Potions for more than 50,000 total HP restored. And that didn't even count the amount of time needed to Steal those Hi Potions and Elixirs one at a time in preparation for the battle. This is a class that had such low offensive output that Crayclaw was a difficult opponent, needing to attack the steel lobster 18 times at an average damage of 110 per round to prevail. My solo Thief also needed 15 Elixirs to defeat Sol Cannon, 30 Hi Potions to get past Archaeoavis, and needed to land the Mute spell via the Mage Masher to avoid dying against Gilgamesh on the Big Bridge. Atomos mandated gaining 25 levels - up to Level 64! - before my solo Thief had enough health to survive the Comet barrage and enough offensive damage to defeat the thing. Frankly, if that leveling hadn't been done against Atomos, it probably would have been needed against Exdeath at the end of the second world, another extremely difficult battle for a low-offense character. The third world was much easier with the Chicken Knife, but even there, the solo Thief struggled against Necrophobia and the Exdeath Tree form. If my character had been the standard Level 55 instead of Level 68 at the end of the game, his damage would be been rather pedestrian. Much as I may have liked my solo Thief, this was one of the slowest and most difficult character paths to complete the solo run.
Therefore the Thief has the dubious honor of being the best of the classes here in this bottom tier. Upon obtaining the Chicken Knife 80% of the way through the solo run, this becomes an above average class that traverses most of the endgame areas without too much trouble. However, the path to reach that point is among the hardest of any solo classes. This is a game where crime doesn't pay.


Bards have traditionally been somewhat of a joke class in the Final Fantasy universe, and although they're better in this game than poor Gordon and Edward from earlier entries in the series, Bards would never be considered the type of class that should strike out on a solo venture. The signature Bard ability is "Sing", which uses one of eight different songs with their own unique mechanics. Four of the songs have an immediate effect of some kind: the Love Song puts enemies into Stop status, while the Charm Song is a free use of the Charm spell. Both of these songs were highly useful at times during the solo Bard run, more so than I was expecting, and the Love Song is infamous for being the cheese way to defeat Omega. The Vitality Song puts the party into Regen status (also great for long boss battles) and Requiem functions as a "HARM" spell from the original Final Fantasy, dealing magic damage to all undead enemies. Bards are therefore outstanding at clearing the Great Trench dungeon since everything down there is undead, the opposite of most other classes who struggle in that area. The other four songs all function in the same fashion: the Bard will keep singing continuously until damaged by a physical attack, with the ongoing song slowly raising one stat for the party (including the Bard). The four options are the Speed Song (increases Agility), the Magic Song (increases Magic Power), the Power Song (increases Strength), and the Heroic Song (increases character level). The Gameboy Advance translation uses a bunch of excessively flowery names like "Mana's Paen" and "Sinewy Etude" that don't make it clear what these songs are doing - I'm not a fan. All of these songs are great options, and with enough time to buff up the individual stats, even a spoony Bard can become incredibly powerful. The Speed Song will take characters to an uncharted territory even faster than Haste status, the Magic Song will increase the damage from Requiem, the Power Song makes anyone a great physical attacker, and the Heroic Song just increases everything, since nearly all of the formulas in FF5 involve Level in some fashion. Unfortunately the stat-boosting songs don't become available until latter in the solo Bard run, with the Speed Song unlocking halfway through the game and the other three becoming available at about the 80% mark. Their presence would have been greatly appreciated earlier in the run.
The other class ability is "Hide", a cowardly ability where the Bard runs offscreen and becomes untargetable until selecting "Return". This is a guaranteed run in battles where running is allowed, and a place to escape injury in boss battles. Some of the worst enemy attacks can be dodged in this way, like Sol Cannon's Surge Beam and Neo Exdeath's Grand Cross, and it functions a bit like a slower non-damaging version of the Dragoon's Jump. Unlike the Jump ability, the Bard can remain in untargetable Hide mode indefinitely and simply wait until enemy bosses use up all of their magic points. This is very tedious even with Fast Forward mode running (don't ever try a solo Bard run on a non-emulator), however it does work and forms the core of the Bard strategy for getting past most difficult opponents. Hide takes the worst bite out of a lot of ugly bosses: no Drain from Byblos, no Condemn from Exdeath, no White Hole, nothing from all-magic Apocalypse, and so on. However, Hide is not a panacea for all troubles: there are many boss attacks that are classified as "abilities" and never require MP to use. Hiding does nothing to stop these threats. Hiding is also helpless to prevent physical damage, and many of the toughest fights for the Bard come against physical opponents. Most of the other weakling physical classes have some kind of method to heal themselves, whether through magic or the Healing Staff or some other ability. Not the Bard! Even a normally trivial foe like the Adamantium turtle required the drinking of 13 Elixirs to win, a classic example of a situation where Hide was useless.
Like many of the other classes near the bottom of the tier list, the Bard has both poor character stats and a paltry equipment selection. The penalties to both Strength and Vitality are absolutely crushing, with this being a class that has to spend most of the game attacking physically to get past obstacles. The Bard has the second-lowest Vitality in the game behind only the Dancer and without the Strength (or ability to equip Ribbons) to match. The bonus to Magic Power is mostly wasted because this affects exactly one thing: the damage from the Requiem song, nothing else. At least Bards are pretty fast, clocking in at well above average. In terms of equipment, they have the class-specific weapon of harps and the standard daggers, which pretty much means that they get the standard daggers. Harps are strange weapons that deal percentage-based damage and don't work against opponents who have the Heavy flag. This makes them useless against most bosses (they simply miss on attack rolls) and also a weak option for random encounters, since who wants to be dealing 1/4 of current HP damage to some random mook? It would take forever to kill anything that way. That limits Bards to daggers alone, and with a laughably awful Strength score, Bards don't strike fear in anyone with their little knives. Prior to getting the Chicken Knife in the third world it takes an ungodly long time to kill anything. This is yet another class that has the Light armor set and can't equip the Bone Mail, which helps contribute to making a low health class even more vulnerable.
It's hard to overstate how fragile and physically weak the solo Bard is. This is a class that needed to go back and farm additional Elixirs to defeat Magisa and Forza, a class that had to drink 99 Potions and take 30 minutes to defeat Galura - freaking Galura! - a class who needed 100 dagger attacks to get past Adamantium, and someone who still had to drink 11 Elixirs to defeat Byblos AFTER running the evil book out of magic points. Good grief. The class actually gets stronger as the game goes along, doing better in the second world than in the first world, and much better in the third world than in the second. This is mostly tied to the power of the Bard songs, with the stat-boosting songs in particular helping a great deal to overcome the shortcomings of this class. It takes a long setup to max out Agility with the Speed Song, but once that happens, the Bard becomes a semi-decent class. I'm not sure that it's a positive thing to point out that the only way the Bard becomes "good" is to use songs to increase all its stats to something that no longer resembles the Bard class. And even with the songs in place, the Bard is still reduced to Hiding until the endgame bosses run themselves out of MP, followed by a lengthy process of buffing their own stats. Anyway, this is definitely among the weakest classes in the game and deserves its spot in this tier.

The White Mage is the game's premiere user of healing and defensive magic. The signature White magic of this class holds incredible usefulness and should be a staple of any non-variant party run. The most basic spells in the White Mage arsenal are the three healing spells, Cure 1/2/3, which restore progressively larger amounts of HP with each additional tier of power. Cure 3 / Curaga heals a single character to max health every time, the equivalent of an Elixir without the MP restoration. White magic also has several spells dedicated to status restoration, starting with Antidote and proceeding to Heal / Esuna and eventually Dispel. Not as useful for a solo game, of course, since you can't undo your own petrification but still handy. There are several indirect attack spells that target status ailments, like Mute and Size and Charm and Berserk. These work on more enemies than one might think and can be useful both offensively and defensively. Image / Blink is rarely used in a non-variant game but becomes extremely helpful for a solo run, locking out physical damage entirely against many bosses. Wall / Reflect controls who gets hit by what spells over the course of each battle. Armor and Shell are probably the second best buff pairing in the game (after Haste/Slow). They cut physical and magical damage in half, with Shell also reducing in half the chance for magic spells to hit the target. There's a reason why so many solo character try to use the Wonder Rod for a one-time use of Shell status, and the White Mage has indefinite access from much earlier in the game. Finally, White magic contains exactly one direct attack spell, with Holy packing enormous damage when it finally arrives 90% of the way through the solo run. Don't let this ranking fool you about the value of this job's spells; White magic itself is incredibly powerful and useful. It's everything else about this class that drops it down to the bottom of the tier list.
White Mages share the terrible Strength and low Vitality of almost all spellcasting classes. They do gets lots of Magic Power to make up for it, although this stat only factors into the calculation for the healing spells and then Holy at the end of the game. The crippling flaw with the White Mage class lies in its equipment selection: staffs are the only allowed weapon. The Oracle is the only other class with this restriction and the Oracle has plenty of damage at its disposal through Condemn and Predict. Given that White magic lacks any direct damage capacity until Holy unlocks at the very end of the solo run, this means a whole lot of bashing away with the Flail. The solo White Mage gets a ton of use out of that poor weapon, with its 70% (in)accuracy figure and highly variable damage. Even with the armor-piercing property of the Flail, the White Mage will spend almost the entirety of the game doing double-digit damage to bosses that have health totals in the thousands, and even tens of thousands, of HP. This class redefines the meaning of "slog" in many of the boss battles. At least the Healing Staff is available and sees heavy use throughout the solo run. This class also predictably has the Light armor set, and of course no access to shields. Better get used to using that Flail for virtually everything.
A solo White Mage game requires an almost inhuman level of patience and dedication to make progress. Karlabos alone has to be defeated with the Staff, a weapon even weaker than the Flail, which T-Hawk's solo White Mage accomplished at Level 20. Byblos must be run out of magic points and then slowly chipped down over the course of five hours of gameplay time. That's not with the emulator Fast Forward running either, that's real world time over roughly 1500 rounds of combat and 225,000 HP healed back for the White Mage. Sol Cannon required 9 Elixirs and about a hundred Surge Beam cycles to be defeated, Archaeoavis took about twenty successful Flail attacks per form, the Hiryuu Plant required Confusing and then Imaging the flowers, while the Gilgamesh/Enkidou ship affair necessitated running both of them out of magic over the course of another six hours of gameplay. T-Hawk actually described boss fights that took 15 minutes and a hundred rounds of combat as "sprightly" after those experiences. Like the solo Thief, defeating Atomos is the culminating event of the solo White Mage run, another boss who must be drained of his 20,000 MP by braving the field of Comets. Shell status is a big help here, but that still requires surviving 1428 Comets in total without screwing up and dying, another boss duel that takes hours of stressful real-world time to complete. Almost anyone would run away screaming bloody murder from this kind of challenge.
The one saving grace of the White Mage class is that it becomes very strong in the lategame. Once the Morning Star shows up in the Forest of Mua, the White Mage merely has terrible damage instead of rolling-on-the-carpet-laughing damage, and along with access to Cure 3 + Wall + Berserk, there's enough defensive and healing magic power to survive almost anything. When Holy finally unlocks after completing Fork Tower, the White Mage becomes totally unleashed as an "Old Testament God smiting the sinners of Gomorrah" in T-Hawk's creative phrasing. The only thing that this class lacks is offensive output. As soon as it gains that, the White Mage becomes an awesome class indeed. If this class could just use the standard daggers, it would probably rank as an average or even slightly above average class. The staffs-only weapon setup is the killer flaw for a solo game. Anyway, as bad as it might be for the White Mage to make it past many of these bosses, they mostly aren't that difficult or dangerous, just very very lengthy. Almost everything that takes place is within the control of the White Mage. That's more than can be said for our final two classes on the list.
The Geomancer is an idea for a character class where the designers botched the execution. This is essentially a spellcasting job that doesn't cast spells, instead dealing elemental magic damage through the "Terrain" ability. The gimmick behind Terrain is that the location in which each battle takes place influences the attacks that come out of the ability. When fighting Karlabos on a ship, Terrain produces water-based attacks; when fighting Adamantium underground, Terrain produces attacks with a caves theme, and so on. The most common Terrain attacks are attuned to air element, with Gale Cut and Sonic Boom showing up over and over again. The Geomancer has a high Magic Power stat to bolster these attacks, and if the Terrain ability had been properly designed, this could have been a semi-viable class for a solo game. However, the critical flaw of Terrain is that the ability is completely random when used: the player does not get to pick which of the Terrain attacks will show up. Instead, a random number is rolled between zero and the Geomancer's current character level, and the outcome of that dice roll determines which of the four Terrain moves will appear. This immediately makes Terrain a nearly useless skill for innumerable situations throughout the game. The designers made a whole bunch of the Terrain attacks instant death moves or "Weak" abilites that drop the target to near-zero HP. All of these Terrain attacks don't work against Heavy opponents, rendering them pointless in boss encounters. The net result is a solo job where the signature class ability is completely useless against a majority of the game's hardest bosses. Fun times.
The Geomancer only has two other abilities, neither of which are combat related. "Pitfalls" allows the party to see the holes that appear on the ground in some of the game's dungeons. Instead of falling into the pits, your character will jump backwards to safety and provide a chance to avoid the drop. "Damage Floors" lets the party walk over the lava floors without taking damage. These are basic utility skills, with the designers clearly intending that the player will throw one Geomancer into their group briefly while traversing these areas and then drop the class immediately afterwards. It's obvious that they never intended to do something as crazy as play out a whole solo game with the Geomancer class. The stats for the class are typical for a magic user, with minor boosts to Strength, Agility, and Vitality to go along with a large bonus in Magic Power. I suppose I should be thankful that this class at least avoids a Strength penalty like the pure mages. For equipment, the Geomancer has the class-specific bells for a weapon type. Bells are a strange weapon that deals magic damage and uses the Magic Power stat for its attack multiplier. They deal very low damage and are rarely worth equipping over the default daggers, which fortunately Geomancers can also use. As a class of pseudo mages, Geomancers also get access to the Light armor set, which means no Bone Mail for them. With no access to rods or staffs or shields, the Geomancer is in a really bad place from an equipment perspective on top of the many other problems they suffer.
What happens when you play a mage class and your magical ability (Terrain) is useless against most of the bosses? You wind up with an atrociously weak and frustrating class, that's what happens. My solo Geomancer was able to get through the first world without too much trouble, with the default power of the Terrain attacks high enough to serve as respectable damage. There were still challenges in places like the Sol Cannon battle, where the boss was immune to air element and my character was forced to drink 19 Elixirs, but Terrain mostly held its own throughout the early portions of the solo run. Things began to fall apart in the second world, with the Hiryuu Plant and Gilgamesh/Enkidou fights forcing many repetitions in situations where Terrain was either highly random or too weak to deal effective damage. This class collapsed completely against Exdeath at the end of the second world, where it was simply impossible to make any progress at all. The Terrain moveset was useless and trying to use physical attack against such a dangerous boss was a literal deathwish due to the use of Condemn. Even fishing for Sword Dances via the Dancing Dagger wasn't enough. My solo Geomancer had to be Level 68 (!!!) to win this battle, and even then only achieved success via dodging four different Condemns at a total of 1/81 odds and landing a bunch of low-odds Sword Dances.
That was among my worst experiences ever in FF5 and the troubles still weren't over yet. Even at a character level around 70 and with the Chicken Knife in hand, my solo Geomancer was only dealing about 3000 damage per attack, not counting the Flee effect that would waste a quarter of all strikes. While the bosses scattered around the third world were relatively simple for such an overleveled character, Necrophobia was a painful process of attacking repeatedly and leaning heavily on the Magic Lamp for elemental damage. This was another place where Terrain was useless. The final boss was even worse than the previous Exdeath duel, with my solo Geomancer dying 100 times in a row without ever making it to Neo Exdeath once. He had to get all the way up to Level 76 - with enough HP to survive enemy castings of Meteor - in order to finally close out this variant game. I'll simply repeat here what I wrote at the end of my solo Geomancer report as a way of summing up this experience:
"It's difficult for me to put in words just how soul-crushing and tedious the final encounters were to play out. When you are dying over and over again, and there is absolutely nothing you can do to affect the outcome of the battle beyond hoping for good luck, it really grates on you as a player. In the Exdeath battle at the end of the second world, it was trying to avoid Condemns and praying for Sword Dances. Against Necrophobia, it was needing to dodge Hurricane/Fight combos. In the final battle, more giant dice rolls involving White Hole and Grand Cross. Not fun, not fun, not fun! This was much worse than grinding a character in an RPG, because at least there you get to see your stats going up, albeit slowly. You are making *SOME* kind of progress. With the solo Geomancer, I would play the game for an hour, die to the current stumbling block boss of the moment 25 times, and would have achieved absolutely nothing. I was in the exact same spot as before, still making failed attempts, my time and effort completely wasted. I felt like Sisyphus pushing the boulder up the hill endlessly, my character Rip dancing in the hands of Fate's invisible puppet strings. This was by far the solo class I enjoyed the least, which is a shame because the first world was very entertaining. But the ending bosses of worlds two and three wiped out all the earlier enjoyment and then some." What a ringing endorsement, eh?
And yet the Geomancer still isn't the worst class for a solo game in FF5.
Garbage Tier

Sometimes in a tier list there's one option that's so overwhelmingly powerful or risibly weak that it deserves its own separate ranking. The Berserker falls into the latter category for FF5. This is overwhelmingly the worst class in the game, hobbled by the worst restriction imaginable: you cannot control your character in battle. Ever. I'll go over the few benefits of this class first before detailing the horrors. Berserkers do end up with a lot of Strength and Vitality, with their HP growth second only to the Monk in the whole game. Unfortunately, like the Monk all of that health often goes up in flames when the class gets attacked by percentage-based damage or status ailments that ignore HP totals. The Berserker suffers from the lowest Agility stat in the game, and that's a real problem since this class acts noticeably slower than anything else. Monsters nearly always get to move first before the Berserker, and faster opponents can sometimes get off two actions to a single attack from this class. As if that wasn't enough, the Berserker also ties the Monk for the worst Magic Power stat in the game, which can be abused in the Sumer Famicom version by equipping the Thornlet helmet for another -5 penalty to Magic Power and then wrapping around the resulting negative value into a maxed-out stat. Abuse of this bug to get high damage out of the Quake spell (25% chance to cast upon attacking with the Earth Hammer) is the only way that anyone has ever managed to beat the game with the solo Berserker, and even that required ridiculous emulator abuse to achieve a one in a million result.
The "Berserk" class ability also does provide an innate damage boost to go along with the uncontrollable wildness. It increases the attack value by 50%, and that's the genuine attack value of the Berserker, not the multiplier. Berserkers make use of the class-specific axes as weapons, which have the property of piercing enemy defenses along with variable damage and very shaky accuracy. Berserkers tend to swing and miss a lot when using their weapons, yet another thing that makes them unreliable. They also make use of the standard daggers, which are often a better choice than axes. Like some of the other unorthodox weapons in FF5, there are relatively few axes in this game and the Berserker can run through long dry spells until the next one becomes available. The Doom Axe's instant death property probably makes it the most useful of the lot, even after its nominal attack value has been eclipsed. This class shares the ability to equip shields and the Heavy armor set with the rest of the game's physical brusiers. The Berserker may as well keep the Bone Mail on at all times since the class can't heal in-battle with items anyway.
The obvious flaw of this class is the fact that it can't be controlled in any way. The action is completely and utterly out of the hands of the player, who becomes a total spectator as soon as combat begins. It's not even possible to run away: once a battle start, either the Berserker dies or everything else dies. There are no items to use, no abilities to mess around with, no tactics to be employed. Nothing. This is worse than the Dancer, worse than the Geomancer, worse than any other class in the game. There are innumerable situations where having an uncontrollable Berserker is bad news, but two opponents stand out as particularly torturous: the Sandworm and Sol Cannon. The Sandworm has permanent back row status to cut physical damage in half, and hides inside one of six (not three) different Holes. The Berserker has to hit the Sandworm at those lousy 1/6 odds while being punished with a Demi spell for every miss, with the percentage-based attack rendering the huge health total of the class irrelevant. Sol Cannon consists of the main cannon with 12,500 HP and two Launchers with 800 HP each. Sol Cannon will fire a Surge Beam after a countdown that deals 50% of max HP, while the Launchers fire Missiles that deal 50% of current HP in damage. Two Surge Beams always mean instant death no matter what, and one Missile + one Surge Beam similarly will always result in defeat. I found that the solo Berserker could only get off seven total attacks before the second Surge Beam went off, and that ignored the vastly more common (and impossible) scenarios where a missile landed. Therefore the solo Berserker had to kill the boss by dealing 12.5k damage in those seven attacks, while doding all of the missiles, and while working with a Doom Axe that only had an 85% odds to hit on each attack. It was an absolute nightmare.
Since no in-battle tactics are possible at all, the only thing that the player can do is prepare the best equipment ahead of time and then pray for good results. In practical terms, this means taking the Berserker to astronomically high levels to defeat opponents, level totals that would make even the White Mage and the Geomancer blush. How about Level 62 for the Sandworm? Level 83 for Sol Cannon? Why yes, both of those bosses are indeed fought in the first world, thanks for pointing that out. If those levels sound excessive, I needed 537 attempts at the Sandworm battle to prevail, and another 700 or so attempts at Sol Cannon to emerge victorious. I had been trying at lower character levels and it was simply impossible. The solo Berserker made me, the player, feel like a pawn dancing helplessly in the hands of Fortune. The fact that you cannot do ANYTHING AT ALL in these battles was unbearably painful. The struggle was not really the solo Berserker against the Sandworm and Sol Cannon. No, the battle was between me, the player, and the incredibly tedious and repetitive gameplay of this variant. It's impossible to avoid the realization that you are basically wasting your time (and your life, perhaps) when spending so many hours on this mission. You don't control the outcomes of the battles. It's not fun or rewarding to play. The variant becomes a chore, a job away from your normal job, devouring time that could have been better spent doing... well, just about anything else. There's a reason why the solo Berserker took me about a full year to play. You simply can't spend too much time on this at once, or it literally will drive you insane. Something is wrong when playing a solo class begins to drive the player into an existential identity crisis.
Furthermore, one thing that I noticed from doing all of these repetitive battles was that the results were not perfectly random. I was running afoul of the limited number of RNG sequences in the game's coding; my random attempts at the boss were not so random after all. For example, I ended up with 13,124 HP remaining on Sol Cannon no fewer than four different times in the span of 15 minutes of play, each of which was literally the exact same battle, blow for blow. As T-Hawk had pointed out earlier about the Sandworm, it was entirely possible that there simply was no starting RNG seed which would allow my solo Berserker to win the fight, because the game engine is not perfectly random. It was entirely possible that I was wasting hours of my life on a quest that was literally impossible. Fortunately, I did manage to win both of these boss battles eventually, but I was doubting my sanity there for a while.
As the final cherry to top this all off, the solo Berserker is not only the class that needed the highest character level to make any progress, it's also the only solo character that was unable to complete the game at all. I never found a solution for Omniscient in Fork Tower, and ditto for the endgame bosses of Necrophobia and Neo Exdeath. My solo Berserker couldn't even defeat one of the four Barriers that make up the first phase of the Necrophobia battle, and while the Exdeath Tree form was readily beatable, it was completely impossible to take down the 220,000 HP of the four Neo Exdeath parts with no access to any sources of healing. A solo Berserker has completed the game before, but only by running millions of repetitions of the final battle with randomized RNG and AI scripts to keep fighting the last boss endlessly. I'm confident that an actual human can't beat the game with a solo Berserker. Since this is the one and only class that finishes the game with its central mission left undone, the Berserker stands alone as the unquestioned worst job in the game.


